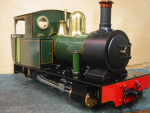
What is your latest project?
-
benchmark
Post
by benchmark » Thu Mar 01, 2012 10:13 pm
if you aer interested you can follow the build thread for the modding of my brand new Mamod william loco. She is a very good runner but the original design is not really to my fancy.
The first thing i want to do is relocate the steam regulator into the cab and add a pressure gauge.
I started by removing some rivets with a drill and here she is laying in disassembled state.
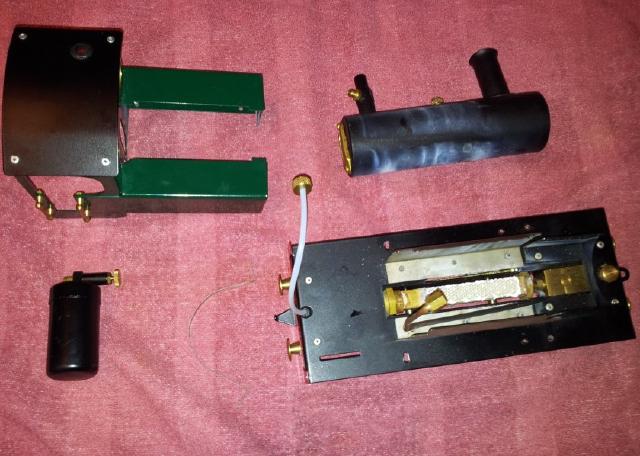
This is the new steam regulator i want to install in the cab and the pressure gauge .

I now cut of the old valve arm on top of the boiler which was too tall for my liking
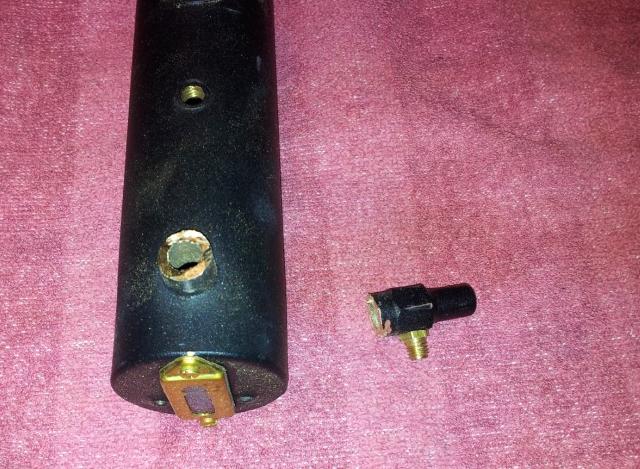
Then i started threading the exhaust ports in the valve chests to allow for a tube coupling , this is to try and see if i can reroute the exhaust steam to the chimney

Last edited by benchmark on Sat Mar 03, 2012 11:06 am, edited 1 time in total.
-
Narrow Minded
Post
by Narrow Minded » Thu Mar 01, 2012 10:22 pm
This looks very interesting and certainly worth following to see if you can indeed "make a silk purse out of a sows ear", as many people would agree with your observations about the loco as supplied.
Your mods should make quite a difference!
Are you planning on also replacing the rather large diameter chimney?
-
benchmark
Post
by benchmark » Thu Mar 01, 2012 10:24 pm
Narrow Minded:67345 wrote:
Are you planning on also replacing the rather large diameter chimney?
The chimney will stay as it is as i do not think its proportionally oversize.
-
bessytractor
- Trainee Driver

- Posts: 677
- Joined: Wed Nov 14, 2007 2:34 pm
Post
by bessytractor » Thu Mar 01, 2012 11:24 pm
is that a water valve you're using as a regulator?
proudly flying in the face of convention
-
benchmark
Post
by benchmark » Fri Mar 02, 2012 7:09 am
Yes it is a Reeves injector regulator. The lady i purchased it from at their stand at the Midlands model exhibition last year claimed it would work fine as a steam valve. At that time i wanted to use it in one of my boats. I hope she was correct.
-
spooner
Post
by spooner » Fri Mar 02, 2012 9:57 am
The valve you wont to use as a regulator look like a plug valve.You really wont a needle valve.A plug valve has only got only 90deg movement from off to full on.
This project is very interesting.
-
Spule 4
Post
by Spule 4 » Fri Mar 02, 2012 2:18 pm
Interesting project.
I have wondered if we will see a William III from Mamod, using the Mk II Mamod boiler on the William II chassis.
-
DLRdan
Post
by DLRdan » Fri Mar 02, 2012 2:58 pm
Looks an interesting project but before you go any further you need to take the cylinders off and remove any trace of metal left over from the threading. It will only take one shard to ruin the valves.
-
benchmark
Post
by benchmark » Fri Mar 02, 2012 5:11 pm
DLRdan:67365 wrote:Looks an interesting project but before you go any further you need to take the cylinders off and remove any trace of metal left over from the threading. It will only take one shard to ruin the valves.
yes thanks, i did that too

You guys are correct about the Reeves injector valve, i tested it with compressed air under water and on close examination , i realised that it was not 100% airtight even in full closed position , this may be because it is designed for use as a water injector valve and not a steam regulator so these are now the parts i will use for plumbing
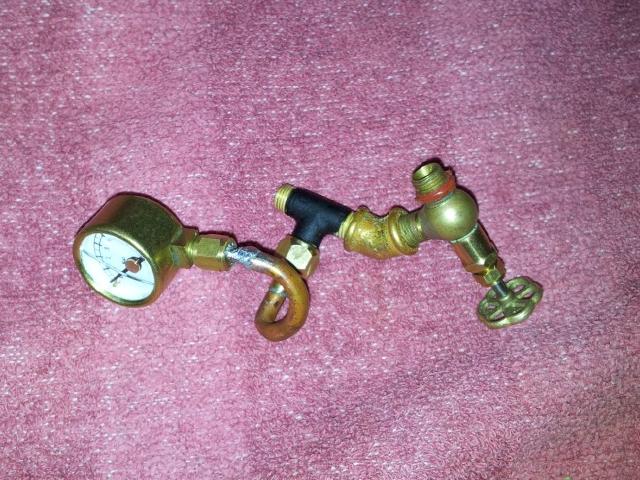
Then i now made a 1/4 x 40 TPI bush and soldered this to the boiler where the old regulator stuck out

Finally i removed the old mamod threaded lug nut and soldered a new nipple and lug nut in 1/4 x 40 TPI threading.

-
benchmark
Post
by benchmark » Sat Mar 03, 2012 11:06 am
Gentlemen , kindly allow me to introduce to you the 'Lady of the Lake'.

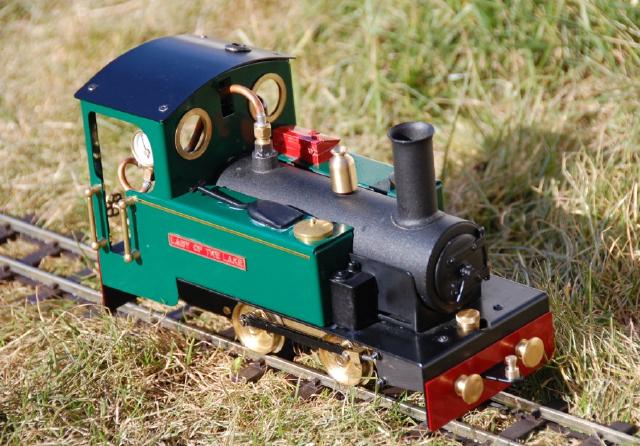
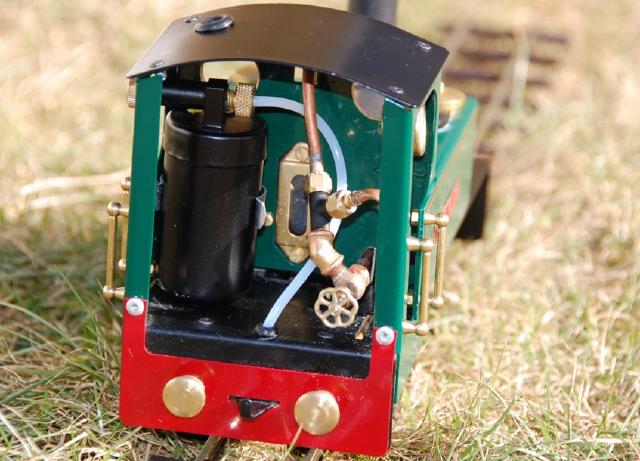
[/url]
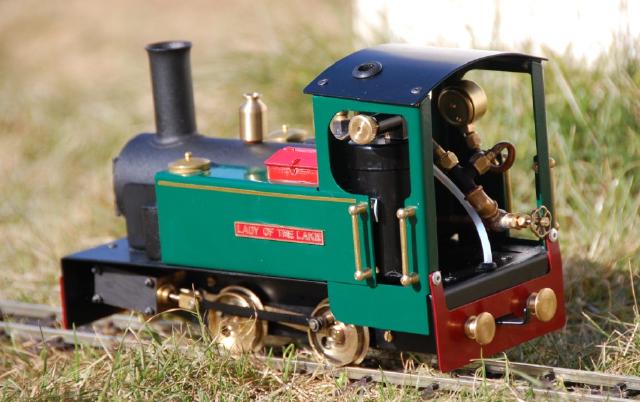
There had to be some alterations as i came along , for example i had to abandon rerouteing the exhaust steam to the chimney because my threaded pipes porting the steam seems to stifle the locomotive. I would rather have a free running loco than a choked loco with chimney effects.
All in all the whole project cost me under £200 for a gas fired , slide valve engine that is capable of pulling up to 7 wagons as impressively as my Millie does it. Needless to say i am well pleased. :-)
Just to remind you, this is what the loco looked like on arrival last week.

-
DolwyddelanLightRail
Post
by DolwyddelanLightRail » Sat Mar 03, 2012 11:33 am
That is quite an improvement, maybe mamod should take note!
-
Narrow Minded
Post
by Narrow Minded » Sat Mar 03, 2012 11:34 am
Congratulations! I think that you can safely say "Mission Accomplished"

The smokebox door and extra details you've added to the tank tops really help to improve the look!
-
spooner
Post
by spooner » Sat Mar 03, 2012 12:11 pm
Only one thing that could be a problem is a plastic gas pipe touch a hot steam pipe.
Its a good job of making a loco out of a toy.
-
LMS-Jools
Post
by LMS-Jools » Sat Mar 03, 2012 3:53 pm
Excellent work,
and a nice name too


-
MDLR
Post
by MDLR » Sat Mar 03, 2012 9:48 pm
Nicely done! If I may make a suggestion, maybe painting that gas pipe with black acrylic will make it "disappear"...................
-
Sir haydn
Post
by Sir haydn » Sat Mar 03, 2012 10:12 pm
MDLR:67417 wrote:Nicely done! If I may make a suggestion, maybe painting that gas pipe with black acrylic will make it "disappear"...................
I believe the rolling stones made a similar suggestion about a red door
-
Gremlin
- Trainee Driver
- Posts: 695
- Joined: Sun Feb 08, 2009 2:46 pm
- Location: Kent
Post
by Gremlin » Sun Mar 04, 2012 9:20 am
Nice job but one comment on the globe valve. The steam inlet should be at the bottom. It will work as you've got it fitted but you are not using the valve to seal the steam, you are using the packing around the spindle and will opening the valve against the steam pressure. I made this mistake as well. Don't know if you can turn it 90 degrees.
-
benchmark
Post
by benchmark » Sun Mar 04, 2012 11:35 am
Gremlin:67434 wrote:Nice job but one comment on the globe valve. The steam inlet should be at the bottom. It will work as you've got it fitted but you are not using the valve to seal the steam, you are using the packing around the spindle and will opening the valve against the steam pressure. I made this mistake as well. Don't know if you can turn it 90 degrees.
dear, that is very true. I didnt think of that.

Thanks for pointing that out, i investigate other options for another type of steam valve . It does work fine now though, i have steamed her on the rolling roads 2 times.
-
Jerm
- Trainee Fireman

- Posts: 114
- Joined: Thu Jun 16, 2011 7:06 pm
- Location: Peterborough, Ontario, Canada
Post
by Jerm » Sat Mar 10, 2012 3:25 pm
Very handsome little loco. I like that the difference is immediately subtle but more distinct the longer you look at it.
Who is online
Users browsing this forum: No registered users and 32 guests