In the Workshop at Woodford

This is the place to talk about news, TV, music and other hobbies
User avatar
Old Man Aaron
Driver
Driver
Posts: 1128
Joined: Wed Oct 19, 2016 11:08 am
Location: Sunshine Coast QLD, Australia

In the Workshop at Woodford

Post by Old Man Aaron » Mon Feb 17, 2025 9:22 am

Following my earlier thread on the Malcolm Moore restoration at the Woodford Railway, I figure there'd be some interest in the other projects I'm working on. Modelling is taking a back seat for the time being, so I might as well contribute something to the forum.

Updates will be sporadic, depending on how long it takes to do anything interesting enough to write about..


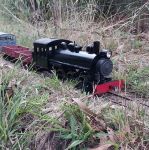
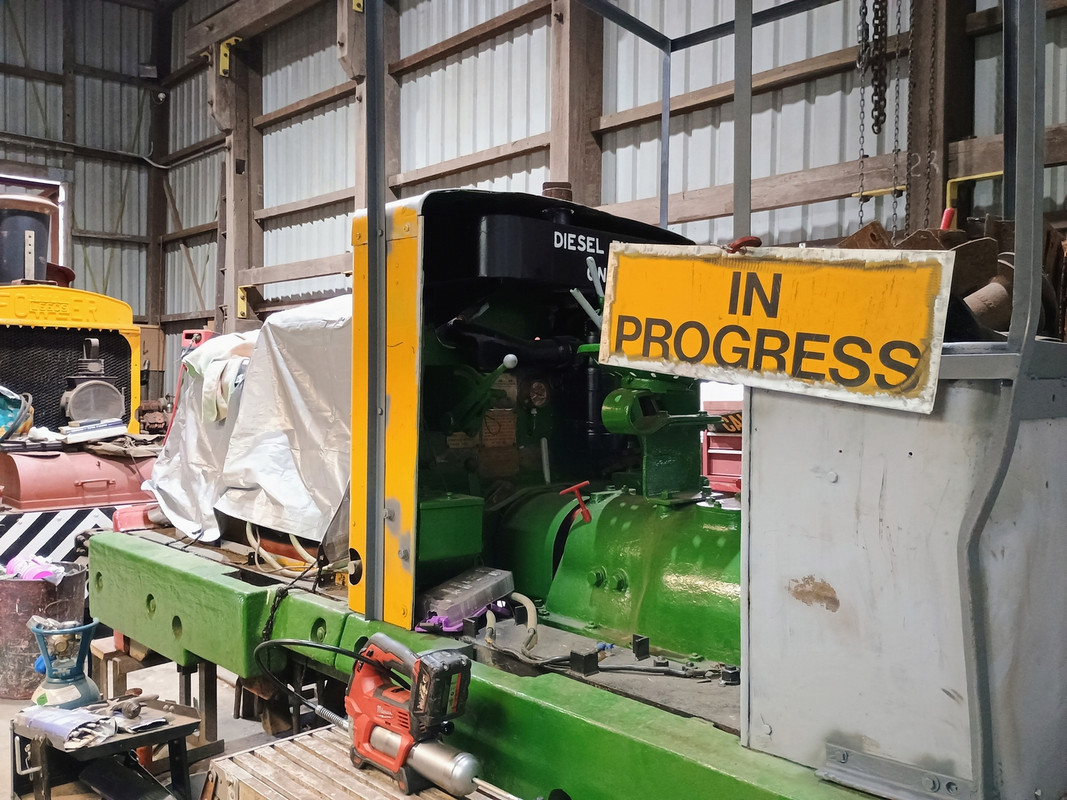
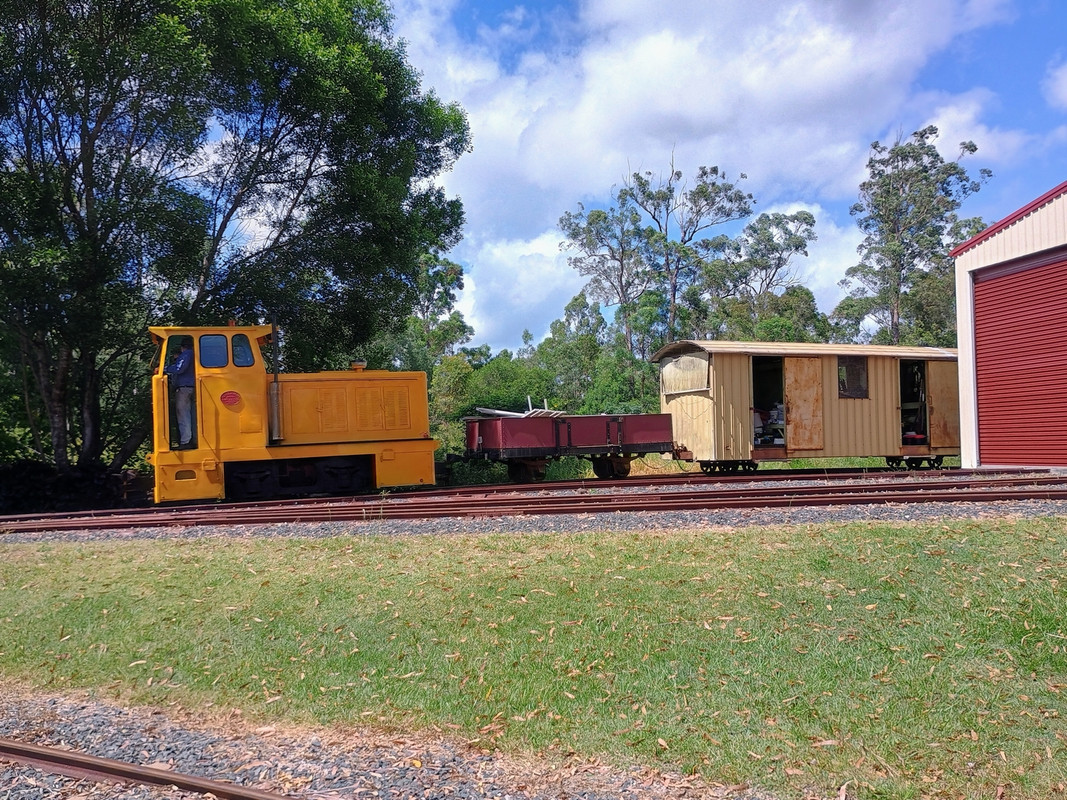
This Ruston & Hornsby 40DL was our first operational loco on-site in 1979, but parked up since the '90s with gearbox issues.
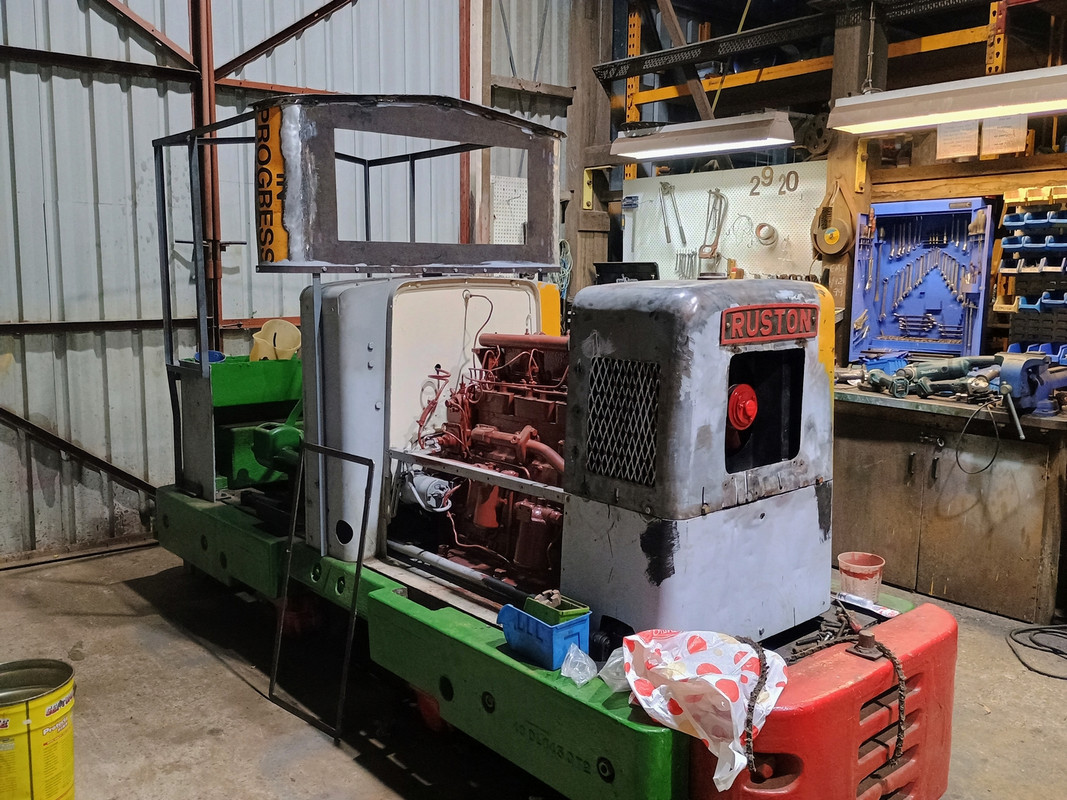
Restoring it for our 50th anniversary in 2022 was a short-notice decision, and our mechanical engineer Ryan got it going, right there in the siding. The little loco limped into the workshop under it's own power.
Image

Ryan put a mammoth effort into the loco, making one good gearbox out of two bad ones, fixed a lot of body rust and machined numerous parts.
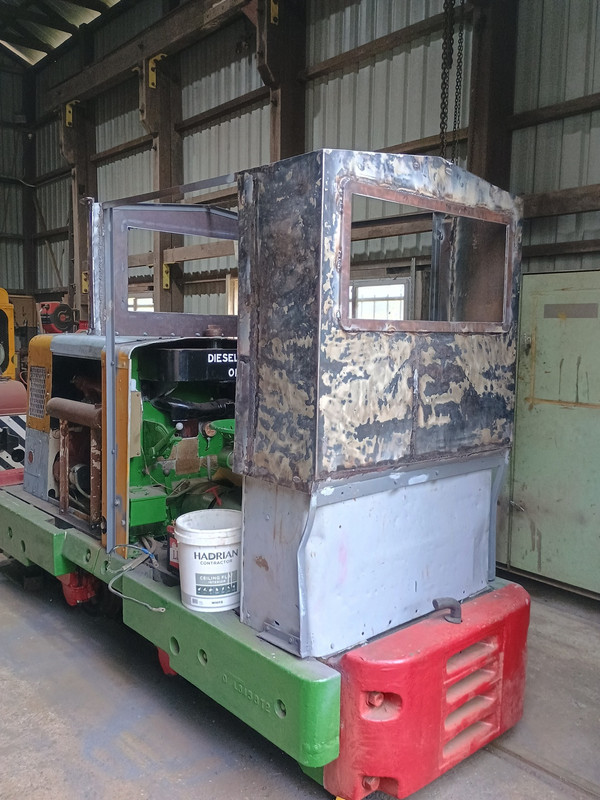
But for the lack of volunteers to complete it, the Ruston spent our 50th missing it's wheels, bonnet and cab, covered in mess.
We have far too many half-finished projects and overdue restorations scattered to the wind.

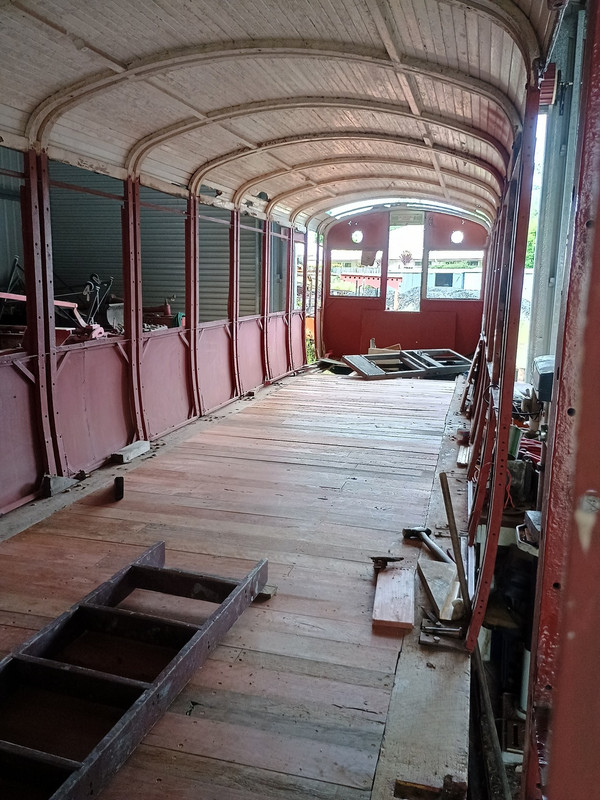
It's taking up space in the workshop and holding up projects we actually need, such as: A third open carriage, the large enclosed RM carriage, (along with two others longer term) '29 Fowler 0-6-0DM, the Baguley 0-6-0DM, new firefighting wagon (prerequisite for a return to steam) and 4+ different steam loco restorations. All of which are stalled projects. And much, much more besides..

Now, the Ruston has only a handbrake by design, so we can't use it on passenger trains. This means it's only good for shunting or trackwork - something we have Gemco and Netherdale for. And, we'll have to evict something from the loco shed to house it.
It is at least small enough to put on a tilt tray and take to model railway or machinery shows. Or loan to other railways.

So then, I want this show pony out of the workshop. Being a limited-use loco, "good enough" work is the order of the day.
My usual perfectionism is out the window on this one.
Image


19/10/2024
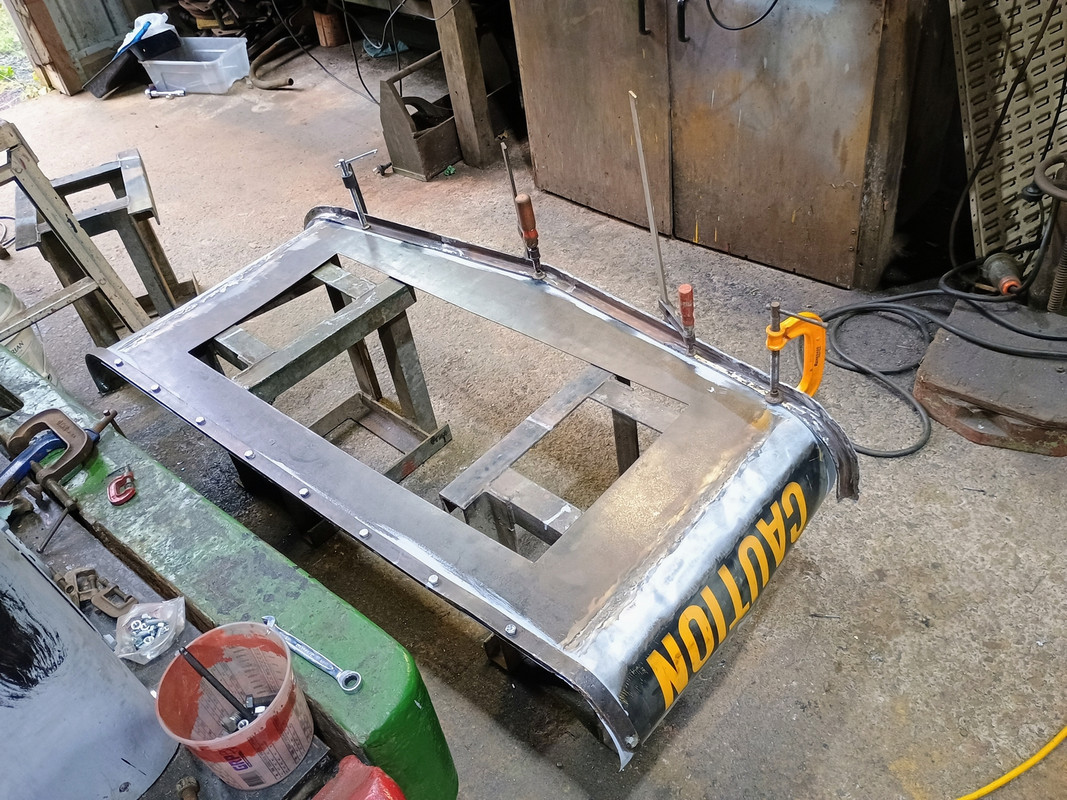
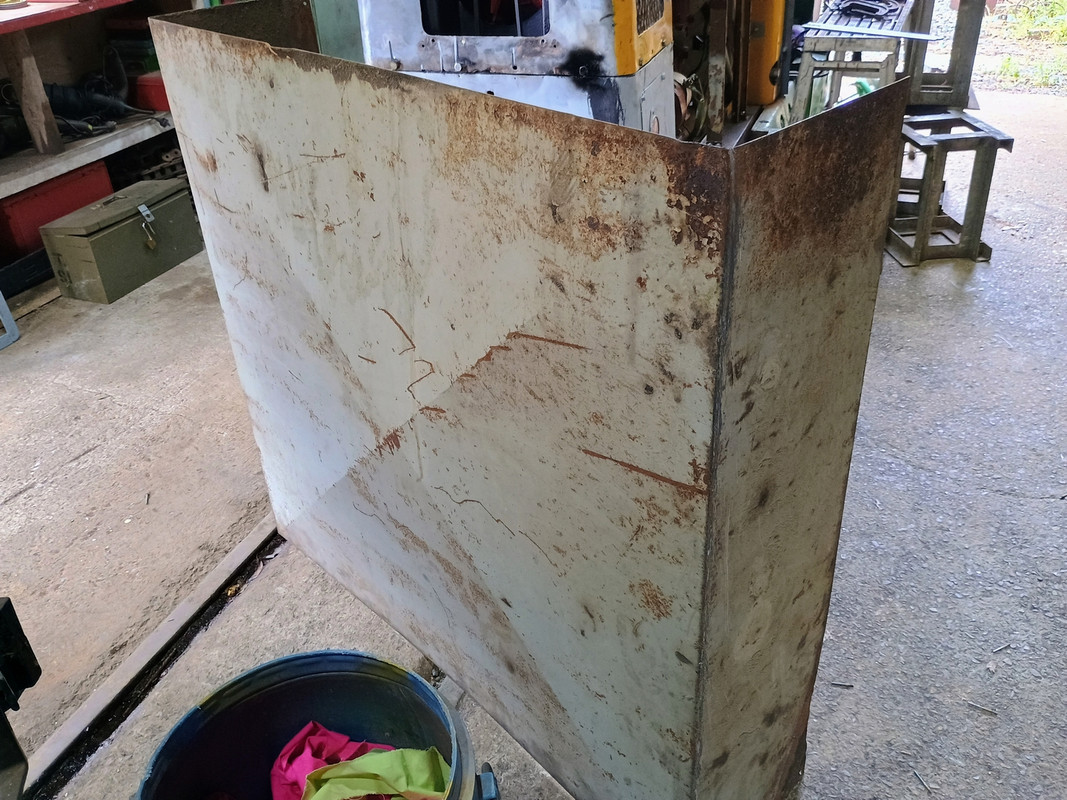
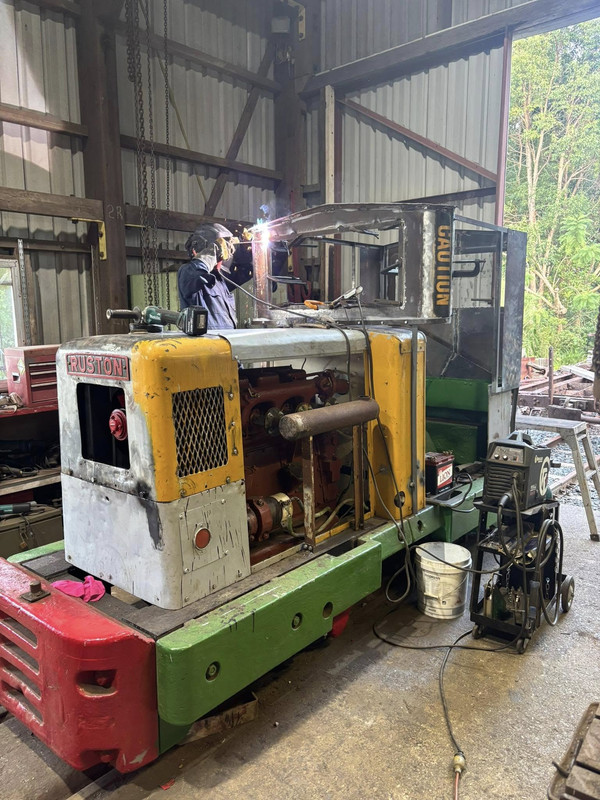
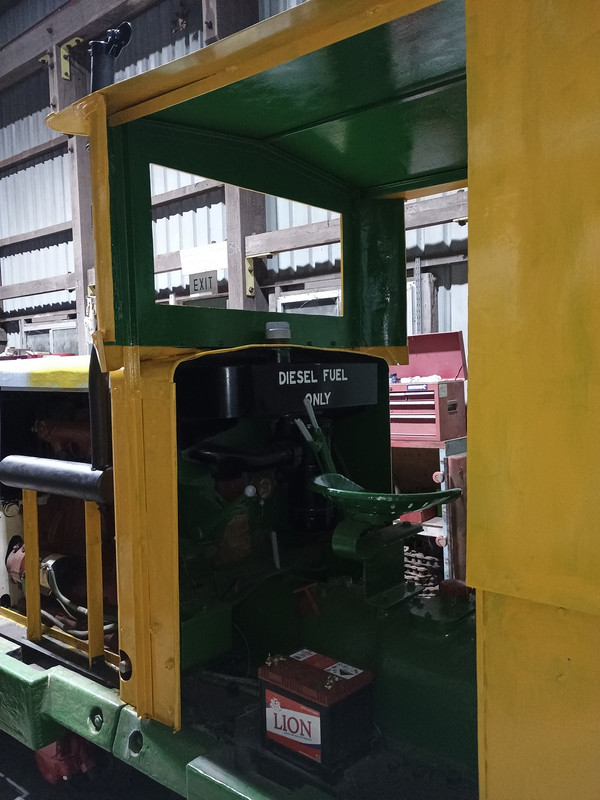
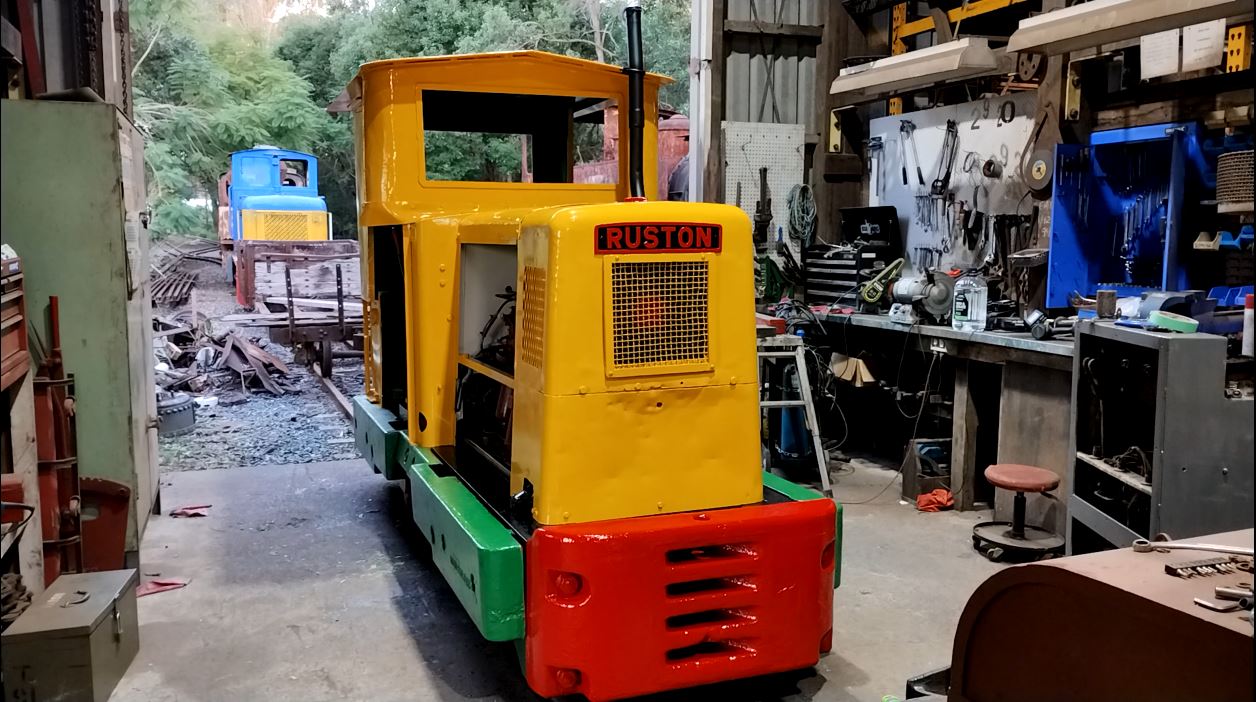
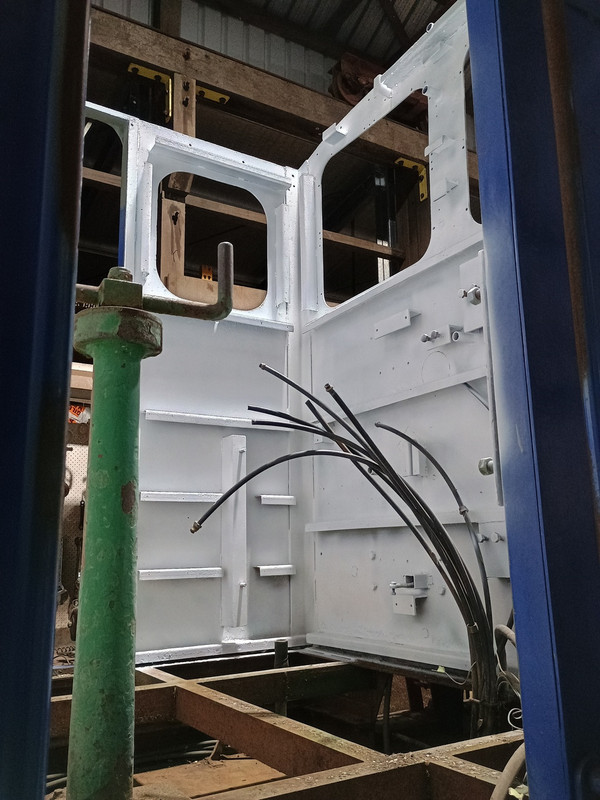
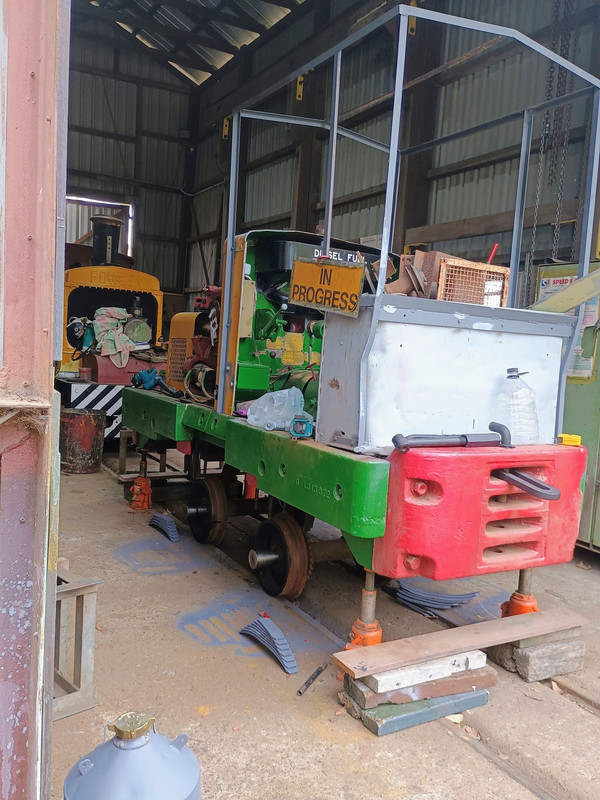
Ryan had started building the frame of a new cab in 2022, so I finished that, including a few parts salvaged from the old corroded cab.
Hitting a roadblock for need of more steel and welding gas, I turned to getting the loco permanently back on it's wheels.

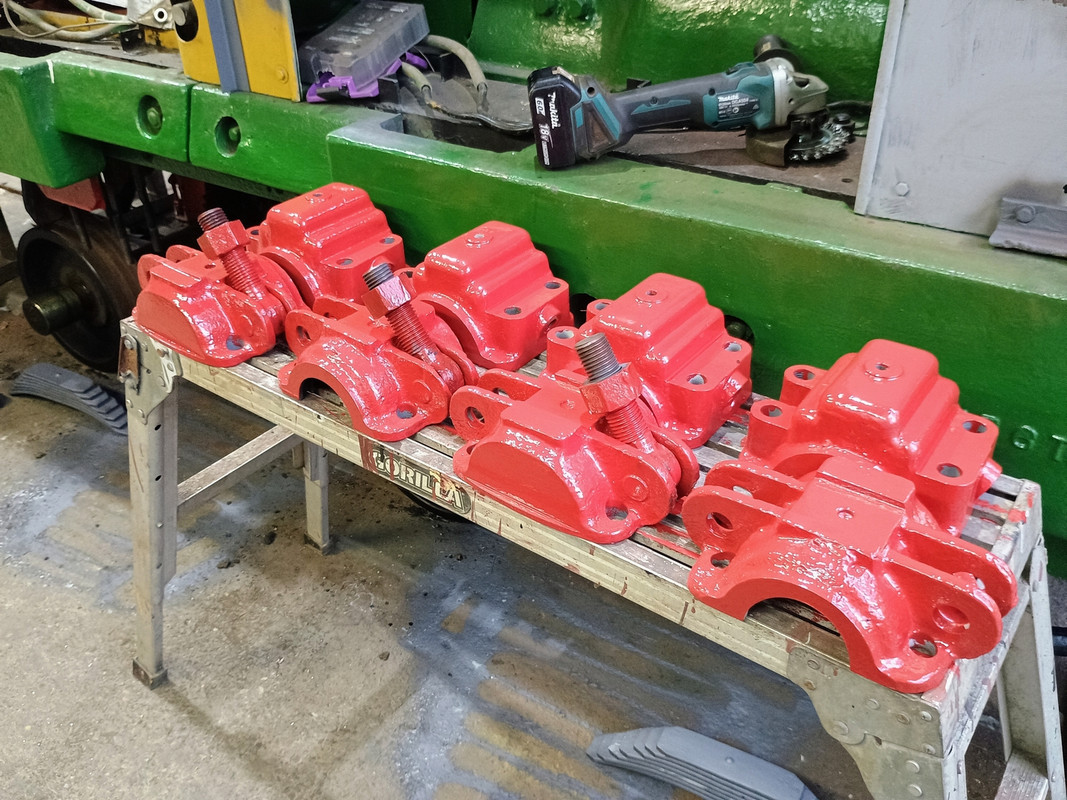
The axleboxes were soaked in solvent for a week, before a thorough cleaning and repaint. The bearings were badly worn, but good enough to reuse once Ryan had re-machined them.
Image


10/11/24
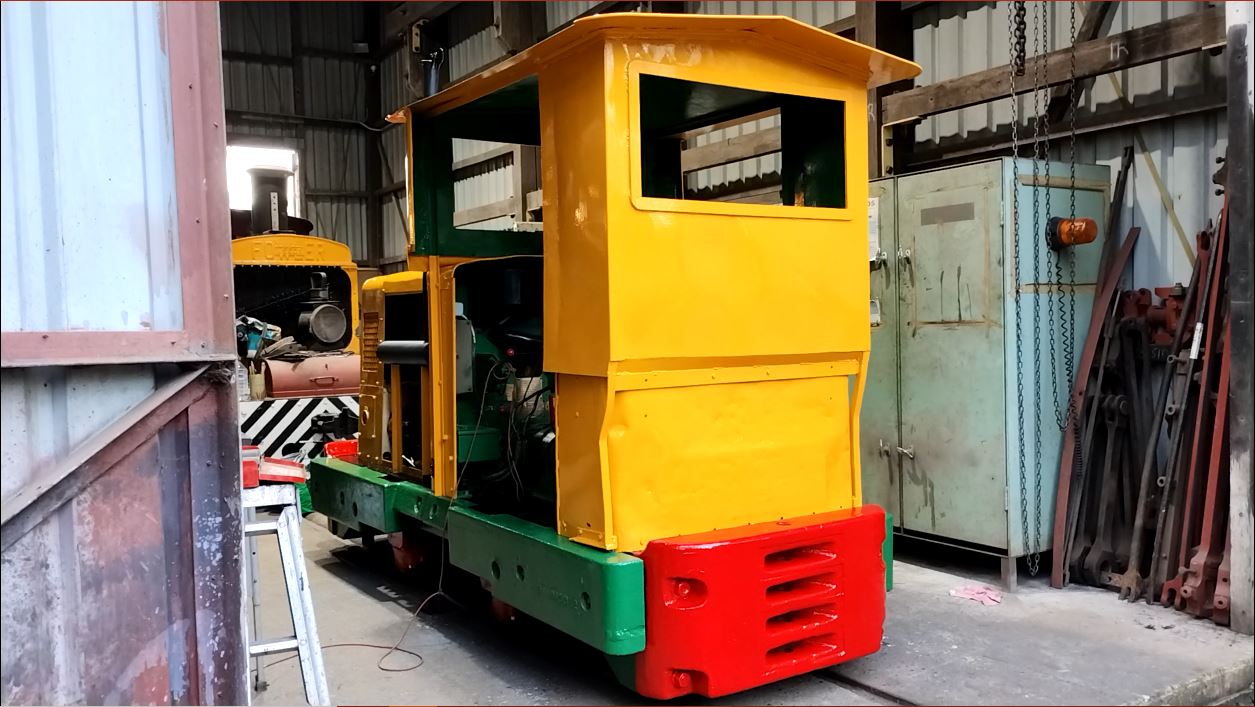
Axleboxes rebuilt, springs refurbished and wheels painted, the loco could then be lowered back onto it's wheels.
Image


25/01/2025
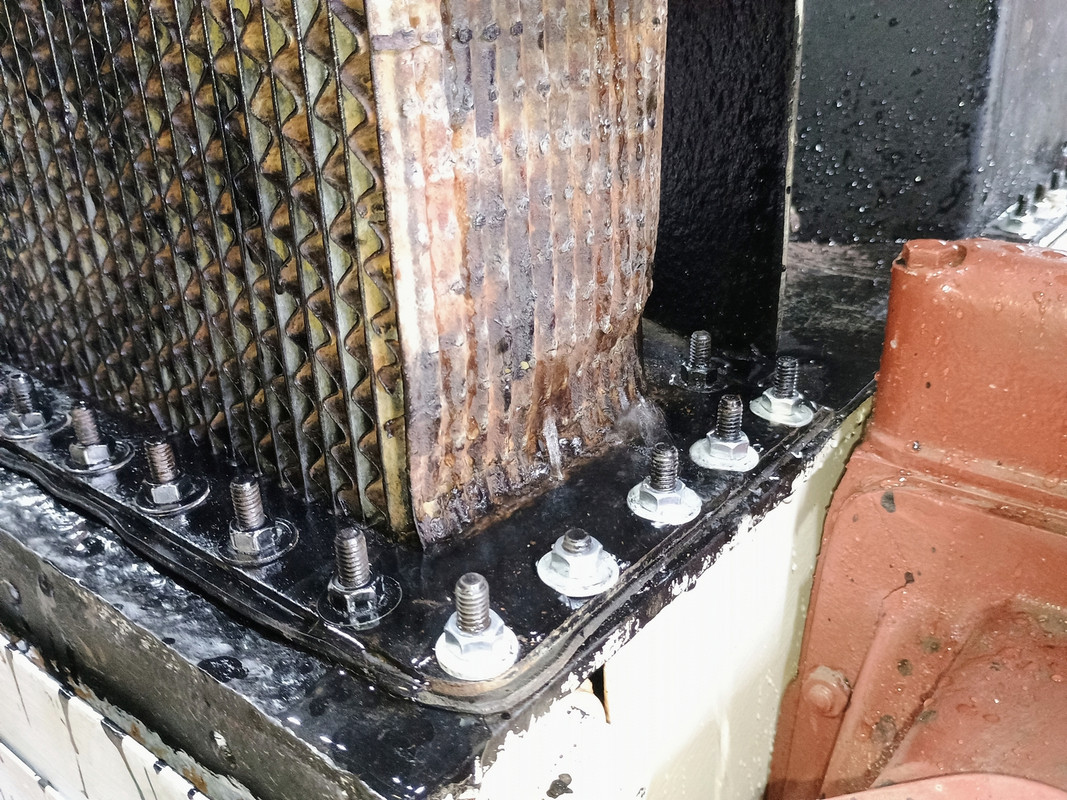
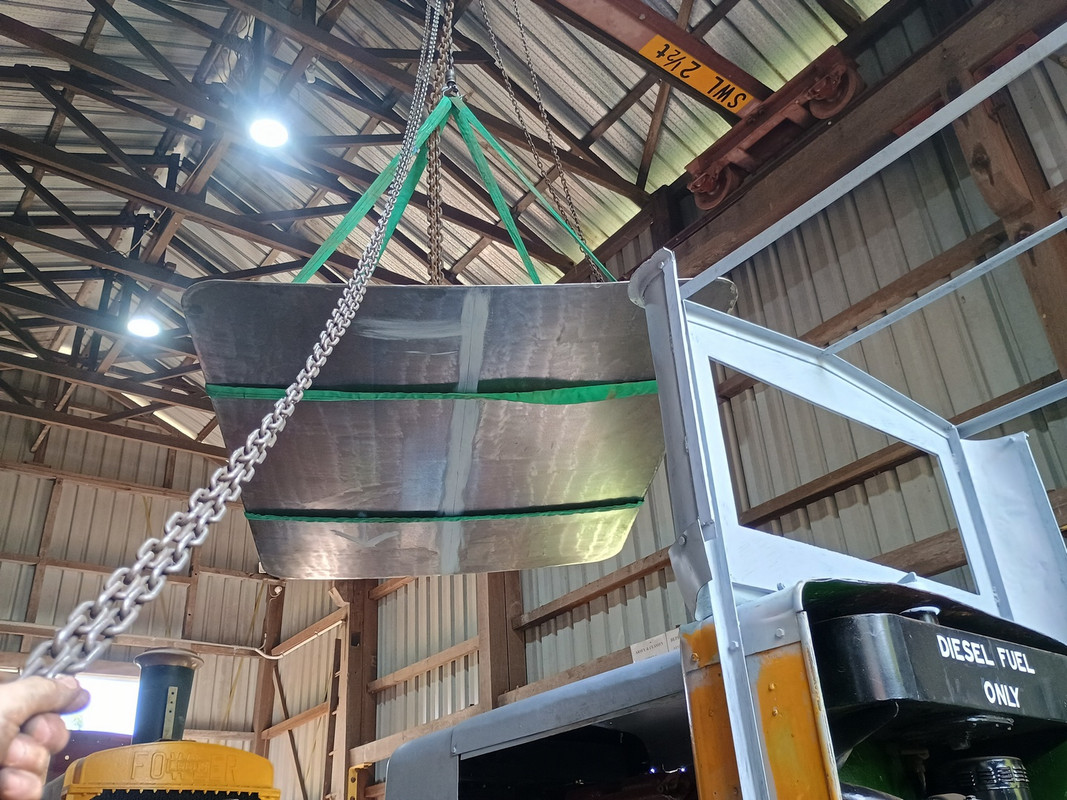
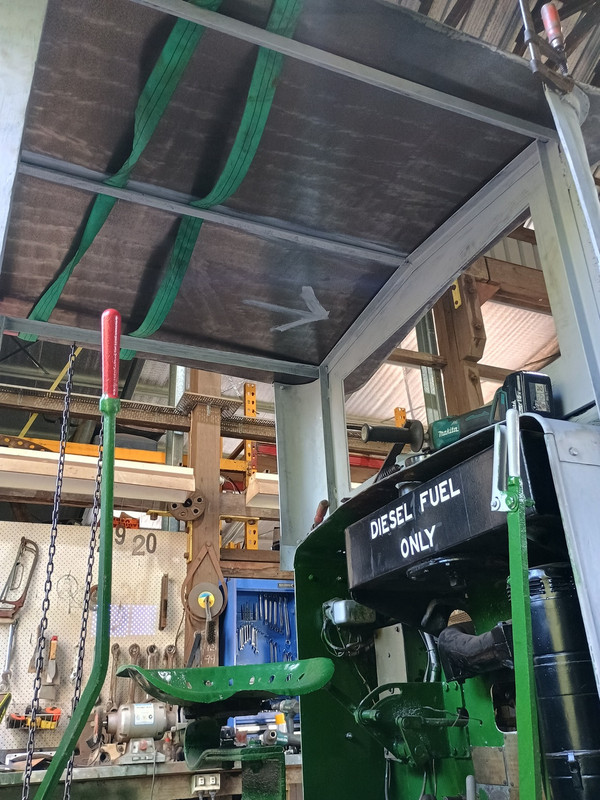
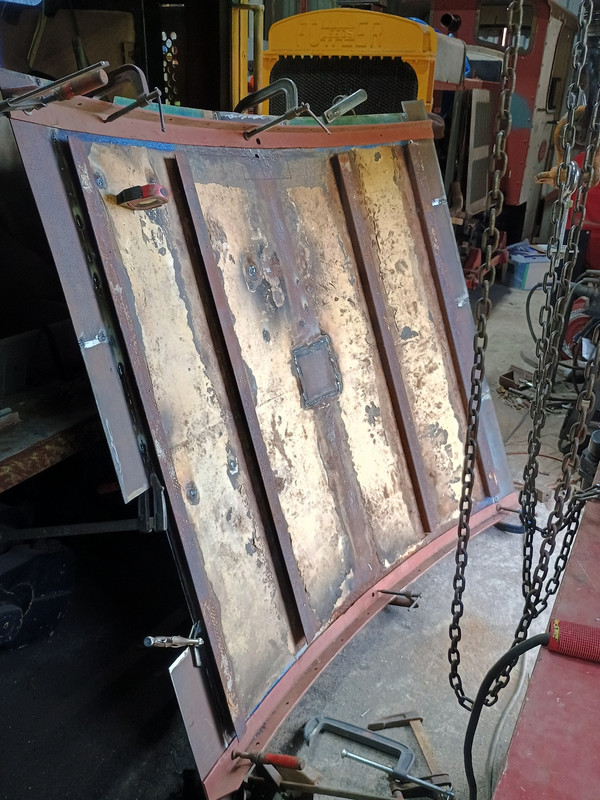
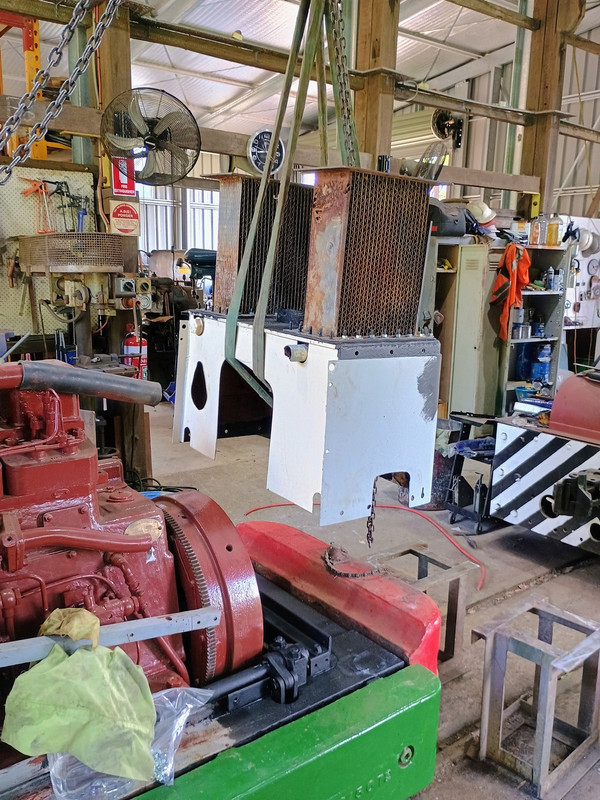
Attention then turned to the unusual (and very leaky) radiator. Many weeks of welding, swearing, tapping, filling, painting and bodging saw the lower tank/bonnet front & radiator cores refitted to the chassis.
Image


01/02/25
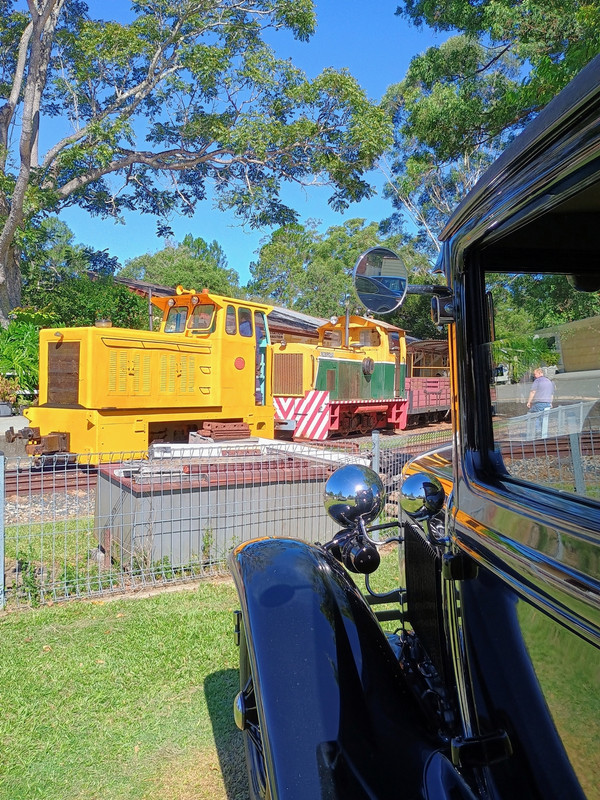
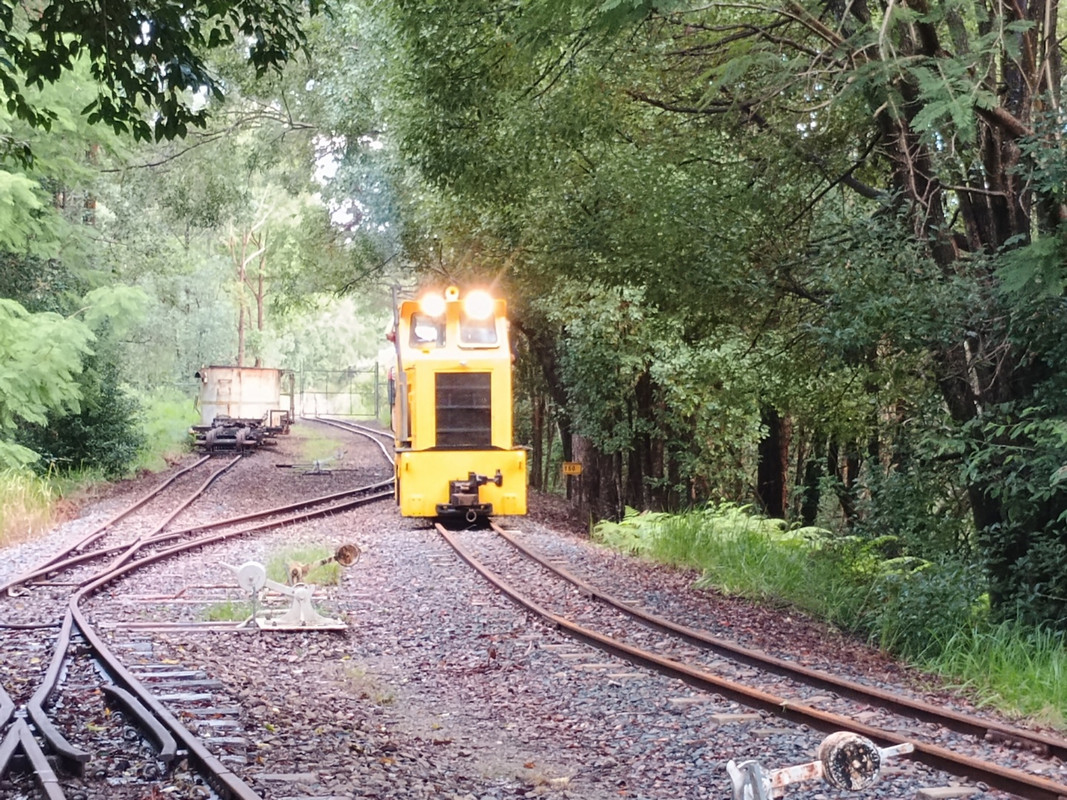
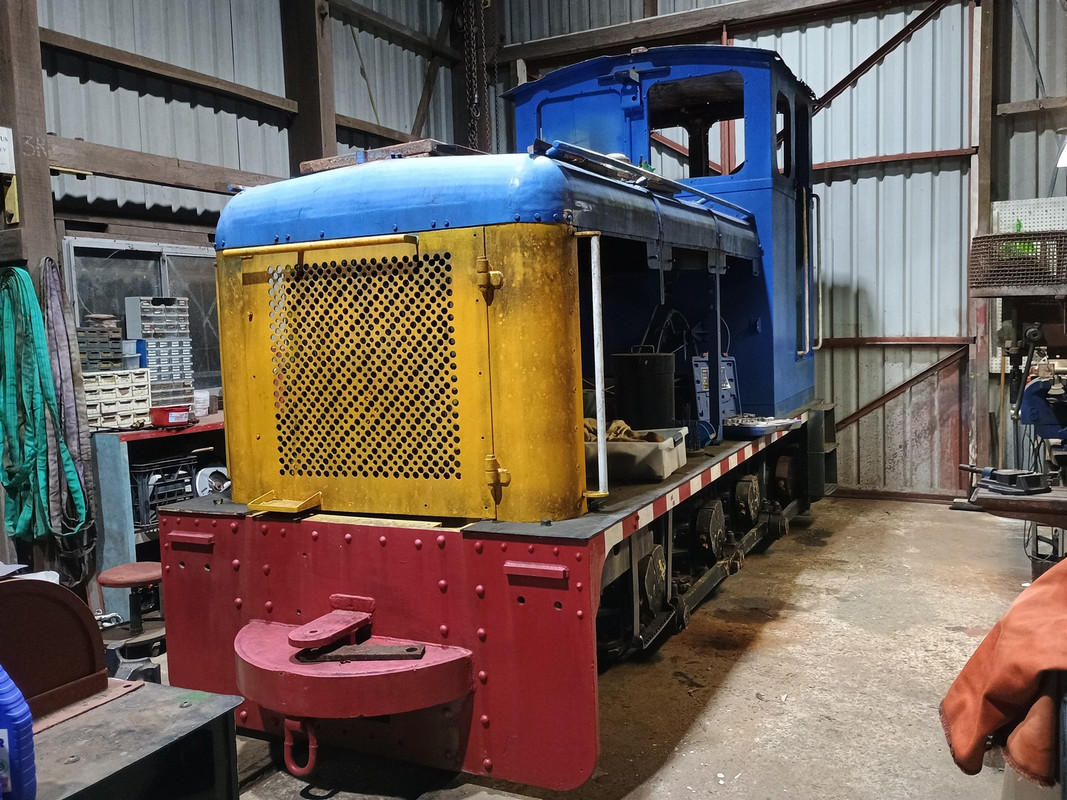
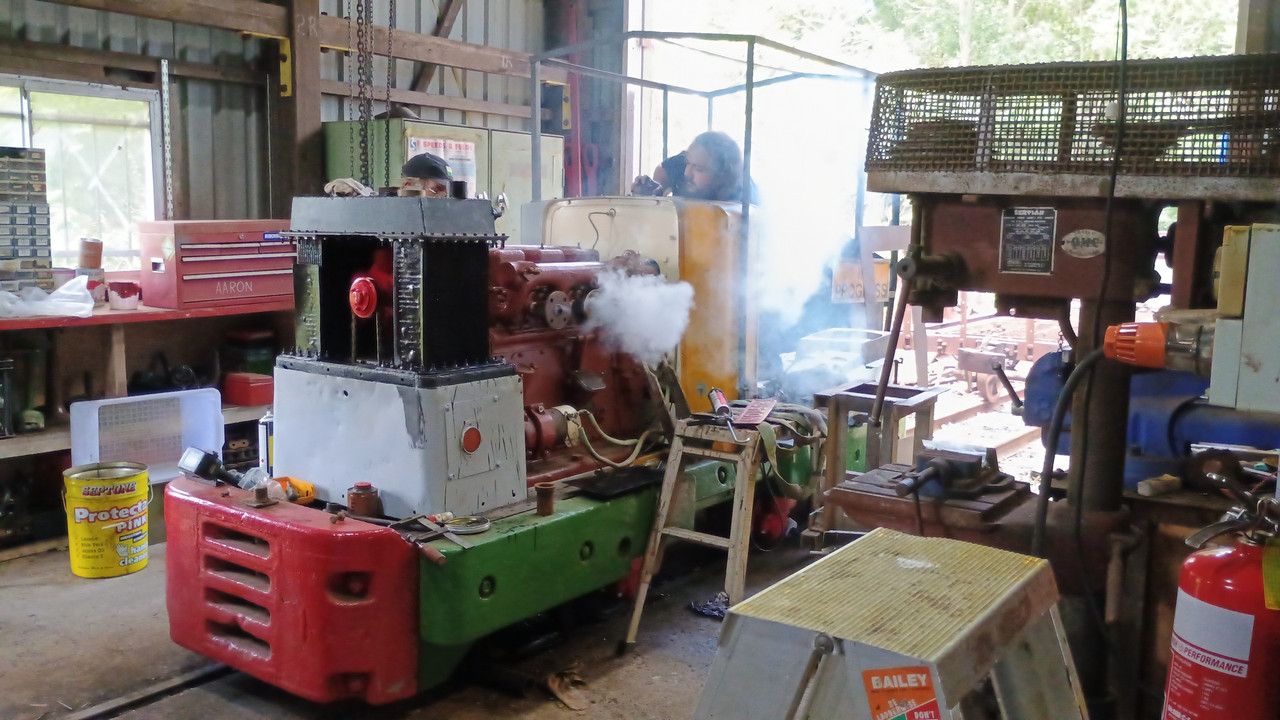
Gemco on a short navvy working. This loco has always been a stalwart of ANGRMS, and received an extensive overhaul in (I think?) early 2022.
Image


With the radiator assembled (not quite as leak-free as thought) Ruston 279,567 of 1949 was started for the first time since it came into the workshop. We have yet to put it in gear, or even refit the chain drive to the wheels. But it's a milestone and the best day I've had in the workshop in years.

Speaking of years, it's been ten to the day, since I joined ANGRMS.
Image


16/02/25
Another trip down to Woodford in my Model A Ford, saw work continue on the radiator and bonnet. All being well, I should have the radiator finished and the bonnet refitted next weekend.
Image
Last edited by Old Man Aaron on Mon Aug 18, 2025 9:32 am, edited 2 times in total.
Regards,
Aaron - Scum Class Works

User avatar
Lonsdaler
Driver
Driver
Posts: 1480
Joined: Tue May 20, 2014 9:50 am
Location: North Yorkshire

Re: In the Workshop at Woodford

Post by Lonsdaler » Mon Feb 17, 2025 10:17 am

That's a lot of time and energy invested Aaron. Well done on the progress so far. And the model A still looks sweet too.
Phil

Sporadic Garden Railer who's inconsistencies know no bounds

My Line - https://gardenrails.org/forum/viewtopic ... 41&t=11077

User avatar
Peter Butler
Driver
Driver
Posts: 5671
Joined: Sun Sep 09, 2012 10:33 pm
Location: West Wales

Re: In the Workshop at Woodford

Post by Peter Butler » Mon Feb 17, 2025 10:39 am

Great work Aaron, not something I could do myself, but I fully appreciate the effort put into restoration of any kind. Your car still looks wonderful too!
The best things in life are free.... so why am I doing this?

User avatar
Old Man Aaron
Driver
Driver
Posts: 1128
Joined: Wed Oct 19, 2016 11:08 am
Location: Sunshine Coast QLD, Australia

Re: In the Workshop at Woodford

Post by Old Man Aaron » Tue Mar 11, 2025 11:10 pm

Cheers gents. Besides costing $0.50 per mile in tyre wear, :shock: :banghead: the "A" is a reliable performer.

Ex-tropical cyclone Alfred passed by an hour South over the end of last week. It missed us at Woodford, but brought plenty of rain. I love rainy days. I love chipping away in the workshop as it pours.

Several weekends were spent chasing leaks in the radiator cores. They're pretty sad. If this loco was doing any real work (or if we had something like the heritage lottery you have in the UK) we'd spend the few thousand to have these re-cored.
Instead I'm patching these with epoxy steel putty. :lol: :roll:
Not ideal, but should hold up for a seldom-used loco.
Image


09/03/25
Work continues on the cab front. Only the top and bottom stiffeners are original - and they needed extensive work.
By this point, the radiator no longer leaks, and refurbishment of the radiator cowl is almost finished, ready to reinstall.
Image

By nightfall, the new cab front and rad. cowl were permanently refitted. (pending purchase of some bolts for the latter)
Always a weird moment, when a long-running project suddenly and finally starts looking like itself again.
Image

An exhausting run home in the pouring blackness on skinny tyres and bumpy country roads, rounded out the evening.


This weekend, I'll finish bolting the radiator cowl on, and start on the cab rear wall.
Last edited by Old Man Aaron on Wed Mar 26, 2025 9:41 am, edited 1 time in total.
Regards,
Aaron - Scum Class Works

User avatar
LNR
Driver
Driver
Posts: 1833
Joined: Sat Feb 27, 2016 5:26 am
Location: Melbourne, Australia

Re: In the Workshop at Woodford

Post by LNR » Wed Mar 12, 2025 4:29 am

I like the appropriate wording on the old signs used for the front corners of the cab ;)
Grant.

User avatar
Old Man Aaron
Driver
Driver
Posts: 1128
Joined: Wed Oct 19, 2016 11:08 am
Location: Sunshine Coast QLD, Australia

Re: In the Workshop at Woodford

Post by Old Man Aaron » Mon Mar 24, 2025 9:40 am

As do I. :lol:

16/03/25
The 3mm steel intended for the cab rear had been pinched for another job, :roll: and replacement sheet was to be added to some future order.
However, the large wheel lathe we've just acquired, has a guard of 1.5mm sheet, fitted over it's existing (and very tall, almost two stories) drive belt arrangement.
As we may well end up redesigning the drive (or build the next workshop annexe around the lathe!) we have little need for the guard.
Once removed from the lathe, I realised it had some stiffening creases in it. After some time with the club hammer, and those angle iron loco stands in the background as anvils, the sheet was flat and could be cut into more manageable halves.

The rest of the day was spent stripping the surface rust, and scuffing back any paint that didn't have rust bleeding through.
Image


23/03/25
By the end of the next weekend, the rear wall of the cab was finished. Along with the original front/rear window frames fitted and cleaned up.
I will admit, there's no small amount of heat warpage, and half my welds look like sh**.
But I learn by doing, and the original mill job wasn't brilliant either. Besides, there's no-one else to get it done.
Bog will disguise all sorts of things.. :lol: :lol: 8)
Image


This weekend is the AGM, and we're having it in the workshop - so I'll be gardening near the station. Expecting to knock out the cab roof by mid-April. After that is paint, exhaust and the usual scattering of fiddly bits.
Image
Regards,
Aaron - Scum Class Works

User avatar
LNR
Driver
Driver
Posts: 1833
Joined: Sat Feb 27, 2016 5:26 am
Location: Melbourne, Australia

Re: In the Workshop at Woodford

Post by LNR » Mon Mar 24, 2025 10:27 am

Congratulations on getting that sheet flat, I've always found it quite difficult to remove
the tension those gentle folds seem to put into a sheet.
You're certainly cracking on with the job.
Grant.

User avatar
Peter Butler
Driver
Driver
Posts: 5671
Joined: Sun Sep 09, 2012 10:33 pm
Location: West Wales

Re: In the Workshop at Woodford

Post by Peter Butler » Mon Mar 24, 2025 10:49 am

Very well done Aaron, great work! I sincerely hope your efforts are appreciated there.
The best things in life are free.... so why am I doing this?

User avatar
ge_rik
Administrator
Administrator
Posts: 7768
Joined: Sun Oct 25, 2009 10:20 pm
Location: Cheshire
Contact:

Re: In the Workshop at Woodford

Post by ge_rik » Mon Mar 24, 2025 8:53 pm

Great to see some 12" to the foot modelling in progress.

Rik
------------------------
Peckforton Light Railway - Blog Facebook Youtube

User avatar
Old Man Aaron
Driver
Driver
Posts: 1128
Joined: Wed Oct 19, 2016 11:08 am
Location: Sunshine Coast QLD, Australia

Re: In the Workshop at Woodford

Post by Old Man Aaron » Tue Apr 15, 2025 1:37 pm

Peter Butler wrote: Mon Mar 24, 2025 10:49 am Very well done Aaron, great work! I sincerely hope your efforts are appreciated there.
Greatly appreciated. We're a tiny group, and workshop progress has come to a virtual standstill for some years now.
Most days, I'm the only one in here. Just as well I enjoy my own company. :lol:


Over in the loco shed, our resident electrician Laurie, has been steadily chipping away at the stalled ex-3'6" Queensland Govt. railmotor trailer project, for a couple of years now. Besides new headstocks and underframe repairs, he's finally seeing the floor in. After that, he'll move onto replacing rotted boards in the roof. We've also had two new members join this month, both interested in the workshop side. :thumbup:
Image


29/03/25
Gemco shunting the workshop road after the AGM.
Image


Some of the next few projects after the Ruston. Don't get excited about SJ5 there on the right, that's a few years off..
Miallo over the pit at left, is a write-off. Cracked frames. Current thoughts are swapping it's boiler with Bundy Fowler No.5.
Image


05/04/25
Thankfully the steel for the roof hadn't been stolen for some latest calamity, and was (with great difficulty) dragged into the workshop to have the corners rounded off, and all surface rust removed. It was then cut almost through with a grinder, so it would bend at the crest of the roof frame.
Image


Image


06/04/25
The roof is now fettled and welded on. A "bead" edge was bent up from 10mm round bar, and welded onto the front and rear ends of the roof.
The grey primer ran out midway through. :lol:
Image


14/04/25
After fixing and refitting the crooked exhaust on Saturday, I could finally start my favourite job - painting.
During the period we're "modelling", this loco was painted in the usual shade of golden yellow, and John Deere green - the latter I suspect Condong Mill had laying around..
I'll be brush painting this loco for two reasons:
  • 1. Ryan had already painted the engine compartment, and I can't be bothered masking it off.
  • 2. The loco was likely brushed by that point in it's life anyway.
  • 3. I felt like using a brush.
Image
I prefer to leave painting toward the end of a project. Partly as a reward, seeing it finally come together. Though mainly to minimise damage, touchups and repeat painting. You wouldn't paint the bonnet of a car, only to stand on it while you weld holes in the roof..

The yellow is covering surprisingly well over the grey primer, should only take two coats. :shock:
Will be back for more brush slinging on good Friday..
Last edited by Old Man Aaron on Mon Aug 18, 2025 10:03 am, edited 1 time in total.
Regards,
Aaron - Scum Class Works

User avatar
LNR
Driver
Driver
Posts: 1833
Joined: Sat Feb 27, 2016 5:26 am
Location: Melbourne, Australia

Re: In the Workshop at Woodford

Post by LNR » Wed Apr 16, 2025 5:12 am

Great work Aaron, your lucky the yellow is covering well as it's not known for great coverage in my book.
It's a personal thing, but I always reckon gable roofs are for buildings, cambered roofs for engines and boats :dontknow: .
Grant.

User avatar
Tropic Blunder
Trainee Fireman
Trainee Fireman
Posts: 227
Joined: Sun Dec 06, 2015 4:02 am
Location: Australia
Contact:

Re: In the Workshop at Woodford

Post by Tropic Blunder » Fri Apr 25, 2025 1:32 am

Looks amazing Aaron. I saw photos of it on facebook finished a few weeks ago and its a stunning rebuild. I think theres a lot to be said for honest rebuilds of industrial locomotives. As nice as it is to see a pristine tank engine you can see yourself in the gloss in it belies a lot of their history. the john deere green and red engine are very eye catching too nice one

With Miallo I know it would be frowned upon in some circles but is there any reason you couldnt weld the frames up? Where is the crack? I'm sure that it was common practise at the mills. A certain much larger 3' 6" 4-8-0 certainly has had it done previously with battle scars littering its frame from a life of being bashed around. With the right bracing and heating it should certainly be feasible

User avatar
Lonsdaler
Driver
Driver
Posts: 1480
Joined: Tue May 20, 2014 9:50 am
Location: North Yorkshire

Re: In the Workshop at Woodford

Post by Lonsdaler » Fri Apr 25, 2025 9:08 am

Great work there Aaron. I admire the time and effort that you and your small band of volunteers are putting in to keep this collection going.
Phil

Sporadic Garden Railer who's inconsistencies know no bounds

My Line - https://gardenrails.org/forum/viewtopic ... 41&t=11077

User avatar
Old Man Aaron
Driver
Driver
Posts: 1128
Joined: Wed Oct 19, 2016 11:08 am
Location: Sunshine Coast QLD, Australia

Re: In the Workshop at Woodford

Post by Old Man Aaron » Sat Apr 26, 2025 2:58 am

LNR wrote: Wed Apr 16, 2025 5:12 am Great work Aaron, your lucky the yellow is covering well as it's not known for great coverage in my book.
It's a personal thing, but I always reckon gable roofs are for buildings, cambered roofs for engines and boats :dontknow: .
Grant.
That's why I used grey primer. If I'd have sprayed the yellow, I'd have had to undercoat in white, as I do in 16mm.

Agreed on the roof.
The loco was built cabless, and we briefly considered leaving it off and restoring to it's earlier Cudgen Sand Mine appearance. The cab as you'd expect was made at Condong Mill.
Tropic Blunder wrote: Fri Apr 25, 2025 1:32 am Looks amazing Aaron. I saw photos of it on facebook finished a few weeks ago and its a stunning rebuild. I think theres a lot to be said for honest rebuilds of industrial locomotives. As nice as it is to see a pristine tank engine you can see yourself in the gloss in it belies a lot of their history. the john deere green and red engine are very eye catching too nice one

With Miallo I know it would be frowned upon in some circles but is there any reason you couldnt weld the frames up? Where is the crack? I'm sure that it was common practise at the mills. A certain much larger 3' 6" 4-8-0 certainly has had it done previously with battle scars littering its frame from a life of being bashed around. With the right bracing and heating it should certainly be feasible
We certainly could weld Miallo. As you may have seen, Steam Workshop in the UK have recently done similarly to their ex-Tully Mill Fowler No.5. Though in that case, it was because of a bent frame from a past accident. Tully had rebuilt the axlebox horns to get the wheels square with the track, (and done so very well) but left the frame slightly off-kilter at the aft end. Steam Workshop cut, bent and re-welded the rear section of the frame, simply to get the new cab to sit perfectly straight! I'm impressed by the dedication to perfection, but I do draw the line at bogging up rust pitting on spring hangers - nobody outside an inspection pit will ever see that.


The only reason we won’t do Miallo is money. But there's a lot more wrong beside just cracked frames (originating from several axlebox corners) - It was under overhaul at Mossman Mill when withdrawn, and is missing most of it's motion; I think at least one wheel was cracked and, a lot of other major damage I don't recall.
All caused by extensive use over light lines that shouldn't carry anything heavier than a Simplex.
The sort of things that make or break the decision on weather to restore, or choose a loco in better shape to spend our extremely limited resources on. And we have plenty of those. Miallo was acquired as a parts donor for Bundy and SJ5..

Grants have become very small, and full of double-binds that make them near-impossible to get or keep. Our engineer still puts a lot of time into trying, though. Funding these projects is almost entirely out of the handful of volunteer's pockets.

But who knows - the Ruston, the Fowler diesel, they were also basket cases we weren't planning on touching..


From Good Friday through to Sunday, the Ruston was painted. Only a low timber step along the RH side to remake, horn/headlights/finish wiring, refit the chain drive. And lots of paperwork..
Image

Image


A week later, Ryan and I spent the second half of yesterday, scouring the workshop and loco shed for a large, vital castle nut (almost 4" across and hard to lose) that retains one of the drive sprockets.
Considering the unworkable shambles I found the workshop in a year ago, parts of all and sundry mixed and scattered far and wide - nobody here cleans up after themselves, and everything is left where it is dropped - this does not surprise me in the slightest..
I threw out a lot of junk in the 3-month cleanup, but never something like that.
Unfortunately for Ryan, he will likely have to machine a new one from scratch.

Ruston will soon take Miallo's place on the pit road, to assemble the final drive. It will then go in the loco shed, and Baguley will enter the workshop for an axlebox rebuild and completion of the bodywork restoration.
Last edited by Old Man Aaron on Mon Aug 18, 2025 10:07 am, edited 2 times in total.
Regards,
Aaron - Scum Class Works

User avatar
LNR
Driver
Driver
Posts: 1833
Joined: Sat Feb 27, 2016 5:26 am
Location: Melbourne, Australia

Re: In the Workshop at Woodford

Post by LNR » Sat Apr 26, 2025 3:42 am

"Looking like a bought one" Aaron.
You should be very pleased, hope they make you the head driver after all that work.
Grant.

User avatar
Old Man Aaron
Driver
Driver
Posts: 1128
Joined: Wed Oct 19, 2016 11:08 am
Location: Sunshine Coast QLD, Australia

Re: In the Workshop at Woodford

Post by Old Man Aaron » Mon Aug 18, 2025 9:29 am

Well then, only four months out of date with this one..
Modelling is still "at the back of the shed" so to speak, but developments continue in Woodford.

With Ruston shunted out, another stalled overhaul was resumed the following weekend.
Baguley No.3377 of 1953. An 0-6-0DM, formerly Mulgrave Mill's No.1.

Two other Queensland sugarcane Baguleys can be found on the Welsh Highland, and Lynton & Barnstaple railways - the latter heavily rebuilt to suit their loading gauge.

Ours was acquired in 2004, from a tourist operation on Saint Helena Island, 23km off the coast of Brisbane. It was carried to the island with an RAAF Chinook helicopter - and back to the mainland under the same aircraft..
It's the only locomotive in Australia (and possibly the world) to have been transported via helicopter.
While operational, the loco was badly in need of a general refit, and the bonnet was full of rust. Restoration began in the late 2000s, with the bonnet extensively rebuilt, but once again fell on the backburner due to the usual reasons.
Image


08/07/25
After clearing the loco of leaf litter and debris, I decided to start with the cab. Stripping out the controls, sandboxes, interior wall lining and fibreglass insulation. Mulgrave was planning on fitting doors and air conditioning to this loco, and had already insulated the cab with fibreglass. However, the loco was phased out before this work could be completed. The problem this poses for us (besides suiting up for removal) is that the insulation retains water and causes rust. The damage wasn't too bad, and by the time of writing, I've now fixed most of it, stripped it all bare and painted everything white.
Image


02/08/25
The roof needed numerous repairs - some due to rust, others because we are backdating the loco to it's 1960's livery. Between warpage and welds cracking when ground flush, repairing this 3mm steel is proving very difficult. After a month's work to get nowhere, I am deferring this job to our engineer. It's also possible that the post-war steel itself may be the problem - we could end up replacing the roof entirely..
Image


17/08/25
On the steam front, one of our new members has taken it upon himself to give our WD Hunslet, No.1229 of 1916, some badly-needed preservation and cosmetic attention. During the loco's time at Cattle Creek mill, it's chimney ended up fitted to their Borsig 4-4-2T - a loco also in our collection. Last week, this chimney was removed from the Borsig, and refitted after over 60 years away from it's rightful smokebox.
A local WWI re-enacting group had a display with the loco during yesterday's running day.
The cab, tanks and many castings need replacement, but the boiler is in good shape, and we intend to make a runner out of this one in the distant future - and yes, that smokebox will be shortened.
Image

WWI Hunslet and WW2 Malcolm Moore.
Image


Incidentally, I've started a Youtube channel for the railway, centred mostly on the workshop. It covers the gritty details I've had to gloss over above.
If you're a regular viewer of channels like Hand Tool Rescue, or the Ffestiniog & Welsh Highland's Moving Pictures series, you might enjoy Woodford Railway Restorations.
I'd love to know what you think of it, and weather you have any criticisms or suggestions for the series.
The link below plays the two videos I've made to date.


More developments are in the pipeline..
Regards,
Aaron - Scum Class Works

User avatar
tommygander1941
Trainee Fireman
Trainee Fireman
Posts: 112
Joined: Thu May 27, 2021 7:52 am

Re: In the Workshop at Woodford

Post by tommygander1941 » Mon Aug 18, 2025 6:19 pm

Not sure why, but the videos seem to struggle loading. If I try to skip to say halfway through (pressing the 5 button on my keyboard) it cannot load at all, even at 144p quality. Perhaps it's YouTube being silly, but I don't have trouble with any other videos?

User avatar
Peter Butler
Driver
Driver
Posts: 5671
Joined: Sun Sep 09, 2012 10:33 pm
Location: West Wales

Re: In the Workshop at Woodford

Post by Peter Butler » Mon Aug 18, 2025 8:34 pm

I'm having no problem at all loading the videos and I have to say, despite it not being within my abilities to carry out such work, I have enjoyed them enormously.
I am so impressed with the work itself, the method, dedication and determination to achieve best possible results within limitations of space, time and costs, but also, the way everything is recorded, filmed, edited and simply explained with minimum captions which say just enough to satisfy.
I have liked and subscribed and look forward to more.
Great work Aaron.
The best things in life are free.... so why am I doing this?

User avatar
tommygander1941
Trainee Fireman
Trainee Fireman
Posts: 112
Joined: Thu May 27, 2021 7:52 am

Re: In the Workshop at Woodford

Post by tommygander1941 » Tue Aug 19, 2025 5:44 am

It was YouTube playing up, a lot of problems were reported

User avatar
LNR
Driver
Driver
Posts: 1833
Joined: Sat Feb 27, 2016 5:26 am
Location: Melbourne, Australia

Re: In the Workshop at Woodford

Post by LNR » Tue Aug 19, 2025 7:10 am

Hey Aaron, don't lose the instructions to put all that back together!
Grant.

Post Reply

Who is online

Users browsing this forum: No registered users and 16 guests