Coachbuilding Query
Coachbuilding Query
I've just started work on rebuilding the bogie coach the MVR acquired last year - and, as is so often the case with "rebuilds", what I actually mean is basically starting again from scratch. At the moment I'm trying to make a new set of ends for the coach, but I'm having great trouble trying to draw an accurate, symmetrical roof profile, and I don't know how I'll cut it properly when the time comes. (Bear in mind I only have very basic hand tools availible, i.e. hacksaws and a craft knife.) Can anyone guide me in the right direction?

-
SillyBilly
- Retired Director

- Posts: 3536
- Joined: Sat Aug 18, 2007 11:00 pm
I use a plate, as the plywood I use is quite thin, I draw around the plate with a pencil, then score a couple of times with a knife, remove the plate and continue scoring, you could keep the plate there, depends how brave you are about shreading the edge. Good luck with finding a plateof the correct radius!

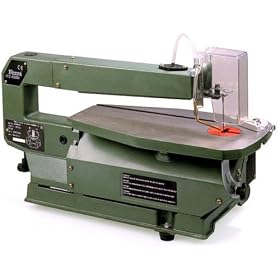
I use an oval cake tin for my roof radius, basically you are looking for something with a reasonably large diameter to draw round. As for cutting, I use dads electric jig saw, although this takes practise to get right. You could probably pick up one cheap from a DIY shed, or argos etc. If the wood is less then 3mm thick then Will's technique will probably be best, although I prefer to use 3mm thick wood for ends
"What the hell is that?"
"It's a model icebreaker sir."
"It's a bit big isn't it?"
"It's a full scale model sir....."
"It's a model icebreaker sir."
"It's a bit big isn't it?"
"It's a full scale model sir....."
Or I bought a cheap electric scroll saw for about £40 - I've used it 1000s of times, from cutting simple strips of wood, to cutting out a coach body with it.laalratty wrote:As for cutting, I use dads electric jig saw, although this takes practise to get right. You could probably pick up one cheap from a DIY shed, or argos etc.

Thanks everyone. In the end I used the plate method, which works OK, but I've learned that one should tape the peice being worked on the working surface while cutting, otherwise it can shift around and mess up the curve.
As regards materials, I've actually decided to use plasticard for my first attempt, because I find it much easier to work with. I may use some wood framing internally to ensure the structure is sufficiently rigid.
And yes, I would like power tools but at the moment I have neither the money nor space for them Nevertheless, my coach does now have a rolling chassis and two ends, so I'm feeling quietly confident about the project...
As regards materials, I've actually decided to use plasticard for my first attempt, because I find it much easier to work with. I may use some wood framing internally to ensure the structure is sufficiently rigid.
And yes, I would like power tools but at the moment I have neither the money nor space for them
-
made-in-england
- Trainee Driver

- Posts: 826
- Joined: Tue May 13, 2008 4:22 pm
Right, I'm afraid I now have another problem...
The coach will, like all MVR coaches, be balcony-ended, and I've bought a very nice W&L-pattern brass fret for the railings from GRS. The big problem with it is, like most GRS kits, the instructions...in this case it has none at all. I want to be sure I assemble it correctly...can anyone explain how to do this?
Here's a picture: http://www.atomic-album.com/showPic.php ... 023089.JPG
-
Hancockshire

- Driver

- Posts: 1204
- Joined: Tue Apr 14, 2009 11:06 am
- Location: Stranraer
- Contact:
Hmmm, I'm guessing that the zig-zaggy bit folds down to the verticle bar bitMuzTrem wrote:Right, I'm afraid I now have another problem...
The coach will, like all MVR coaches, be balcony-ended, and I've bought a very nice W&L-pattern brass fret for the railings from GRS. The big problem with it is, like most GRS kits, the instructions...in this case it has none at all. I want to be sure I assemble it correctly...can anyone explain how to do this?
Here's a picture: http://www.atomic-album.com/showPic.php ... 023089.JPG

I think so too...but I'd just like to be absolubtely certain before I actually start to fold the metal!
Incidentally, I've written a little more about my coachbuilding project in the latest update to the MVR website's Workshop Page. A photo of the chassis can be found here.
Incidentally, I've written a little more about my coachbuilding project in the latest update to the MVR website's Workshop Page. A photo of the chassis can be found here.
Who is online
Users browsing this forum: No registered users and 4 guests