
Ever since the very early days of the railway, a resin Model Town signal box has guarded the station (now named Delabole) and the many junctions off to the stone quarry nearby. The kit was built up as one would normally do and here was the result:
I thought it looked rather tidy and was pleased with my effort
- IMG_2563.jpg (3.95 MiB) Viewed 8309 times
- IMG_3101.jpg (3.76 MiB) Viewed 8309 times
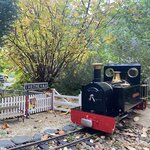
Still alright but a bit tatty.
- IMG_1761.jpg (3.54 MiB) Viewed 8309 times
First of all I took the top half apart and played around with the proportions (I wasn't completely happy) until I (drastically
I also didn't like the overcall window framed so they were removed as well with a hacksaw
I had drawn inspiration from boxes at pilot yard on the L&B, Douglas on the Isle of Man and of course Delabole box on the North Cornwall railway. I found these all very picturesque buildings so I have tried implementing features from these into the model.
the roof is just placed on at this point
- IMG_3672.jpg (2.36 MiB) Viewed 8309 times
I also added a vertical halfway along the front window using some of the old window frame.
- IMG_3692.jpg (2.28 MiB) Viewed 8309 times
a needle file was used to create the notches - here are the results:
Success
- IMG_3709.jpg (2.66 MiB) Viewed 8309 times


