Hi George and welcome to the Forum.
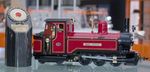
For a first time build you have shown a high level of skill in putting those kits together. I have had some experience with IP kits and my findings are they leave much to be desired. They usually need additional pieces (not supplied) to add strength and support.
The roof assembly is best done by forming a ribbed framework, whether in wood or HIP. I found that a cradle is best to lay all the pieces on while the glue is drying, once set you can either have it fixed or removable......

- IMG_5909.JPG (84.39 KiB) Viewed 6510 times

- IMG_5910.JPG (78.47 KiB) Viewed 6510 times
This shows one method of keeping everything in place, although 2 clamps and a length of timber is better!....

- IMG_5911.JPG (95.04 KiB) Viewed 6510 times
You have painted the panels and overlays separately before final assembly, which is the best way to give a crisp edge. My guess is that you have used spots of superglue to attach the overlays when I prefer canopy adhesive.....

- IMG_5802.JPG (74.75 KiB) Viewed 6510 times
This is wonderful stuff which sticks almost everything but dries clear and doesn't affect paintwork. Any in the wrong place is easily wiped off before it sets or peeled off after.
During lock-down I did a series of kit builds to show how manufacturers differ in design and materials. I was interested to see how they differed, some very basic yet others have gone to extremes with jigs to prevent movement and maintain perfect alignment. The cost varies quite a bit, but not in the way you might expect.
If you search on my thread, 'Time to build a railway.... ' under Railways and Layouts section, beginning at page 150, I cover about 6 or 7 kits.
The best things in life are free.... so why am I doing this?