The G&DLR begins.

-
Sylvian Tennant
- Fireman

- Posts: 327
- Joined: Wed Aug 10, 2011 4:48 pm
- Location: Teesside
Re: The G&DLR begins.
You're very much welcome.
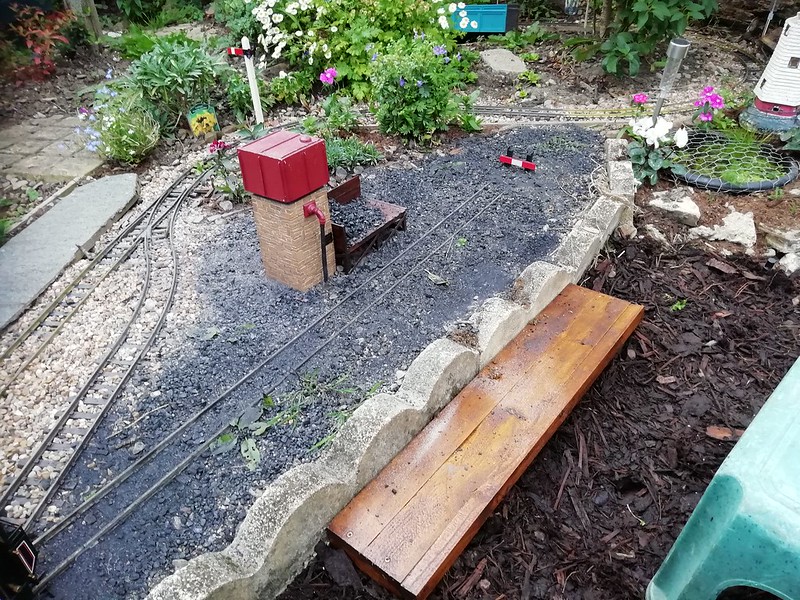
So, finally.... the track side of things are done.
I've added a pass strip to the LGB R1 point that was causing the most problems. This seems to have eliminated the derailments here.

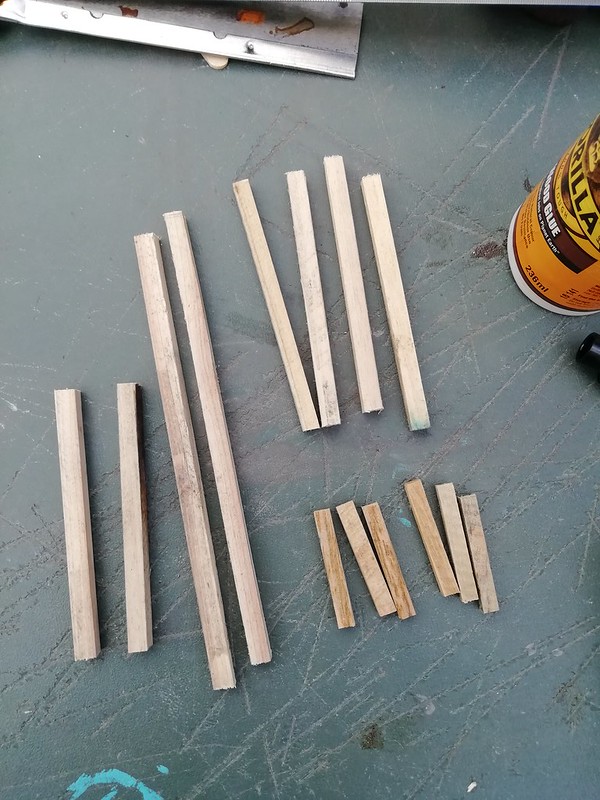
In addition to that, I needed somewhere to cross over. originally I was going to dig out and restore my original crossing gates. Unfortunately I was quick to find out that Toddlers have limited sympathies for hand crafted and detailed models so I decided it was best to just make an unmates crossing which is just simply some wooden firework stakes picked up post Nov. 5th glued together and coated in Weather protective woodstain.

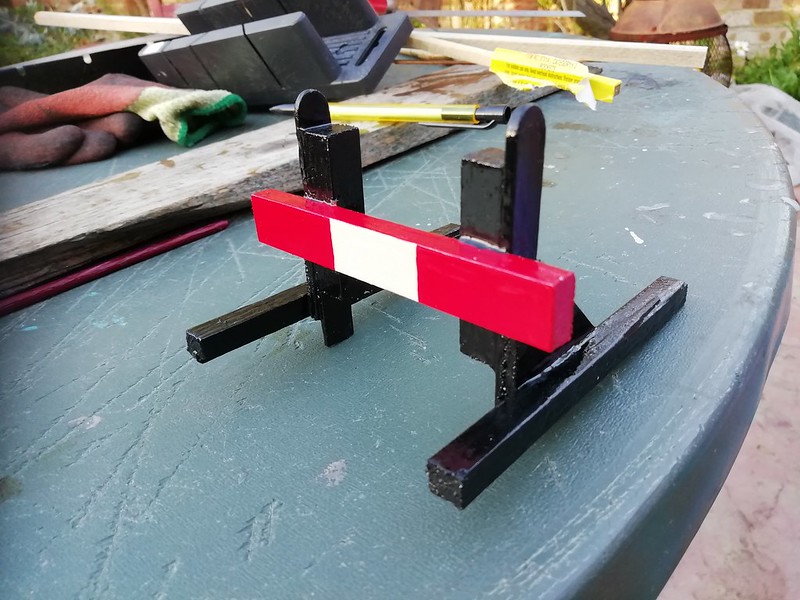
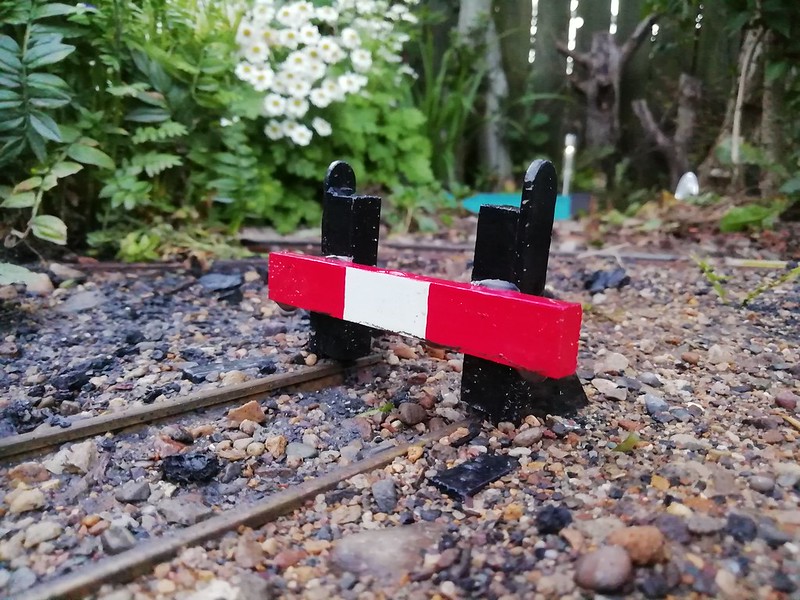
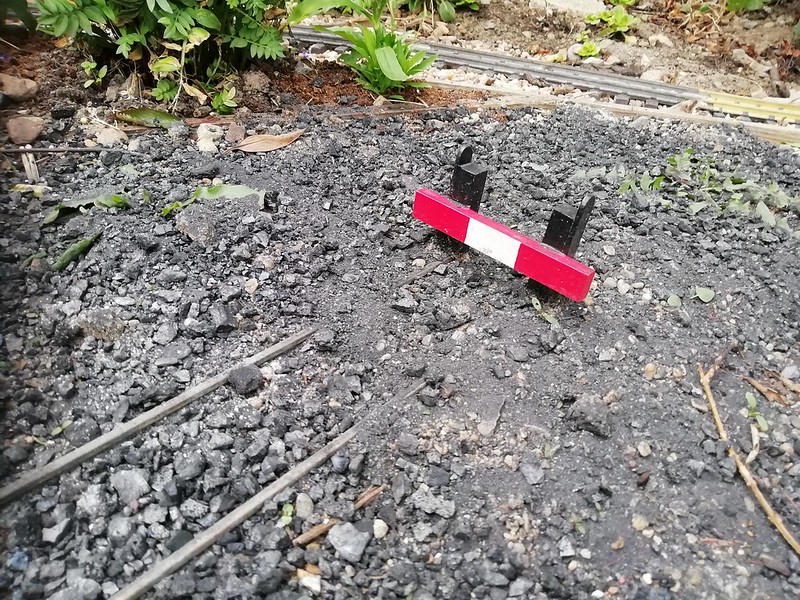
finally and also using some of the firework stakes and some spare bits of wood lying around I built a much needed buffer stop.


I may need to go over the steaming bay with coal and ash. I got a little over excited with my new garden hose.
So, finally.... the track side of things are done.
I've added a pass strip to the LGB R1 point that was causing the most problems. This seems to have eliminated the derailments here.
In addition to that, I needed somewhere to cross over. originally I was going to dig out and restore my original crossing gates. Unfortunately I was quick to find out that Toddlers have limited sympathies for hand crafted and detailed models so I decided it was best to just make an unmates crossing which is just simply some wooden firework stakes picked up post Nov. 5th glued together and coated in Weather protective woodstain.
finally and also using some of the firework stakes and some spare bits of wood lying around I built a much needed buffer stop.
I may need to go over the steaming bay with coal and ash. I got a little over excited with my new garden hose.
Facebook - https://www.facebook.com/Area51Models/
Instagram - https://www.instagram.com/area51greumach/
Instagram - https://www.instagram.com/area51greumach/


Re: The G&DLR begins.
Great looking buffer stop ..
Rik
Rik

Re: The G&DLR begins.
Agree..Your buffer stop is brilliant... 
ROD
Life is so easy when I run my trains.


https://gardenrails.org/forum/viewtopic ... 41&t=11364
https://www.youtube.com/@fairywoodlightrailway
Life is so easy when I run my trains.


https://gardenrails.org/forum/viewtopic ... 41&t=11364
https://www.youtube.com/@fairywoodlightrailway
-
Sylvian Tennant
- Fireman
- Posts: 327
- Joined: Wed Aug 10, 2011 4:48 pm
- Location: Teesside
Re: The G&DLR begins.
Thank you gents for your kind words. The buffer stop is a little on the low side for most of my stock. Should have added another strip of wood to the top but it works fine for roundhouse locos.
Facebook - https://www.facebook.com/Area51Models/
Instagram - https://www.instagram.com/area51greumach/
Instagram - https://www.instagram.com/area51greumach/
-
Sylvian Tennant
- Fireman
- Posts: 327
- Joined: Wed Aug 10, 2011 4:48 pm
- Location: Teesside
Re: The G&DLR begins.
More work on line saw an on the whim project which I had in my mind for a little while. A coal stage, taking inspiration of the likes of Hayling Island (For the record I'm an LNER man rather than Southern but the Hayling Billy holds a particular fascination) Here is a photo run down of the whole project made up from more of the spare firework stakes I had lying around, lollipop sticks and coffee stirrers.


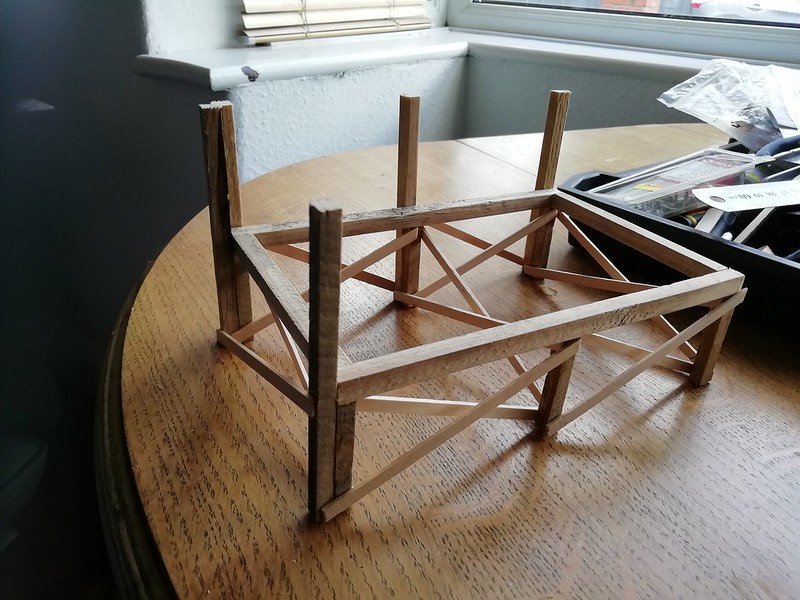

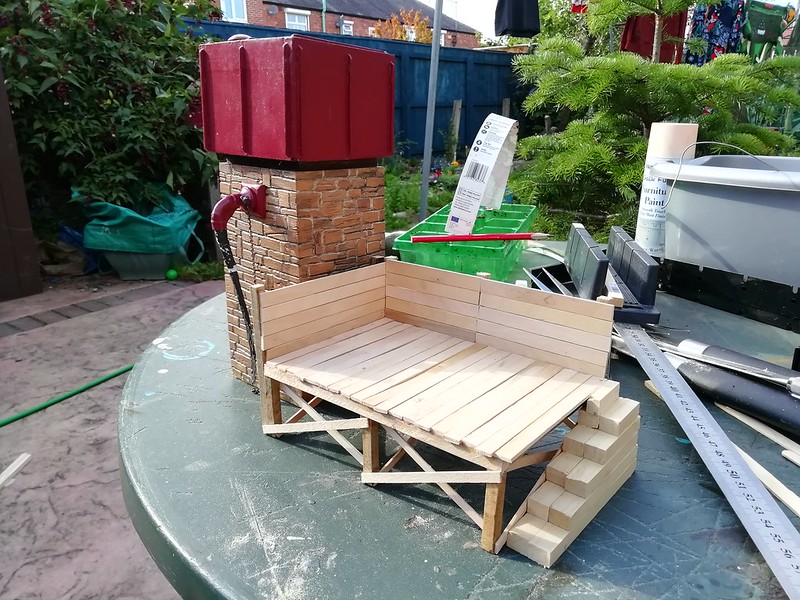

In all it cost me about £12 - mainly because I had to buy in a plank of Obechi, the lollipop sticks and a large tin of natural teak woodstain (they only had large...) Thinking about it, I had light oak woodstain which may have been a better idea as it now looks like someones artistic interpretation of Spareribs. But as you can see the rain stays off it - which is the important thing, plus it's darker in real life.
Next up the water tower. For out of curiosity what do people use for a bag for a watercrane (Im trying without success to find a long black balloon) and does anyone know where I can source a knackered old carriage for a mess hut?
Facebook - https://www.facebook.com/Area51Models/
Instagram - https://www.instagram.com/area51greumach/
Instagram - https://www.instagram.com/area51greumach/
Re: The G&DLR begins.
Great work on the coal stage, may use your idea if that's ok. Try and rub the woodstain off as much as you can, you may then put some of the lighter stuff on or it might take the sparerib look off a bit. But if you put some coal dust on it after putting some watered down PVA on first, it should turn out more to your liking.
For the bag and carriage I'am afraid I can't help you. The carriage could be found on eBay I suppose.....
For the bag and carriage I'am afraid I can't help you. The carriage could be found on eBay I suppose.....
ROD
Life is so easy when I run my trains.
https://gardenrails.org/forum/viewtopic ... 41&t=11364
https://www.youtube.com/@fairywoodlightrailway
Life is so easy when I run my trains.
https://gardenrails.org/forum/viewtopic ... 41&t=11364
https://www.youtube.com/@fairywoodlightrailway

Re: The G&DLR begins.
How about some black staining to tone down the spare rib effect? It would also fit with it's use as a coaling stage.Sylvian Tennant wrote: ↑Mon Sep 07, 2020 11:37 pm More work on line saw an on the whim project which I had in my mind for a little while. A coal stage, taking inspiration of the likes of Hayling Island (For the record I'm an LNER man rather than Southern but the Hayling Billy holds a particular fascination) Here is a photo run down of the whole project made up from more of the spare firework stakes I had lying around, lollipop sticks and coffee stirrers.
In all it cost me about £12 - mainly because I had to buy in a plank of Obechi, the lollipop sticks and a large tin of natural teak woodstain (they only had large...) Thinking about it, I had light oak woodstain which may have been a better idea as it now looks like someones artistic interpretation of Spareribs. But as you can see the rain stays off it - which is the important thing, plus it's darker in real life.
Next up the water tower. For out of curiosity what do people use for a bag for a watercrane (Im trying without success to find a long black balloon) and does anyone know where I can source a knackered old carriage for a mess hut?
i have used a strip of black heatshrink for the bag on my water tower, it looks quite effective.
- water-tower.jpg (99.73 KiB) Viewed 5756 times
Phil
Sporadic Garden Railer who's inconsistencies know no bounds
My Line - https://gardenrails.org/forum/viewtopic ... 41&t=11077
Sporadic Garden Railer who's inconsistencies know no bounds
My Line - https://gardenrails.org/forum/viewtopic ... 41&t=11077
-
Sylvian Tennant
- Fireman
- Posts: 327
- Joined: Wed Aug 10, 2011 4:48 pm
- Location: Teesside
Re: The G&DLR begins.
Thanks chaps, I think the finish could have been a lot worse. Certainly not enough to damage by stripping but We'll how it goes when elements and coal hit it.
Great idea Phil, nanaged to grt some heat shrink today. Just one question. This might sound a bit daft but did you heat it up or just attach it as you bought it.
Great idea Phil, nanaged to grt some heat shrink today. Just one question. This might sound a bit daft but did you heat it up or just attach it as you bought it.
Facebook - https://www.facebook.com/Area51Models/
Instagram - https://www.instagram.com/area51greumach/
Instagram - https://www.instagram.com/area51greumach/
-
Sylvian Tennant
- Fireman
- Posts: 327
- Joined: Wed Aug 10, 2011 4:48 pm
- Location: Teesside
Re: The G&DLR begins.
Thanks chaps, I think the finish could have been a lot worse. Certainly not enough to damage by stripping but We'll how it goes when elements and coal hit it.
Great idea Phil, managed to get some heat shrink today. Just one question. This might sound a bit daft but did you heat it up or just attach it as you bought it.
Great idea Phil, managed to get some heat shrink today. Just one question. This might sound a bit daft but did you heat it up or just attach it as you bought it.
Facebook - https://www.facebook.com/Area51Models/
Instagram - https://www.instagram.com/area51greumach/
Instagram - https://www.instagram.com/area51greumach/
Re: The G&DLR begins.
I applied some cautious heat where it fitted to the downpipe, just to allow it to grip, but kept the rest cool so it stayed in its unshrunk state. Hope that helps.Sylvian Tennant wrote: ↑Tue Sep 08, 2020 5:42 pm Thanks chaps, I think the finish could have been a lot worse. Certainly not enough to damage by stripping but We'll how it goes when elements and coal hit it.
Great idea Phil, managed to get some heat shrink today. Just one question. This might sound a bit daft but did you heat it up or just attach it as you bought it.
Phil
Sporadic Garden Railer who's inconsistencies know no bounds
My Line - https://gardenrails.org/forum/viewtopic ... 41&t=11077
Sporadic Garden Railer who's inconsistencies know no bounds
My Line - https://gardenrails.org/forum/viewtopic ... 41&t=11077
-
Sylvian Tennant
- Fireman
- Posts: 327
- Joined: Wed Aug 10, 2011 4:48 pm
- Location: Teesside
Re: The G&DLR begins.
I'm going to spread this over a couple of posts. A few weeks ago I managed to finish the water tower to go along with the coal stage. Taking previous advice the bag is some heat shrink which was carefully and very very quickly heated to help it wilt a bit and cling to the arm of the tower. I made a base from some scrap foam board with a grate made from some repair mesh picked up years ago from Halfords.


So far I think it looks the part - just need to decide on a place for the crew to go.
So far I think it looks the part - just need to decide on a place for the crew to go.
Facebook - https://www.facebook.com/Area51Models/
Instagram - https://www.instagram.com/area51greumach/
Instagram - https://www.instagram.com/area51greumach/
-
Sylvian Tennant
- Fireman
- Posts: 327
- Joined: Wed Aug 10, 2011 4:48 pm
- Location: Teesside
Re: The G&DLR begins.
Next up, a small table for the steam up bay. A few months ago we received a new cooker and instead were some wooden batons for padding. The tragic order in me saw some potential at the time (though I had no real idea on what). Eventually I decided to turn my hand to some basic wood work. Not bad for a first attempt.


The finish is some Ronseal light oak wood stain which hopefully lies unto it's 5 year guarantee. It's just enough space to put all my rubbings and my brew.
The finish is some Ronseal light oak wood stain which hopefully lies unto it's 5 year guarantee. It's just enough space to put all my rubbings and my brew.
Facebook - https://www.facebook.com/Area51Models/
Instagram - https://www.instagram.com/area51greumach/
Instagram - https://www.instagram.com/area51greumach/
-
Sylvian Tennant
- Fireman
- Posts: 327
- Joined: Wed Aug 10, 2011 4:48 pm
- Location: Teesside
Re: The G&DLR begins.
Finally some extra bits and pieces. The steam up bay as been re-ashed (which for the better part is a bit of a waited effort but it has muted the sand beneath it.
I also managed to create a coupler from some brass and a bit of dowel from a seaside windmill which has seen better days.


In addition to that I had recent started making some real progress which resorting and updating my old signal box.
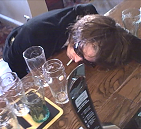
The good news is that my little one has now taken a keen interest in trains. It does mean so much to me that this has happened and is something that, with encouragement may grow into one of the many bonds we have moving into the future.

As a side note, and sadly on the same day this photo was taken my mum passed away from cancer. Although we had to prepare for the actual eventuality, the speed at which she succumbed took us all by surprise. She wasn't into railways particularly but tried to encourage my hobby as best she could, especially as my father was not at all interested (and thankfully let the family - not before time). We have taken it hard in many ways and as many of you will appreciate we are trying to come to terms with the loss of not just a mother but also a new grandmother which I'm finding particularly hard. Please watch this space as I do plan to try and keep myself busy with modelling and bring up a future enthusiast.
I also managed to create a coupler from some brass and a bit of dowel from a seaside windmill which has seen better days.
In addition to that I had recent started making some real progress which resorting and updating my old signal box.
The good news is that my little one has now taken a keen interest in trains. It does mean so much to me that this has happened and is something that, with encouragement may grow into one of the many bonds we have moving into the future.
As a side note, and sadly on the same day this photo was taken my mum passed away from cancer. Although we had to prepare for the actual eventuality, the speed at which she succumbed took us all by surprise. She wasn't into railways particularly but tried to encourage my hobby as best she could, especially as my father was not at all interested (and thankfully let the family - not before time). We have taken it hard in many ways and as many of you will appreciate we are trying to come to terms with the loss of not just a mother but also a new grandmother which I'm finding particularly hard. Please watch this space as I do plan to try and keep myself busy with modelling and bring up a future enthusiast.
Facebook - https://www.facebook.com/Area51Models/
Instagram - https://www.instagram.com/area51greumach/
Instagram - https://www.instagram.com/area51greumach/
-
Peter Butler

- Driver

- Posts: 5266
- Joined: Sun Sep 09, 2012 10:33 pm
- Location: West Wales
Re: The G&DLR begins.
Tragic news and incredibly bad timing, sincere condolences. With luck your little one will help you to move forward and concentrate the mind.
The best things in life are free.... so why am I doing this?

Re: The G&DLR begins.
So sorry for you and the family, but as you say you need to keep yourself looking forward and just remember the good parts of the past.
That water tower and coal stage (and the little table) look superb.
That water tower and coal stage (and the little table) look superb.
Philip
Re: The G&DLR begins.
Sorry for your lose. Our condolences go out to you. 
On a brighter side, your builds are absolutely brilliant. I really do like your water tower and coaling stage...
On a brighter side, your builds are absolutely brilliant. I really do like your water tower and coaling stage...
ROD
Life is so easy when I run my trains.
https://gardenrails.org/forum/viewtopic ... 41&t=11364
https://www.youtube.com/@fairywoodlightrailway
Life is so easy when I run my trains.
https://gardenrails.org/forum/viewtopic ... 41&t=11364
https://www.youtube.com/@fairywoodlightrailway
-
Sylvian Tennant
- Fireman
- Posts: 327
- Joined: Wed Aug 10, 2011 4:48 pm
- Location: Teesside
Re: The G&DLR begins.
Thank you chaps.
It's been a funny few weeks having to get used to everything with coming to terms and the likes.
Slowly back on track and all that.
Anyway, I've managed to get some modelling sorted, cracking back on with the garden railway. Over the last few months I've been restarting my old signal box. The original was alright but the veranda was very flimsy and the interior was a rushed job and looking back didn't reflect what I had wanted.
The original incarnation is somewhere a few pages earlier. After about 3 years trundling around being left outside in the yard of a flat in newcastle for about 1 year and kept in a box for another year it was time to renovate the blighter.
New sides from the step were fabricated from foam board along with a new veranda which looks a little more robust.

I also created a stand for the signalman to clean the outside windows with a rail to hold onto. Already there's a discernable improvement. I also created a boardwalk as this is a common feature with signal boxes. The wooden part were made just using lollipop sticks. I decided to put it on a foam board base for ease and sturdiness.

Next was the lever frame. the original kit comes with five rivets to represent them. I wasn't a huge fan so with bits of wooden sprue, brass and copper I decided to make my own the same way. The lever frame was again just some spare foam board cut up and filed.


The interior was next, the floor was again just some lollipop stick (I use a lot of these). The stand was bits of wooden plank and some spare sprue from an IP engineering kit. The dial and instruments were again just wooden off cuts.
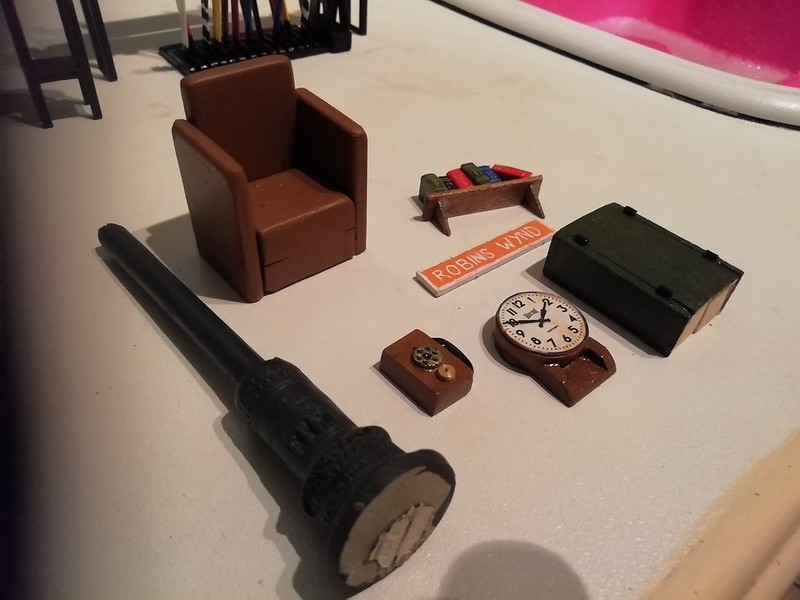
The chair was some 5mm foamex cut, layered and sanded there wearisome other bits that came with the kit such as the clock and stove which I kept.
Once varnished and painted there started to look the part. I must admit at this stage. i'm no signal man so I'm not going to say it's accurate by any means. I will also notice the small brass bells which are actually dolls house light switches. I dropped a ****** with this one as half an hour I bought them I found some brass bell pins for a fraction of the price which would have done just as well. D'oh!
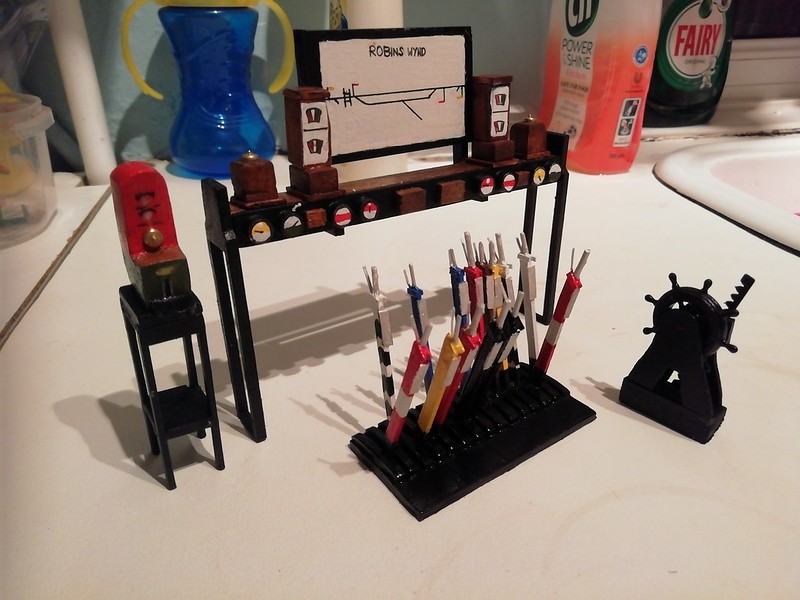
The lever frames were painted in accordance with BR rules (I'm not being too picky with eras or railways with my line) and reflect the points, signals and (imaginary) level crossing. The level crossing wheels was a model ship helm some other model ships parts (the name of which I forget but can show you a picture) and some spare ply wood.
Looking down directly the interior looks very, very compact but with the roof on there's no real way you notice it.


Finally here's the finished article. I added a solar light so the signal man can see what he's looking at in the dark. I'm not too bothered that the solar panel is noticeable, it's just a little compromise for not having to switch it on and off all the time. I added a chimney for the stove but I have a feeling a certain toddler half inched it - it currently remains missing!


and finally with the lights on.


In addition to that, my recent birthday was most fruitful with these four tank wagons rocking up at the door.

The eventual plan is to do something not unlike bertieB's modifications - whom i was greatly impressed with. The beauty of these are there don't look too out of place with Vyv and I've always loved watching old 9F's, 8F's and Black 5's hauling TTA wagons over the pennines.

The only modification done so far was to remove the LGB style couples and drill through a hole in the buffers to accept a chain couple.

The apprentice shunter seems rather taken with them.

More work to follow.
It's been a funny few weeks having to get used to everything with coming to terms and the likes.
Slowly back on track and all that.
Anyway, I've managed to get some modelling sorted, cracking back on with the garden railway. Over the last few months I've been restarting my old signal box. The original was alright but the veranda was very flimsy and the interior was a rushed job and looking back didn't reflect what I had wanted.
The original incarnation is somewhere a few pages earlier. After about 3 years trundling around being left outside in the yard of a flat in newcastle for about 1 year and kept in a box for another year it was time to renovate the blighter.
New sides from the step were fabricated from foam board along with a new veranda which looks a little more robust.
I also created a stand for the signalman to clean the outside windows with a rail to hold onto. Already there's a discernable improvement. I also created a boardwalk as this is a common feature with signal boxes. The wooden part were made just using lollipop sticks. I decided to put it on a foam board base for ease and sturdiness.
Next was the lever frame. the original kit comes with five rivets to represent them. I wasn't a huge fan so with bits of wooden sprue, brass and copper I decided to make my own the same way. The lever frame was again just some spare foam board cut up and filed.
The interior was next, the floor was again just some lollipop stick (I use a lot of these). The stand was bits of wooden plank and some spare sprue from an IP engineering kit. The dial and instruments were again just wooden off cuts.
The chair was some 5mm foamex cut, layered and sanded there wearisome other bits that came with the kit such as the clock and stove which I kept.
Once varnished and painted there started to look the part. I must admit at this stage. i'm no signal man so I'm not going to say it's accurate by any means. I will also notice the small brass bells which are actually dolls house light switches. I dropped a ****** with this one as half an hour I bought them I found some brass bell pins for a fraction of the price which would have done just as well. D'oh!
The lever frames were painted in accordance with BR rules (I'm not being too picky with eras or railways with my line) and reflect the points, signals and (imaginary) level crossing. The level crossing wheels was a model ship helm some other model ships parts (the name of which I forget but can show you a picture) and some spare ply wood.
Looking down directly the interior looks very, very compact but with the roof on there's no real way you notice it.
Finally here's the finished article. I added a solar light so the signal man can see what he's looking at in the dark. I'm not too bothered that the solar panel is noticeable, it's just a little compromise for not having to switch it on and off all the time. I added a chimney for the stove but I have a feeling a certain toddler half inched it - it currently remains missing!
and finally with the lights on.
In addition to that, my recent birthday was most fruitful with these four tank wagons rocking up at the door.
The eventual plan is to do something not unlike bertieB's modifications - whom i was greatly impressed with. The beauty of these are there don't look too out of place with Vyv and I've always loved watching old 9F's, 8F's and Black 5's hauling TTA wagons over the pennines.
The only modification done so far was to remove the LGB style couples and drill through a hole in the buffers to accept a chain couple.
The apprentice shunter seems rather taken with them.
More work to follow.
Facebook - https://www.facebook.com/Area51Models/
Instagram - https://www.instagram.com/area51greumach/
Instagram - https://www.instagram.com/area51greumach/
-
Peter Butler
- Driver
- Posts: 5266
- Joined: Sun Sep 09, 2012 10:33 pm
- Location: West Wales
Re: The G&DLR begins.
Really nice, the signal box interior is brilliant, I have no idea what the things do, but they look just right.
Your apprentice is growing rapidly, soon be able to drive, under supervision!
Your apprentice is growing rapidly, soon be able to drive, under supervision!
The best things in life are free.... so why am I doing this?
Who is online
Users browsing this forum: No registered users and 0 guests