
But I’ve bent my rules again and decided to build a radio controlled (road) traction engine.
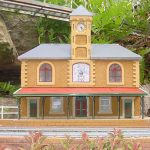
Maybe I can drive it around the loungeroom? But it would be nice to see it trundle along Lilyvale’s main street. To do this it will need to be able to have a turning circle of max 30cm.
If all else fails I can mount it on a flat car.
Making the wheels has always been the impossible sticking point for me, but when ge_rik mentioned he had a simple model he didn’t need, I took it off his hands.
It turned out to be too small for me to put RC in, but I used the wheels and started from scratch to build the body.
I had an old solid vacuum cleaner hose 36mm dia and it looked right for the boiler. I also had a Tamiya motor/gearbox, I’d bought long ago but was too wide for a 45mm gauge loco. It seemed the speed would be slow enough for a traction engine, even with it’s large dia wheels.
So I started the design, based on the parameters of
• boiler dia 36mm
• Wheels 90mm dia
• motor dimensions of 75mm long x 30mm high x 35mm wide
• and needing four AAA batteries.
The main ‘box’ (what else can I call it?) contains the motor with the boiler above.
The motor is screwed to a base of 1.5mm styrene with aluminium angles to allow it to be screwed up into the main ‘box’, which is hollow. The top of the box is held on by magnets.
- tamiya motor gearbox.JPG (242.51 KiB) Viewed 6804 times
• speed (using the Picaxe PWM command and a FET),
• direction (5V relay with DPDT contacts) and
• steering (Servo, using chains to the front axle).
All this is inside the boiler and will pull out of the from smokebox.
The batteries are four, NiMH AAA 900 mAh cells mounted under the floor of the driver’s standing space.
I don’t think I can find space for a speaker, so there will probably be no sound system.
Here it is roughly put together to check how it looks.
- progress3.JPG (91.61 KiB) Viewed 6804 times
This video shows the progress so far - the basic body shape, undercoated but no detailing
It also shows test driving it around Lilyvale main street which is the purpose of the whole exercise.
https://youtu.be/TrooWm2IwOo
There are 2 problems:
1) the horrible gear noise (how come I never noticed it before?)
2) the steering - the front wheels don't have enough grip. I think I need more weight over the wheels but have little space to fit any.
I have tried putting a couple of rubber bands around the wheels and that has helped enough to convince me I can somehow over come the problem. It can actually turn the sharp corners of the street which was my main worry.
I have even managed to test the idea of programming a set sequence to run it over a set route without my driving it. (So I can drive my train and have the traction engine trundling along the street in the background.)


