Ol' Bill

Ol' Bill was been stripped of his body and is in the line for a repaint. The body had been painted with enamel and no primer so all I had to do was show it a gallon of gunwash and all the paint and thumbmarks, cat hair etc fell off.
I aim to create the impression of an engine at the end of its working life. So a mattish finish to the paint will be in order.
Has anyone got any ideas about the best way to achieve this on a live steam loco as I would imagine that most weathering techniques suitable for plastic models wouldn't work. and matt paint and oily fingers could be a problem.
I don't want to go down the route of just not cleaning him as this could lead to problems. I need simulated decrepitude not the real thing.
Any one got any ideas
If at first you don't succeed, use a bigger hammer!
I finally got back up the shed this afternoon after a gap of nearly 2 months 
Real life, jobs, essays and being a loving Husband and Father have all got in the way of my modelling.
Ol' Bill is now in a fetching shade of etch primer and hopefully will be in top coat in the next few weeks.
Satin black and well weathered will be the order of the day.
Real life, jobs, essays and being a loving Husband and Father have all got in the way of my modelling.
Ol' Bill is now in a fetching shade of etch primer and hopefully will be in top coat in the next few weeks.
Satin black and well weathered will be the order of the day.
If at first you don't succeed, use a bigger hammer!

I was thinking about your paint finish- maybe instead of black satin, to which you will have to apply "weathering" powder or similar, you could try overall matte black. Then, leaving the smokebox the way it is of course, you could go over the rest of the bodywork with a bit of scotchbrite scrubby-pad to knock back some of the "matte" finish to more of a satin effect. Then you could rub some oil into the paint on the top surfaces of the tanks and boiler where grease would naturally build up anyway... well you said you wanted it to look really worn. Nothing gets grubby quicker than matte black paint, but you can also use abrasives to "shine" up certain areas and leave other areas looking really dirty.
I have never tried this myself, but I've seen my Dad do it on some of his HO scale brass engines. The goods engines get matte paint which really looks gross when he is finished painting on the grease and rust and other horrible things.
Another thing you could do is give him a nice coat of black satin, then take a can of matte black, stand back about eight feet and make it "rain" filth. The paint will make the engine look really dirty, and mostly on the top surfaces if you waft it on convincingly. I discovered this particular "weathering" technique by accident...
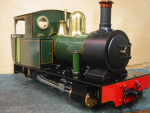
I randomly pinched this picture from the internet... this engine isn't "satin"...it's matte!

I have never tried this myself, but I've seen my Dad do it on some of his HO scale brass engines. The goods engines get matte paint which really looks gross when he is finished painting on the grease and rust and other horrible things.
Another thing you could do is give him a nice coat of black satin, then take a can of matte black, stand back about eight feet and make it "rain" filth. The paint will make the engine look really dirty, and mostly on the top surfaces if you waft it on convincingly. I discovered this particular "weathering" technique by accident...
I randomly pinched this picture from the internet... this engine isn't "satin"...it's matte!
-
tom_tom_go

- Driver

- Posts: 4824
- Joined: Wed Feb 23, 2011 3:08 am
- Location: Kent, UK
- Contact:
-
tom_tom_go
- Driver
- Posts: 4824
- Joined: Wed Feb 23, 2011 3:08 am
- Location: Kent, UK
- Contact:
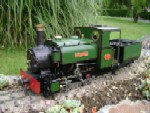
The smokebox and boiler are spray painted with different brands of high temp paint so to give varying shades of colour although now that she has been in steam a bit the crap out of the chimney has blended these colours into one oily finish (just like a real coal fired steam engine).Big Jim:115031 wrote:What did you paint yours with Tom?
The body was built and painted by Tony (Rhos Helyg Works) and is a nice matt finish that will eventually get splattered with oil/grime to mix in with the boiler. The cab roof is painted with high temp paint.


Nice!
Tony Willmore
Rhos Helyg Locomotive Works: http://www.rhoshelyg.me.uk
Facebook: https://www.facebook.com/RhosHelygLocoWorks
Rhos Helyg Locomotive Works: http://www.rhoshelyg.me.uk
Facebook: https://www.facebook.com/RhosHelygLocoWorks
-
Peter Butler

- Driver
- Posts: 5252
- Joined: Sun Sep 09, 2012 10:33 pm
- Location: West Wales

Progress of sorts, I produced some etched brass name plates for a few of my engines last night. I will post pictures and a guide about doing this when the home internet is back in a state of unbuggeredness.
Last edited by Big Jim on Sun Jan 03, 2016 7:12 am, edited 1 time in total.


Well, Ol' Bill was going to go back together this weekend but a combination of excessive work load from both the paying job and the unpaid one, along with the demands of a three year old and a wife who has developed a nagging technique to something approaching biblical levels. I only managed a quick half hour up the shed to finish off a WD D type wagon.
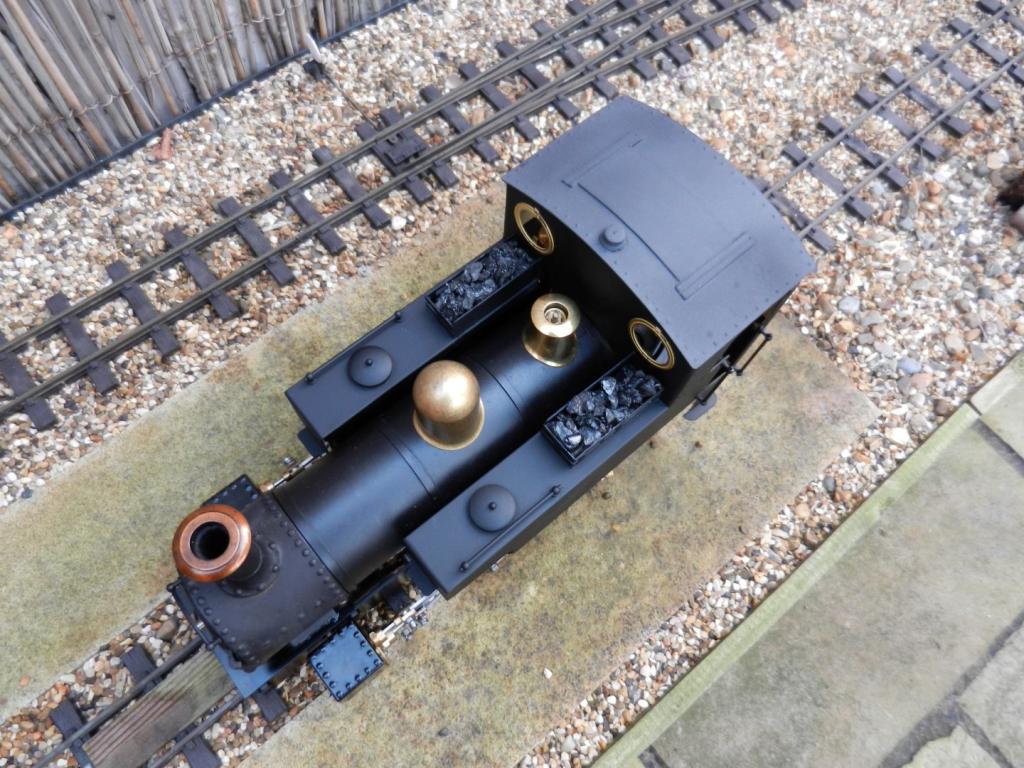
I did have a look at Ol' Bill's body sat on the bench, looking nice in matt black. The only thing I don't really like about it is the cab back.
I don't like the dirty great big gap in it. It would be okay if a tender was to be used but to me it doesn't look quite right running as a tank engine.
I was wondering what it might look like with a bunker fitted in the aperture. Or possibly a full width bunker.
Has anyone done this adaption?
The other possibility was to make a full cab back with specs and put coal baskets on the tanks.
Any suggestions anyone?
If at first you don't succeed, use a bigger hammer!
KjellAn stuck a "Lady Anne" bunker on the cab of his Billy. It looks very good with this addition. Here is the thread where he discusses it, and there is a photo of another Billy thus equipped.
http://gardenrails.myfreeforum.org/view ... 15&start=0
http://gardenrails.myfreeforum.org/view ... 15&start=0
I made this removable door for a Katie a few years ago. It just lifts out...

Tony Willmore
Rhos Helyg Locomotive Works: http://www.rhoshelyg.me.uk
Facebook: https://www.facebook.com/RhosHelygLocoWorks
Rhos Helyg Locomotive Works: http://www.rhoshelyg.me.uk
Facebook: https://www.facebook.com/RhosHelygLocoWorks
Who is online
Users browsing this forum: No registered users and 0 guests