A place for discussing battery-electric locomotives, whether they're diesel, steam or even electric outline
-
Big Jim
- Moderator

- Posts: 2694
- Joined: Sat Jul 06, 2013 5:28 pm
- Location: Near Llanelli
Post
by Big Jim » Wed Dec 24, 2014 10:07 pm
I acquired bits of an unbuilt Jessie a while back.
The main body panels, chassis side and a few castings were present. No motor or wheels etc.
After pricing up the cost of wheels, gears, motor, bushes etc. It seemed that the cheaper way to go was to purchase a new chassis from Essel.
I think with a bit of work it should turn out to be a nice powerful engine.
 DSC_0348
 by
bigjimiflash, on Flickr[/img]
The bits as arrived
 DSC_0349
 by
bigjimiflash, on Flickr[/img]
Essel Chassis
 DSC_0350
 by
bigjimiflash, on Flickr[/img]
The Essel chassis is about 3/4' too short but this should not be a problem to hide. I have to say the hole positioning on the body leave a lot to be desired.
If at first you don't succeed, use a bigger hammer!
-
Joe
- Fireman

- Posts: 465
- Joined: Sat Dec 20, 2014 6:18 pm
- Location: West Midlands
Post
by Joe » Wed Dec 24, 2014 11:08 pm
Looks stirdy , are you going to base it on a prototype? And add radio control? I have a Andel models ffion and one invaluable feature is being able to plug a wire into the cab from the mains to charge it without having to take the body off etc. If you wanted to do that this is the best opertunity you may also want to add a soundcard. Good luck anyway and I'm sure it will prove a good diesle , merry Christmas too 😀
Steam is highly under rated
-
Big Jim
- Moderator
- Posts: 2694
- Joined: Sat Jul 06, 2013 5:28 pm
- Location: Near Llanelli
Post
by Big Jim » Thu Dec 25, 2014 1:17 am
Merry Christmas to you too Joe.
It won't be based on any prototype it will just be a large diesel. I will fit sound and RC and it will be rechargeable, well that is the idea. One thing I want to do is try and avoid the 'Meccano' look so the m3 screws holding it all together will need to be hidden.
If at first you don't succeed, use a bigger hammer!
-
steamie1
- Trainee Driver

- Posts: 685
- Joined: Tue Nov 13, 2012 11:04 pm
Post
by steamie1 » Thu Dec 25, 2014 11:45 am
proper job! Ansome!
-
Joe
- Fireman
- Posts: 465
- Joined: Sat Dec 20, 2014 6:18 pm
- Location: West Midlands
Post
by Joe » Thu Dec 25, 2014 12:47 pm
Big Jim:106717 wrote:Merry Christmas to you too Joe.
It won't be based on any prototype it will just be a large diesel. I will fit sound and RC and it will be rechargeable, well that is the idea. One thing I want to do is try and avoid the 'Meccano' look so the m3 screws holding it all together will need to be hidden.
Ok, sounds good, good luck and when you've fitted it could you let me know what sound card you used please
Cheers
Joe
Steam is highly under rated
-
Big Jim
- Moderator
- Posts: 2694
- Joined: Sat Jul 06, 2013 5:28 pm
- Location: Near Llanelli
Post
by Big Jim » Fri Dec 26, 2014 9:05 pm
Got the body screwed together. I don't know if mine was a Friday afternoon special but the various body holes don't line up at all well.
I am still not sure about this loco. I know they can build up into nice models but it still seems a little too 'mamod' to me with all the screw heads. The ones on the bonnet should not be too hard to hide, but the roof ones are going to be a nuisance, I could spot weld the roof on but that would cause problems with maintenance.
The chassis is great but I don't know if the wheel base is too small for the loco.
Do I carry on with the build or just build a completely new loco on the chassis?
Anyway the picture shows how far the build has got, with various castings placed on the engine to see what it looks like.
 DSC_0398
 by
bigjimiflash, on Flickr[/img]
If at first you don't succeed, use a bigger hammer!
-
Peter Butler
- Driver

- Posts: 5304
- Joined: Sun Sep 09, 2012 10:33 pm
- Location: West Wales
Post
by Peter Butler » Fri Dec 26, 2014 9:26 pm
Persevere Jim! I believe my loco is from the same stable.... Jessica, I think?
When doing the build I also hated the look of the screw heads so they had to go!
For the roof I used countersunk bolts into the steel and covered the surface with a thin Plasticard skin and a rain strip to hide the height difference. You can't tell! The roof can be held in place with nuts inside the cab which can be removed if required.
The bonnet has a plasticard strip attached to the bottom edge and rivets attached. This is a lift-0ff section to access the batteries and speed controller if I need to.

I am pleased with the way this has turned out and it is worth the effort.


The best things in life are free.... so why am I doing this?
-
Big Jim
- Moderator
- Posts: 2694
- Joined: Sat Jul 06, 2013 5:28 pm
- Location: Near Llanelli
Post
by Big Jim » Sun Dec 28, 2014 9:59 pm
Thanks Peter.
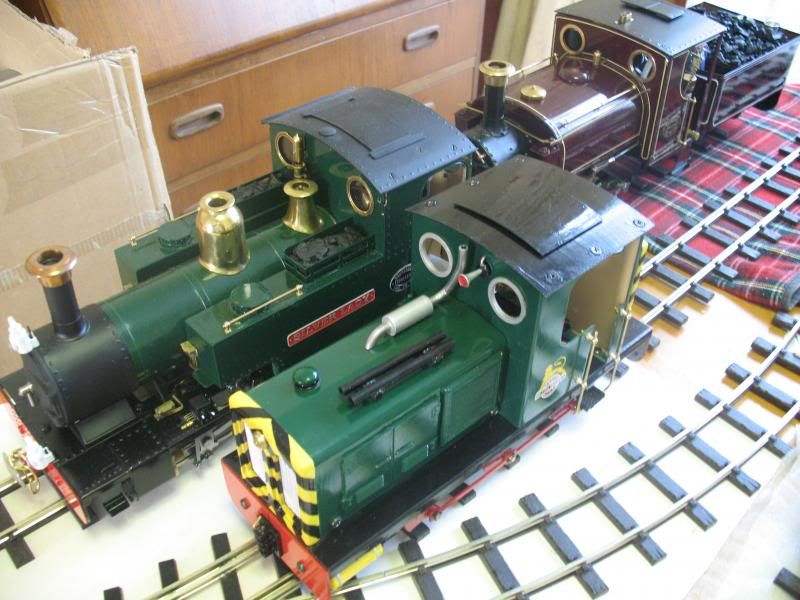
I have done a little more work on the engine. It does seem to be growing on me.
 DSC_0403
 by
bigjimiflash, on Flickr[/img]
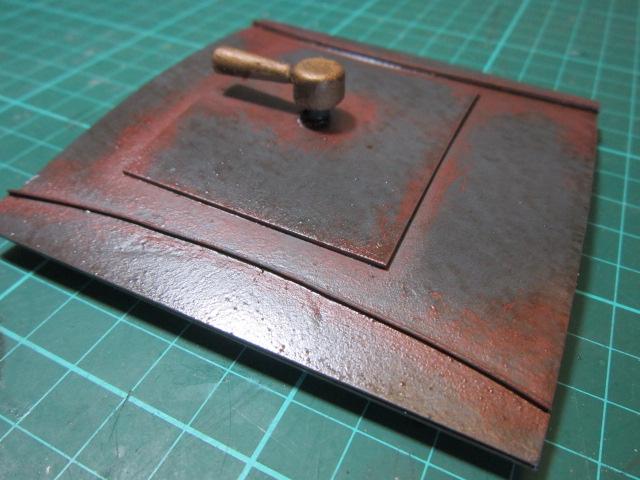
I have glued some of the castings in position and made up a few hatch covers from plastic with Cambrian bolt heads cemented on.
If any one can suggest how the cab controls might be set up on a loco like this, or provide pictures I would be most grateful.
If at first you don't succeed, use a bigger hammer!
-
philipy
- Moderator
- Posts: 5168
- Joined: Sun Jan 30, 2011 3:00 pm
- Location: South Northants
Post
by philipy » Mon Dec 29, 2014 5:58 am
Jim,
I'm away at the mo, so dont have the link to hand, but on the VOR webste there are some interior cab pics of the baguley, which might give you a clue in general terms.
Philip
Philip
-
Big Jim
- Moderator
- Posts: 2694
- Joined: Sat Jul 06, 2013 5:28 pm
- Location: Near Llanelli
Post
by Big Jim » Mon Dec 29, 2014 7:03 am
Thanks I'll look them up.
If at first you don't succeed, use a bigger hammer!
-
ge_rik
- Administrator
- Posts: 6679
- Joined: Sun Oct 25, 2009 10:20 pm
- Location: Cheshire
-
Contact:
Post
by ge_rik » Mon Dec 29, 2014 9:24 am
I opted for pop rivets for the cab roof on my Jessie. Not entirely invisible but less obtrusive than the bolts

Rik
-
ge_rik
- Administrator
- Posts: 6679
- Joined: Sun Oct 25, 2009 10:20 pm
- Location: Cheshire
-
Contact:
Post
by ge_rik » Mon Dec 29, 2014 9:29 am
BTW Peter. Did you add your own running plates to the sides of your Jessie/Emma? My version was without running plates (but it was an early model). I must say the running plates do complement her appearance nicely.
Rik
-
Peter Butler
- Driver
- Posts: 5304
- Joined: Sun Sep 09, 2012 10:33 pm
- Location: West Wales
Post
by Peter Butler » Mon Dec 29, 2014 11:32 am
Hi Rik, I have had to check my pictures to see what I did to my loco, and yes, I did add running plates either side made of Plasticard (of course!) and topped with aluminium expanded metal to form a non-slip surface.
The best things in life are free.... so why am I doing this?
-
sstjc
- Fireman
- Posts: 442
- Joined: Mon Dec 22, 2008 10:47 am
- Location: Faversham Kent
-
Contact:
Post
by sstjc » Mon Dec 29, 2014 1:18 pm
Jim
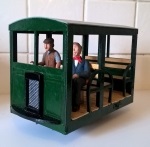
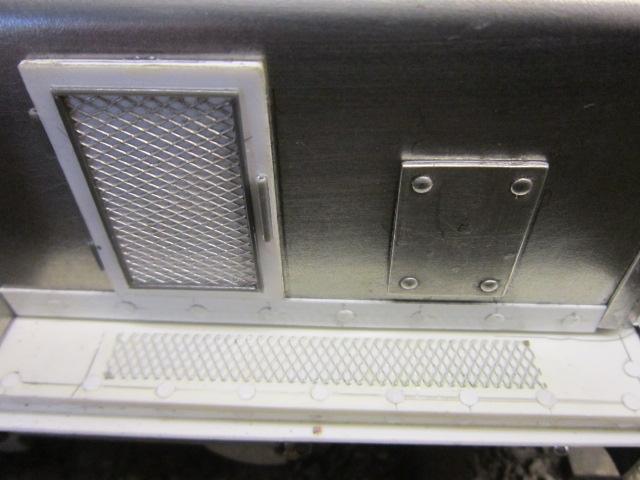
You asked about cab controls.... I can't provide any info for this but in the absence of anything from anyone else I do have some pictures, which hopefully will appear below, of a roughly similar Billard (I think ?) from a line in Northern France just on the offchance it may help.
Barry

[/img]

[/img]

[/img]
-
Big Jim
- Moderator
- Posts: 2694
- Joined: Sat Jul 06, 2013 5:28 pm
- Location: Near Llanelli
Post
by Big Jim » Mon Dec 29, 2014 2:00 pm
Thankyou very much that's just the ticket.
-
tom_tom_go
- Driver
- Posts: 4824
- Joined: Wed Feb 23, 2011 3:08 am
- Location: Kent, UK
-
Contact:
Post
by tom_tom_go » Mon Dec 29, 2014 4:33 pm
That it looking great, well done.
I need to start using Plastikard, it looks to be very versatile.
-
Big Jim
- Moderator
- Posts: 2694
- Joined: Sat Jul 06, 2013 5:28 pm
- Location: Near Llanelli
Post
by Big Jim » Sat Jan 10, 2015 10:34 pm
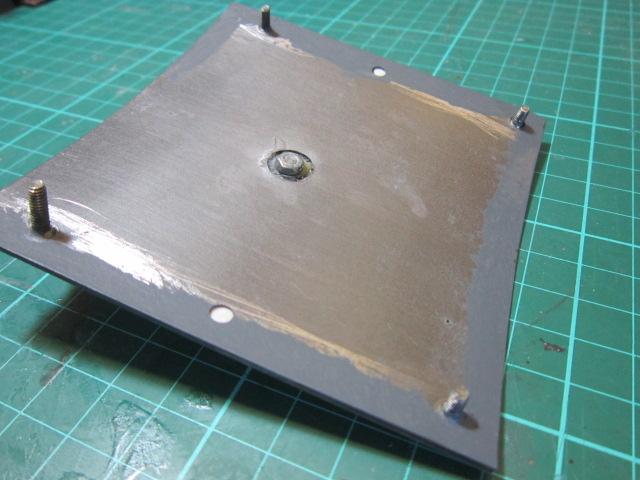
A little bit of progress. The body has been detailed with door castings and access panels made of plastic with Cambrian bolt heads. The body bolt holes have been counter sunk and will be covered with little panels held in place with 'Smurf Poo' (blutac) this will allow ir to be dismantled when something goes 'pouf' and lets the magic smoke out.
 DSC_0378
 by
bigjimiflash, on Flickr[/img]
The chassis has been detailed. I will be fitting springs when I get around to making them.
 DSC_0379
 by
bigjimiflash, on Flickr[/img]
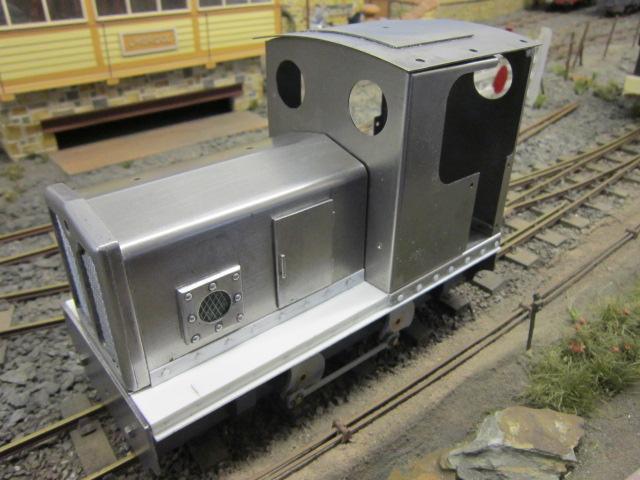
The rear panel has been fabricated and spectacles have been made from microstrip.
 DSC_0380
 by
bigjimiflash, on Flickr[/img]
If at first you don't succeed, use a bigger hammer!
-
Peter Butler
- Driver
- Posts: 5304
- Joined: Sun Sep 09, 2012 10:33 pm
- Location: West Wales
Post
by Peter Butler » Sat Jan 10, 2015 10:50 pm
Good progress Jim, let me know when you are ready for a test run so you can see how well it runs.
The best things in life are free.... so why am I doing this?
-
Big Jim
- Moderator
- Posts: 2694
- Joined: Sat Jul 06, 2013 5:28 pm
- Location: Near Llanelli
Post
by Big Jim » Sat Jan 10, 2015 11:09 pm
Will do Peter,
It might be a few months as the degree course has started again with yet more essays. I haven't banned myself from the shed yet though!
If at first you don't succeed, use a bigger hammer!
-
Big Al
- Fireman
- Posts: 496
- Joined: Wed Apr 04, 2012 3:43 pm
- Location: Romford,Essex.
Post
by Big Al » Sun Jan 11, 2015 2:14 pm
It's a good idea to counter sink the holes and fit the roof with flush fitting screws.
Allen Hopper - early retirement can't beat it !
Who is online
Users browsing this forum: No registered users and 0 guests