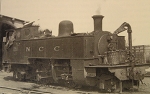
I've recently bought one of the hglw 4wd powered chassis kits with the intention of making a steam outline loco and was going to do the same as Si by making it tram outline. Looking at the kit though if I can put a longer axle on the wheels it should be possible to make it an outside frame loco which matches the prototype I'm very roughly basing it on.
So does anyone know how the wheels and pulleys are fixed on the axle and how easy it would be to remove them without braking things?
Thanks,
Philip
changing hglw powered chassis axle
-
pskipper
- Trainee Fireman

- Posts: 141
- Joined: Sat Nov 23, 2013 5:38 pm
- Location: Lincolnshire
-
steamie1
-
sstjc
- Fireman

- Posts: 442
- Joined: Mon Dec 22, 2008 10:47 am
- Location: Faversham Kent
- Contact:

-
steamie1
So sorry, I read your email and took none of it in. I've not been well so it is a new lesson for me. 'Don't reply to a topic till you can think straight.' It's weird as I read it understood it in my mind and now I feel better realise I did not! You wanted to remove the wheels from the axle. As the question is answered, all I can do is learn and say sorry for the above.
-
Enginehouse
I have actually done this twice to HGLM wheel/axle combos using a little applied heat. A decent soldering iron on the wheel close to the axle joint will allow the wheel once nicely hot, to be twisted and freed. Not tried the small gas torch method with the axle in situ, but regularly done it this way to free les critically located steel on steel joints where for example Loctite 603 ( my preferred grade of loctite) has been used. I converted 45mm to 32mm axled stock running this way, the only damage being slight marks on the axle due to my over the enthusiastic use of mole grips. This method is very useful where loctite has been used on threaded joints,me here forcing can quite easily strip out threads. Not so easy to do where blind steel studs are locked into cast iron castings. A lot of heat is required and a fair bit of skill and patience is definitely beneficial.pskipper:101092 wrote:That's okay, it was a useful answer to the question you thought I was askingI'll let people know how the nail varnish remover goes
-
jay1976
-
pskipper
- Trainee Fireman
- Posts: 141
- Joined: Sat Nov 23, 2013 5:38 pm
- Location: Lincolnshire
Forgot to say, I tried acetone on one wheel, clamped the wheel in a well padded vice and turned the other with some well padded mole grips and the one which hadn't been soaked came loose. Turns out that a clamp and some mole grips are all you need 
All the parts have arrived to make the chassis so I'll be starting a projects thread once I have enough done
All the parts have arrived to make the chassis so I'll be starting a projects thread once I have enough done
-
pskipper
- Trainee Fireman
- Posts: 141
- Joined: Sat Nov 23, 2013 5:38 pm
- Location: Lincolnshire
Build diary for the project is here for anyone who wants to see it.
http://gardenrails.myfreeforum.org/sutr ... php#101543
http://gardenrails.myfreeforum.org/sutr ... php#101543
Who is online
Users browsing this forum: No registered users and 33 guests