Thatched cottage - RE-ROOFED


The only thing I can think of to help with the thatch would be to gather a bunch of the thatching fibres and hold them together standing up like the bristles of a broom, with the ends all lined up, then bend the bundle in the middle so the ends of the bristles become staggered, and then have someone cut the bundle at the bend so one end of the resulting handful of fibres is cut straight across, while the other has that angled bias you are looking for.
Rather difficult to explain what I mean.
Rather difficult to explain what I mean.

I think that if you´re going to use this method you might achieve the effect your looking for by staggering the ends of the bunches rather than creating straight lines. I haven´t attempted this yet, I have to say.
Those in the dollhouse scene might know a thing or two. Here a link to what I found a while back.
http://miniatures.about.com/od/miniatur ... Houses.htm
Those in the dollhouse scene might know a thing or two. Here a link to what I found a while back.
http://miniatures.about.com/od/miniatur ... Houses.htm


Brian - Nah, I dont hate you, i just hate the roof pictures! All gone now and started again.
Keith - What you said makes perfect sense, thanks. I'm not sure how practical it would be to do a whole roof like that, though.
Kandnwlr - Thanks for the link, I spent ages looking for something like that before i started, but without success. Knowing how much mess I always make with silicone sealer I'm not sure the idea of pushing bundles of fibre through it appeals, though.
I've spent the afternoon experimenting and I think I now have a method which gives an acceptable result. I'm slightly encouraged to find that its a kind of cross between Keith's suggestion and kandnwlr's suggestion and the link, plus some of my own!
Hopefully some pics tomorrow with an explanation if its worth it.
Philip
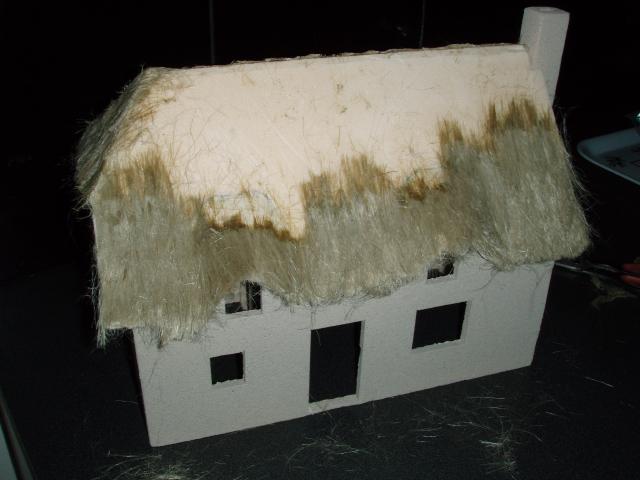
OK folks, ripped off all of the original thatch and started again.
Still have the ridge cap to do ( made that as a separate piece and waiting for the glue to dry before fixing in place).
Still got the eaves to thicken up and some trimming to do, but I think I'm happy with the overall effect, what does anyone else think?

Still have the ridge cap to do ( made that as a separate piece and waiting for the glue to dry before fixing in place).
Still got the eaves to thicken up and some trimming to do, but I think I'm happy with the overall effect, what does anyone else think?
Philip
-
Peter Butler

- Driver

- Posts: 5253
- Joined: Sun Sep 09, 2012 10:33 pm
- Location: West Wales
Thanks chaps.
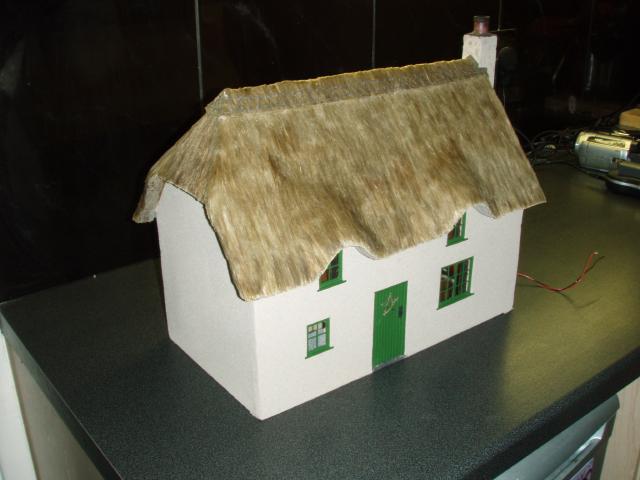
I used the same plumbers hemp but applied differently. I still used bunches/clumps but smaller to reduce the tendancy for any individual clump to have a straight edge.
Then I cut the clumps from the hank at an angle rather than straight.
Having cut it I shuffled it in my fingers to try to make sure, again, that the ends were not level.
When gluing the clumps to the roof, instead of just going from side to side in rows, after putting on one complete row at the eaves, I then went up the roof in small areas, then moved along and did anothe bit, then another, then went back and filled in a small bit, and so on. This broke up a natural tendancy to get into a subconcious neat and tidy rythym.
Finally I made sure that the vertical separation between clumps wasn't even.
I have to say it took a LOT longer this time!
Philip
And it does look more impressive this time. I´m glad the idea was helpfulphilipy:100535 wrote:Thanks chaps.
I used the same plumbers hemp but applied differently. I still used bunches/clumps but smaller to reduce the tendancy for any individual clump to have a straight edge.
Then I cut the clumps from the hank at an angle rather than straight.
Having cut it I shuffled it in my fingers to try to make sure, again, that the ends were not level.
When gluing the clumps to the roof, instead of just going from side to side in rows, after putting on one complete row at the eaves, I then went up the roof in small areas, then moved along and did anothe bit, then another, then went back and filled in a small bit, and so on. This broke up a natural tendancy to get into a subconcious neat and tidy rythym.
Finally I made sure that the vertical separation between clumps wasn't even.
I have to say it took a LOT longer this time!
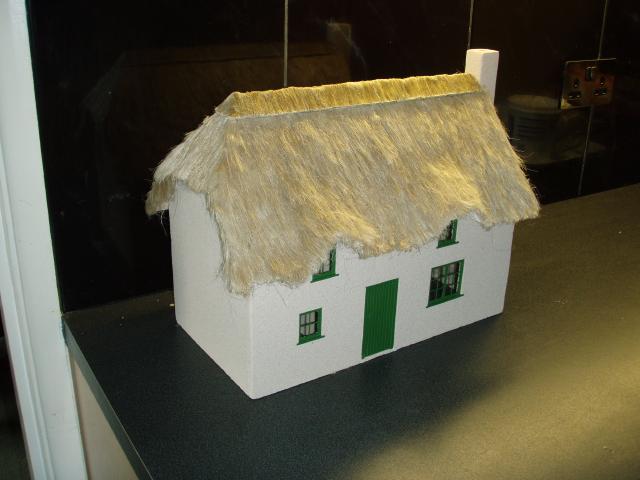
Update on the past weeks work.
Unfortunately I was a bit busy last week and didn't make as much progress as I'd have liked, but still, the windows and doors are all made and fitted and the ridge cap is done apart from the adding the spars ( the patterned arrangement of sticks that anchor it).
Unfortunately I was a bit busy last week and didn't make as much progress as I'd have liked, but still, the windows and doors are all made and fitted and the ridge cap is done apart from the adding the spars ( the patterned arrangement of sticks that anchor it).
Philip


Who is online
Users browsing this forum: No registered users and 2 guests