Page 1 of 1
Signal box refurbishment
Posted: Wed Jan 05, 2022 11:23 pm
by steamgeorge
Hello all,
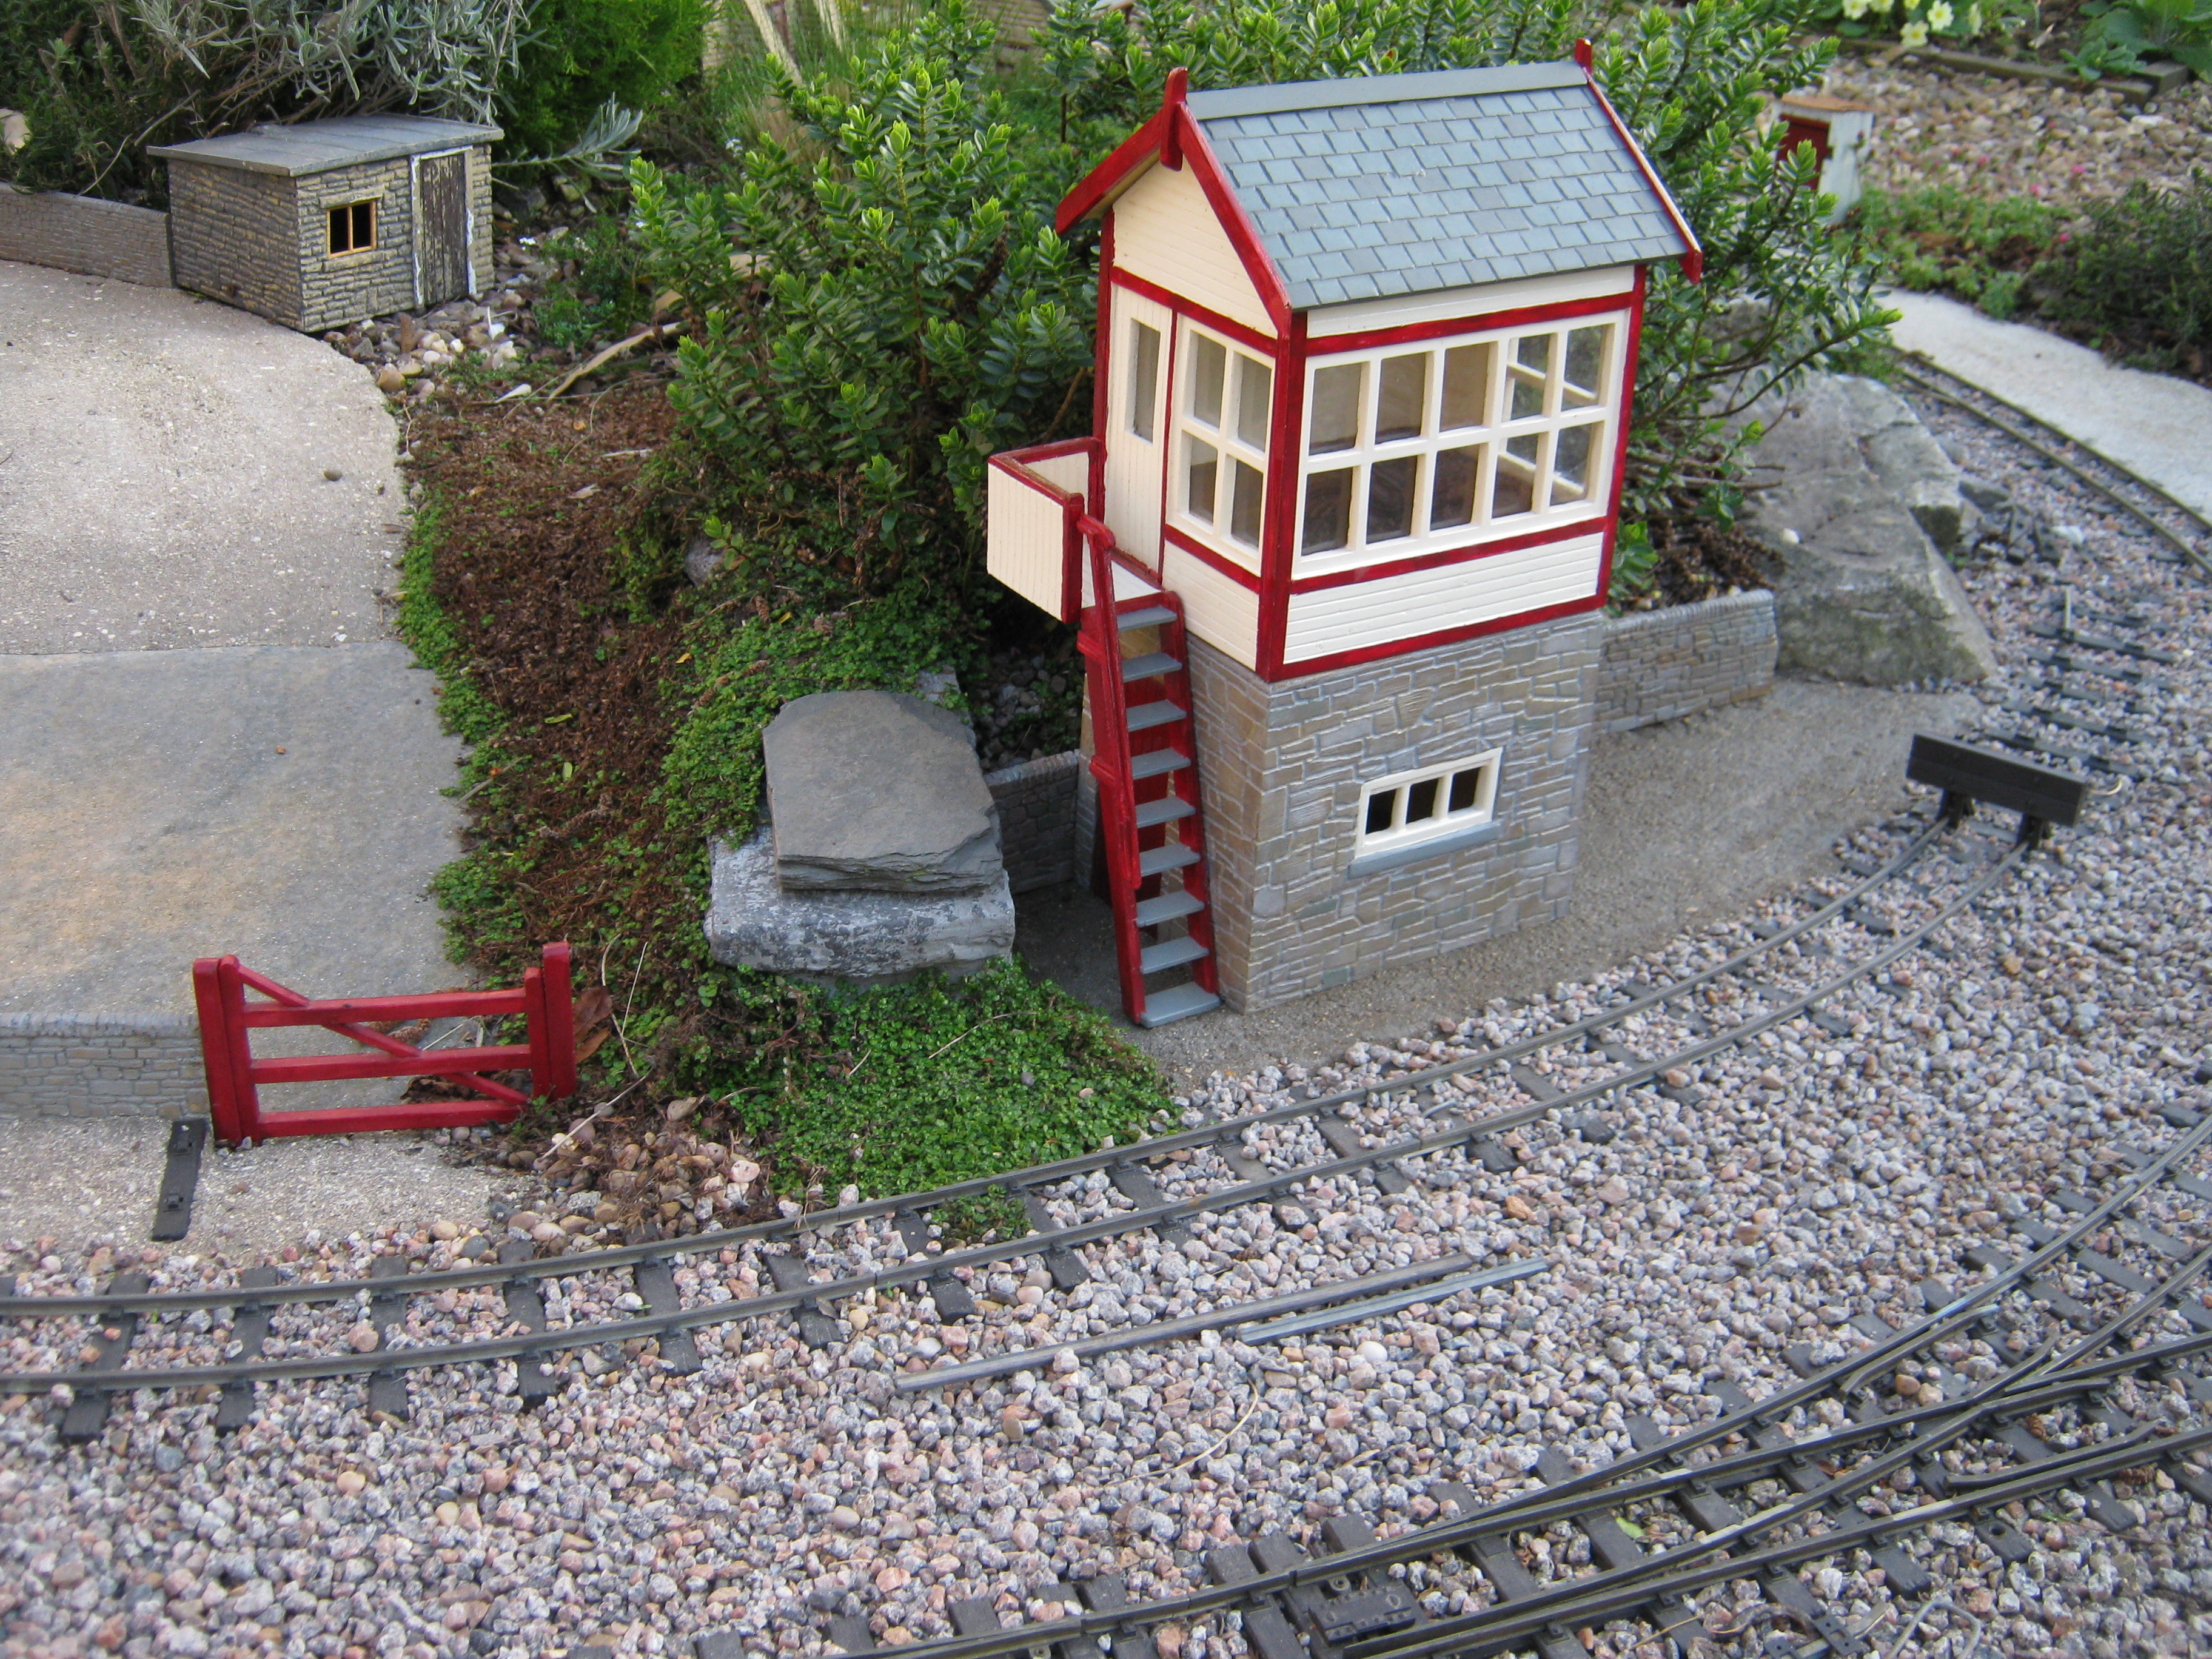
Ever since the very early days of the railway, a resin Model Town signal box has guarded the station (now named Delabole) and the many junctions off to the stone quarry nearby. The kit was built up as one would normally do and here was the result:
I thought it looked rather tidy and was pleased with my effort

- IMG_2563.jpg (3.95 MiB) Viewed 6872 times
At one point it even got its own concrete foundation and retaining wall to hold back the flower bed debris.
- IMG_3101.jpg (3.76 MiB) Viewed 6872 times
However the red Humbrol soon started to fade and peel in the sun and nearly 4 years later it looked like this:
Still alright but a bit tatty.

- IMG_1761.jpg (3.54 MiB) Viewed 6872 times
I decided to give it some tlc but instead of just a repaint I thought I'd add some embellishments at the same time

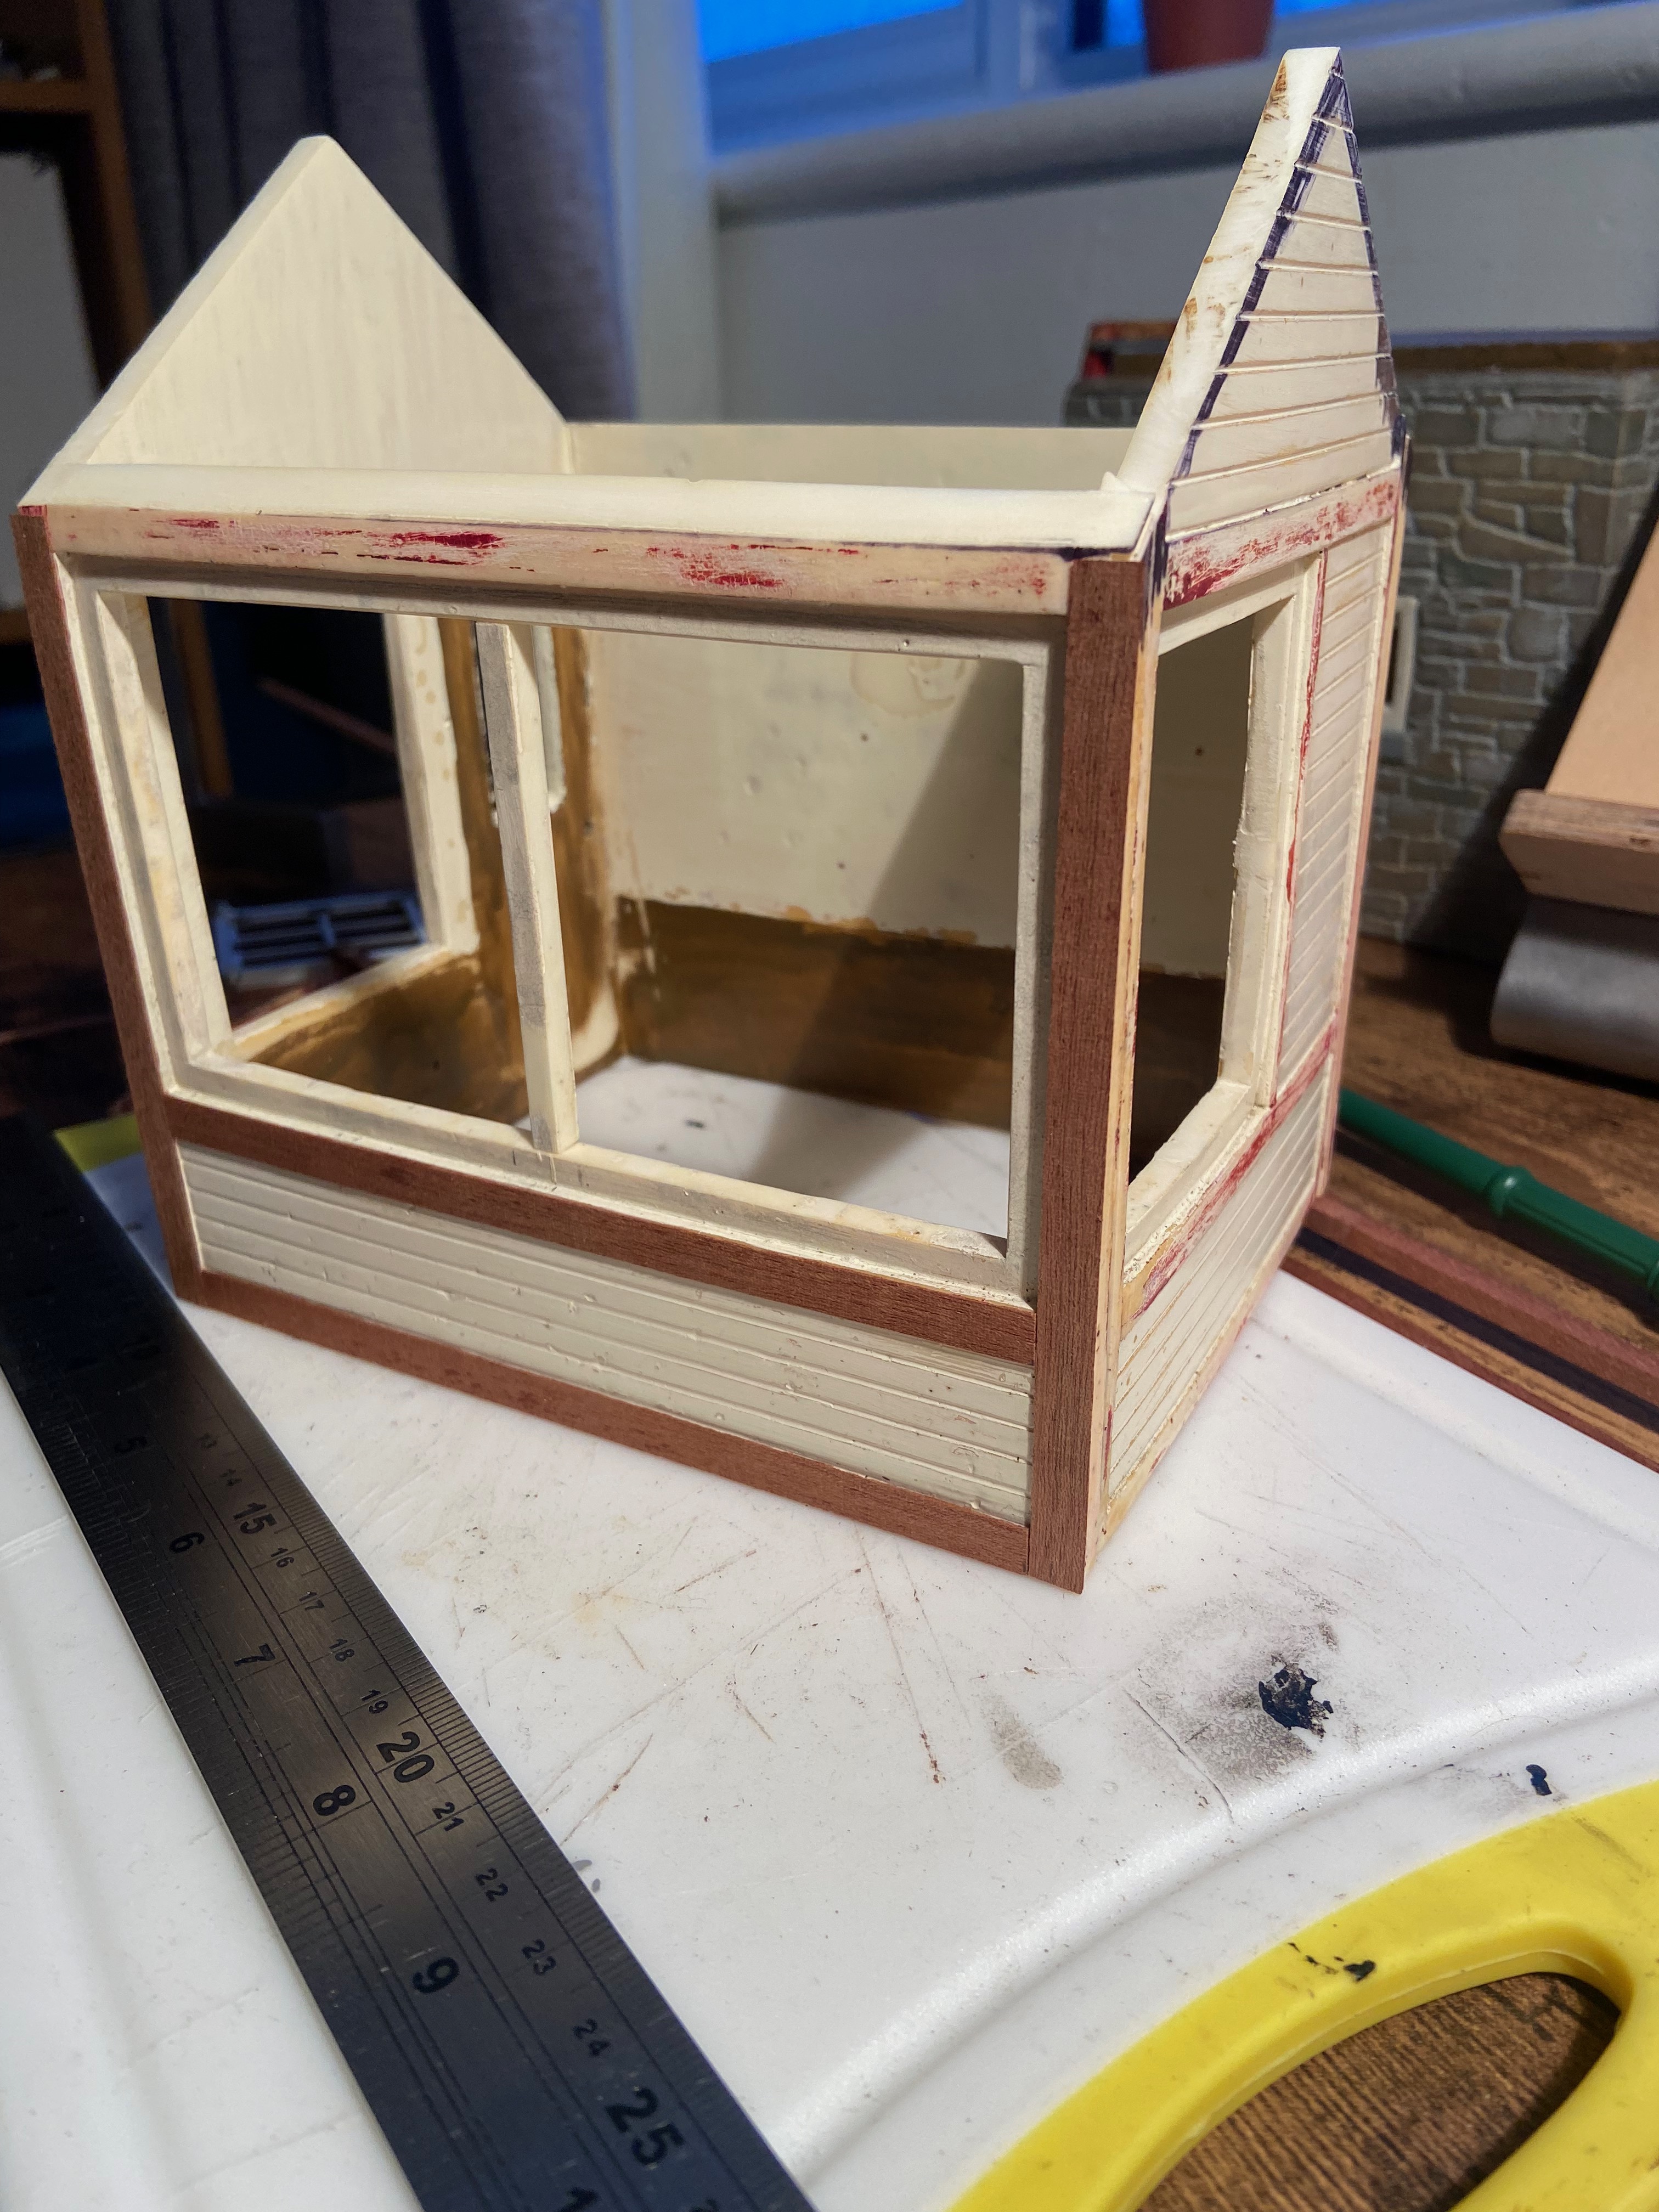
First of all I took the top half apart and played around with the proportions (I wasn't completely happy) until I (drastically

) chopped the roof line down so the top of the window met the roof.
I also didn't like the overcall window framed so they were removed as well with a hacksaw
I had drawn inspiration from boxes at pilot yard on the L&B, Douglas on the Isle of Man and of course Delabole box on the North Cornwall railway. I found these all very picturesque buildings so I have tried implementing features from these into the model.
the roof is just placed on at this point

- IMG_3672.jpg (2.36 MiB) Viewed 6872 times
I always like the patina that real wood gets compared to resin so I decided my first move would be to overlay the existing panelling with hardwood veneer strip. This adds nice texture as well as depth to the model.
I also added a vertical halfway along the front window using some of the old window frame.
- IMG_3692.jpg (2.28 MiB) Viewed 6872 times
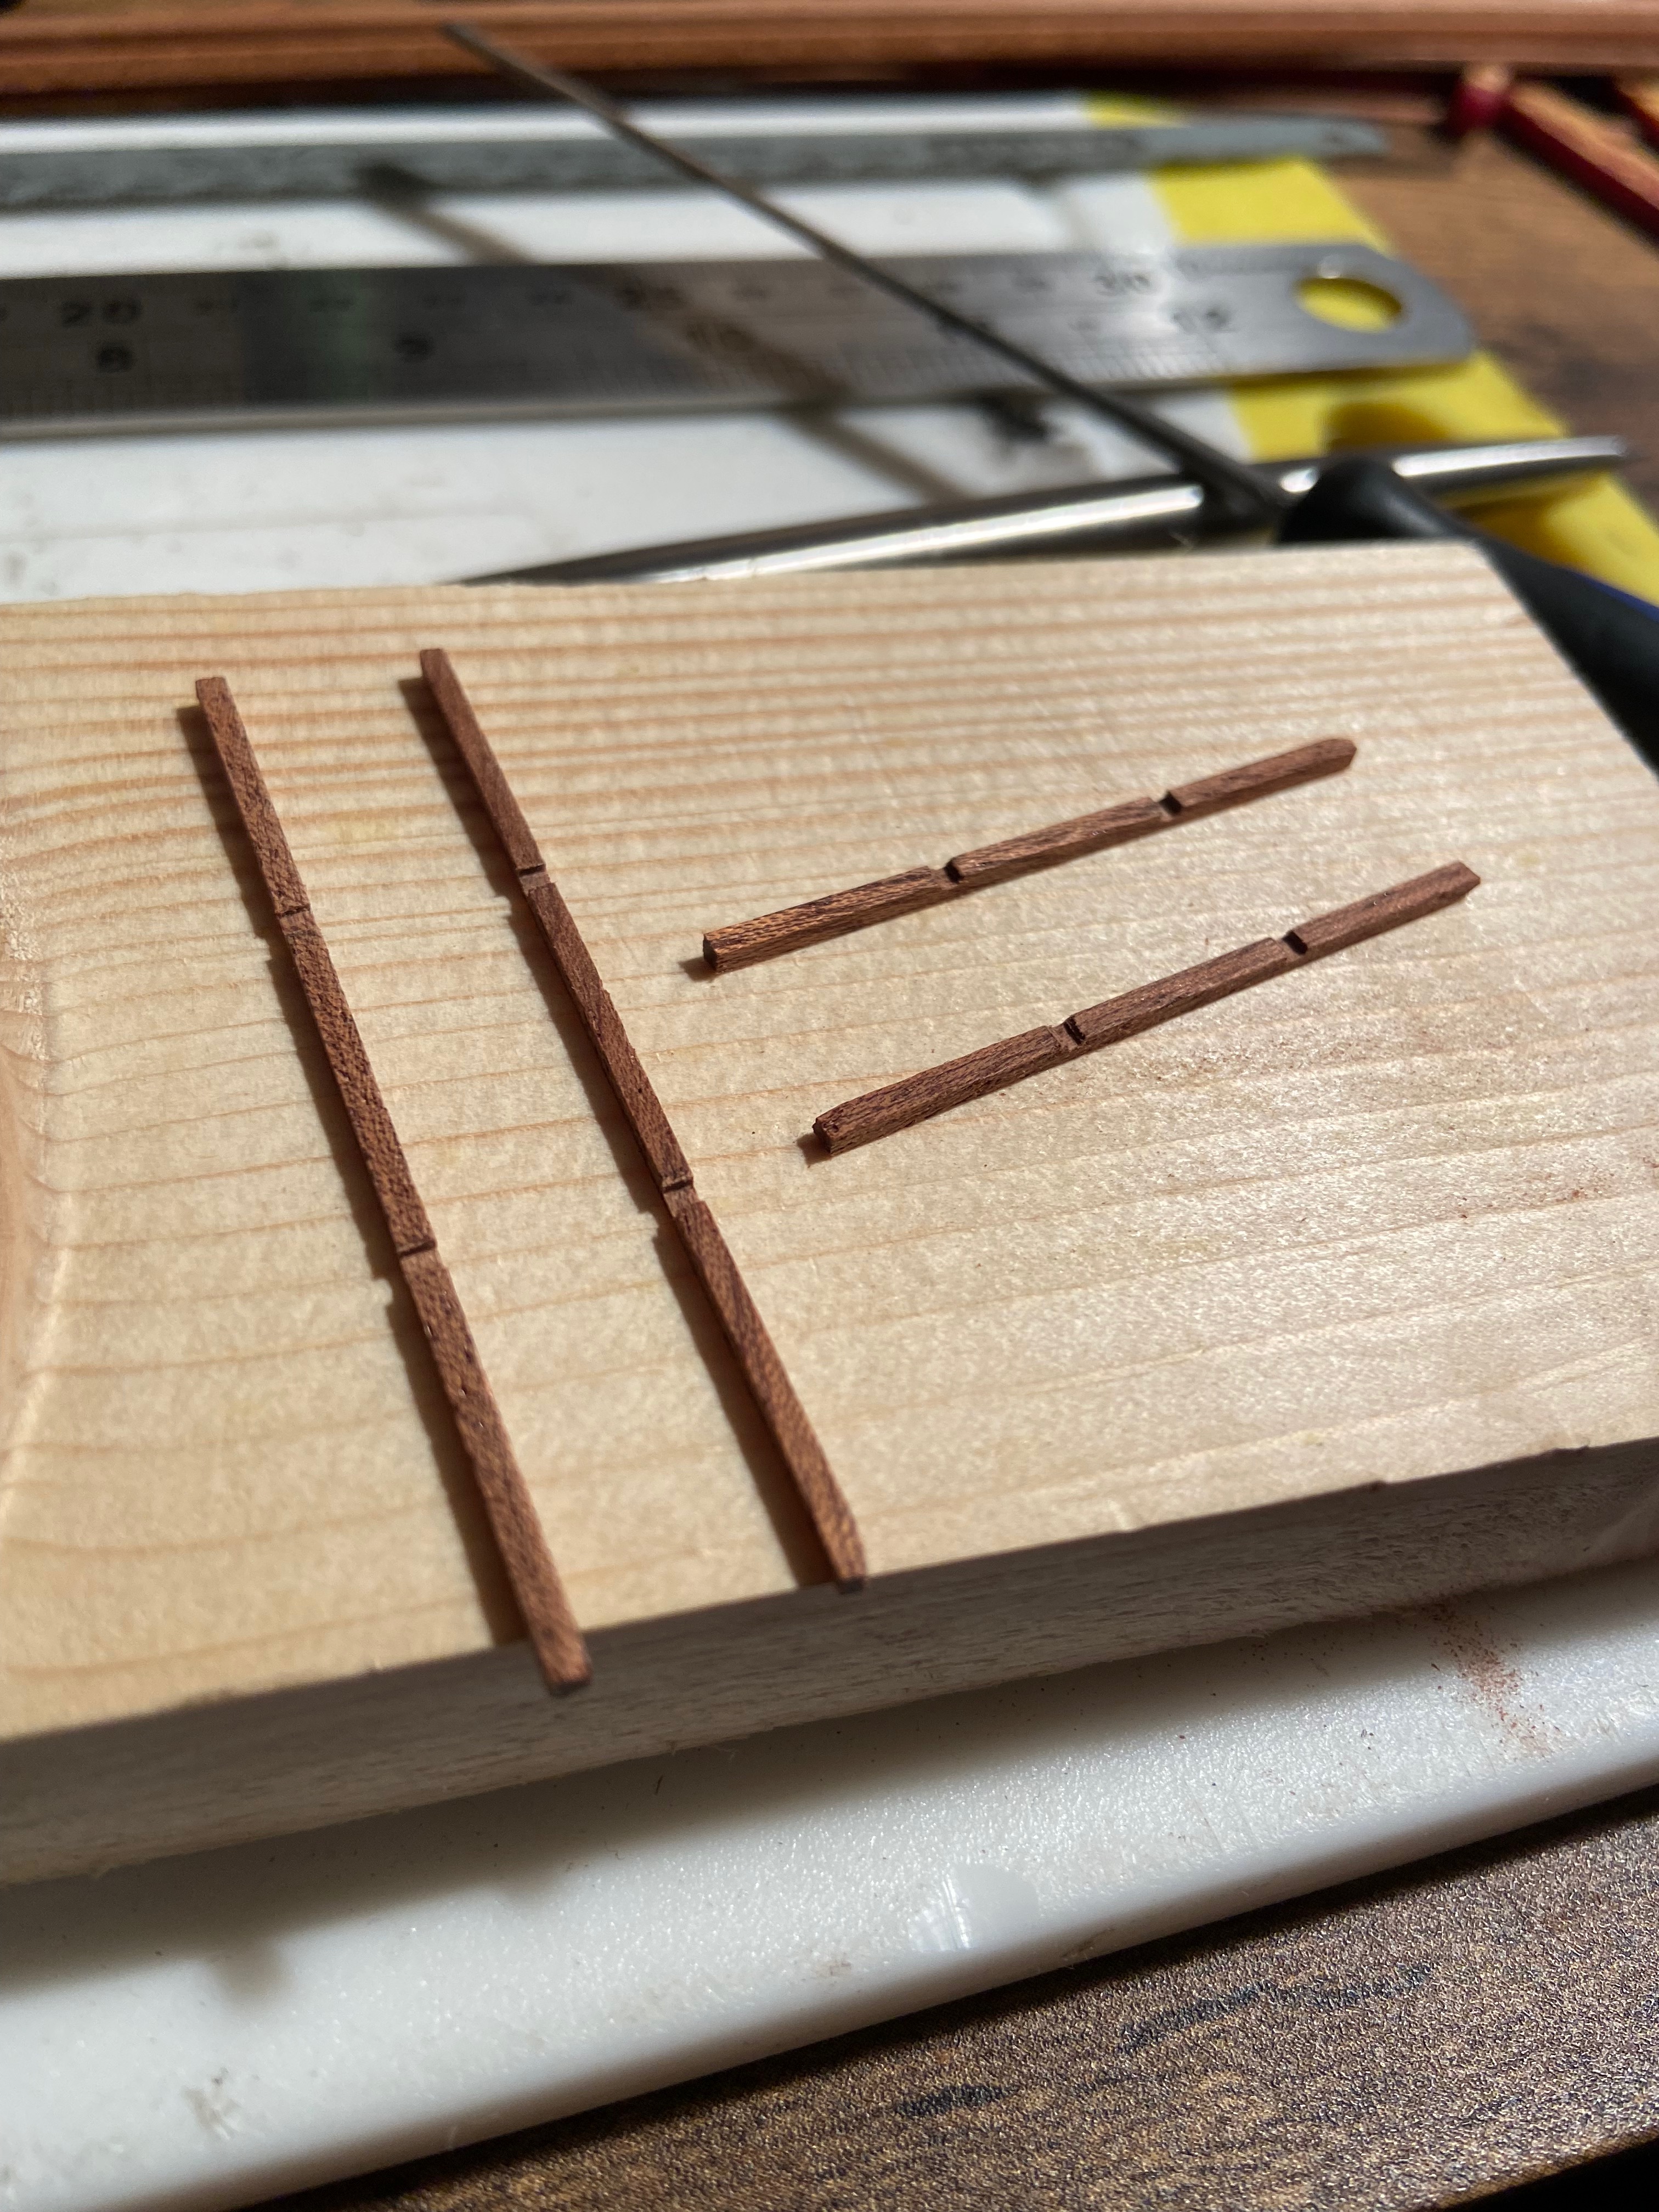
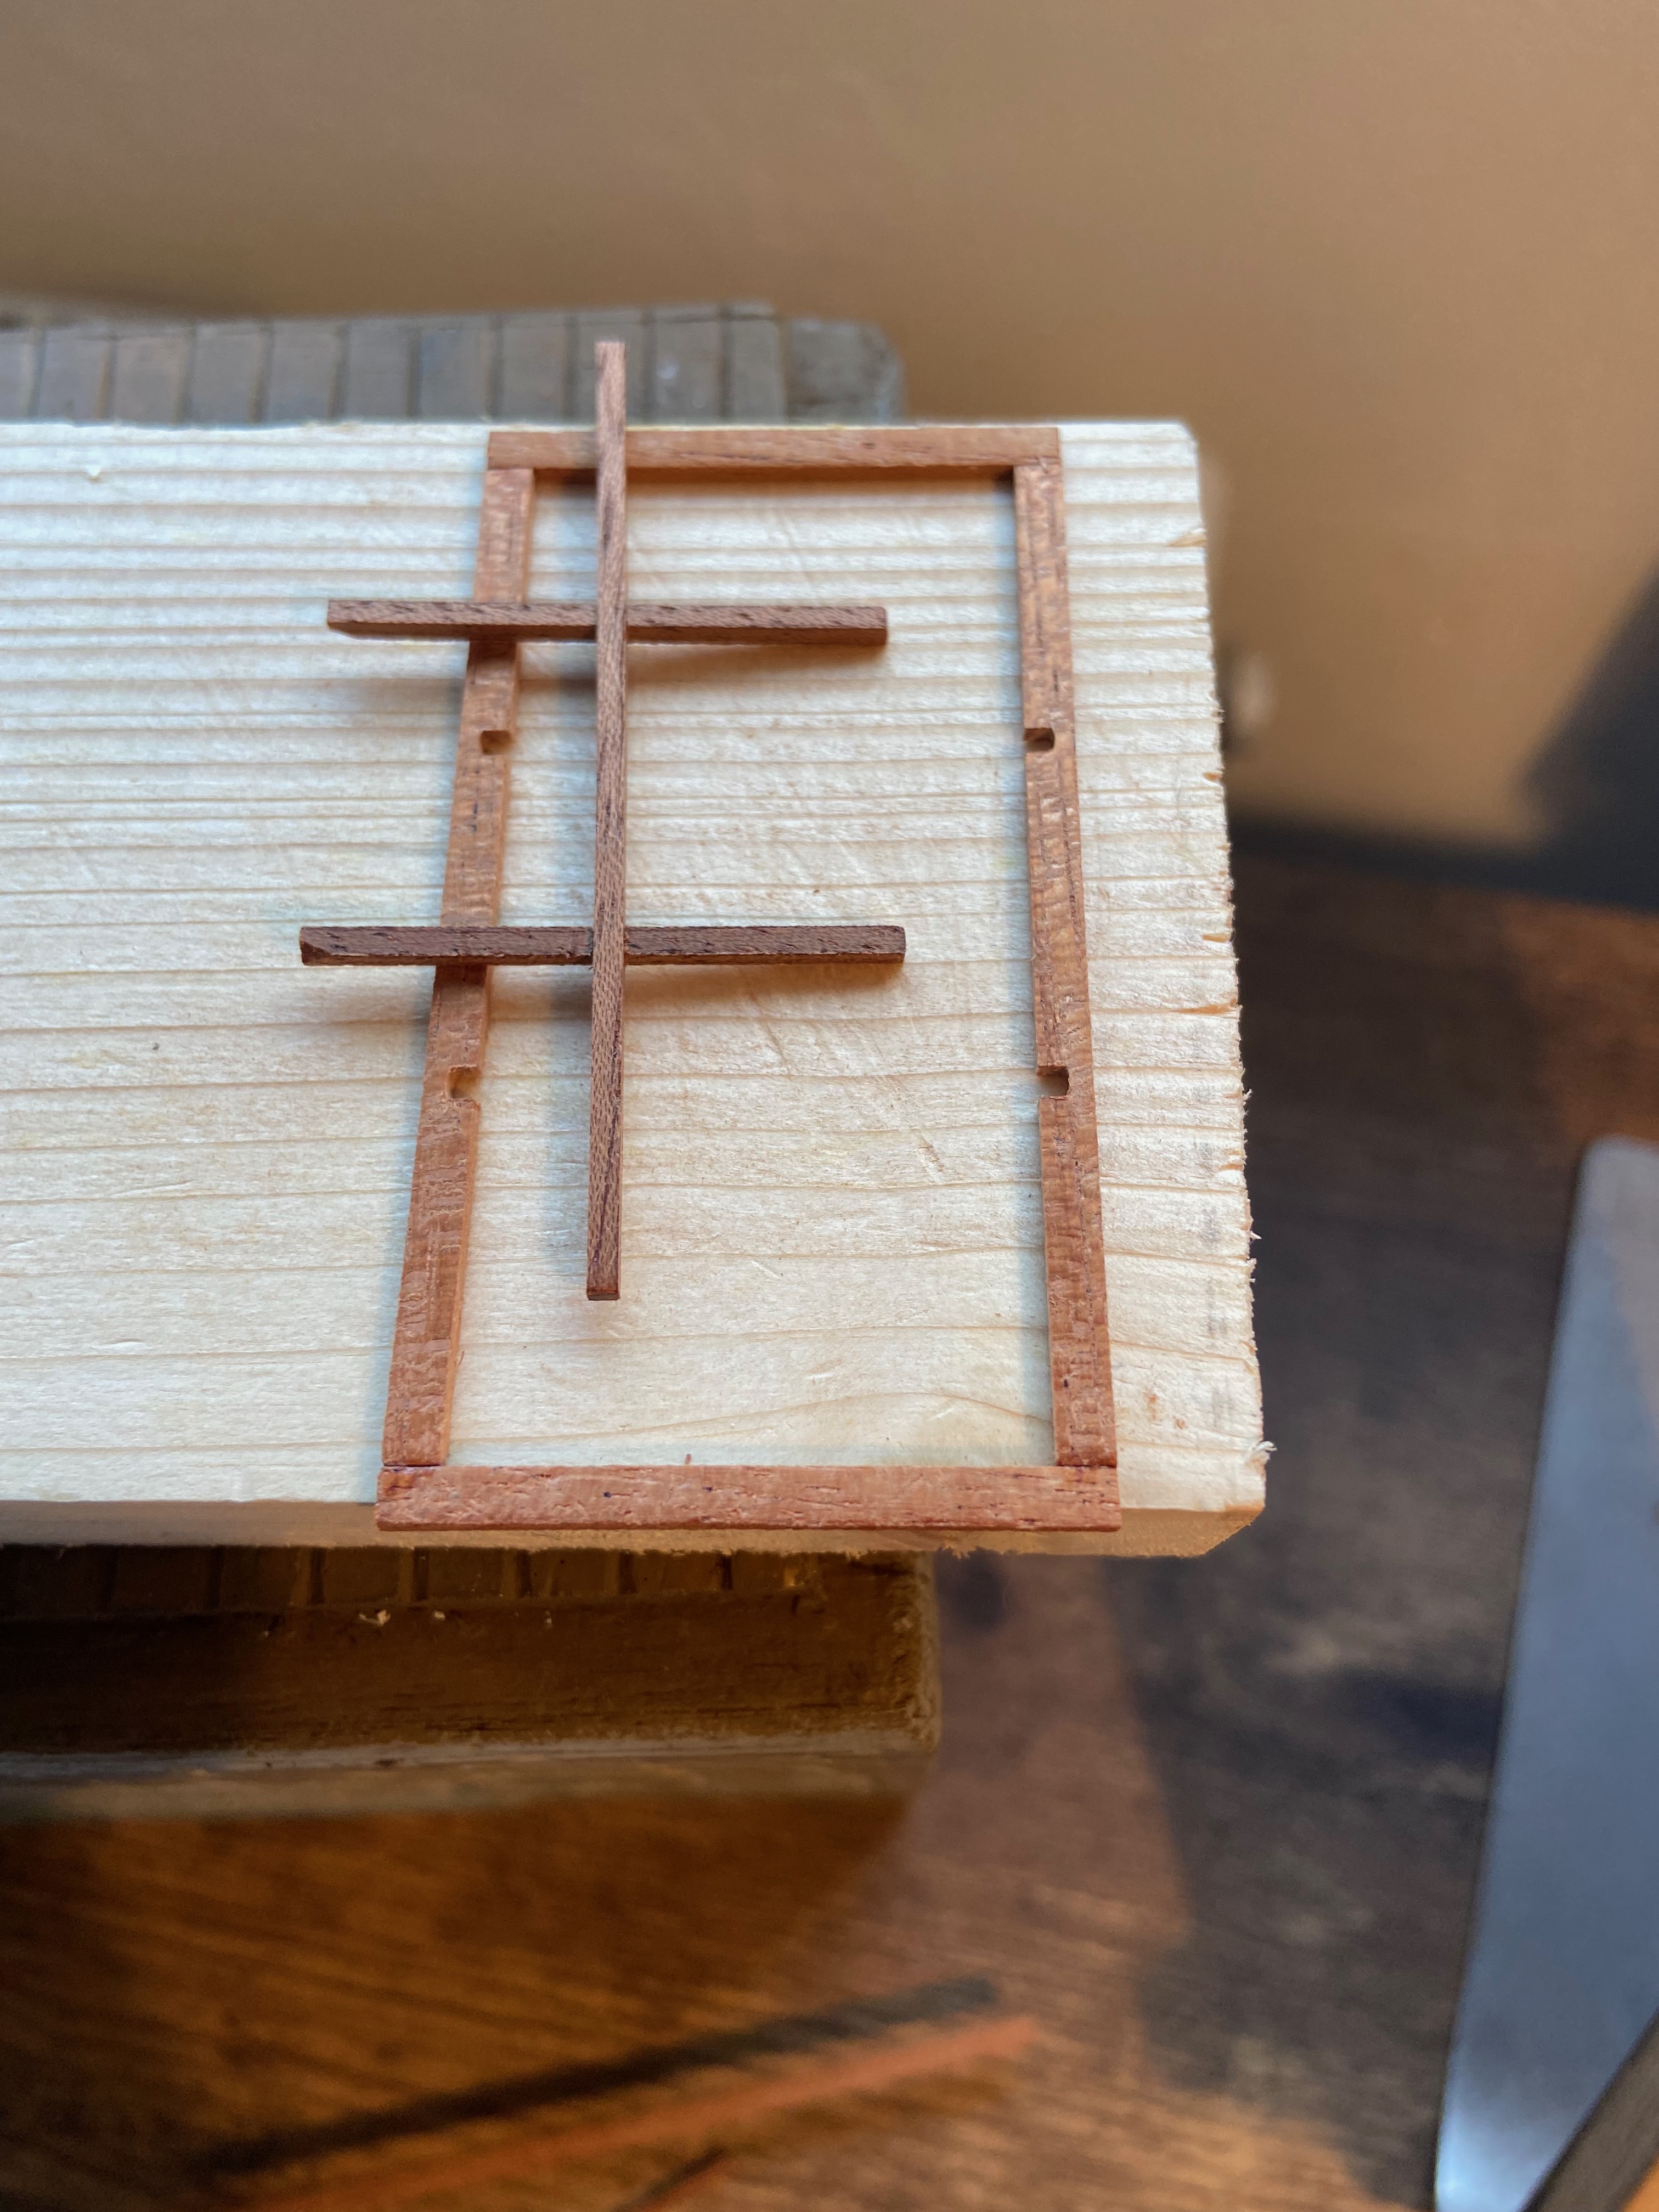
I then decided to make a move on replacing the windows I had ripped out. I thought I would trial some frames made out of 1.5mm square hardwood strip to see what would be possible. Whilst the frame worked well around the edge, I found that trying to create any sash bars was nearly impossible with just butt joints. I trialled some miniature lap joins instead.
a needle file was used to create the notches - here are the results:
Success
- IMG_3709.jpg (2.66 MiB) Viewed 6872 times
Re: Signal box Refurbishment
Posted: Thu Jan 06, 2022 9:22 am
by ge_rik
Looking good so far. Those frames look the bees-knees
Rik
Re: Signal box Refurbishment
Posted: Thu Jan 06, 2022 11:51 am
by steamgeorge
Cheers Rik!
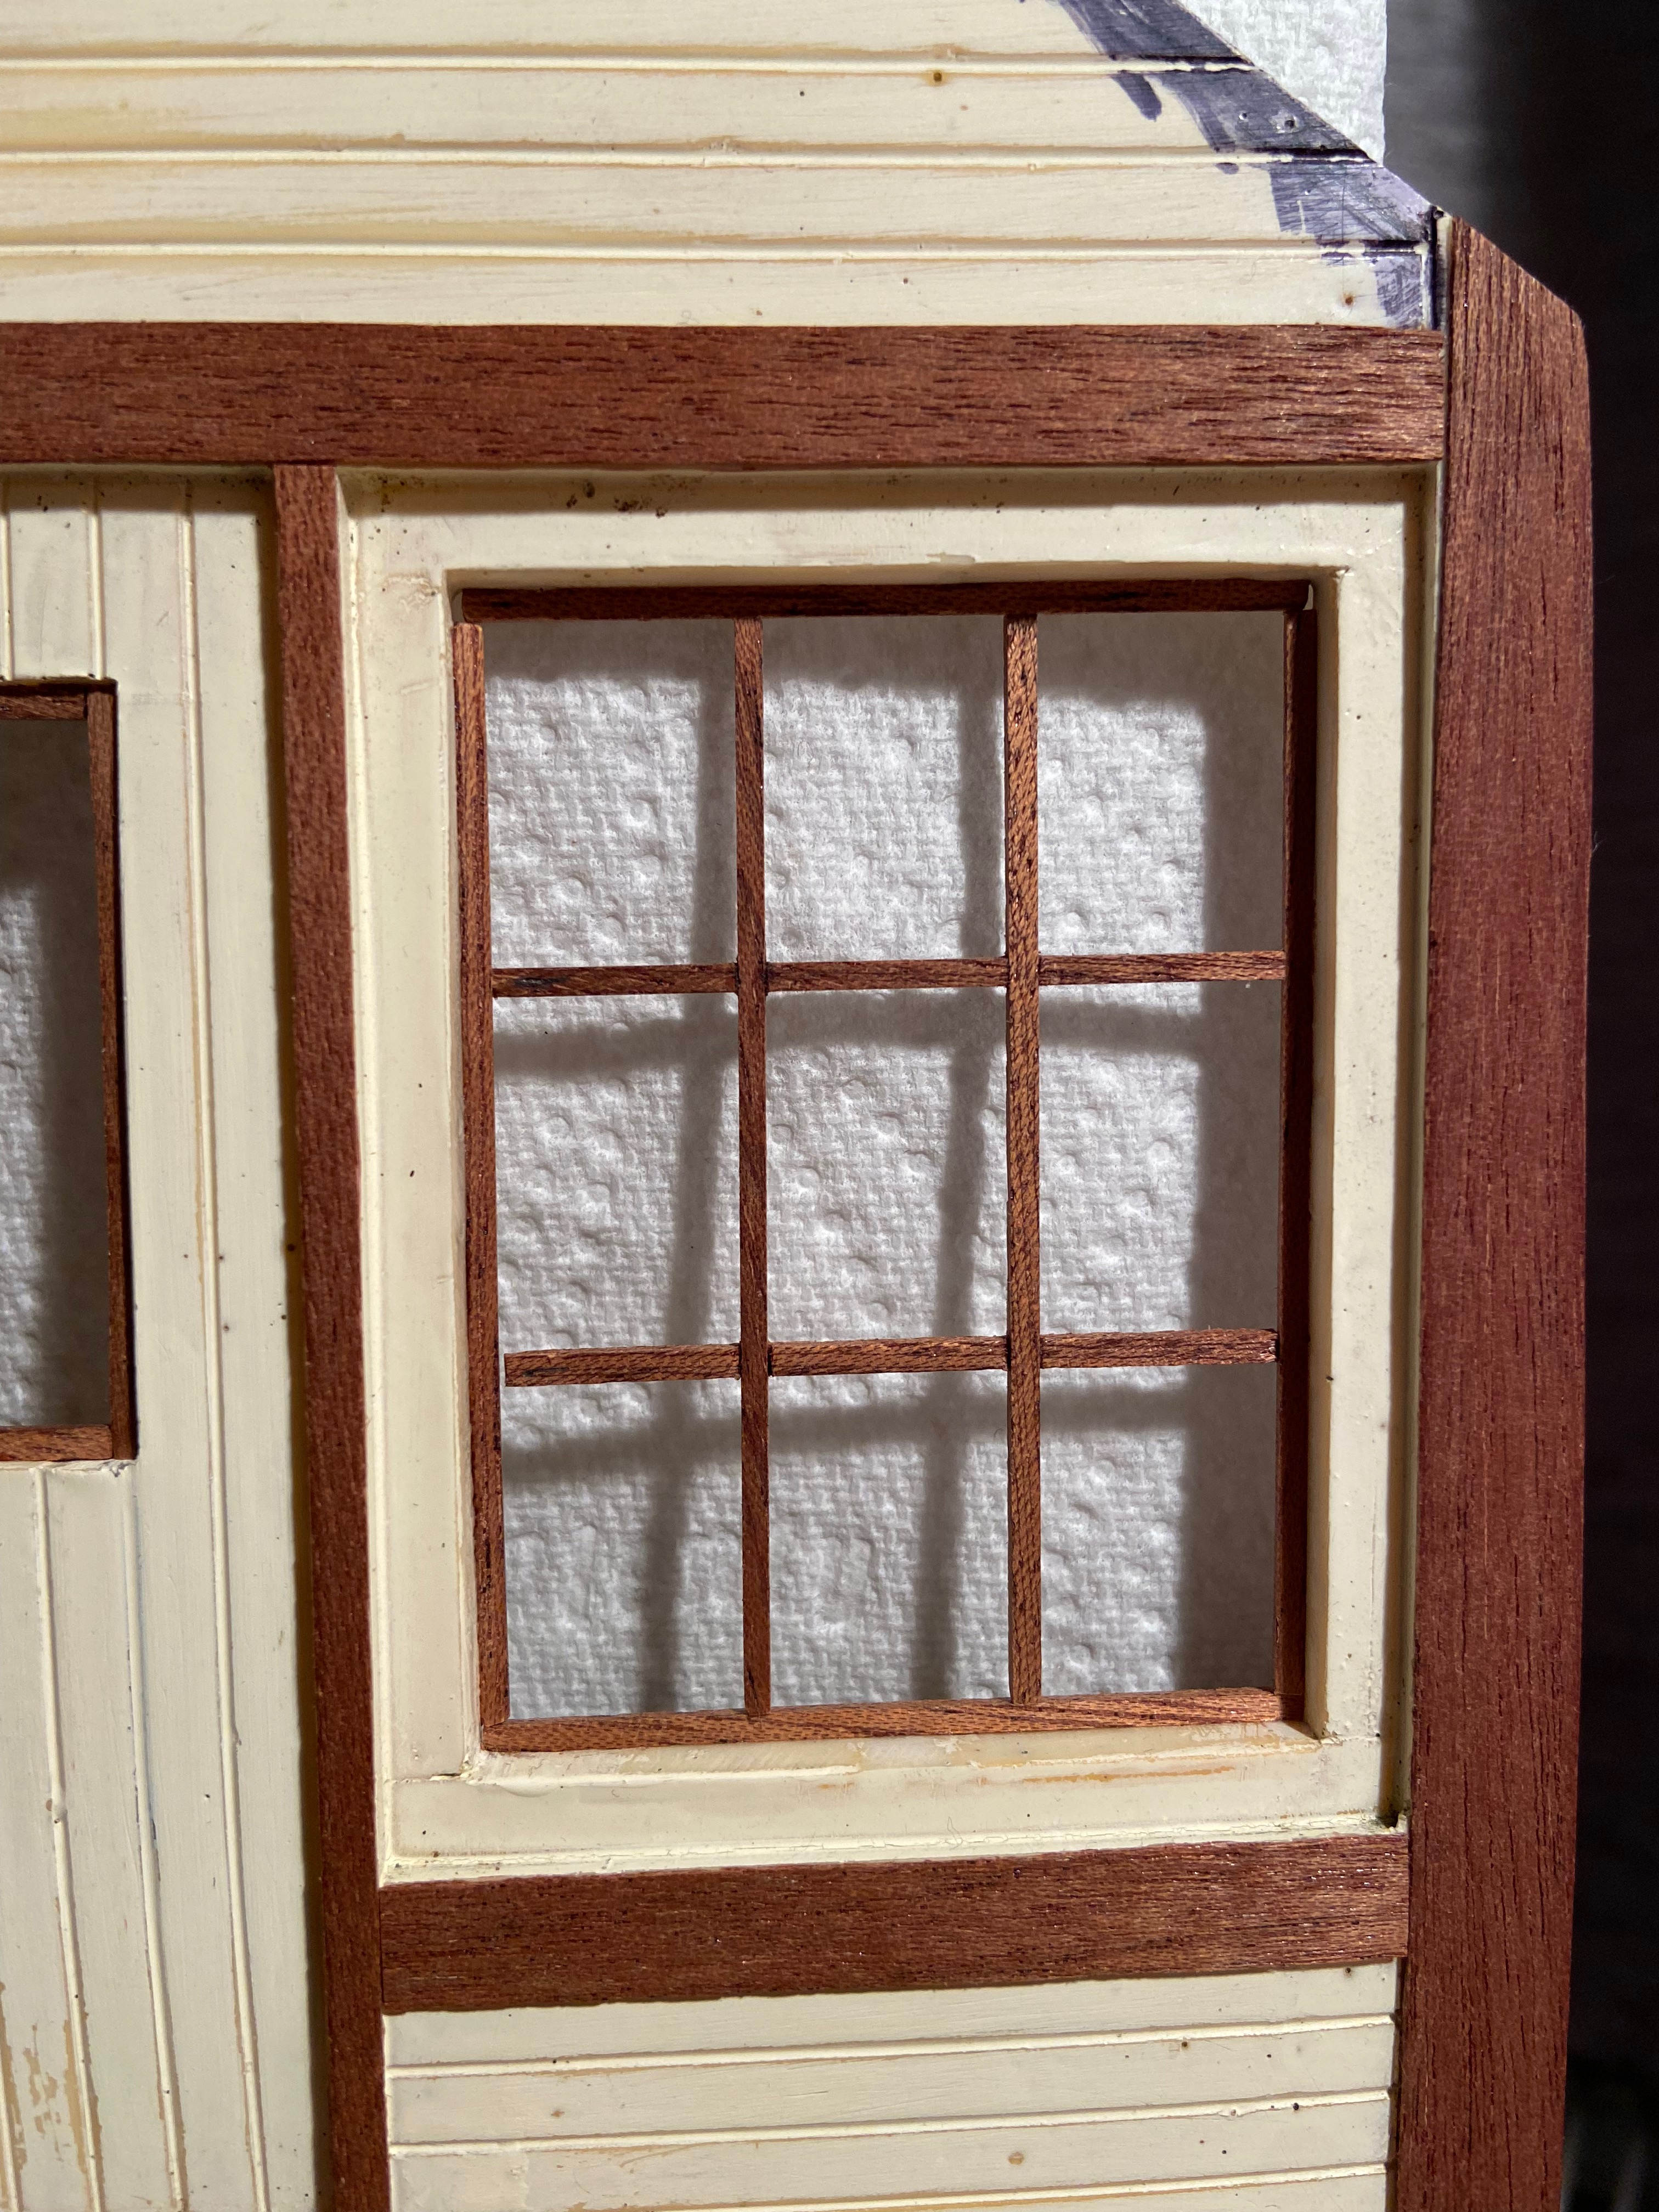
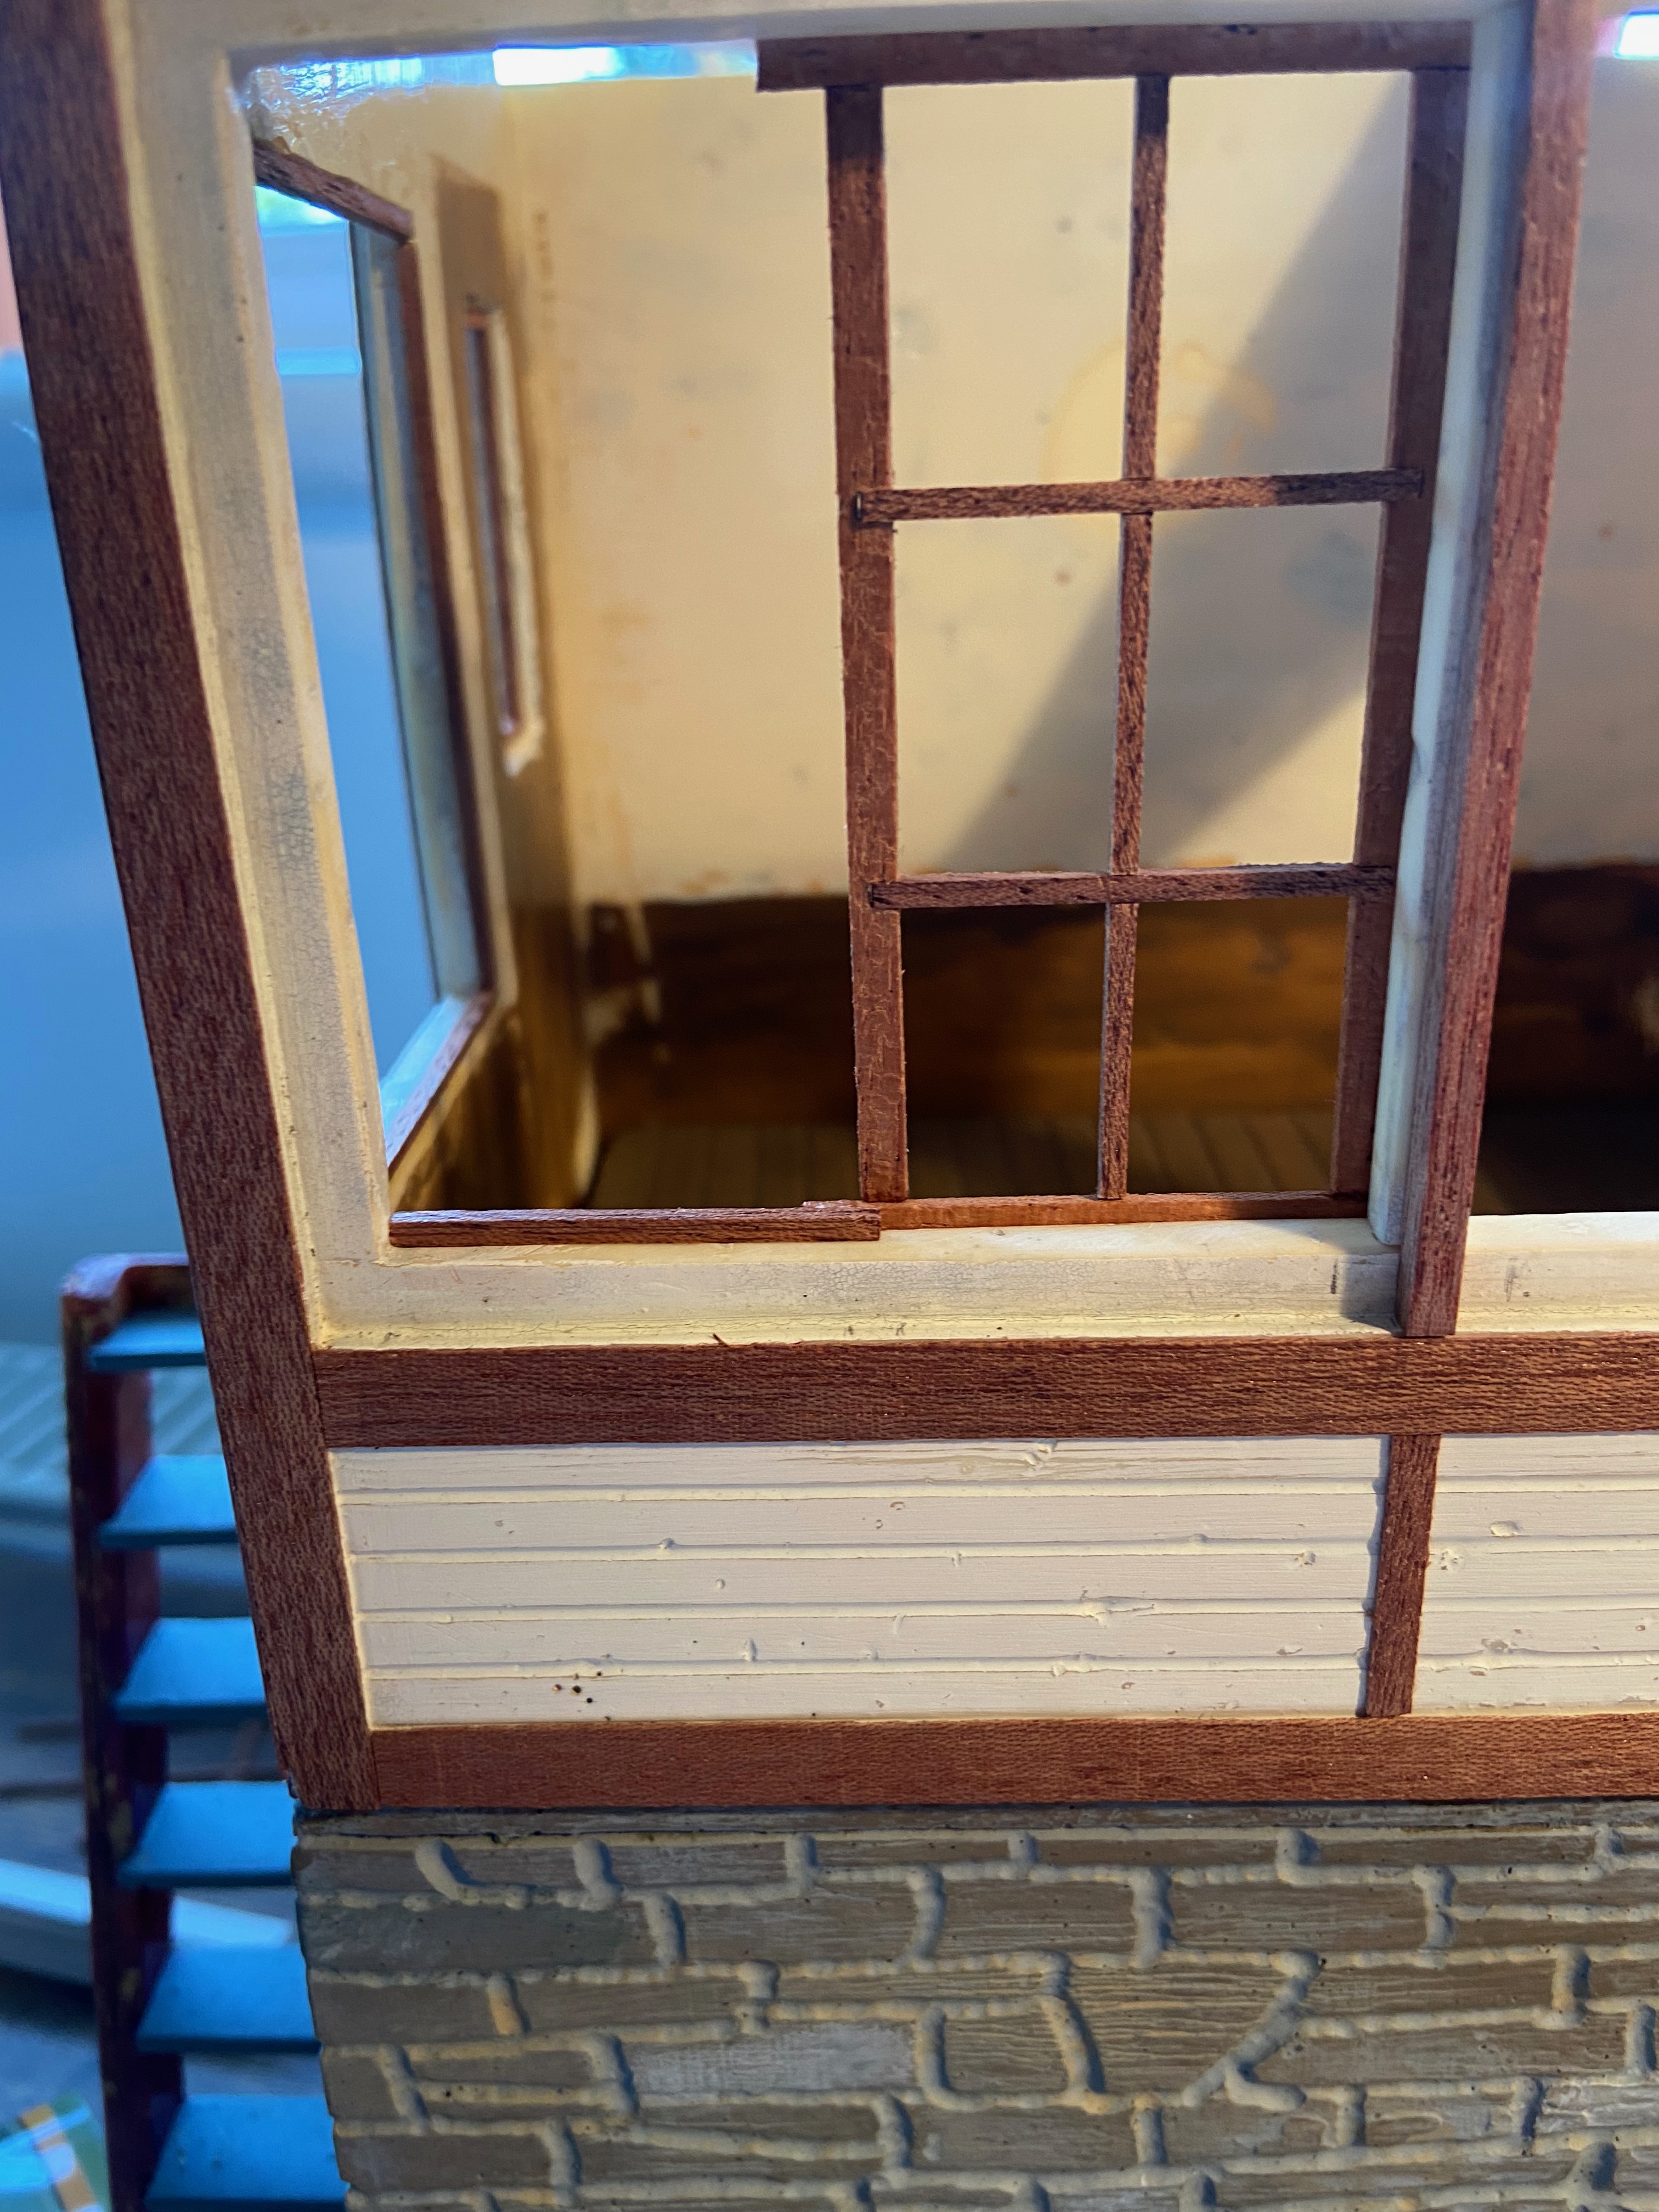
To continue the build, here is the first window I trialled. It uses the joining method shown in the last post to hold it all together. I have also added a simple frame to the window in the door as well.
- IMG_3711.jpg (2.94 MiB) Viewed 6834 times
As I was happy with how the side windows looked so I turned my attention to the front.
Looking at prototype photos for inspiration I had noticed that almost all signal boxes had sliding sash windows. Also, I always like it when doors, windows etc are modelled with the ability to be opened and closed. I thought it would be nice when, for example, I'm running trains on a hot day, to be able to open the windows on the signal box - adding a nice bit of authenticity to the scene I feel. So with these criteria in mind I set about head scratching.
some sashes were made up:
- IMG_3714.jpg (2.24 MiB) Viewed 6834 times

- IMG_3732.jpg (2.46 MiB) Viewed 6834 times
These were then trialled in the window frame to see if it could all be made to open and close
- IMG_3715.jpg (2.21 MiB) Viewed 6834 times
The dimensions of the sash were designed to fit behind the existing frame (on the inside of the wall). This would mean that they only need a thin runner along the top and bottom of the window to hold in place.
this photo should help it all make sense:

- IMG_3767.jpg (2.49 MiB) Viewed 6834 times
After many happy hours of cutting and sticking what were basically match sticks, I had got this far:
First coat of primer has also been applied
- IMG_3739.jpg (3.25 MiB) Viewed 6834 times
It still needs more sanding and filling but it's getting there!
more to follow!
Re: Signal box refurbishment
Posted: Thu Jan 06, 2022 2:12 pm
by philipy
Coming on well, George. The corner quoins look really good, it's a detail that often gets overlooked and can really spoil an otherwise nice model.
Re: Signal box refurbishment
Posted: Thu Jan 06, 2022 3:32 pm
by Andrew
That's looking very good indeed - the sliding sash windows are seriously impressive! I bottled out of those when I came to make the windows on my 'box - although mine's been re-purposed as an aviary for the station master's canaries, and I don't suppose he'd be too pleased if the windows were left open...
Looking forward to further updates,
Andrew.
Re: Signal box Refurbishment
Posted: Thu Jan 06, 2022 8:17 pm
by SimonWood
This is looking really good.
steamgeorge wrote: ↑Thu Jan 06, 2022 11:51 am
Looking at prototype photos for inspiration I had noticed that almost all signal boxes had sliding sash windows. Also, I always like it when doors, windows etc are modelled with the ability to be opened and closed. I thought it would be nice when, for example, I'm running trains on a hot day, to be able to open the windows on the signal box - adding a nice bit of authenticity to the scene I feel. So with these criteria in mind I set about head scratching.
Fantastic. What I love about this forum - people here who are willing to take perfection, and improve on it

Re: Signal box refurbishment
Posted: Fri Jan 07, 2022 10:49 pm
by steamgeorge
Hello all,
I appreciate all your kind words! Its about time I contribute something to this wonderful forum!
Anyway to continue the build...
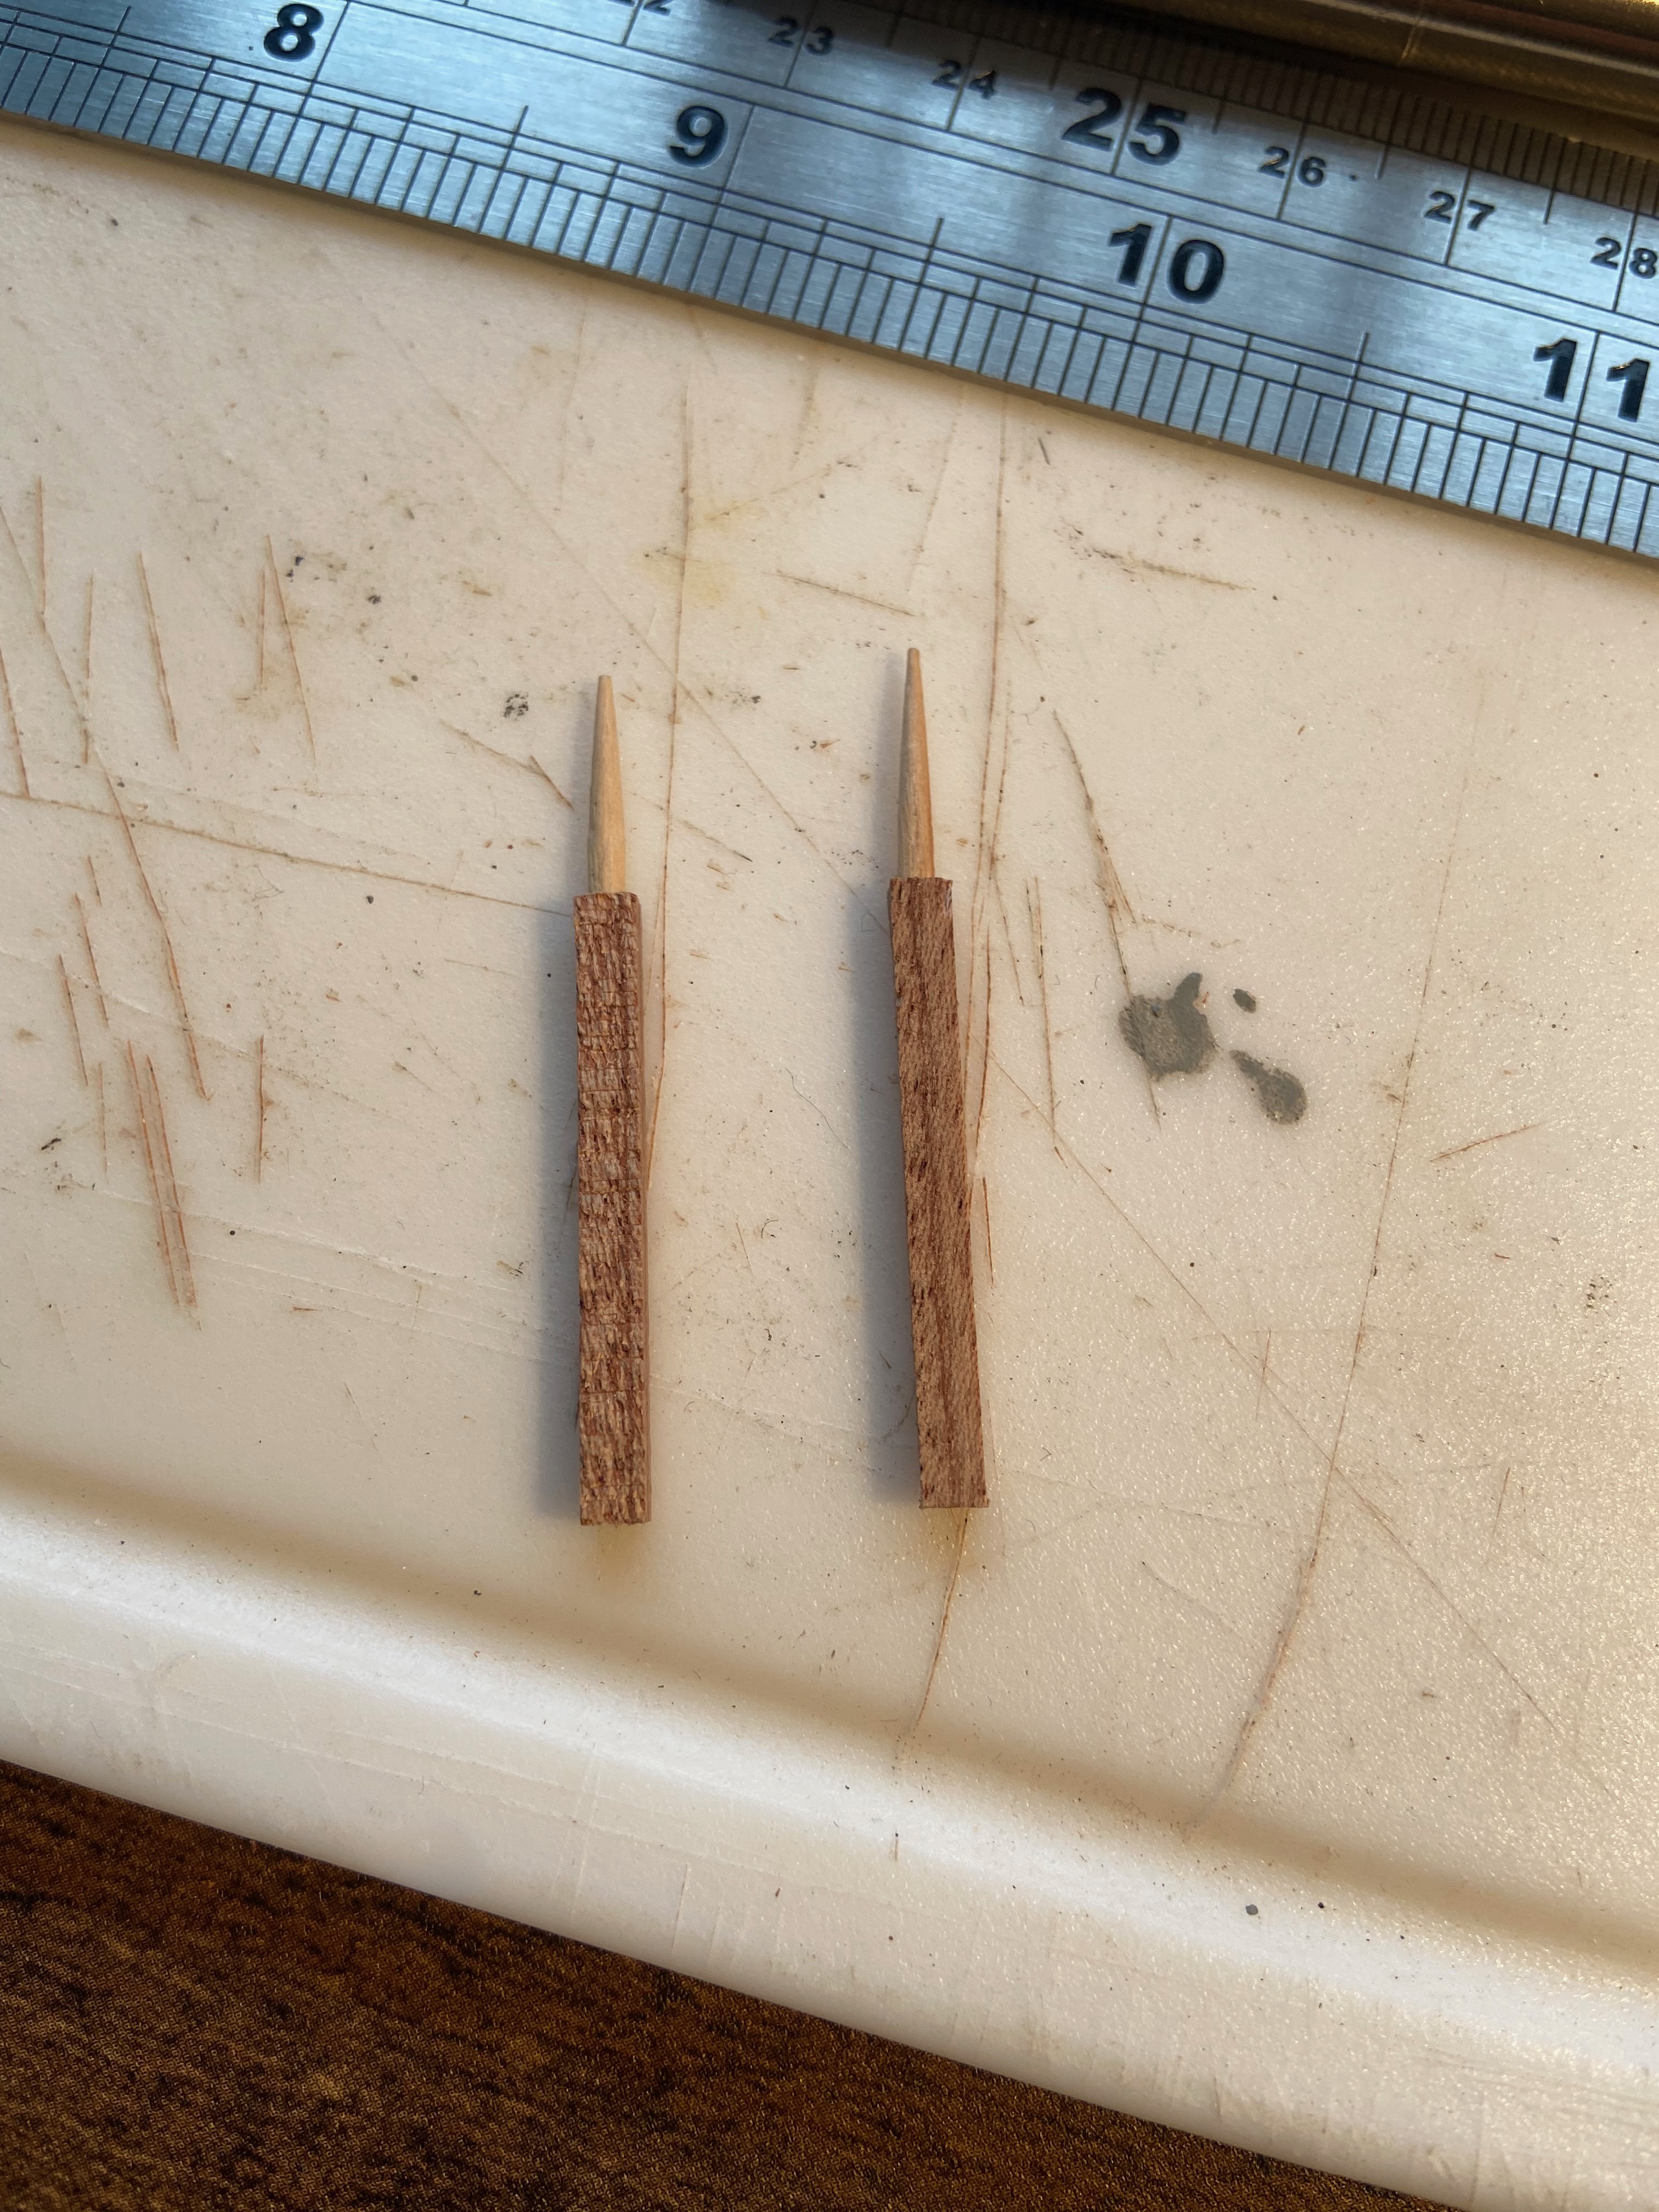
To finish the roof I now needed to replace the resin barge boards with wooden ones. I couldn't resist tackling the finials first however!
The spike is made from a cocktail stick guided into a 2mm hole in the end of the finial
- IMG_3735.jpg (2.72 MiB) Viewed 6735 times
I also added a little carving at the other end
Here is a comparison with the old resin one:

- IMG_3737.jpg (2.72 MiB) Viewed 6735 times
I thought the new finial looked quite vulnerable considering how thin it was however the building is far away from any 'hand of god' operators when the railway is in use so I'm hoping all will be fine! Plus, it will get taken in during the winter months.
Some barge boards were made up from hardwood strip wood and attached to the roof along with the finials:
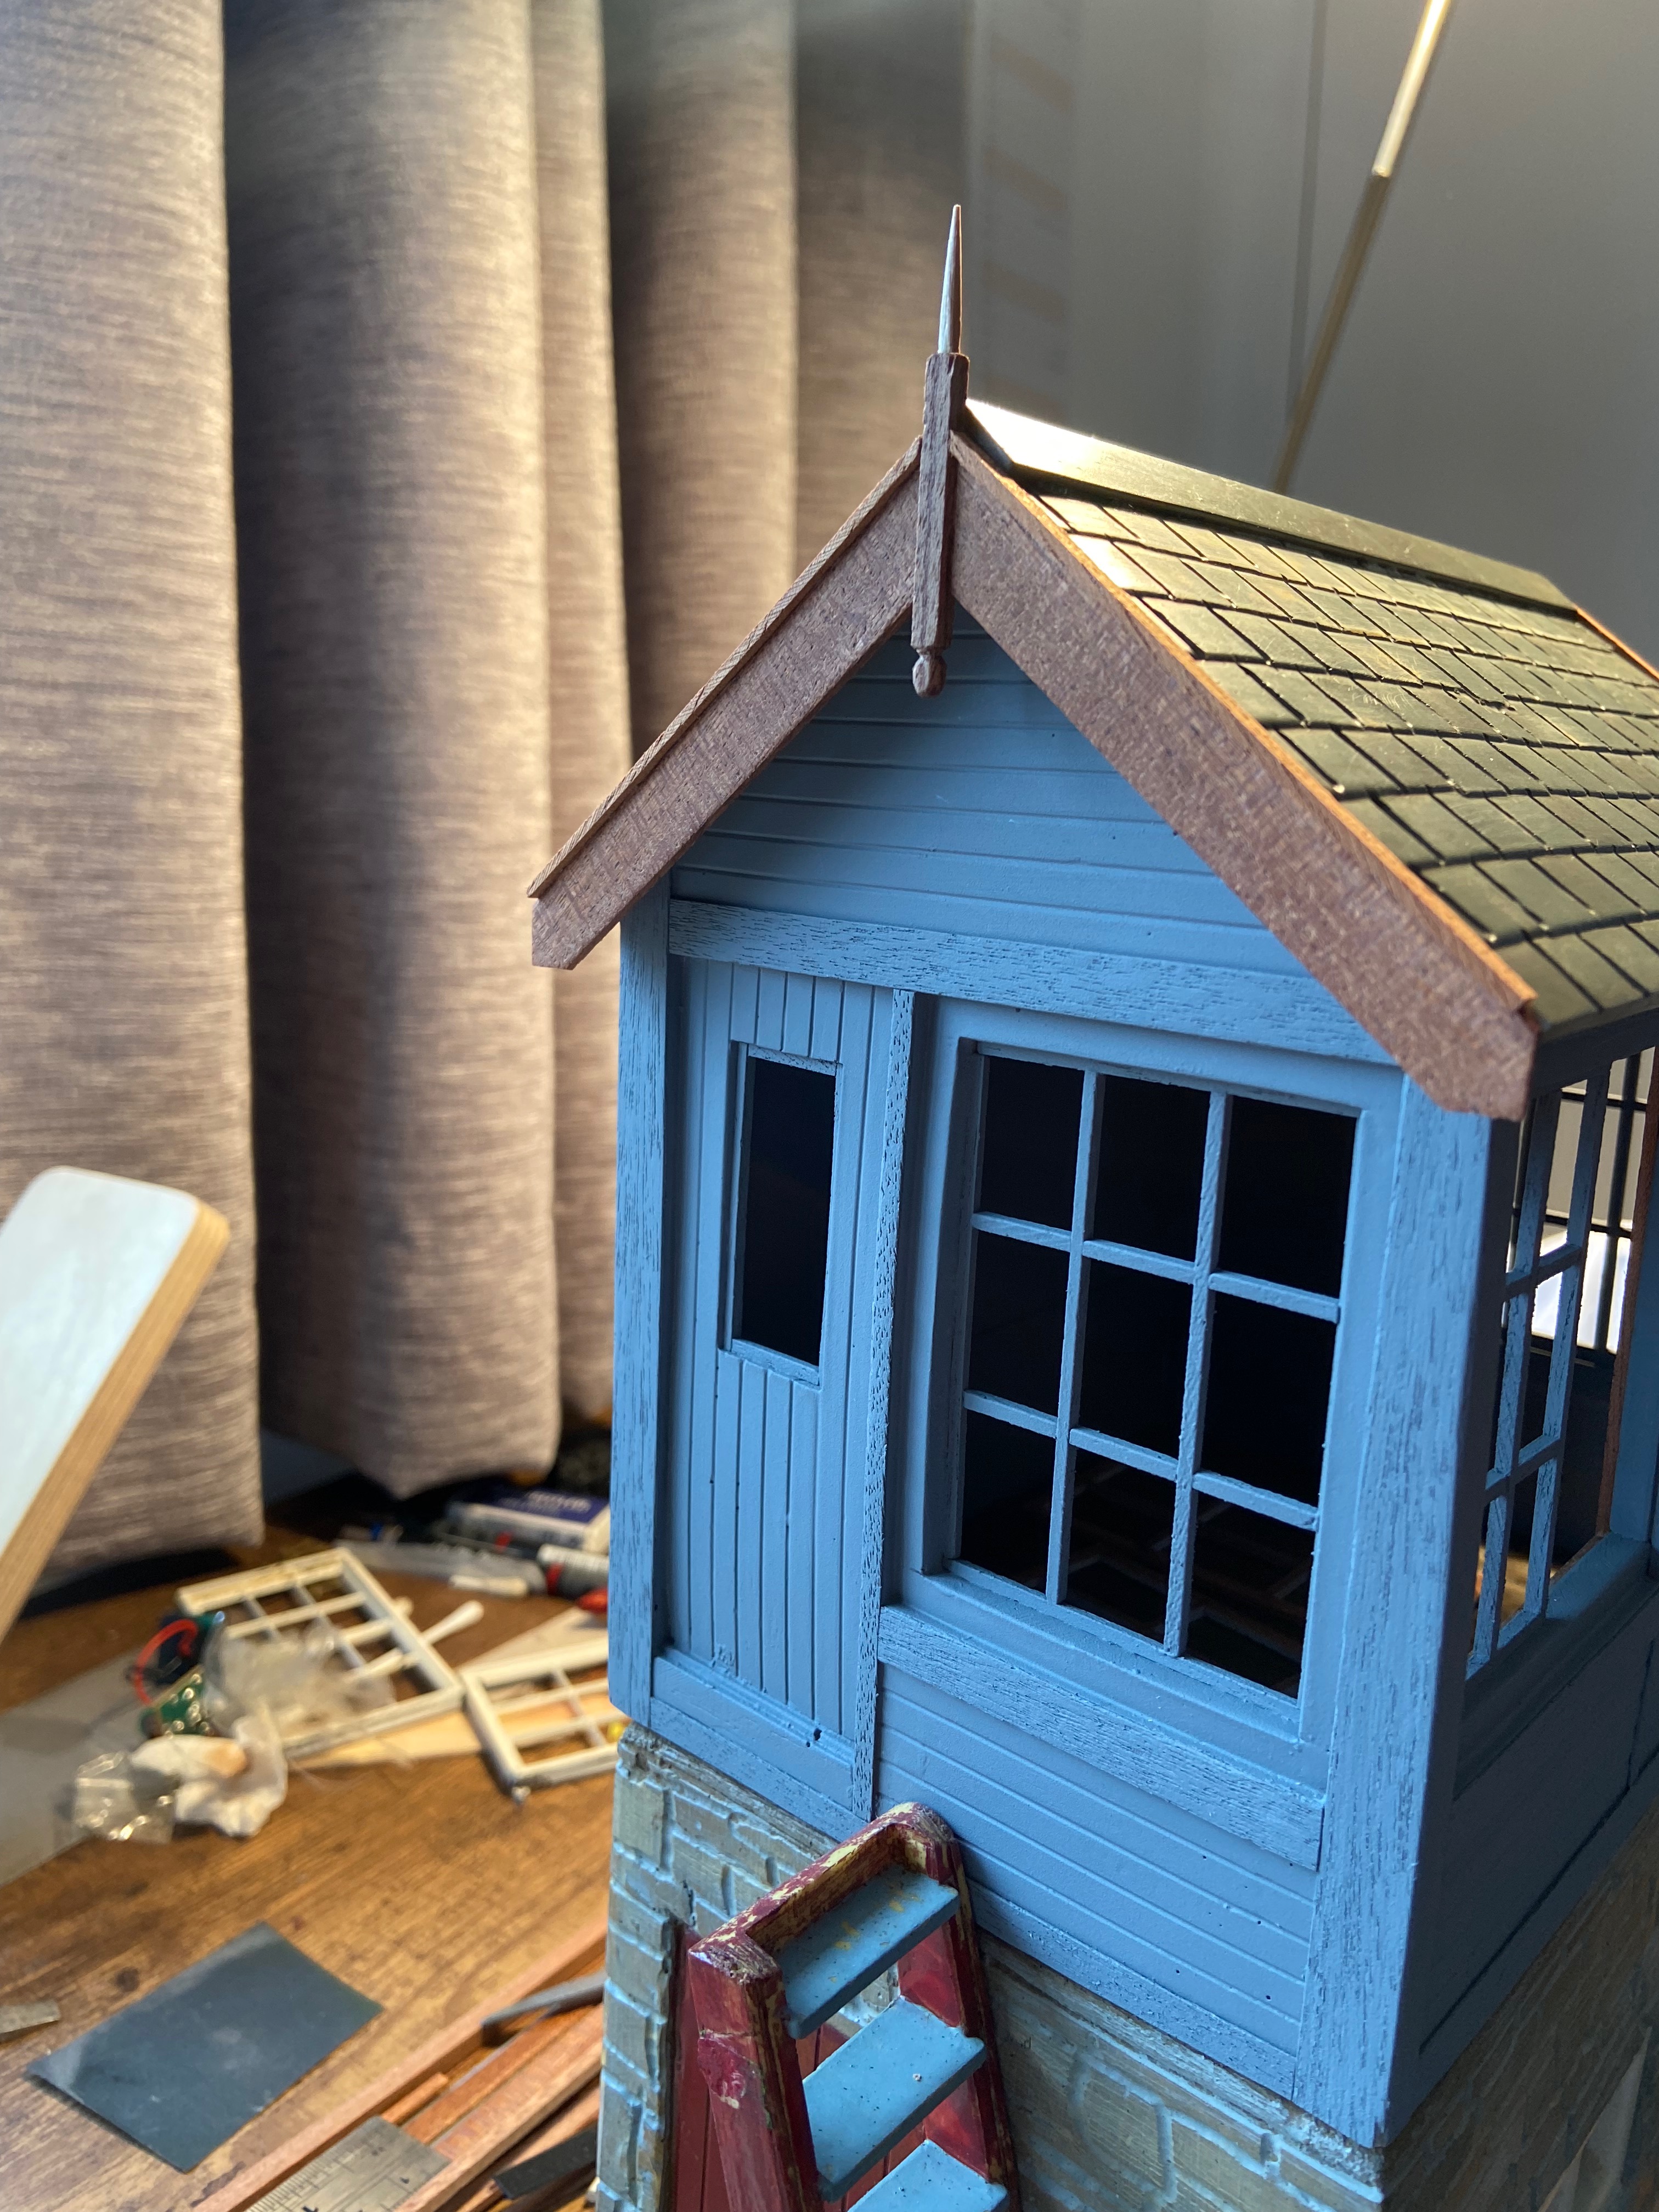
- IMG_3740.jpg (2.28 MiB) Viewed 6735 times
I also added some plasticard strips inside to represent panelling (I hope to add some sort of interior at one point)
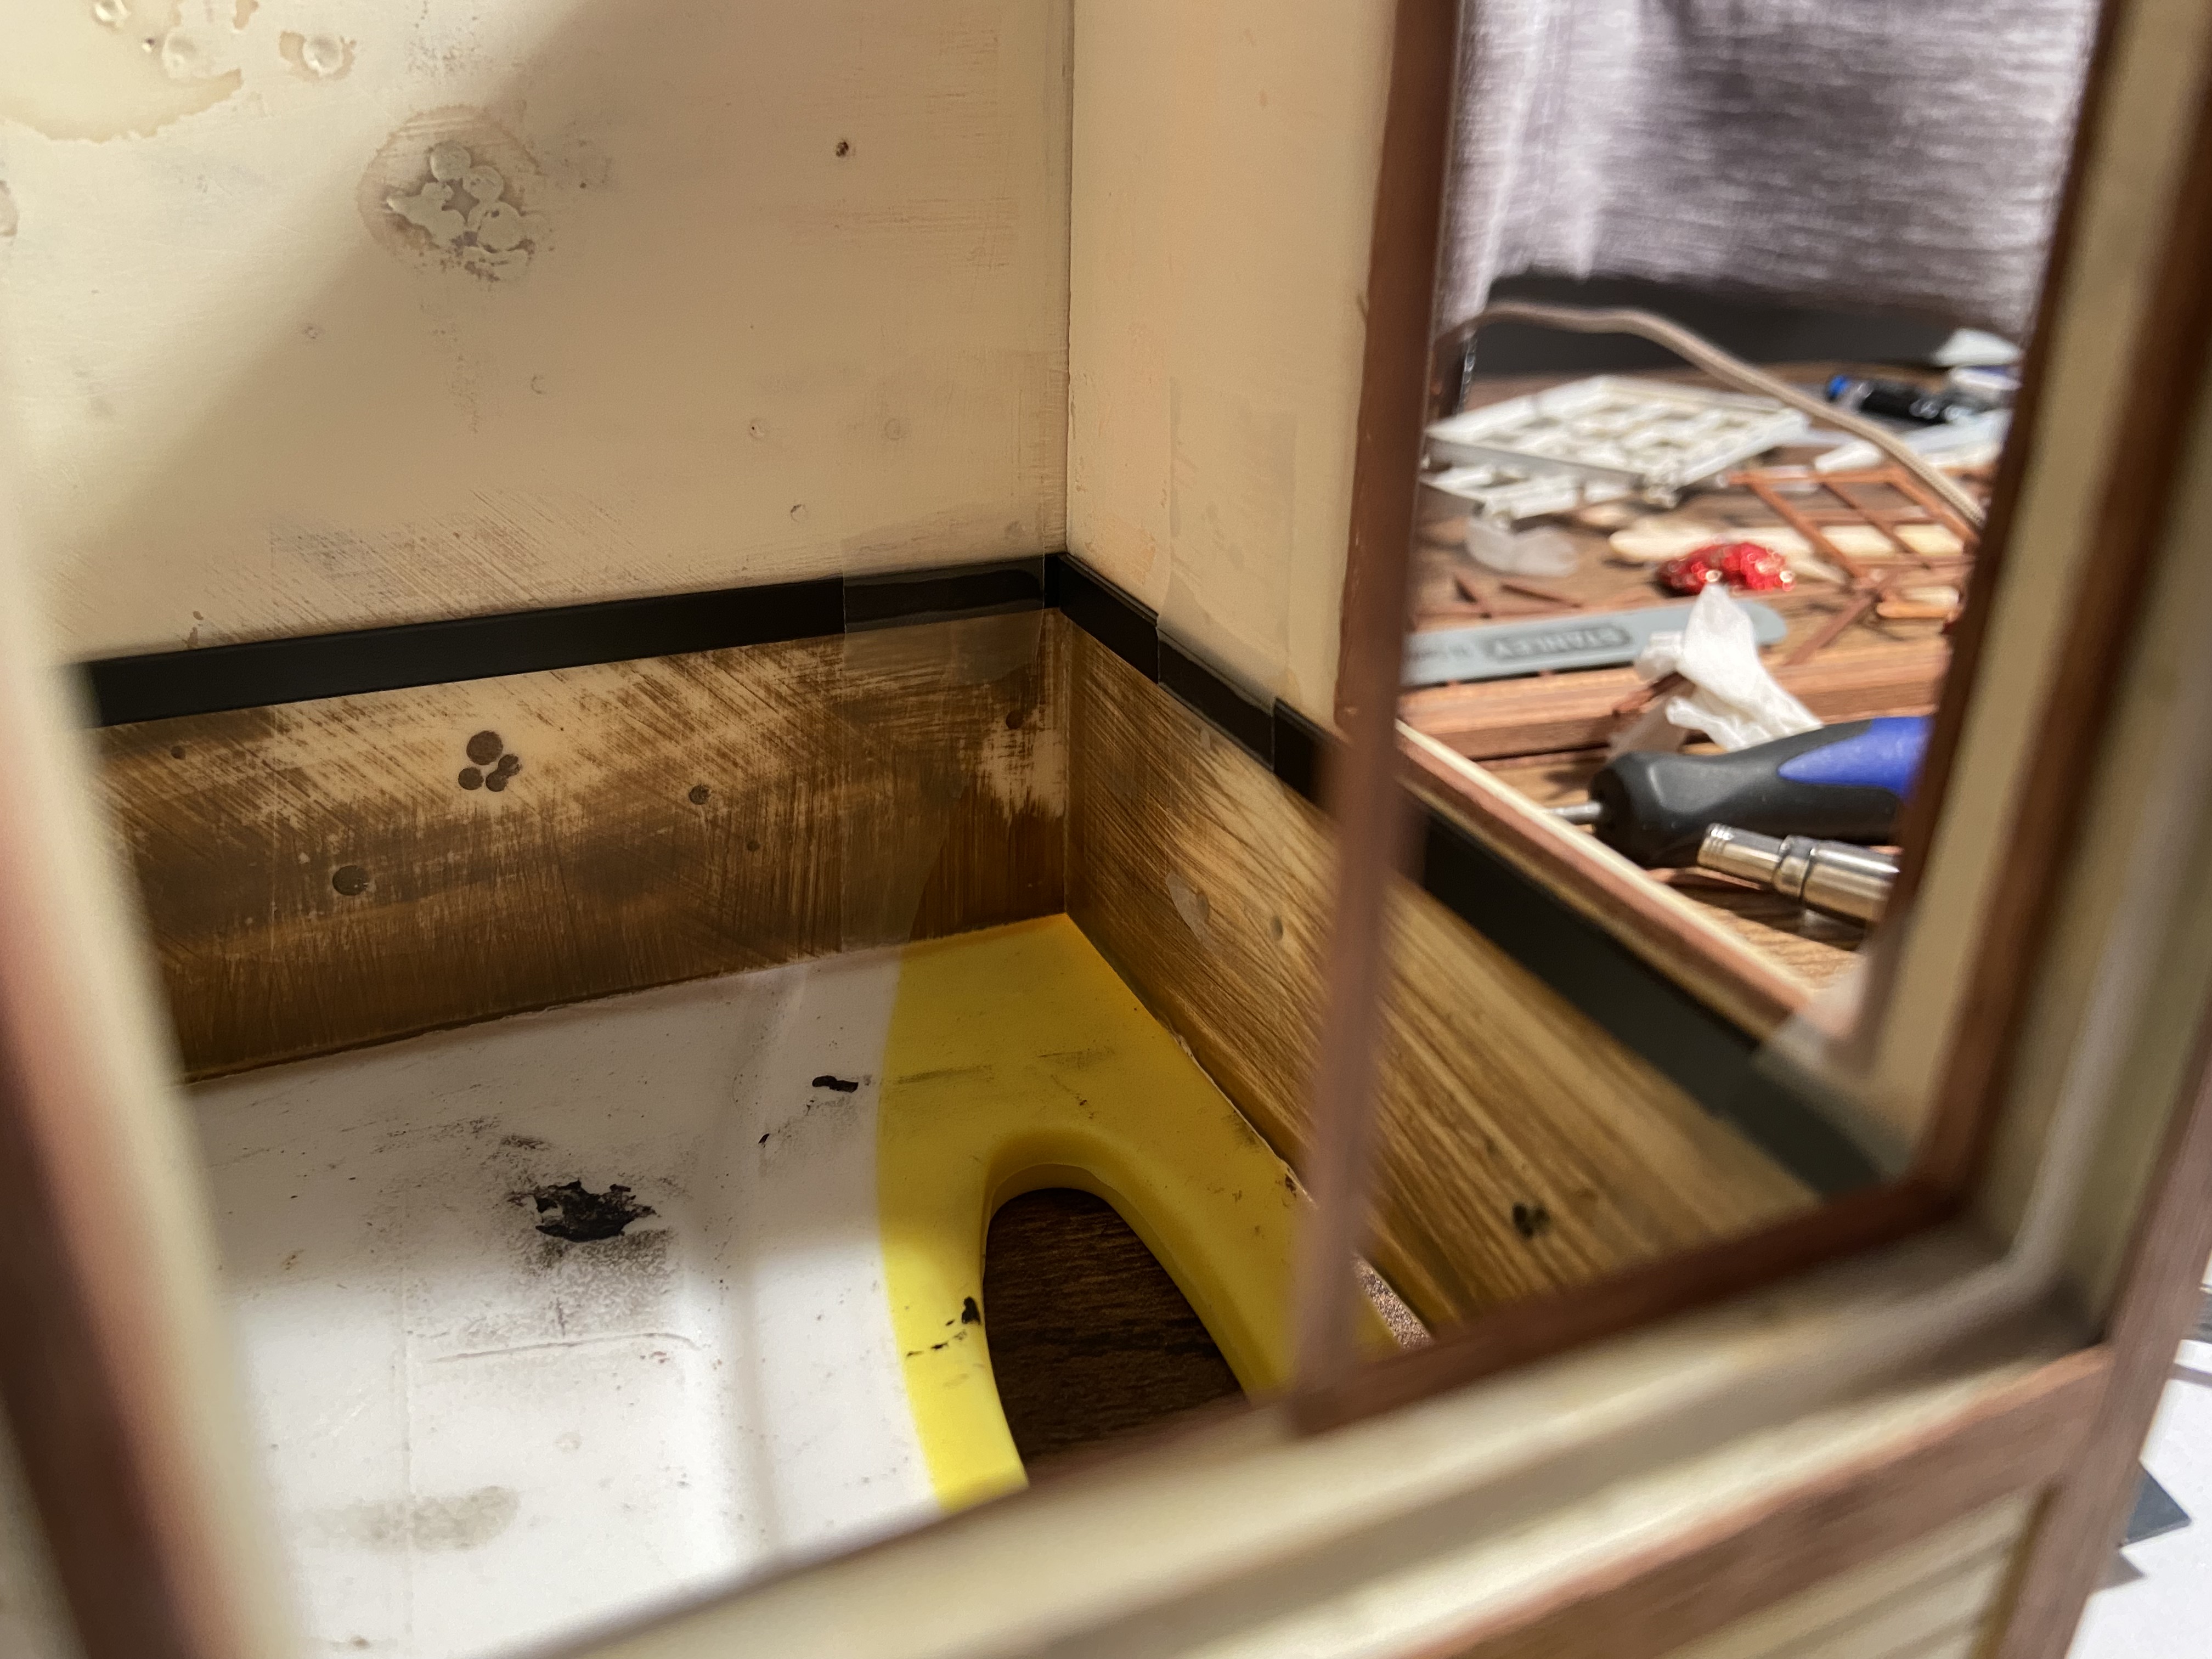
- IMG_3734.jpg (1.92 MiB) Viewed 6735 times
And the whole thing was given a rub down with some sand paper, a de-grease, followed by a couple coats of Halfords grey primer
Here are the results:
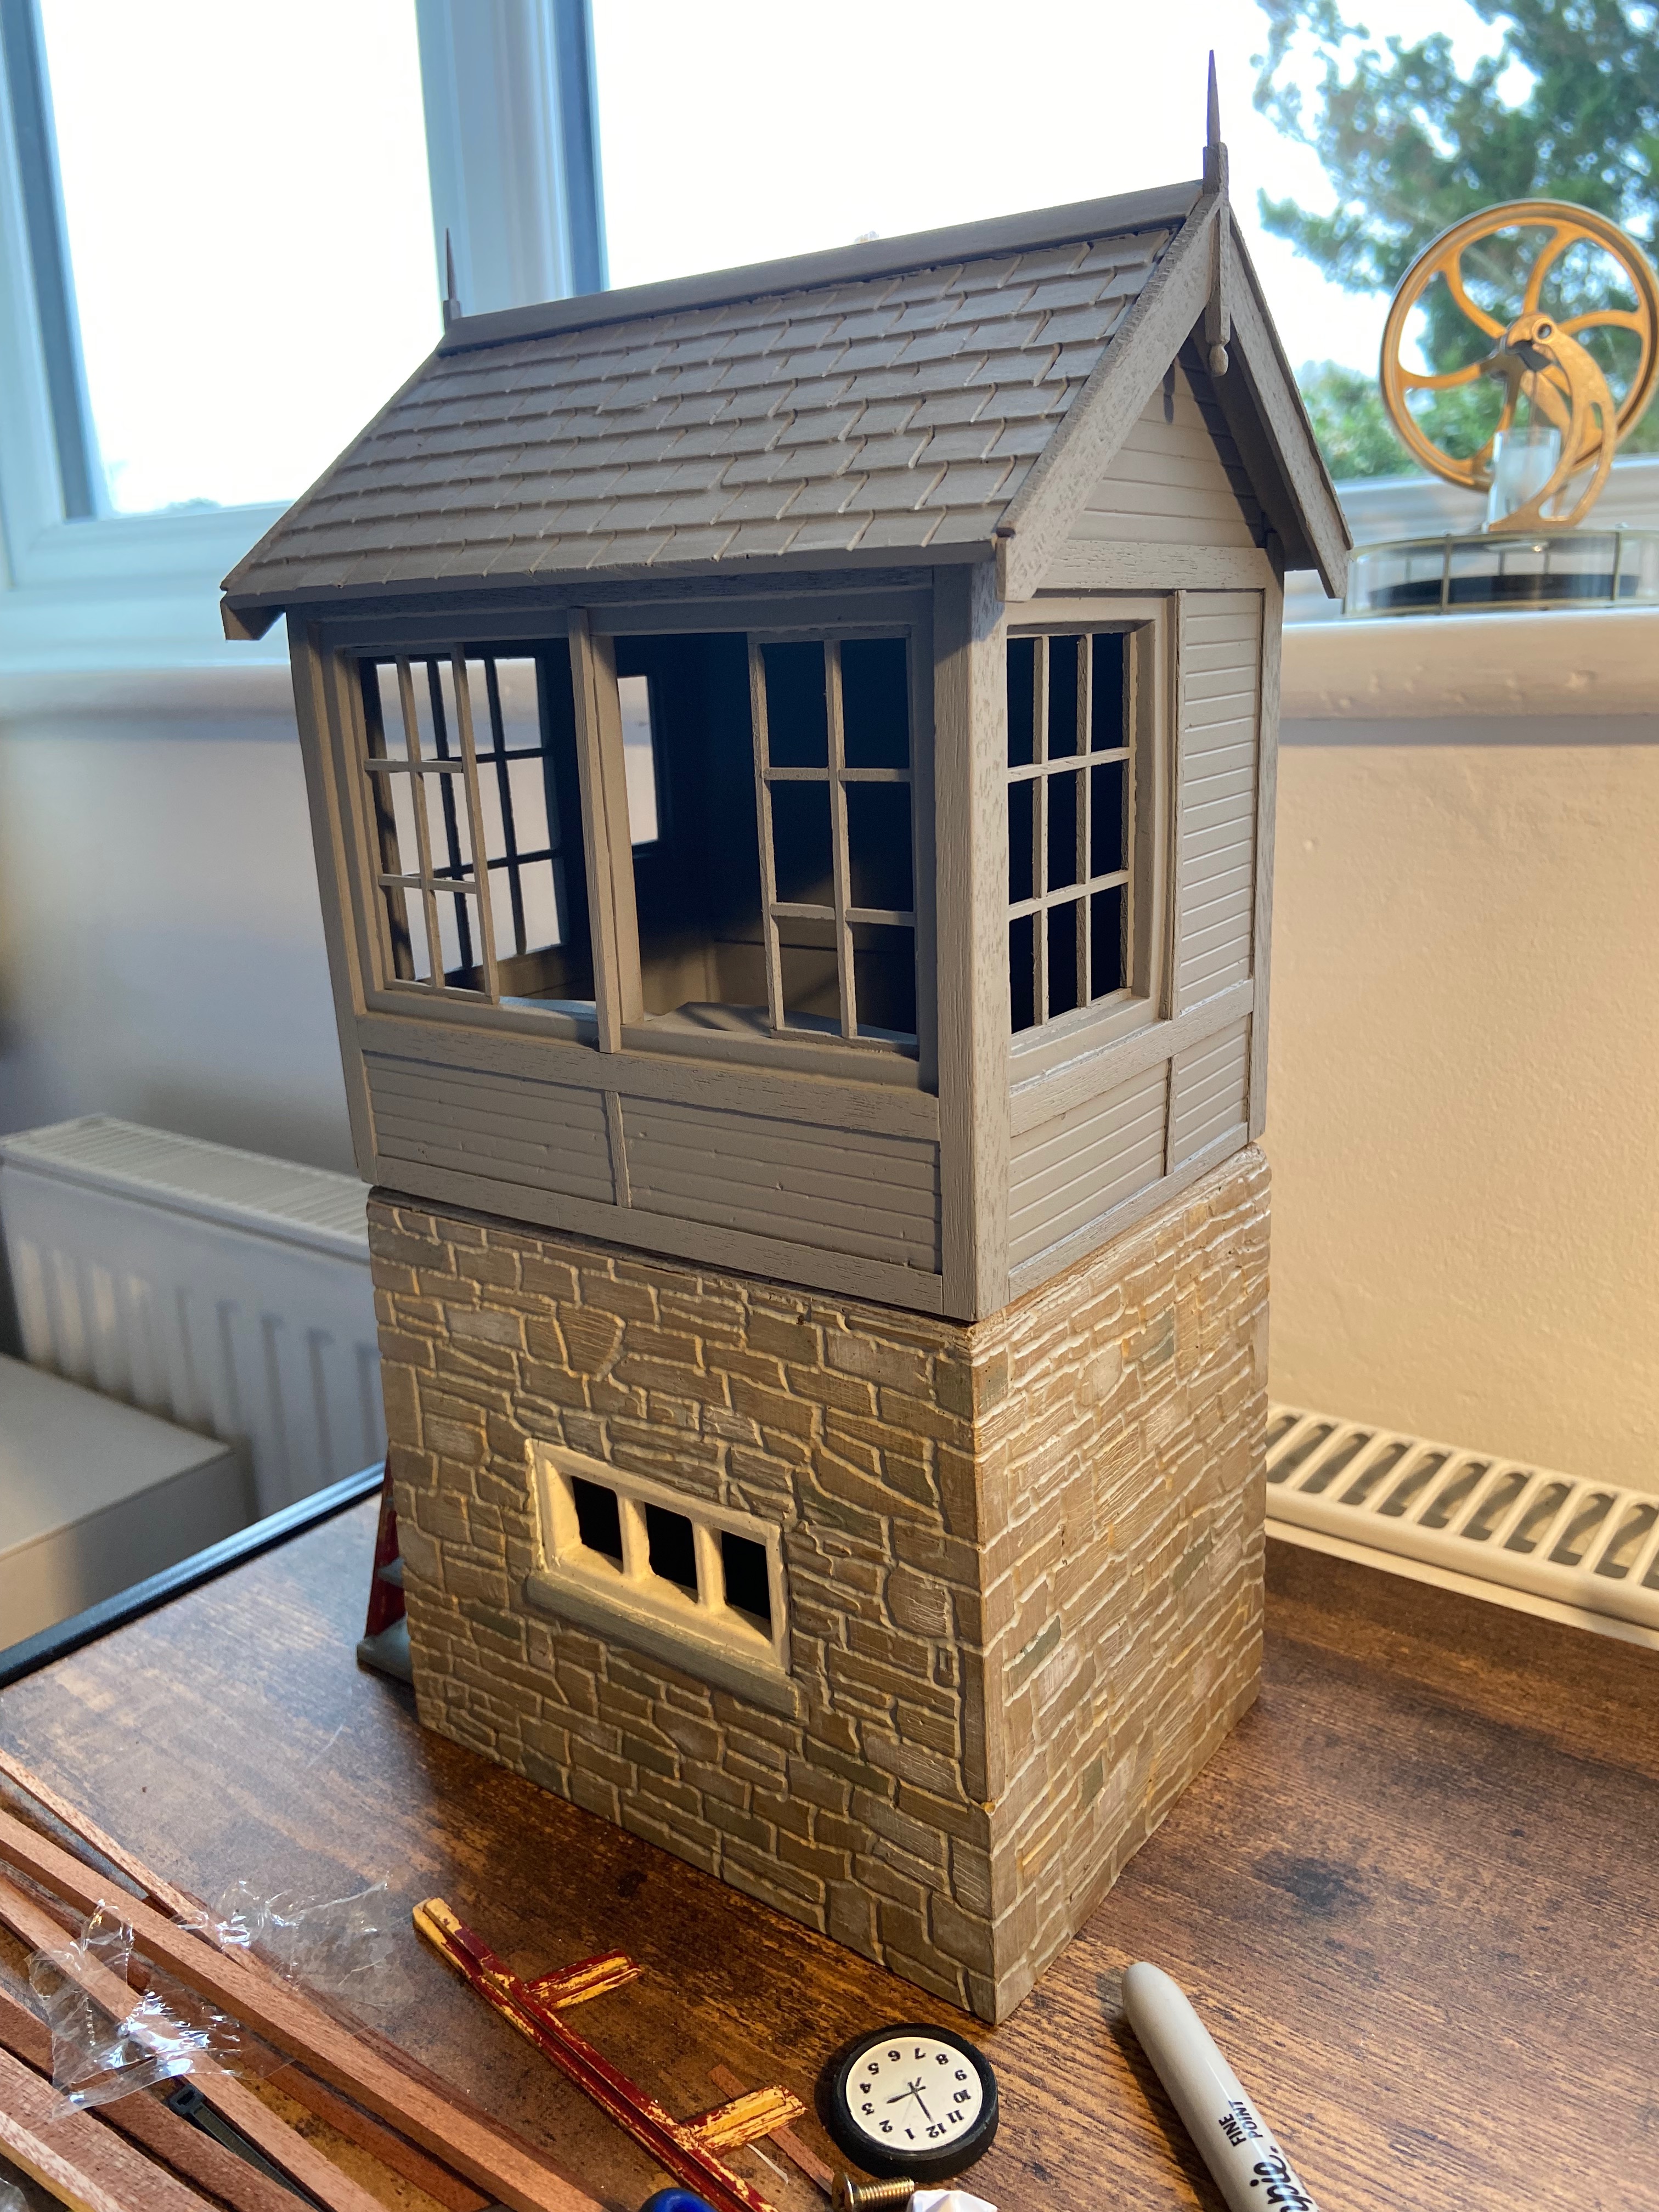
- IMG_3741.jpg (2.64 MiB) Viewed 6735 times
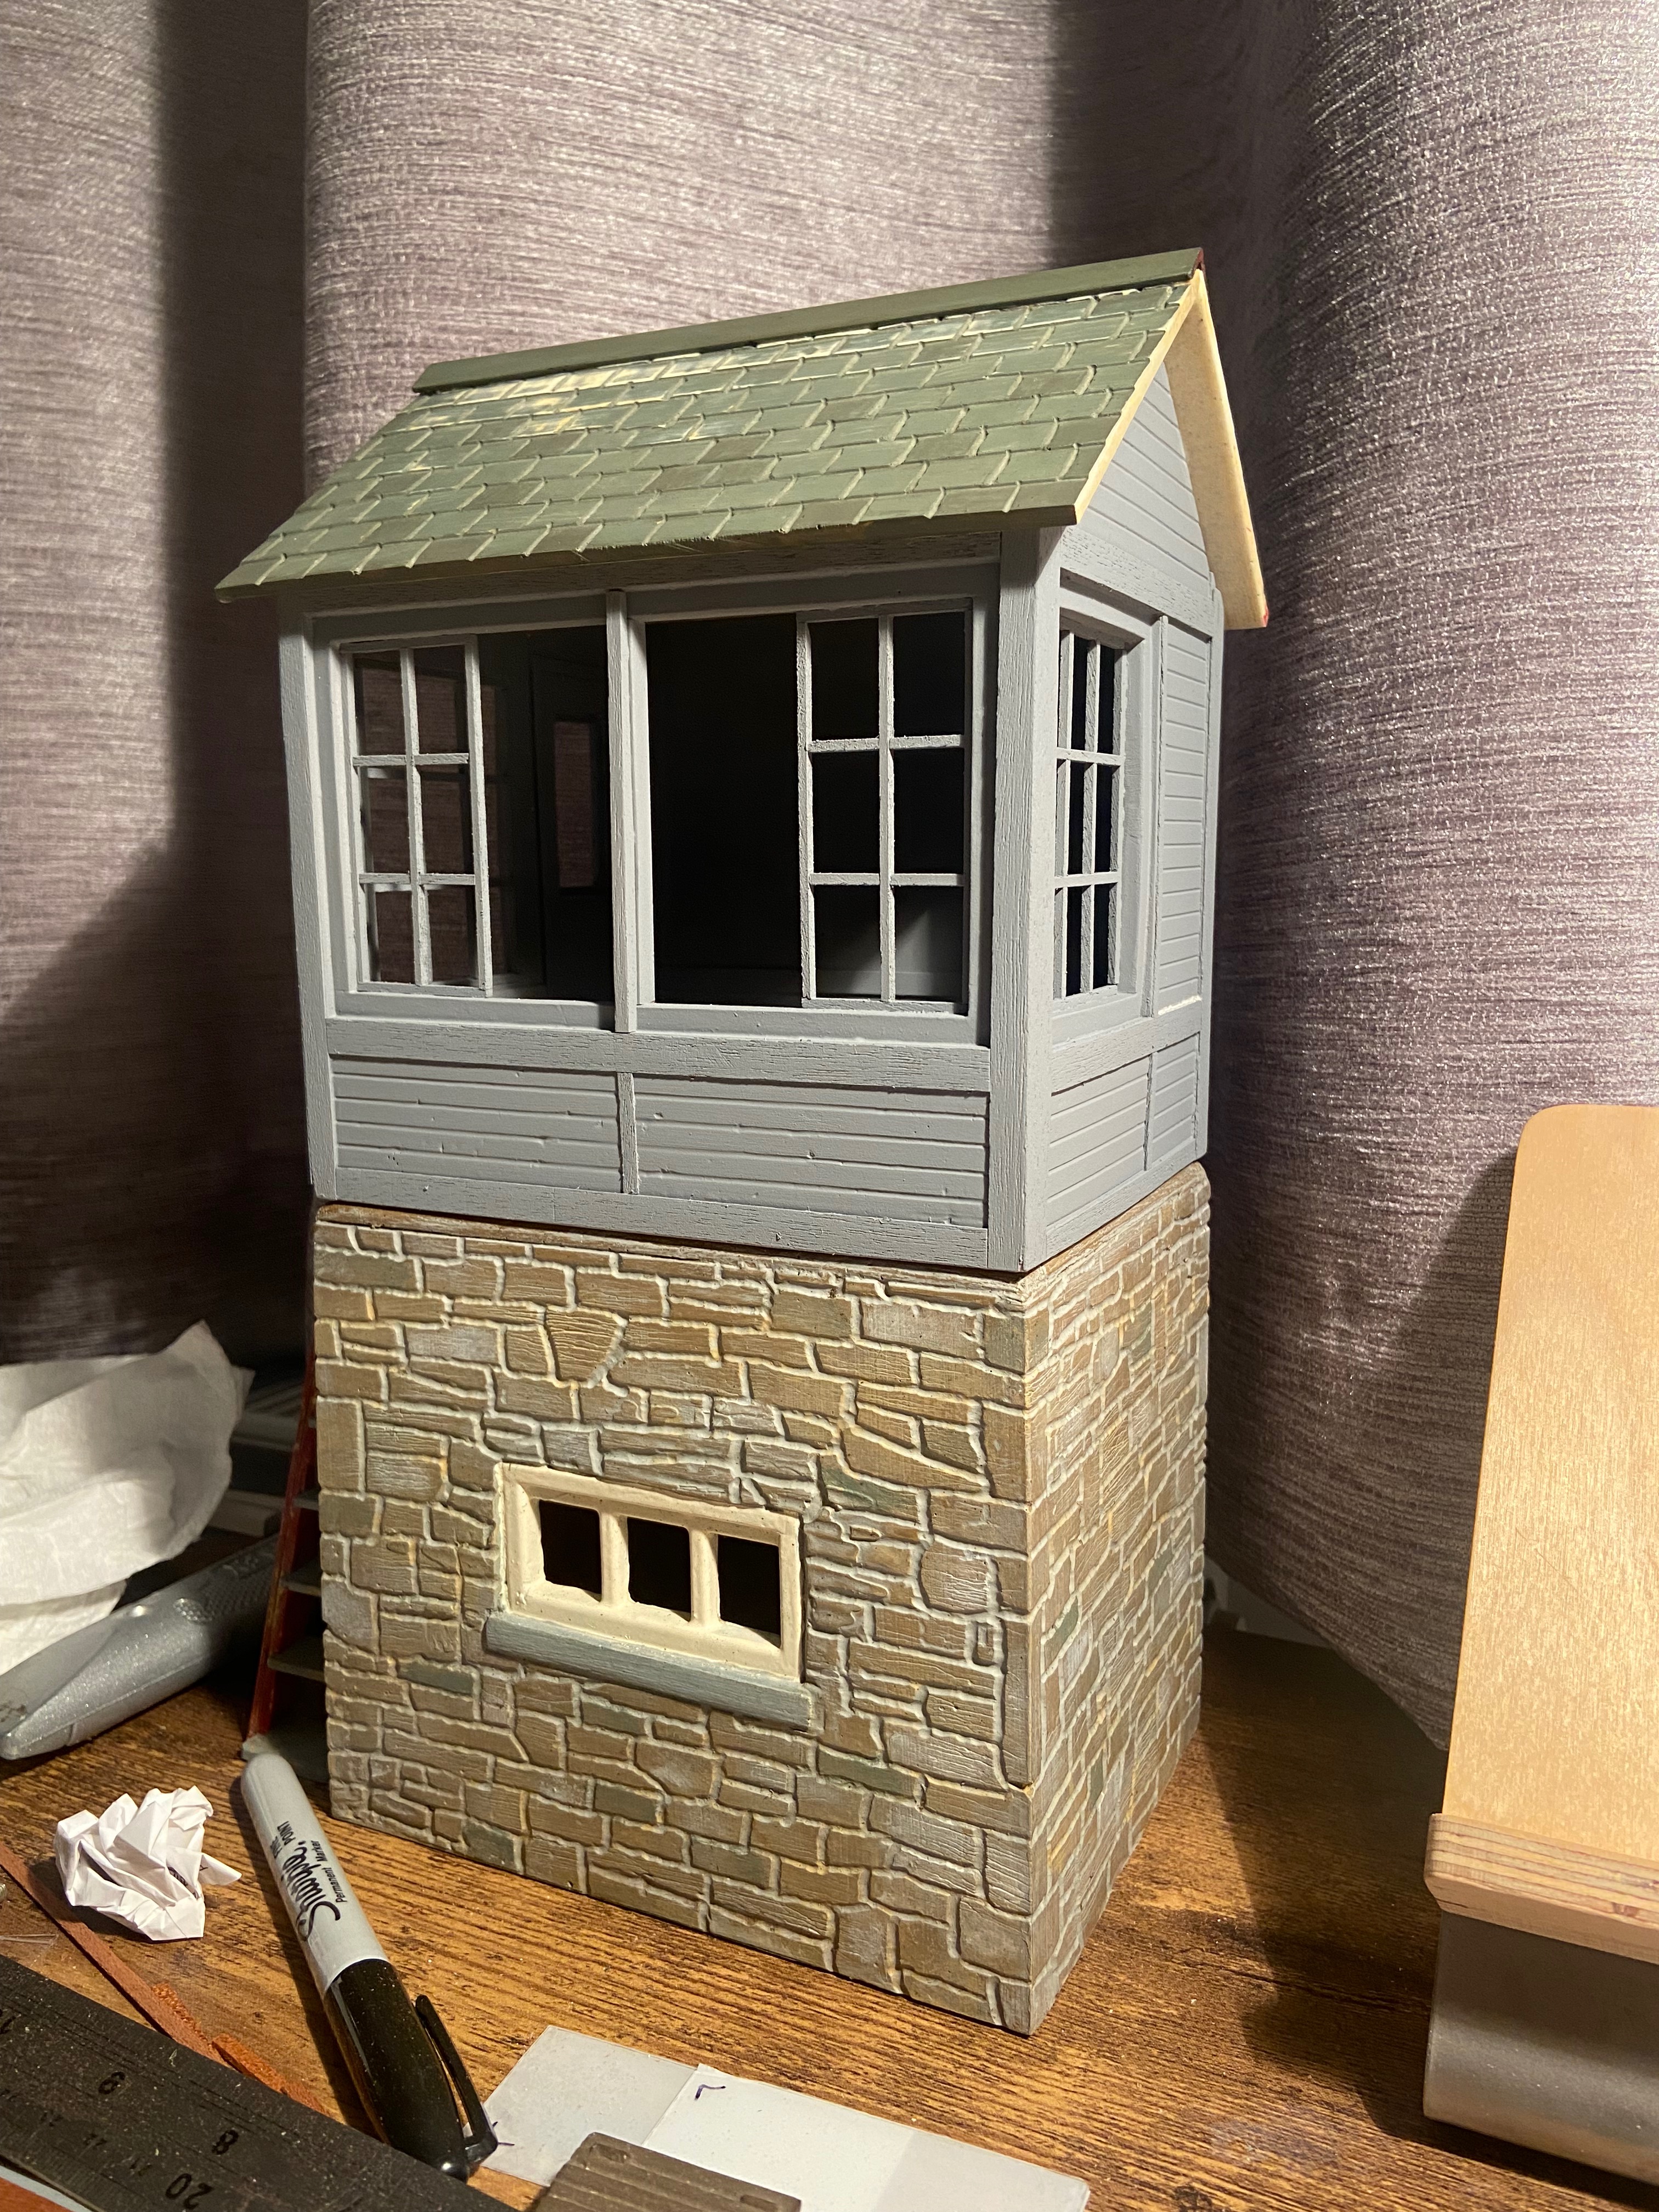
Further coats of Halfords white primer were then added to form a base coat. following another sanding a couple of coats of Precision paints 'SR buildings cream' was added to the panelling to seal it up nicely.
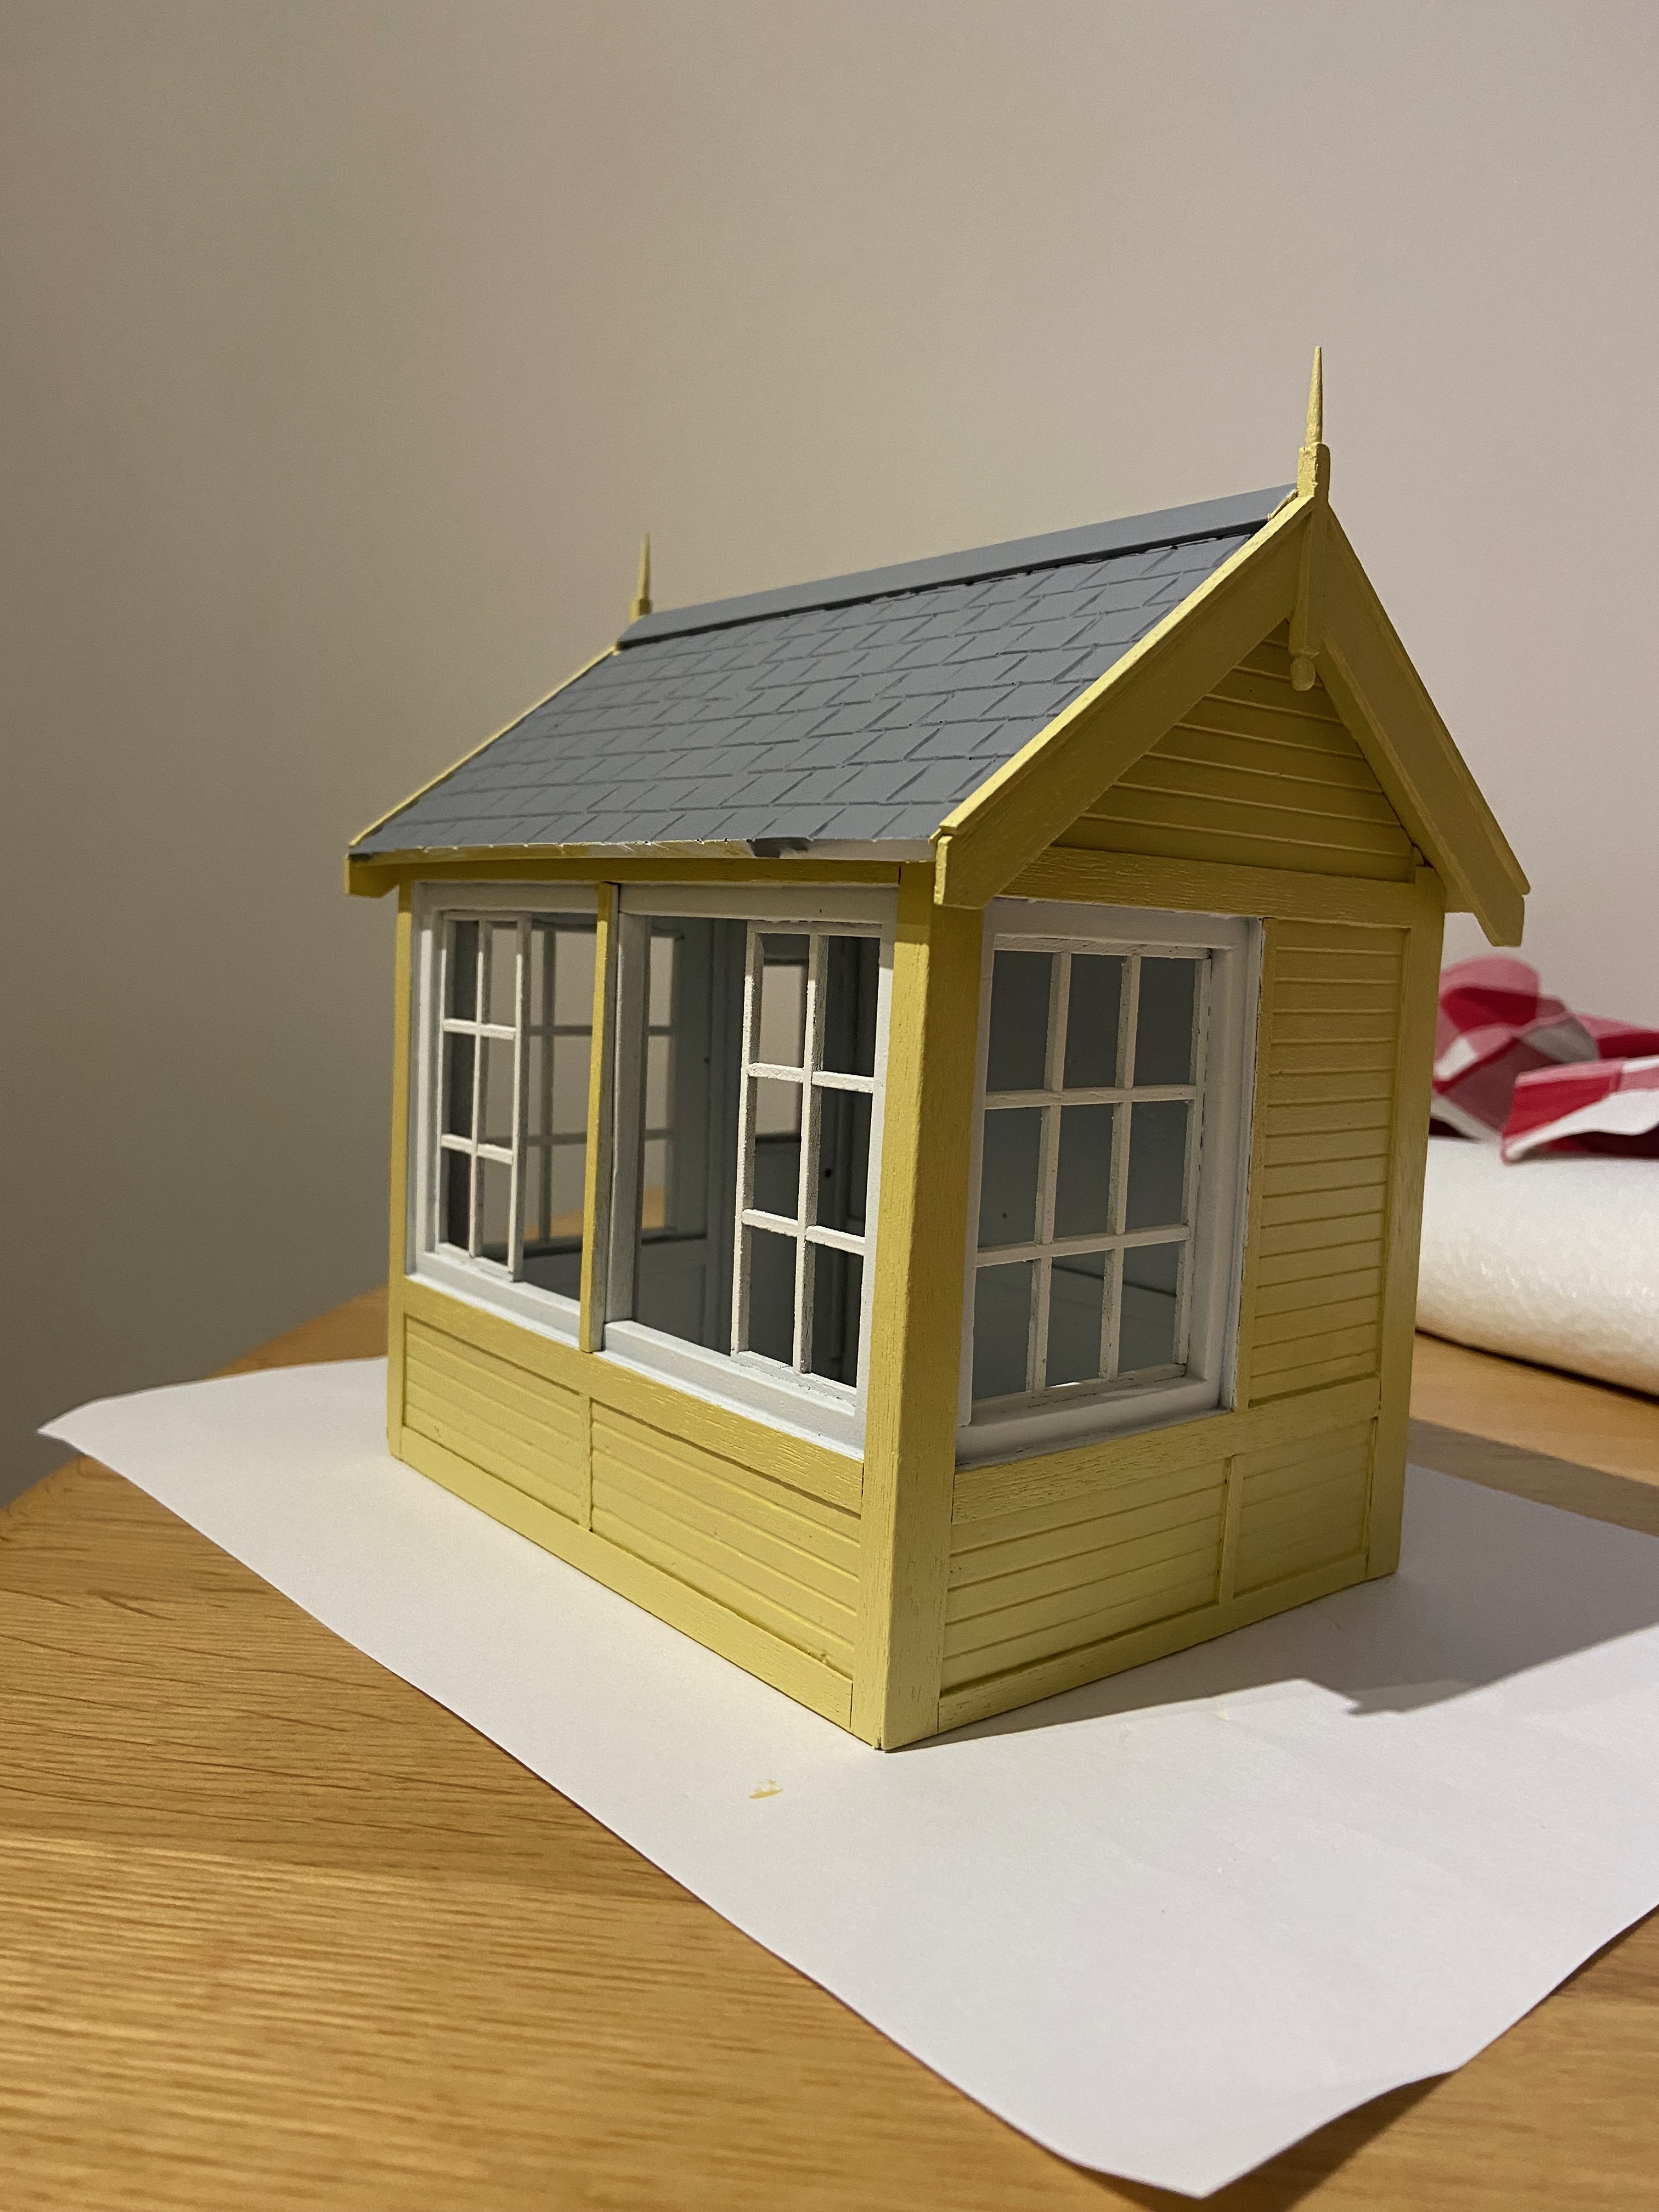
- IMG_3763.jpg (2.18 MiB) Viewed 6735 times
Re: Signal box refurbishment
Posted: Fri Jan 07, 2022 11:04 pm
by steamgeorge
some more photos of the building being trialled on the base:

- IMG_3788.jpg (3.61 MiB) Viewed 6734 times
Windows closed:
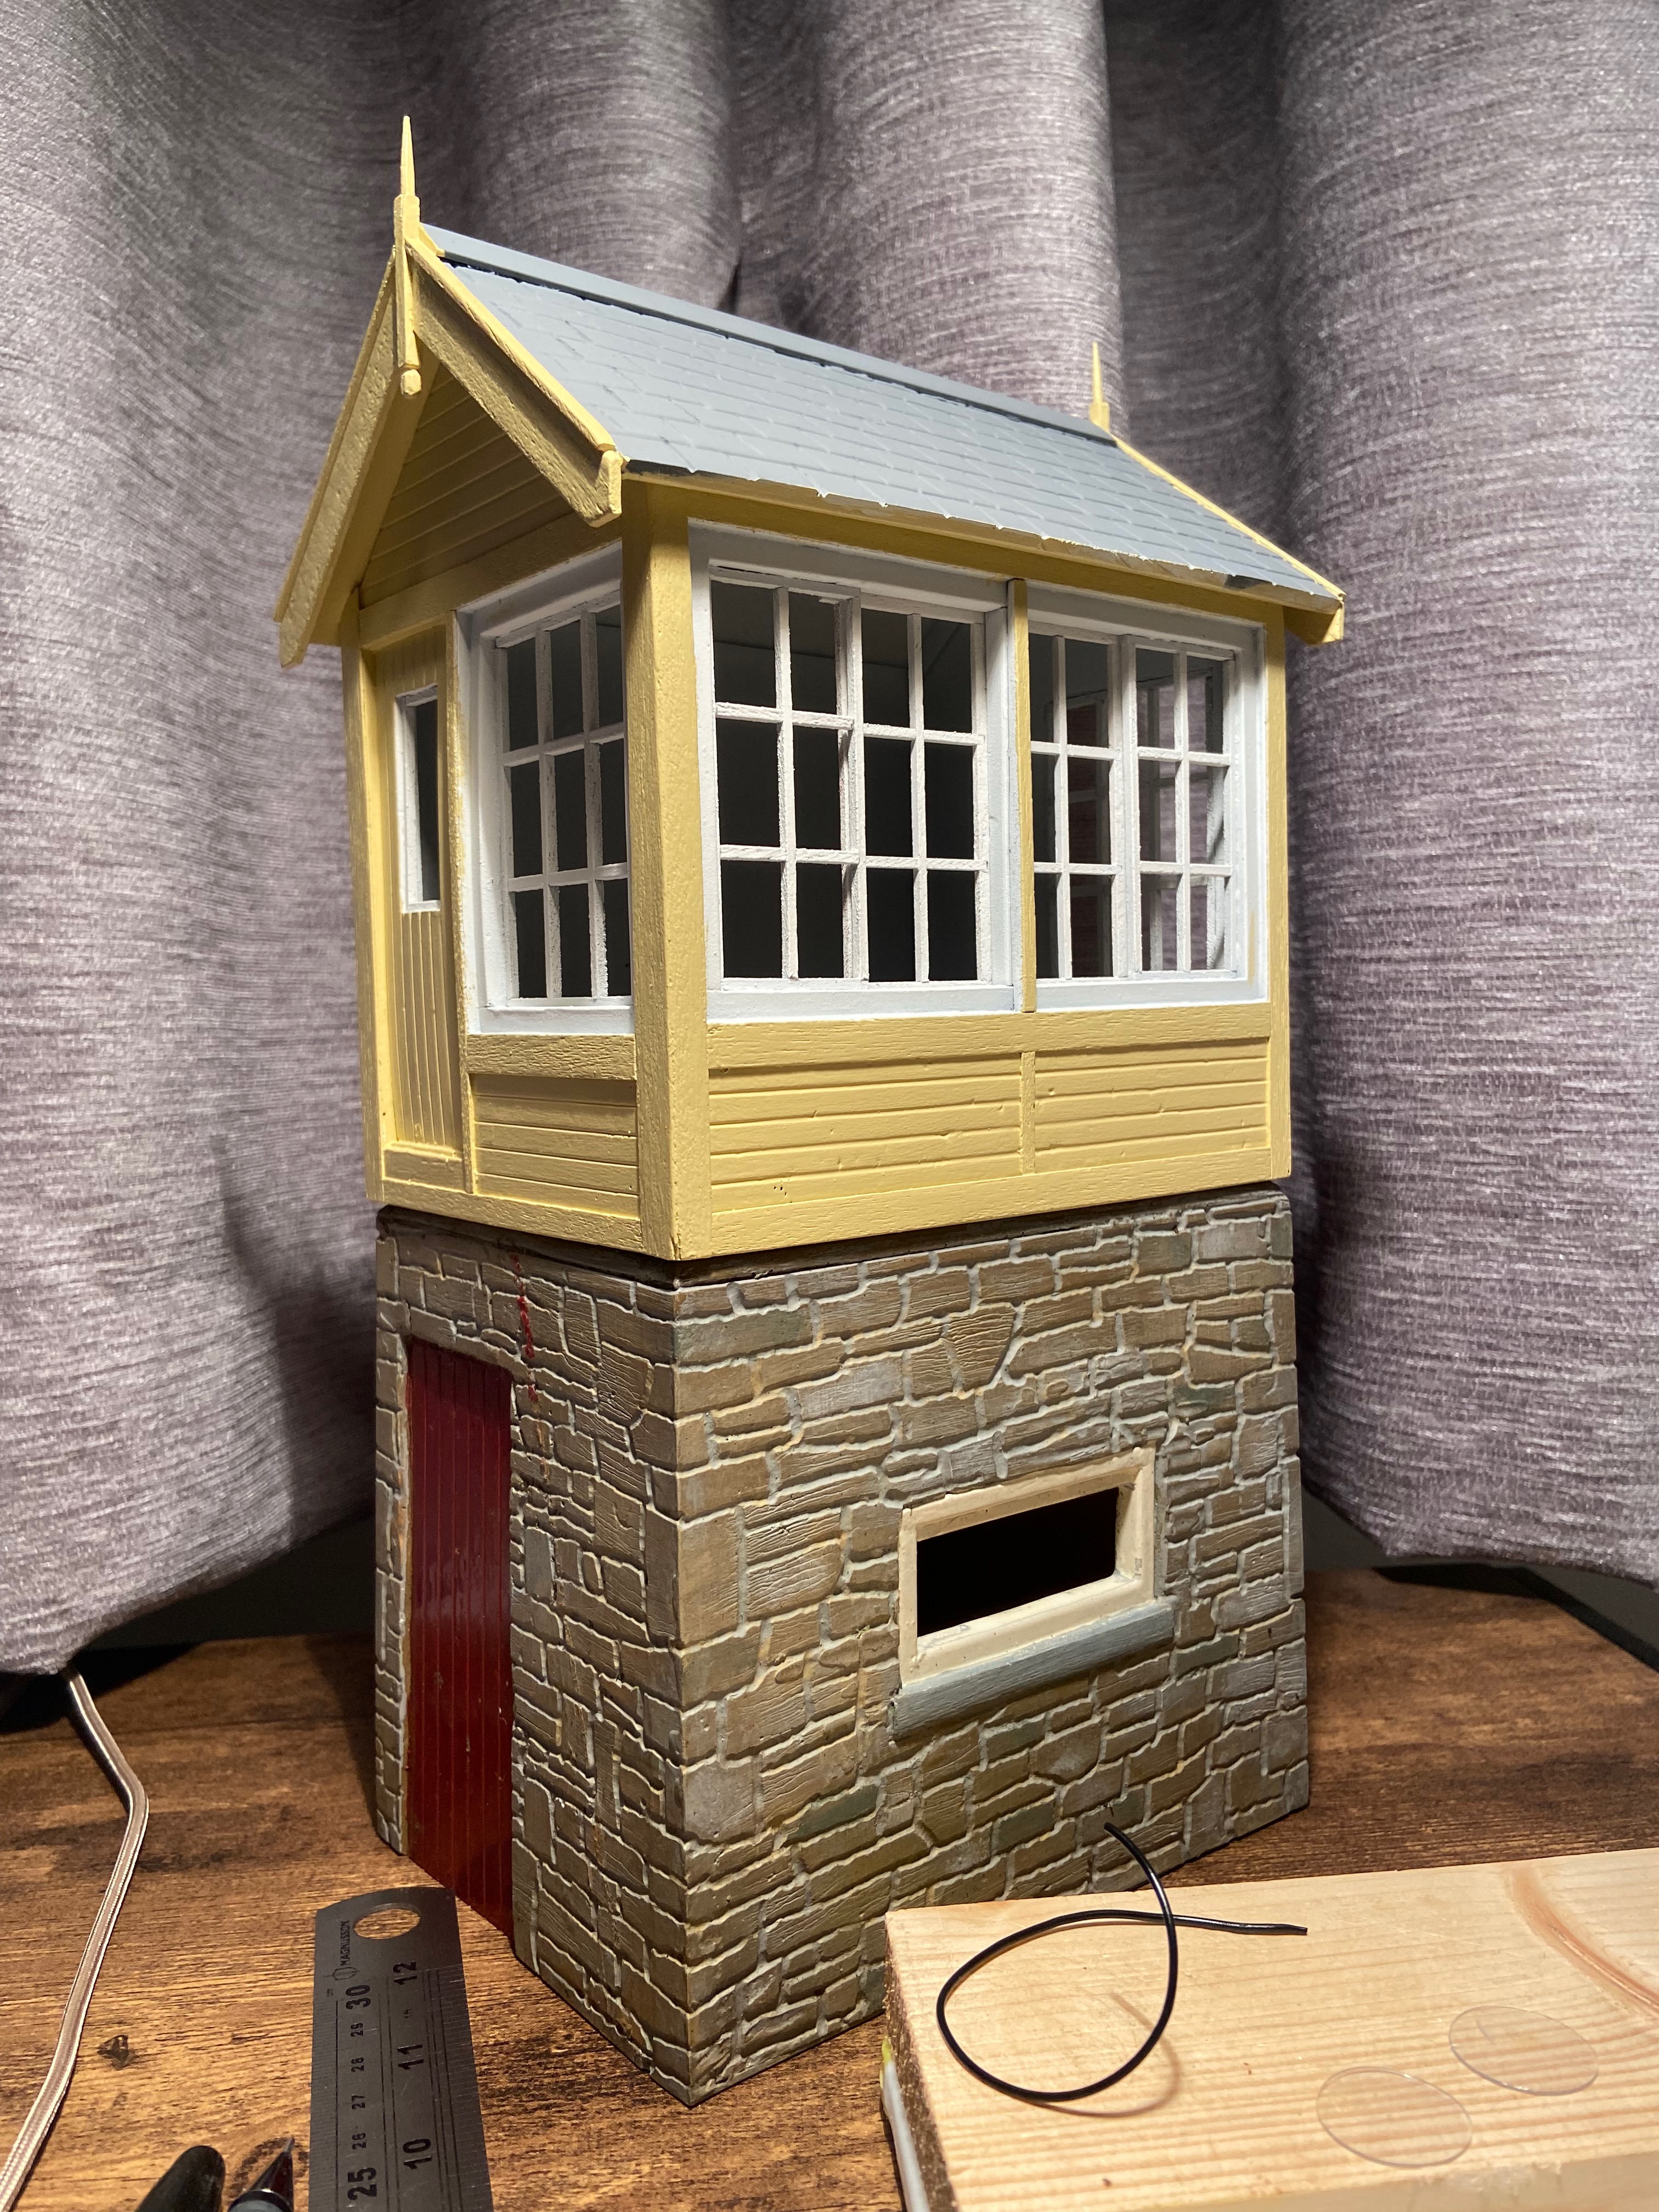
- IMG_3792.jpg (3.25 MiB) Viewed 6734 times
Windows open:
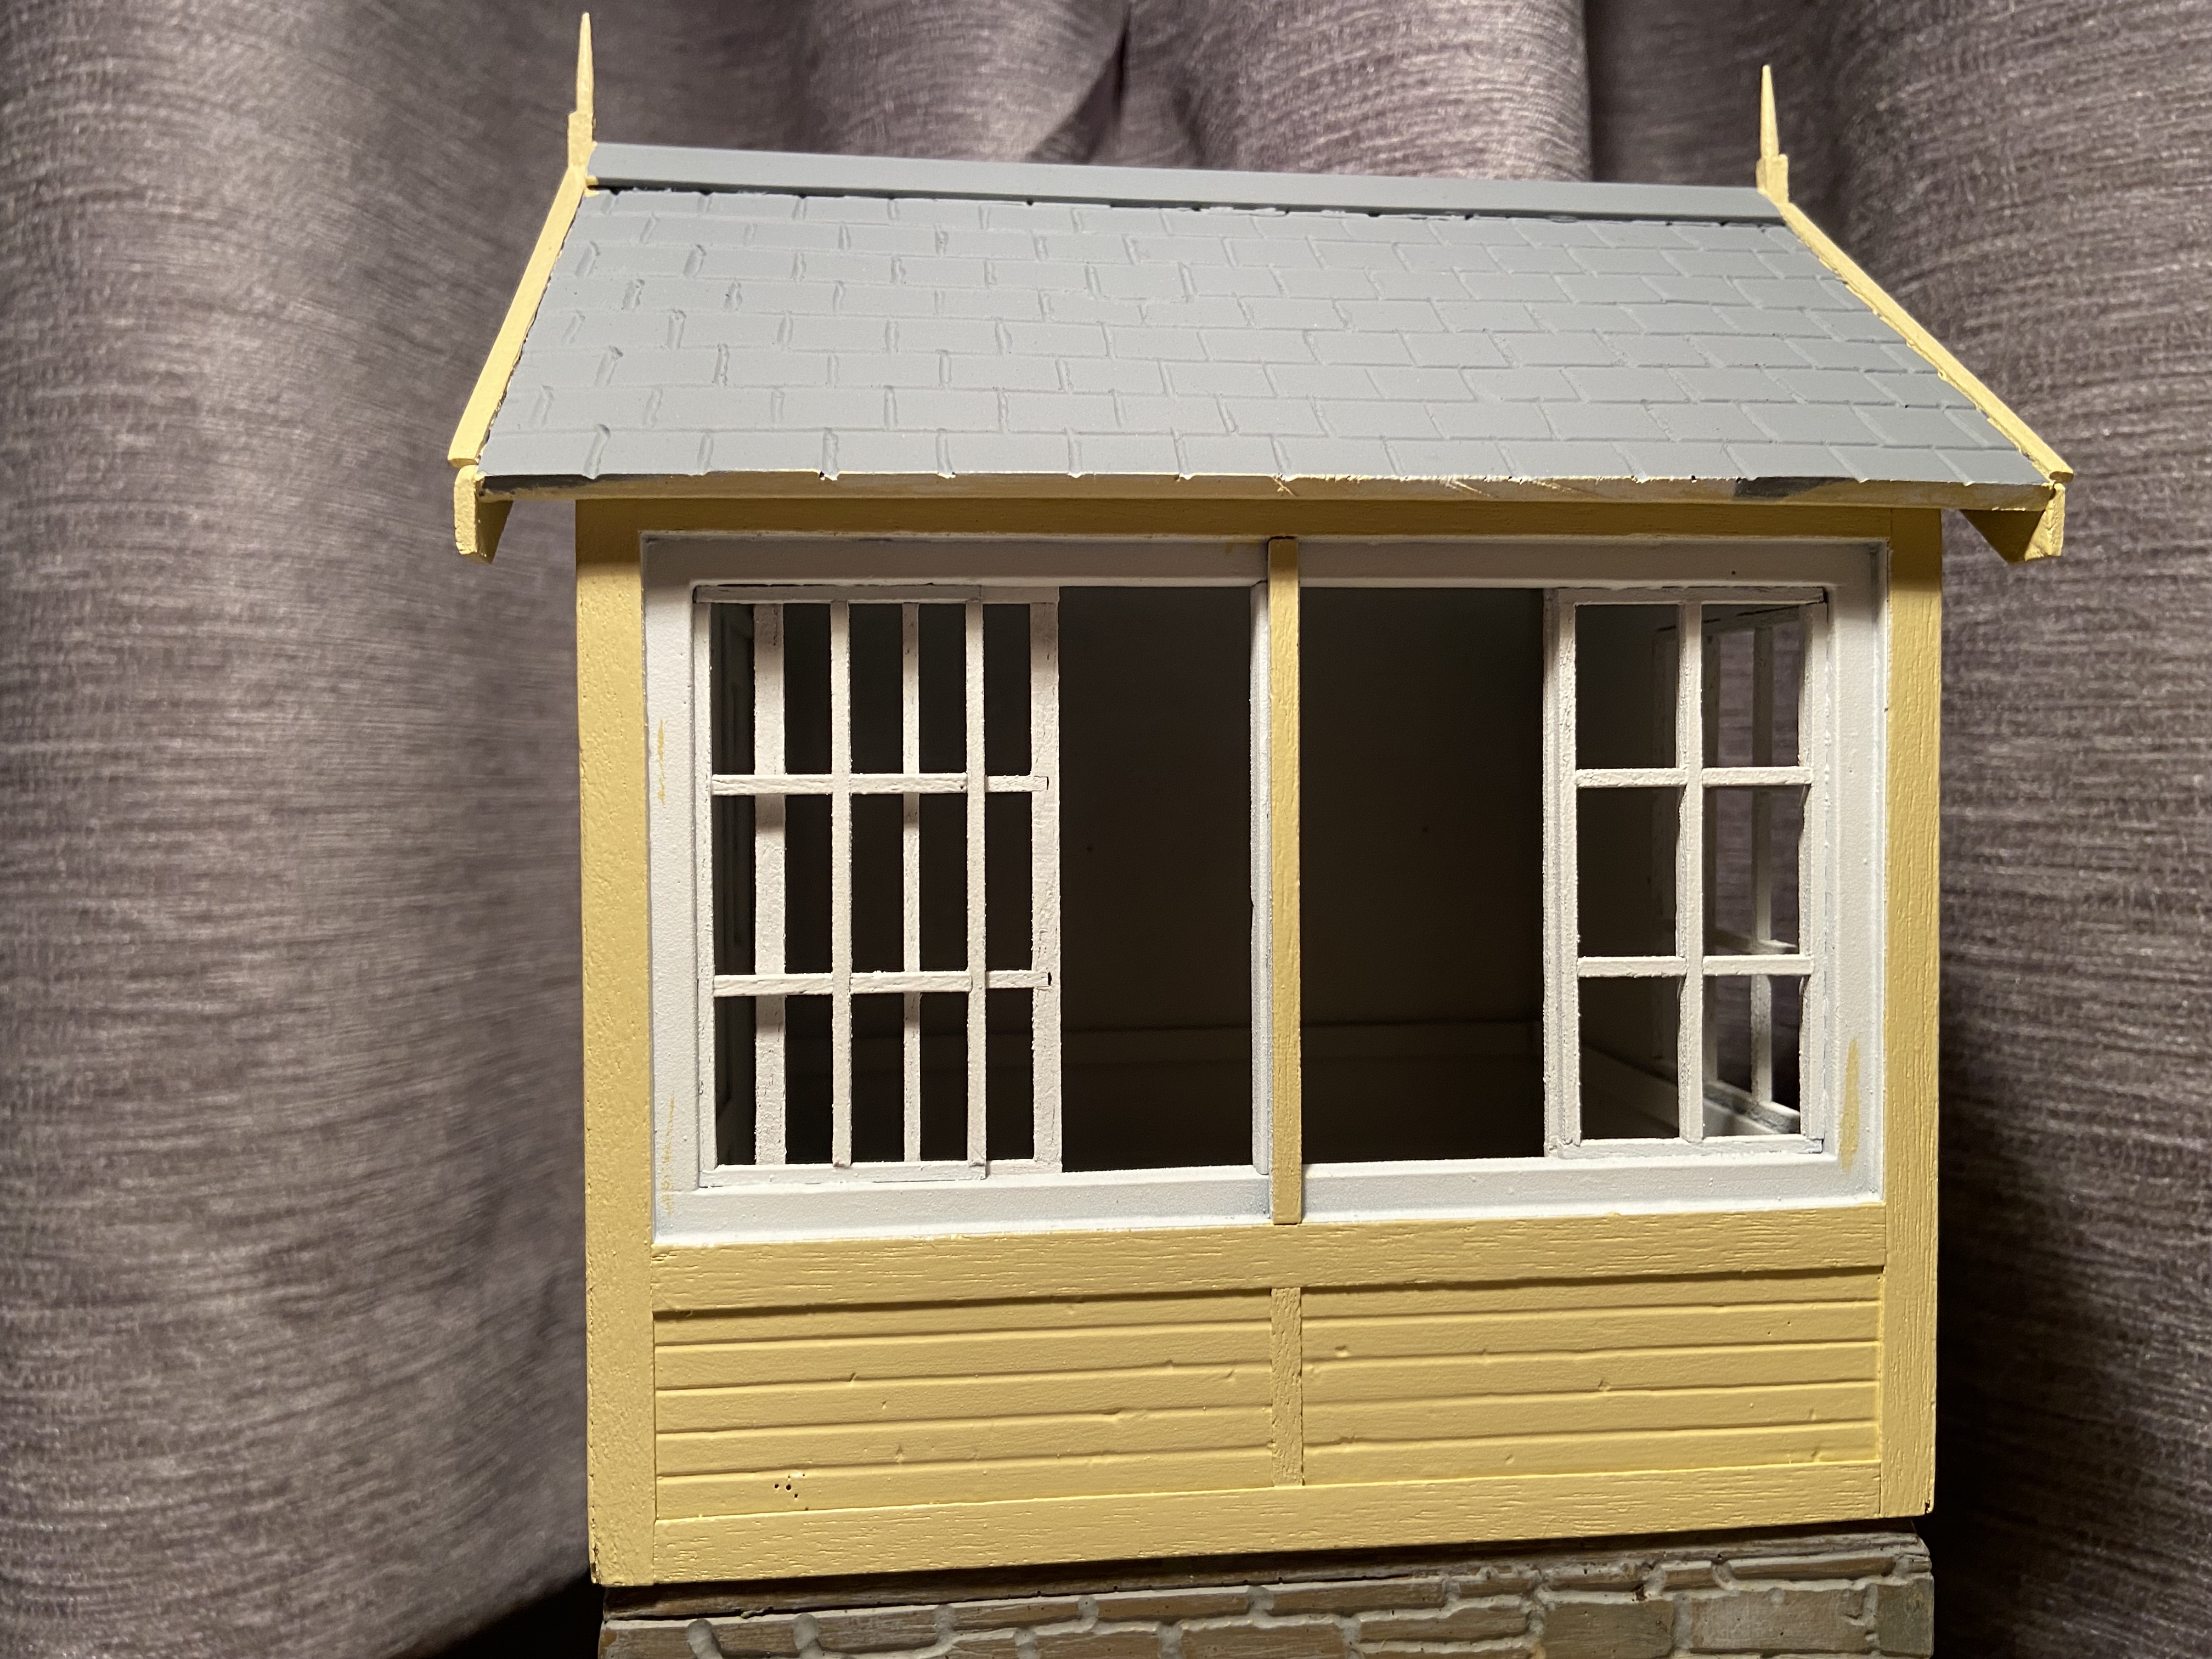
- IMG_3791.jpg (2.35 MiB) Viewed 6734 times
I couldn't help but brave the cold and see what it looked like in situ
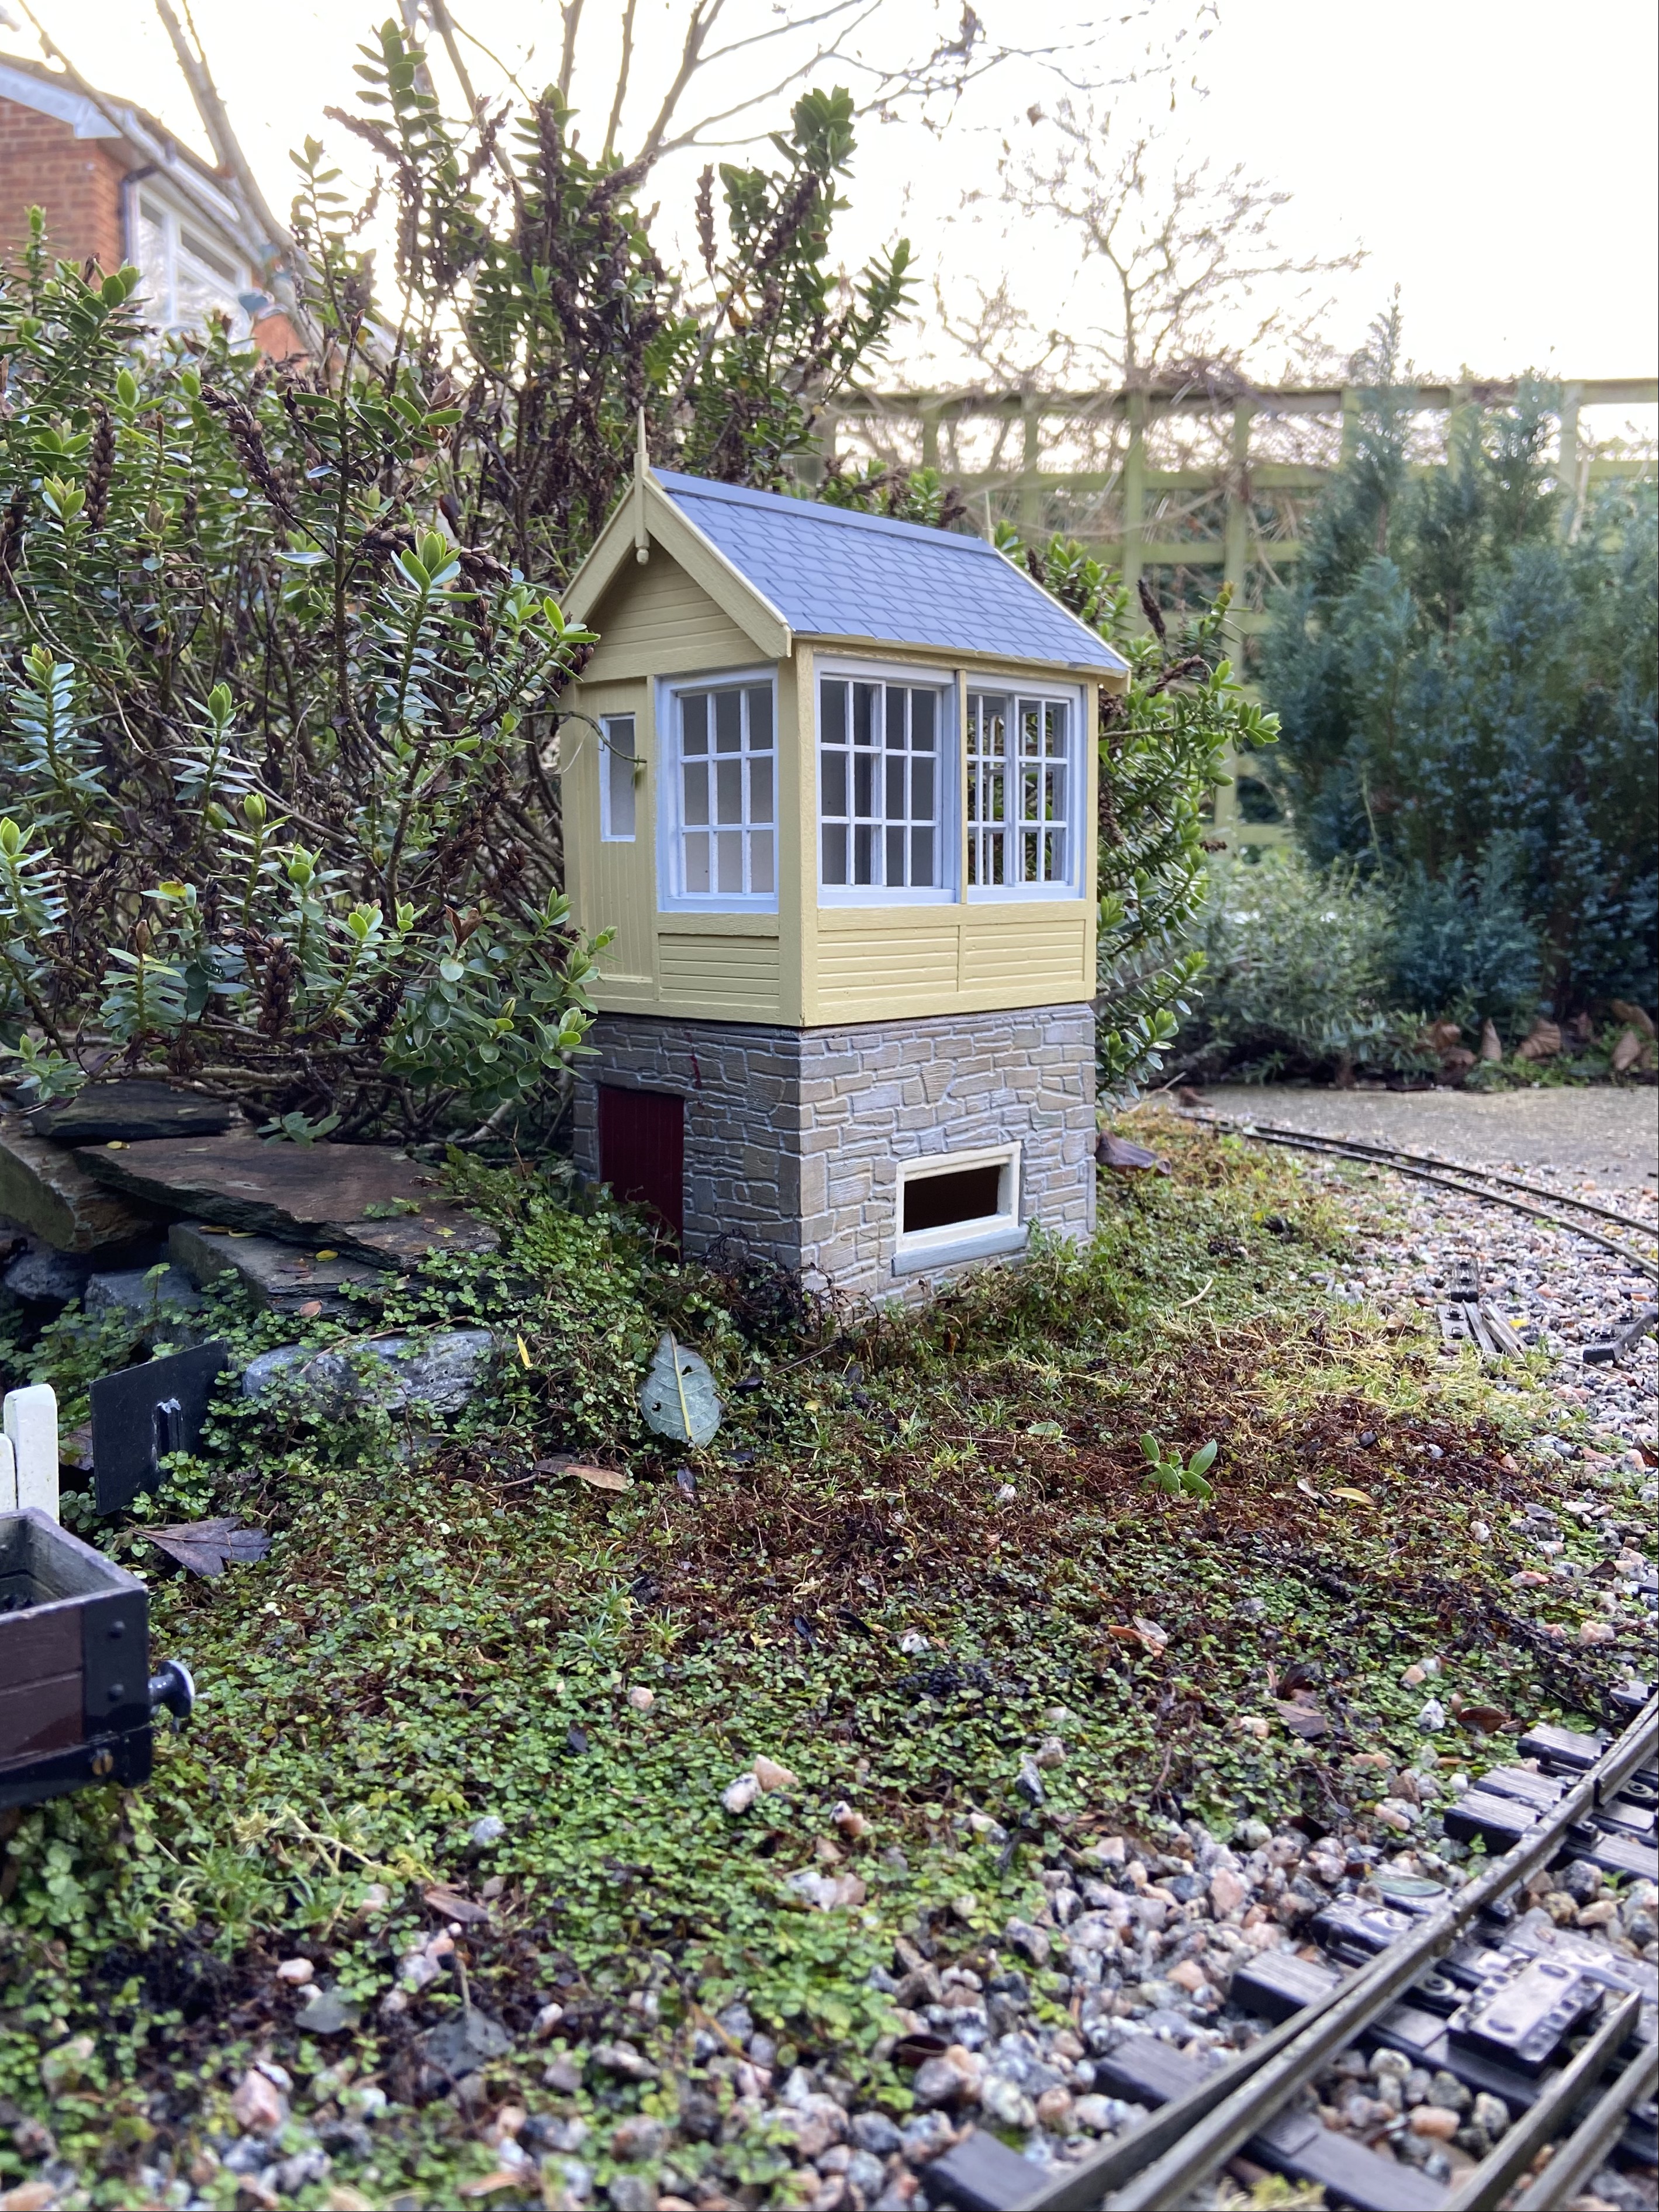
- IMG_3771.jpg (3.24 MiB) Viewed 6734 times
Jobs to do include but are not limited to:
- painting the slate roof
- repainting the door on the base
- giving the windows final coats of white (they're still in the primer)
- adding the steps and replacing the balcony
- do something with the window on the base (Suggestions please! so far all I've done is remove the old frame)
Im not sure how to create a realistic slate effect on the roof so help on that would be appreciated cheers
All the best,
George
Re: Signal box refurbishment
Posted: Fri Jan 07, 2022 11:48 pm
by Peter Butler
Superb job George, it looks so much better then the original and you have thought about the potential problems of winter weather, so should be OK.
I can't offer a 'best way' to complete your model, just do what satisfies you and that is sufficient. You might teach us something new?
Re: Signal box refurbishment
Posted: Sat Jan 08, 2022 5:45 am
by philipy
Getting better and better.
For the slates, I'd give it and all ver wash of whatever base colour you want, no need yo worry about streaks if they occure. Then add small amounts of succesively lighter or darker colour to the base paint and pick out a few random tiles with each variation. Then finally, once it is all totally dry, go over the whole lot with a thin wash of very dark, (not quite black ) paint. this will find the tile joints and just even everything to look like years of engine soot.
Re: Signal box refurbishment
Posted: Sat Jan 08, 2022 8:39 am
by Jimmyb
I find applying the paint (over a good colour base coat) with a sponge gives a good effect, a couple of colours that a similar, and then pick out a couple of slates in these colours.
Re: Signal box refurbishment
Posted: Sat Jan 08, 2022 10:57 am
by Trevor Thompson
That signal box is looking very nice.
Trevor
Re: Signal box refurbishment
Posted: Sun Jan 09, 2022 1:31 pm
by ge_rik
Corrrr ..... That's lovely! Even more so close-up!
Rik
Re: Signal box refurbishment
Posted: Sun Jan 09, 2022 2:07 pm
by Peter Butler
One tip I can add about finishing your model is not to use a lacquer or varnish over any paint surface left out in the rain. I learned, to my cost, that water will penetrate and form a misty layer between paint and top coat which can't escape, leaving no option but to re-paint.
Re: Signal box refurbishment
Posted: Wed Jan 26, 2022 4:50 am
by Old Man Aaron
Beautiful refurb sir.

I'd just throw some mullions in the bottom window and leave it as a fixed assembly.