Time to build a railway...but where?

A place for the discussion of garden railways and any garden style/scale portable and/or indoor layouts
User avatar
FWLR
Driver
Driver
Posts: 4276
Joined: Sat Aug 05, 2017 9:45 am
Location: Preston, Lancashire, UK

Re: Time to build a railway...but where?

Post by FWLR » Thu Mar 01, 2018 9:25 am

Just caught up with all the Notifications Peter left to me 37 in all, left yours to the last, well it was next to last on the list anyway. WOW Peter those buildings are absolutely brilliant, love the Pink Pub, noticed the windows are leaning the same way has the wooden framework...brilliant. The other two are excellent also. :thumbright: :thumbright: :thumbright:
(Not done any work at all on anything for nearly two months with having the viral infection in my left lung, coughing so much it has kept me awake, so consequently no energy at all.)

You are so lucky to have that Slaters kit to build Peter, I need a good friend like that ;) ;) ;)

User avatar
GTB
Driver
Driver
Posts: 1559
Joined: Sat Mar 05, 2011 2:46 pm
Location: Australia

Re: Time to build a railway...but where?

Post by GTB » Thu Mar 01, 2018 3:41 pm

Peter Butler wrote: Wed Feb 28, 2018 4:11 pm As for the 'sausages', they show up particularly when attempting to assemble parts with nuts and bolts..... 14BA! I never heard of 14BA before let alone tried to handle them. They are so tiny I can't see nuts held between finger and thumb, they disappear into the skin.
BA threads were originally developed for scientific instrument use and the smallest size in the range is 25BA, which is ~0.25mm in dia., with an ~0.4mm hex head. How they make a thread that size, or a spanner, I've no idea........ :shock:

16BA is the smallest BA thread now available commercially, but I've never found a need for anything smaller than 10BA when building locos, even when I was working in HO scale. I do find the reduced hex head sizes useful in garden scale though and often use 10BA screws with a 12BA size hex head for cosmetic reasons.

I prefer to use nut drivers for small hex screws/nuts and for handling 8BA and smaller I put a blob of blu-tack in the hex socket of the nut driver. Easily replaced when it gets dirty and it picks up the nut then keeps it steady until the thread engages. I've lost a lot less small BA hex head screws and nuts on the workshop floor since I started using the blu-tack.

My workshop floor is smooth concrete painted a light grey and it gets swept regularly, but somewhere down there are enough BA fasteners to build another loco...... :roll:

Regards,
Graeme

User avatar
Peter Butler
Driver
Driver
Posts: 5232
Joined: Sun Sep 09, 2012 10:33 pm
Location: West Wales

Re: Time to build a railway...but where?

Post by Peter Butler » Thu Mar 01, 2018 6:32 pm

Slaters do recommend using a 14BA spanner but I failed to find one of any description on eBay. Fortunately I have managed to fit the bolts using the method described earlier and there are few left to fit.
I am now getting on quite well with the remainder of the kit and the chemical blacking for brass which I ordered has arrived.
The best things in life are free.... so why am I doing this?

User avatar
GTB
Driver
Driver
Posts: 1559
Joined: Sat Mar 05, 2011 2:46 pm
Location: Australia

Re: Time to build a railway...but where?

Post by GTB » Fri Mar 02, 2018 12:06 pm

Peter Butler wrote: Thu Mar 01, 2018 6:32 pm Slaters do recommend using a 14BA spanner but I failed to find one of any description on eBay. Fortunately I have managed to fit the bolts using the method described earlier and there are few left to fit.
Fairly typical of UK kit instructions in my experience.................

Roundhouse have the decency to include BA spanners in their chassis kits, but like the BA spanner sets on Ebay, they stop at 11BA.


Eileens Emporium mostly cater for the P4 brigade and list BA spanners from 8BA down to 16BA, which look like they are laser cut. They also list nut drivers down to 16BA.

https://eileensemporium.com/index.php?o ... Itemid=189

Graeme

User avatar
Peter Butler
Driver
Driver
Posts: 5232
Joined: Sun Sep 09, 2012 10:33 pm
Location: West Wales

Re: Time to build a railway...but where?

Post by Peter Butler » Sat Mar 03, 2018 9:48 pm

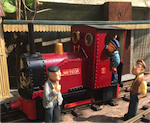
Steaming ahead (sorry)..... I have 'engineered' the cranks and valve gear to slide and pivot well, completed soldering the etched brass components, which raised an issue with some small parts already fixed in place with epoxy, that is, they all fell off! The 'brass black' has been applied but, despite all the preparation work, I'm not best pleased with the result. However, it is just a primer so paint will cover any areas of exposed brass. I have cleaned all the brass body parts and used an etch primer, followed by matt black spray paint and I'm quite satisfied with that....
IMG_5259.JPG
IMG_5259.JPG (94.6 KiB) Viewed 3699 times
The bunker has a large brass lamp positioned top centre and I spent a long time polishing it before spraying, so here it is still masked....
IMG_5260.JPG
IMG_5260.JPG (74.2 KiB) Viewed 3699 times
Unfortunately, due to poor indoor lighting the colour is not a true likeness, but you get the idea.
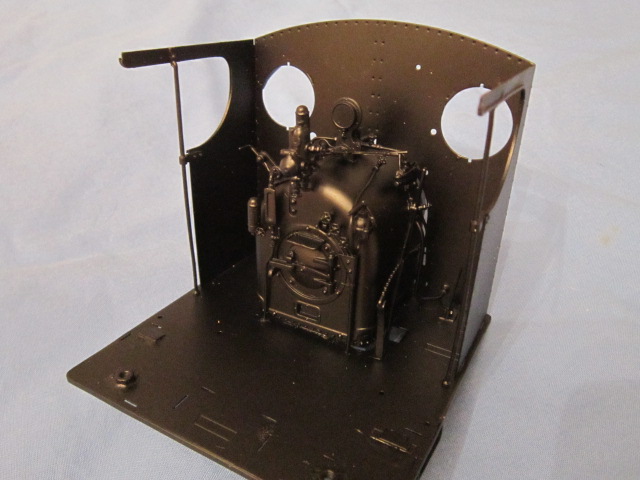
Just to show how mad this kit is, the underside of the cab is fully detailed where no-one will see it.....
IMG_5264.JPG
IMG_5264.JPG (93.31 KiB) Viewed 3699 times
The resin tanks are held in place with a fancy brass cage and the batteries are expected to fit in the space between them and across the boiler. Oh no they don't!!!!! The motor supplied is 12v and I want to fit 10 AA rechargeable batteries in there.... a single pack will not go in so I have ordered a 4 battery pack and 6 single batteries with solder tags to make up into a configuration (not available) which I think will fit. The three packs will then be connected and should work well.
So far I am struggling to think where to fit the switch and re-charge socket before all the body parts are permanently attached.
All good fun for a first attempt at brass loco building...... an 'entry level' kit it aint!!!
Edit.... forgot to include the picture of the tanks and frame.....
IMG_5256.JPG
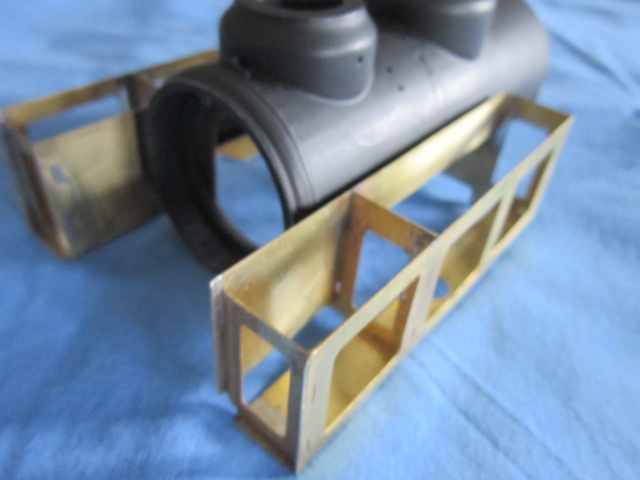
IMG_5256.JPG (82.98 KiB) Viewed 3698 times
The best things in life are free.... so why am I doing this?

User avatar
LNR
Driver
Driver
Posts: 1542
Joined: Sat Feb 27, 2016 5:26 am
Location: Australia

Re: Time to build a railway...but where?

Post by LNR » Sun Mar 04, 2018 5:17 am

Glad your enjoying the build Peter, the cab certainly looks really well done. You'll be able to take pit shots with cab under floor detail like that!
Grant.

User avatar
FWLR
Driver
Driver
Posts: 4276
Joined: Sat Aug 05, 2017 9:45 am
Location: Preston, Lancashire, UK

Re: Time to build a railway...but where?

Post by FWLR » Sun Mar 04, 2018 9:48 am

Some work involved with it Peter, but I’am sure with your eye for detail it will be fabulous.... :thumbright: :thumbright:

User avatar
Peter Butler
Driver
Driver
Posts: 5232
Joined: Sun Sep 09, 2012 10:33 pm
Location: West Wales

Re: Time to build a railway...but where?

Post by Peter Butler » Sun Mar 04, 2018 10:06 pm

Progress with paintwork today, more bodywork primed.....
IMG_5267.JPG
IMG_5267.JPG (85.71 KiB) Viewed 3577 times
A decision on where to locate the on/off switch has been made. It had to be somewhere accessible (so inevitably it would be seen) but not too obtrusive. I hope this will be a good choice where it is partially hidden by the huge lamp and when painted black should disappear....
IMG_5266.JPG
IMG_5266.JPG (89.33 KiB) Viewed 3577 times
The recharge point is now inside the tank filler, the cap will be removable and simply plugs in. I thought of making a hinged lid but it wouldn't be strong enough to cope with repeated use.
IMG_5265.JPG
IMG_5265.JPG (78.62 KiB) Viewed 3577 times
A pair of 3D printed driver figures are on order from Design/Scan/Print and a Rx65B receiver from RC Trains.
Not over yet but getting there!
The best things in life are free.... so why am I doing this?

jim@NAL
Driver
Driver
Posts: 1115
Joined: Sun Sep 23, 2012 11:01 am
Location: haverhill suffok

Re: Time to build a railway...but where?

Post by jim@NAL » Sun Mar 04, 2018 10:21 pm

Looking good peter

User avatar
FWLR
Driver
Driver
Posts: 4276
Joined: Sat Aug 05, 2017 9:45 am
Location: Preston, Lancashire, UK

Re: Time to build a railway...but where?

Post by FWLR » Mon Mar 05, 2018 6:47 am

Looking great Peter, is it Modelu you are getting your figures from. :thumbright:

User avatar
Peter Butler
Driver
Driver
Posts: 5232
Joined: Sun Sep 09, 2012 10:33 pm
Location: West Wales

Re: Time to build a railway...but where?

Post by Peter Butler » Mon Mar 05, 2018 10:41 am

Hi Rod, www.designscanprint3d.co.uk ... Sometimes they advertise here on the Forum. The figures are excellent in good poses and well priced.
If you look on their site and open 'Gallery' you will see some of my work there.
The best things in life are free.... so why am I doing this?

User avatar
FWLR
Driver
Driver
Posts: 4276
Joined: Sat Aug 05, 2017 9:45 am
Location: Preston, Lancashire, UK

Re: Time to build a railway...but where?

Post by FWLR » Mon Mar 05, 2018 10:56 am

Thanks Peter, I have bookmarked the site. Your work is brilliant has usual, can I also ask where did you get your flesh paint from please, I have tried to mix the colours because I can’t find any online, but I have to say it didn’t come out looking anything like flesh coloured ..... :roll: :roll: :lol: :lol:

User avatar
Peter Butler
Driver
Driver
Posts: 5232
Joined: Sun Sep 09, 2012 10:33 pm
Location: West Wales

Re: Time to build a railway...but where?

Post by Peter Butler » Mon Mar 05, 2018 2:42 pm

I use Citadel acrylic paints from Games Workshop for all my models, indoors and out. The flesh colour is called.... 'Cadian Fleshtone' and does what it says on the tin! Sometimes I use a little white to lift certain facial areas or red to warm-up cheeks.
You can get too fussy with this as they are generally seen from a distance.
The best things in life are free.... so why am I doing this?

User avatar
ge_rik
Administrator
Administrator
Posts: 6548
Joined: Sun Oct 25, 2009 10:20 pm
Location: Cheshire
Contact:

Re: Time to build a railway...but where?

Post by ge_rik » Mon Mar 05, 2018 5:25 pm

Really clever the way you've secreted the switch and charge socket.
Looking forward to seeing the end product.

Rik
------------------------
Peckforton Light Railway - Blog Facebook Youtube

User avatar
FWLR
Driver
Driver
Posts: 4276
Joined: Sat Aug 05, 2017 9:45 am
Location: Preston, Lancashire, UK

Re: Time to build a railway...but where?

Post by FWLR » Tue Mar 06, 2018 8:31 am

Thanks Peter, do you use a base coat, something like what is explained on their site or just paint it as is, and thinned down a bit.

User avatar
Peter Butler
Driver
Driver
Posts: 5232
Joined: Sun Sep 09, 2012 10:33 pm
Location: West Wales

Re: Time to build a railway...but where?

Post by Peter Butler » Tue Mar 06, 2018 10:54 am

I spend some time preparing the surface of the figures with files and wet & dry before spraying with grey plastic primer. This helps to smooth out the print process and gives an adequate base for the paint, which I use direct from the pot.
The best things in life are free.... so why am I doing this?

User avatar
Peter Butler
Driver
Driver
Posts: 5232
Joined: Sun Sep 09, 2012 10:33 pm
Location: West Wales

Re: Time to build a railway...but where?

Post by Peter Butler » Tue Mar 06, 2018 11:08 pm

Certainly can't rush this build, every step is a challenge, especially as I am having to build-in extras like the on/off switch which is now mounted on the top centre of the bunker. I am pleased with this as it won't be seen at all when surrounded by lumps of coal.....
IMG_5274.JPG
IMG_5274.JPG (102.82 KiB) Viewed 3941 times
Also, the recharge point is now installed in the water filler on one of the side tanks. I use a standard socket on all my locos and this one fits perfectly. The lead from the charger has a male end and I have butchered one of these to form a locating fastener soldered on the underside of the filler cap.....
IMG_5270.JPG
IMG_5270.JPG (75.43 KiB) Viewed 3941 times
IMG_5271.JPG
IMG_5271.JPG (89.06 KiB) Viewed 3941 times
IMG_5272.JPG
IMG_5272.JPG (81.95 KiB) Viewed 3941 times
Water lifter hose on order from Swift 16.
Spraying separate parts as I go before final assembly in the hope I get a better finish in those hard to get to places.
The best things in life are free.... so why am I doing this?

User avatar
FWLR
Driver
Driver
Posts: 4276
Joined: Sat Aug 05, 2017 9:45 am
Location: Preston, Lancashire, UK

Re: Time to build a railway...but where?

Post by FWLR » Wed Mar 07, 2018 6:56 am

Love all the detailing Peter, your’e working out process for those small little details, like the switch and charging plug is brilliant. :thumbright:

User avatar
markoteal
Trainee Driver
Trainee Driver
Posts: 763
Joined: Mon Apr 18, 2016 6:23 pm
Location: Yorkshire

Re: Time to build a railway...but where?

Post by markoteal » Tue Mar 13, 2018 2:14 pm

Great work Peter - I also have converted from spraying my loco builds at the end once built to now spraying in bits as I build - its odd how you find these things out - just makes you be extra careful when glueing things together (he keeps reminding himself as a mantra as he prepares to build his painted hunslet cab and attach to the finished chassis and boiler!)
Where did I put that uncoupler?

User avatar
Peter Butler
Driver
Driver
Posts: 5232
Joined: Sun Sep 09, 2012 10:33 pm
Location: West Wales

Re: Time to build a railway...but where?

Post by Peter Butler » Wed Mar 14, 2018 11:17 pm

We are getting on to the fiddly bit now, the connecting rods etc..... as supplied, the lost wax cast rods will not work! I have tried all ways to get them to fit and rotate but only achieved 50% of that. So, having spent several hours with a friend in his well equipped workshop we have now produced working rods, phew!!!
IMG_5287.JPG
IMG_5287.JPG (104.84 KiB) Viewed 3849 times
Lets not get carried away.... still the valve gear to assemble yet and potential problems to face with that too?
Meanwhile I have been able to continue with the cosmetic build, something I am now quite enjoying. One of the tasks I put off was curving the roof sheet to match the very flimsy framework I had already assembled from the etched brass fret. When I asked Diane whether I could use her rolling pin she thought I was going to make pastry..... No chance.... anyway her pastry is so good I could never compete!
Fortunately the curve was easily produced and then came the soldering of the roof to the frame. In the event no problem so I am well pleased that is done.....
IMG_5290.JPG
IMG_5290.JPG (86.73 KiB) Viewed 3849 times
The boiler is now permanently attached to the cab, domes and chimney fitted and tank support frames in place....
IMG_5286.JPG
IMG_5286.JPG (101.96 KiB) Viewed 3849 times
Next will be to stuff the 10 AA rechargeable batteries inside the boiler/tank assembly and begin wiring...... Oh, I almost forgot..... finish the valve gear!
The best things in life are free.... so why am I doing this?

Post Reply

Who is online

Users browsing this forum: No registered users and 4 guests