Building the Fairfield Railway

A place for the discussion of garden railways and any garden style/scale portable and/or indoor layouts
User avatar
bungle80a
Trainee Driver
Trainee Driver
Posts: 516
Joined: Sun Jan 20, 2008 12:01 am
Location: Fife, Scotland
Contact:

Building the Fairfield Railway

Post by bungle80a » Thu Apr 24, 2008 11:02 pm

I have been asked to help build a garden railway, and this thread will chronicle the construction. The 'days' at the beginning of each post are the days I have spent working on the railway. Although this is day 1, a couple of other days work may (I cant remember, I am editing this on day 24ish) have been carried out before hand!?!

Day 1: Where to start?!

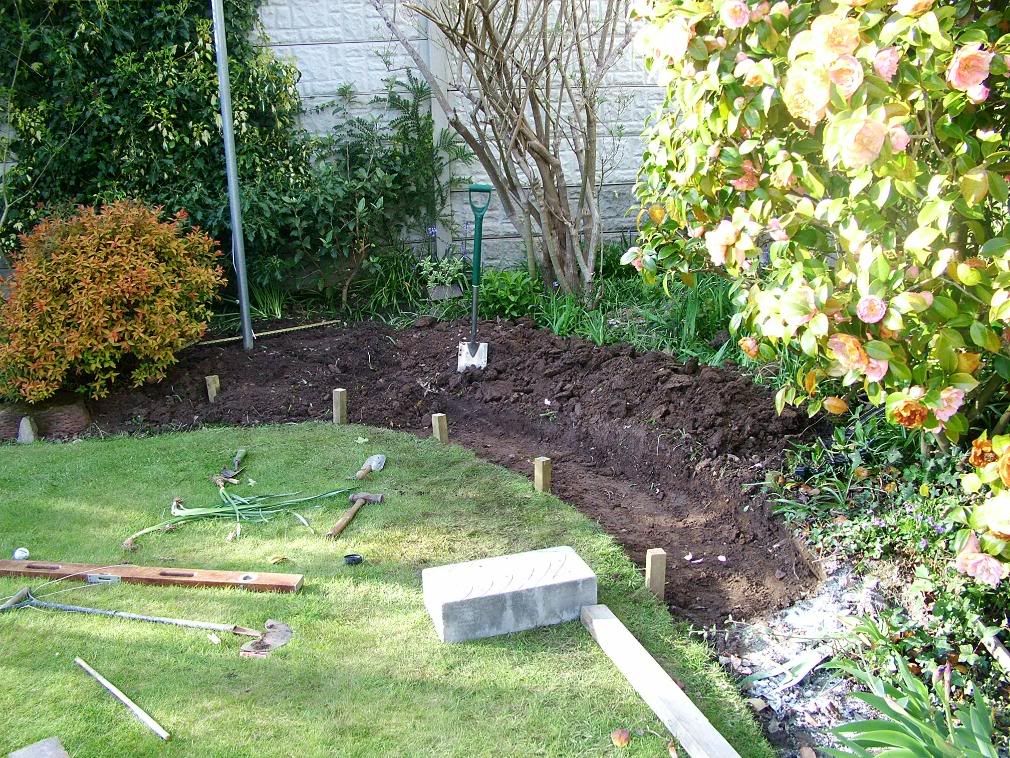
Fortunately, the datum point was already set, as the owner had set it last summer, along with starting to dig a trench, but this has partially refilled with soil.

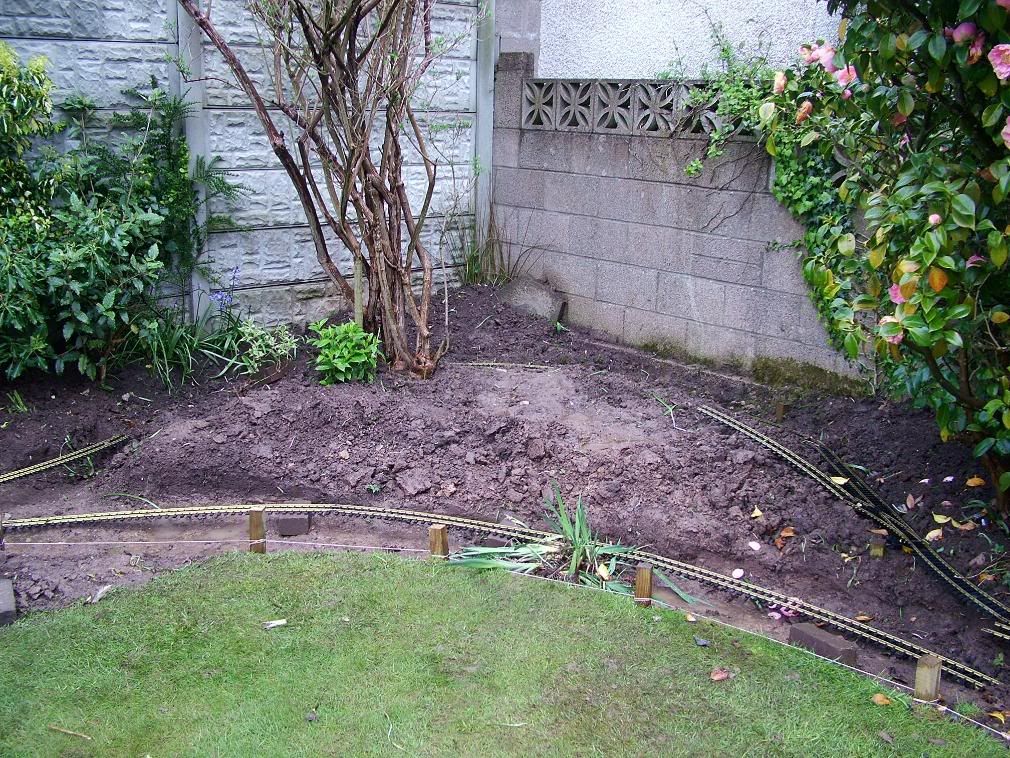
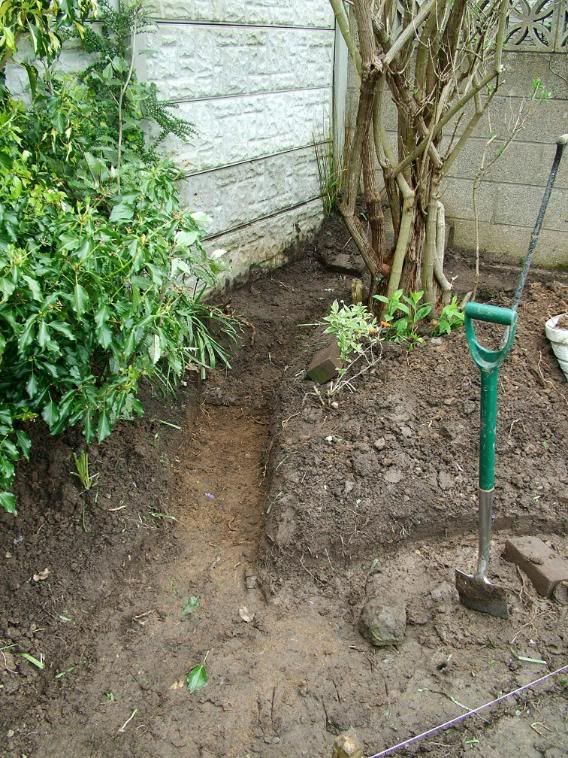
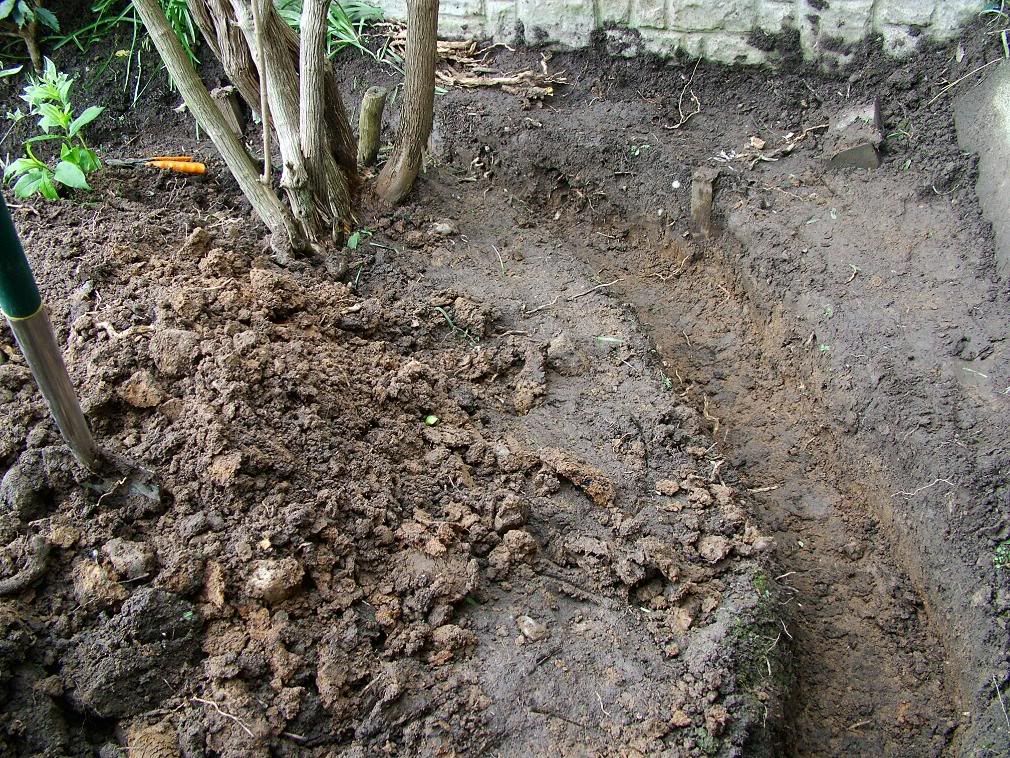
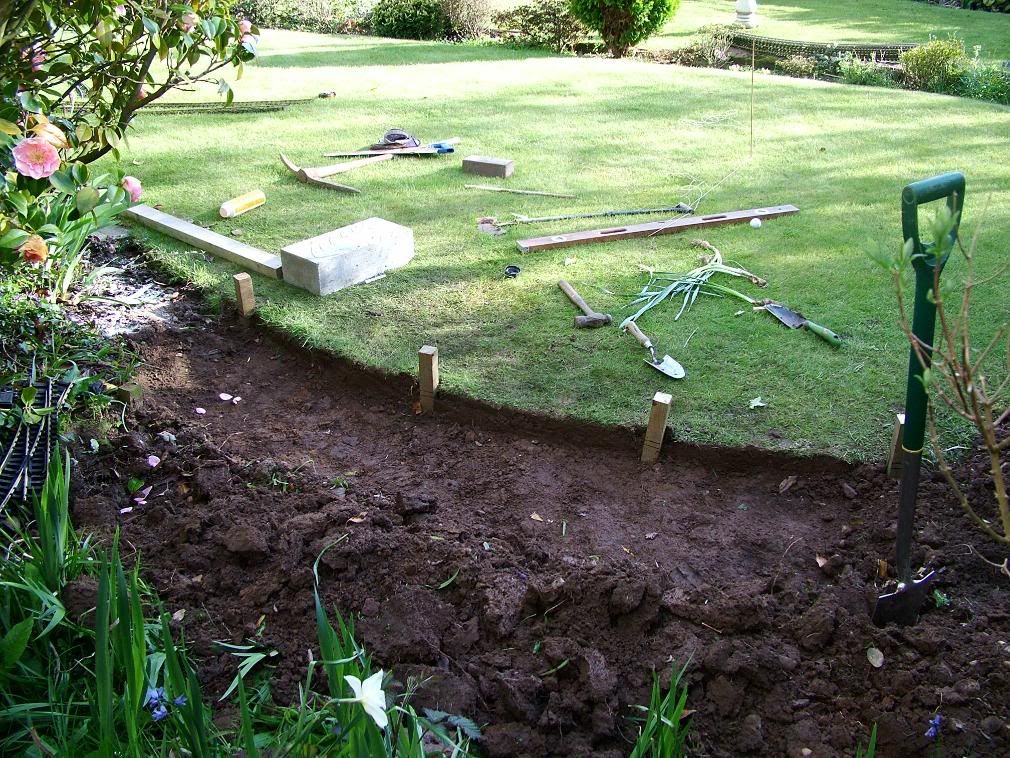
So today involved moving some big heavy edging stones from round the top end of the lawn, cutting a nice curve in the lawn to match that of the blocks that will be used as the trackbed, removing the turf, knocking some pegs in to set a level and form a line to show where the front of the blocks will be positioned. Oh, and then started to dig the trench for the hardcore, mortar and thermalite blocks.

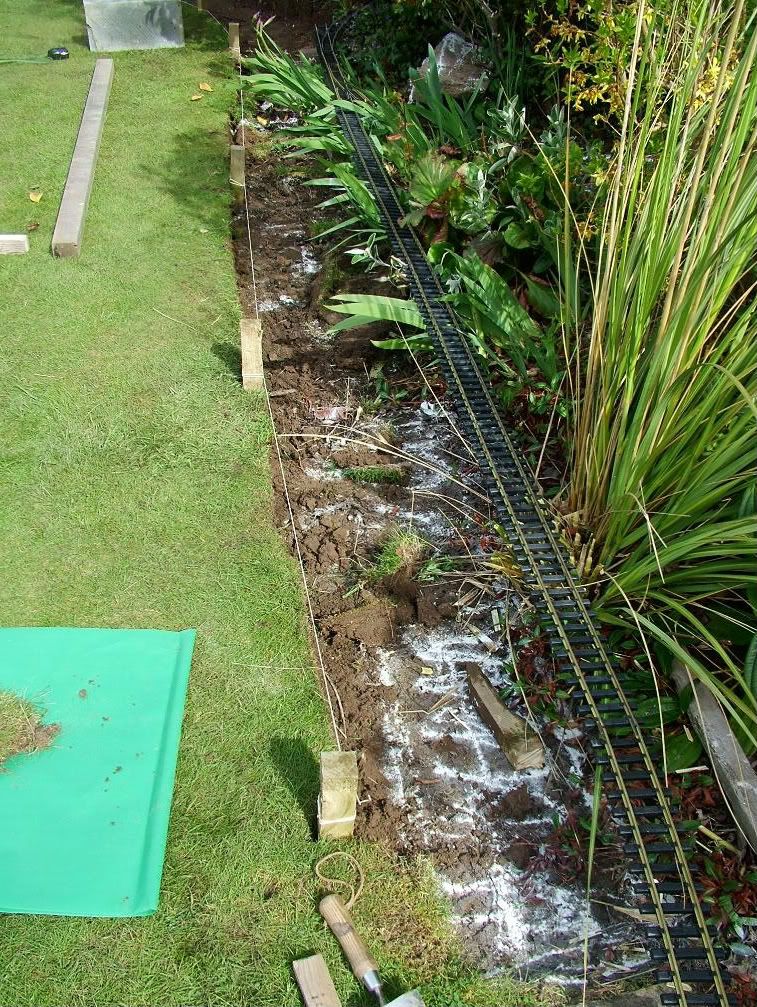
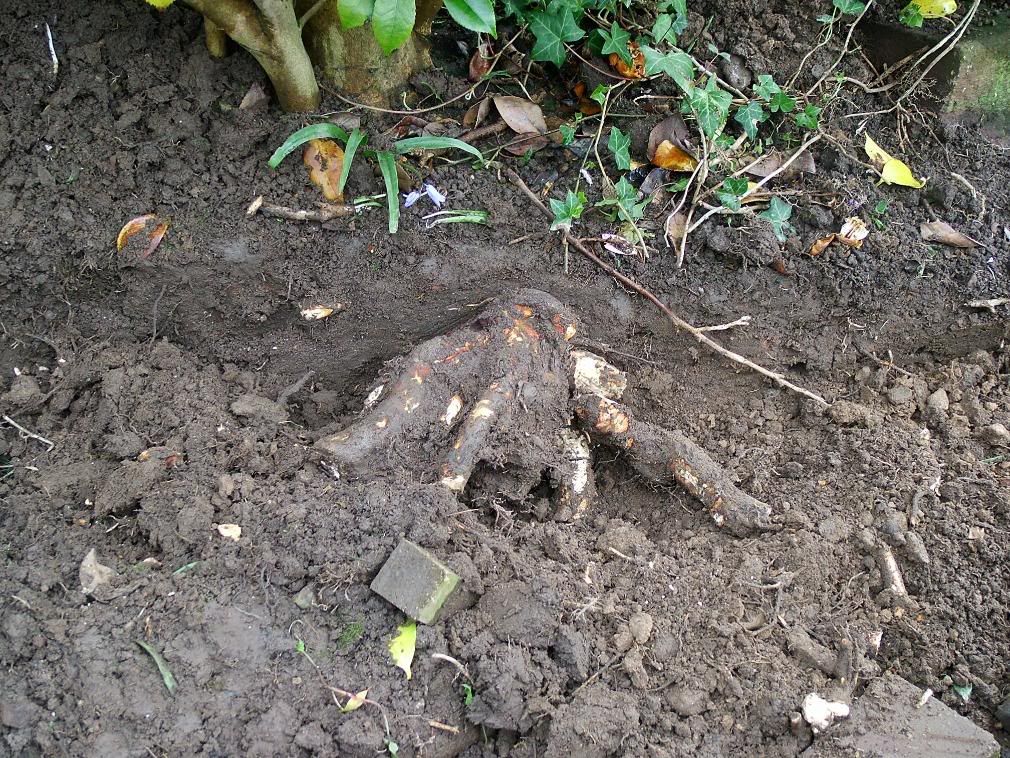
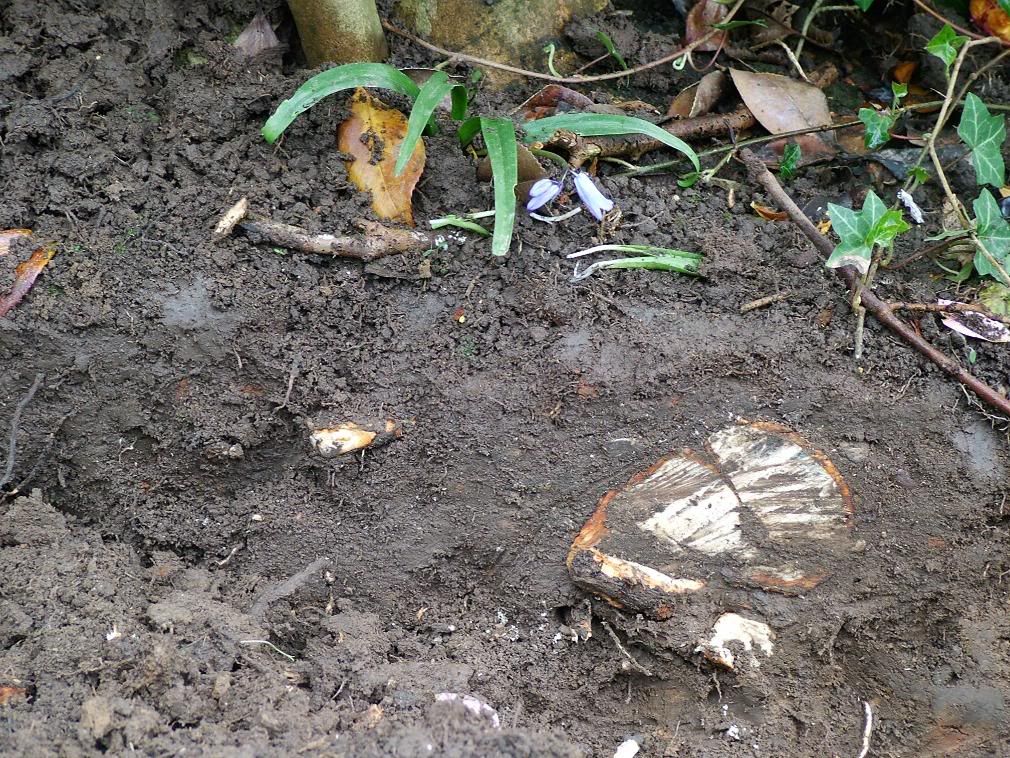
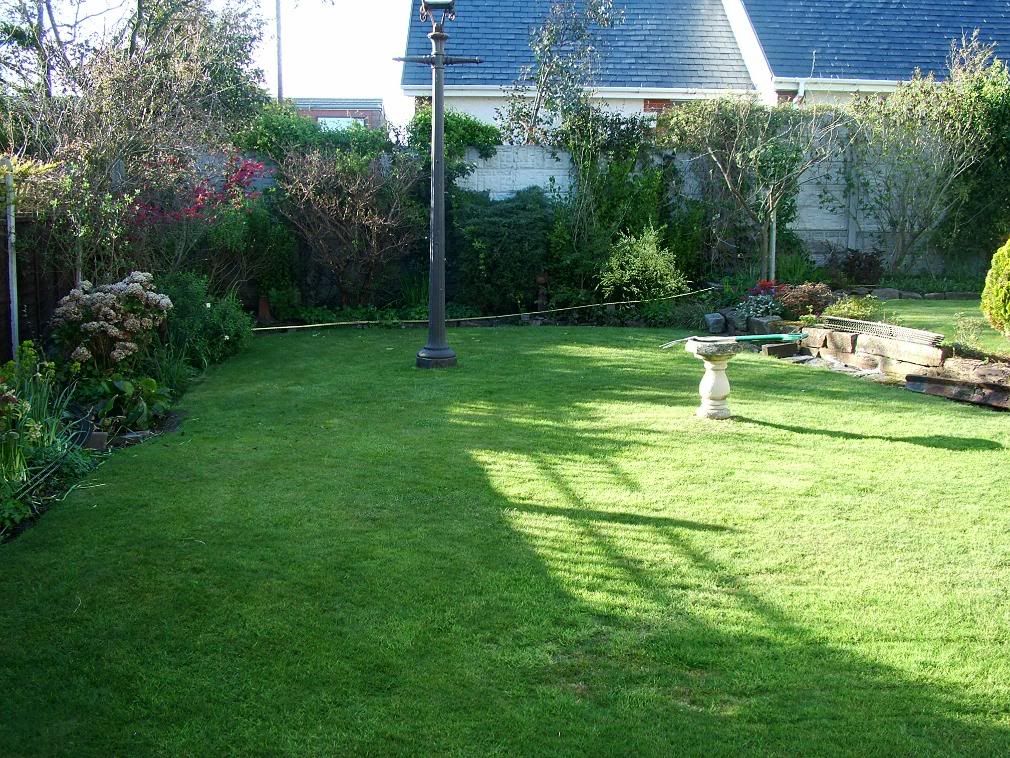
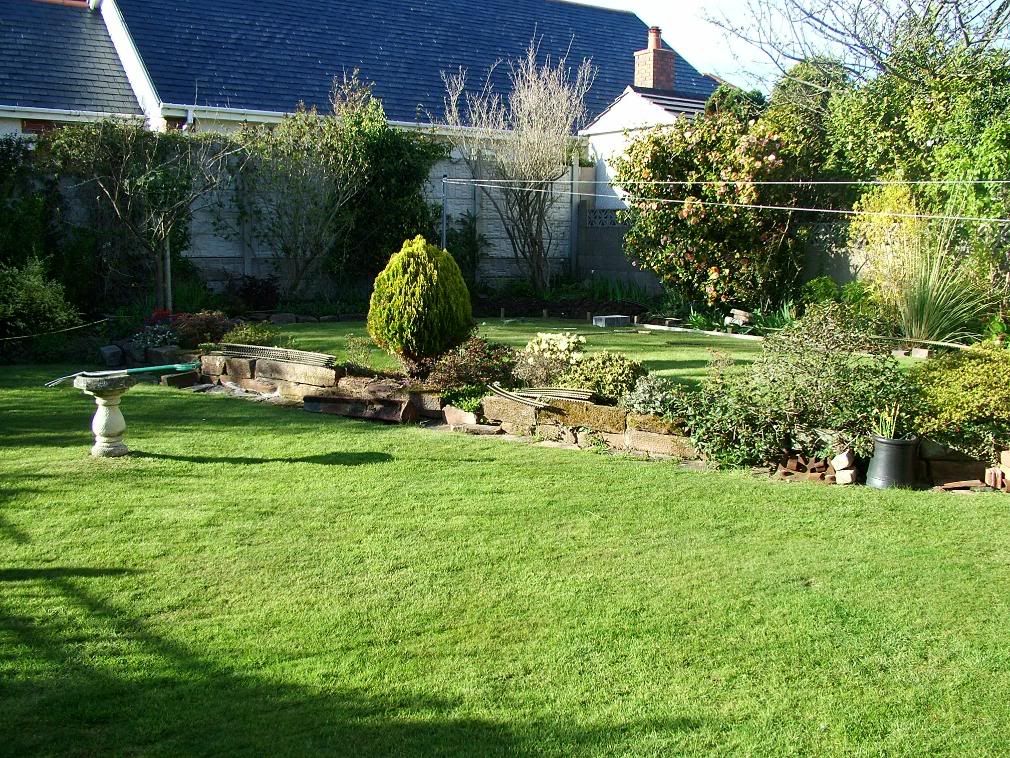
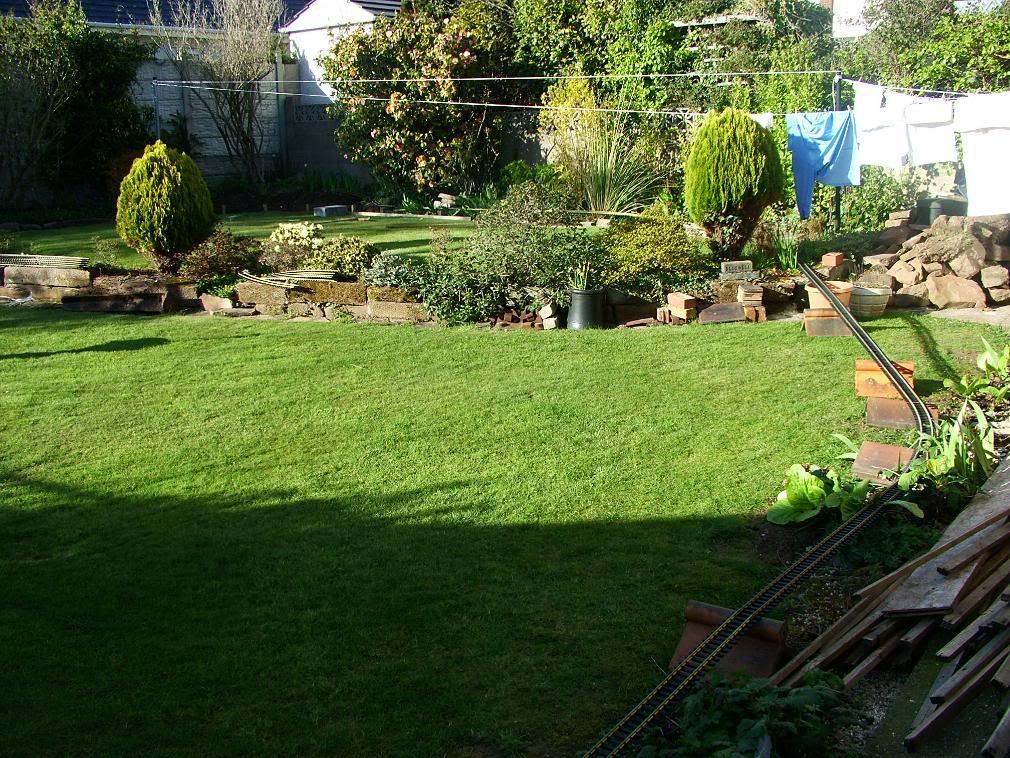
And heres some piccies of where I am doing the work. The first 3 images are a kind of pan from left to right looking up the garden from the house round to looking across the back of the house. The area I am currently working on is in the top corner shown in the 2nd picture.
Image
Image
Image

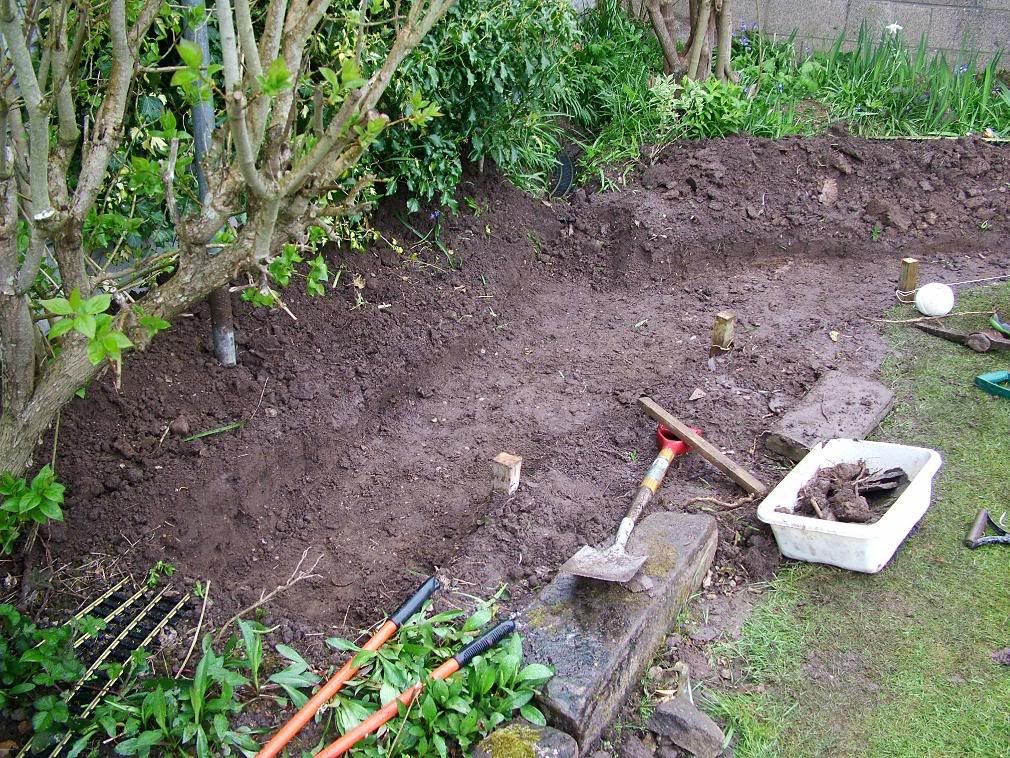
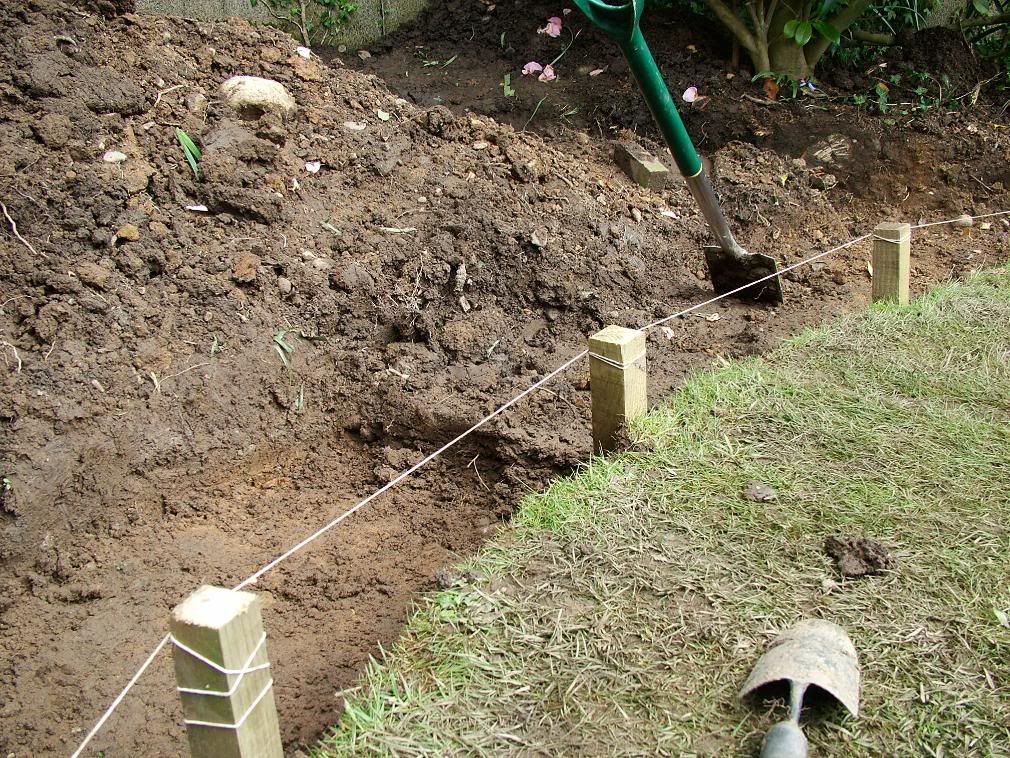
This image shows the are by the end of Day 1. The pegs have all ben levelled and represent the top level of the blocks. Rond the back of the tree is a looop and this is the only section of line that doesn't conform to the 10ft min radius, but this is not part of the main running line!!!
Image

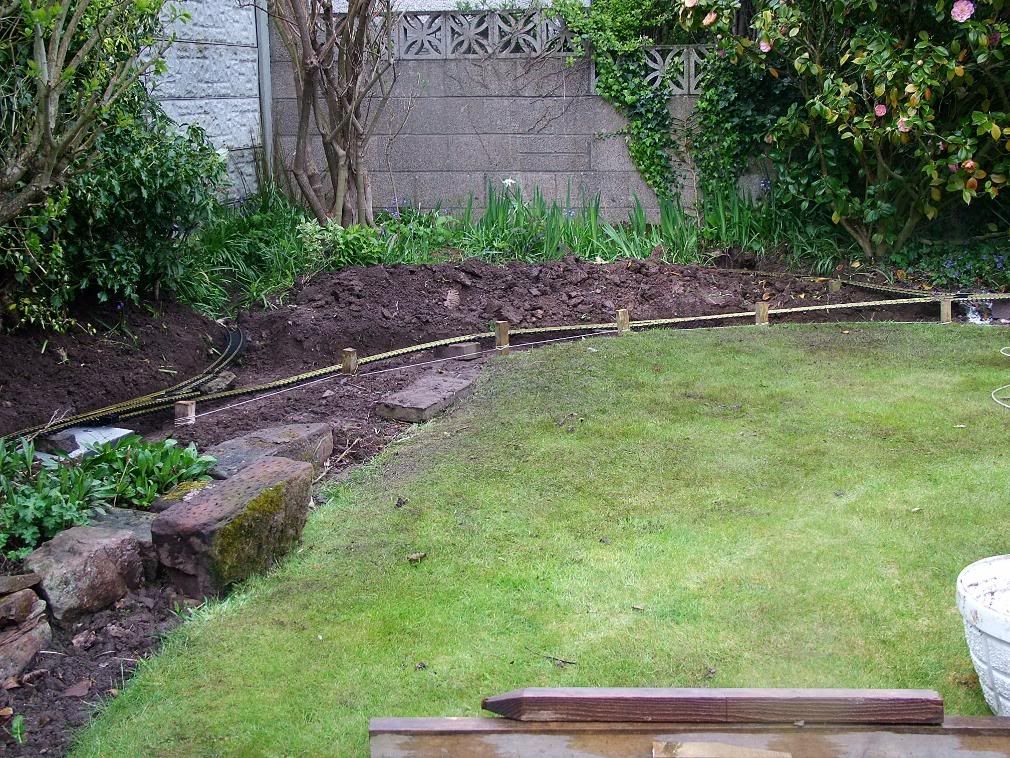
This piccy is taken from the back lookin back towards the house. The lines on the pegs are ther to show the level to which the hardcore needs filling up (bottom line) and the othe line (about 1/2 inch up) is the bottom of the block. The bit in between will be the mortar level.
Image

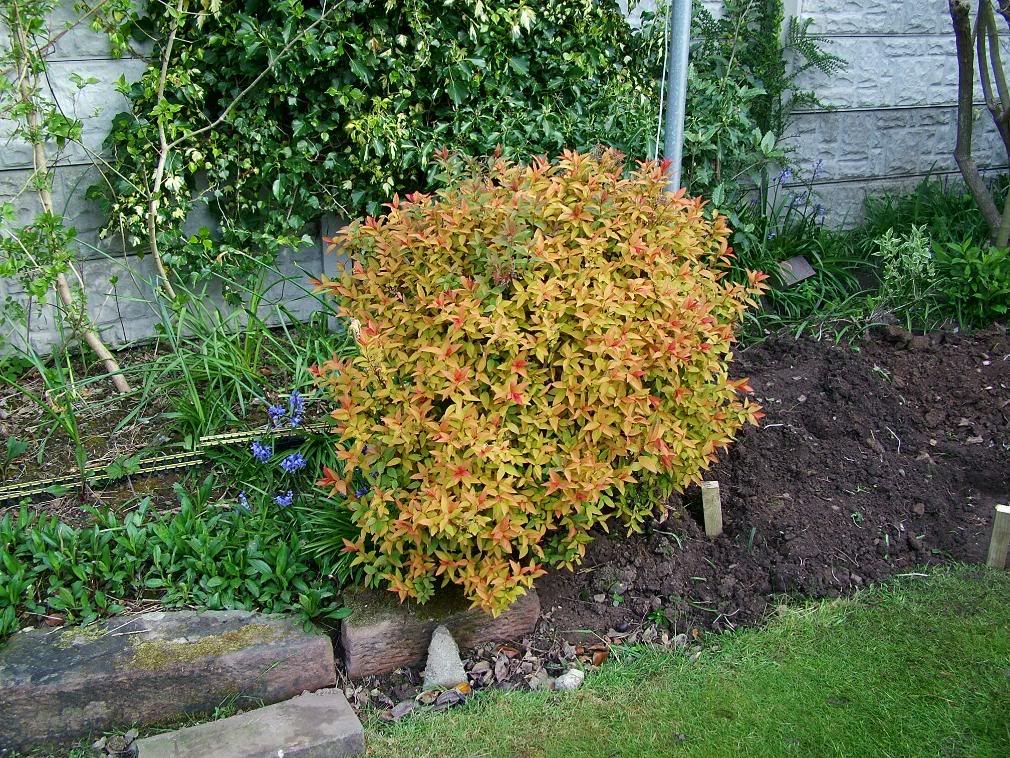
Tomorrows jobs include removal of the reddy green bush on the left of the 4th pic as it is in the way! more pegs then need to be positioned and the trench dug the rest of the way around the curve! Once the front trench has been completed,  the rear trench needs some attention.

Maybe this should have its own thread!?!
Last edited by bungle80a on Sat May 31, 2008 1:13 am, edited 3 times in total.
Bungle80a

"Who has stolen the 3 link coupling off the end of my train?!?!

.....[a few minutes pass hunting down replacements].....

"So, which comedian has uncoupled my entire train?!?!"

User avatar
bungle80a
Trainee Driver
Trainee Driver
Posts: 516
Joined: Sun Jan 20, 2008 12:01 am
Location: Fife, Scotland
Contact:

Post by bungle80a » Thu Apr 24, 2008 11:31 pm

And it has been! Cheers Silly Billy!
Bungle80a

"Who has stolen the 3 link coupling off the end of my train?!?!

.....[a few minutes pass hunting down replacements].....

"So, which comedian has uncoupled my entire train?!?!"

User avatar
ACLR
Retired Director
Retired Director
Posts: 1592
Joined: Wed Oct 17, 2007 6:22 am
Location: Brisbane
Contact:

Post by ACLR » Fri Apr 25, 2008 3:33 am

will be watching this with interest :D

User avatar
Matt
Driver
Driver
Posts: 1978
Joined: Sat Nov 24, 2007 3:56 pm

Post by Matt » Fri Apr 25, 2008 5:21 pm

Looking good.  What gauge track are you using?  I know your engines are 32mm gauge, but the track looks like 45mm gauge.
Garden Railways-best hobby in the world.

steamyjim
Retired Director
Retired Director
Posts: 1210
Joined: Tue Oct 16, 2007 9:19 pm

Post by steamyjim » Fri Apr 25, 2008 5:48 pm

Very nice!!!!

Well done :D

User avatar
bungle80a
Trainee Driver
Trainee Driver
Posts: 516
Joined: Sun Jan 20, 2008 12:01 am
Location: Fife, Scotland
Contact:

Post by bungle80a » Fri Apr 25, 2008 7:46 pm

It is indeed 45mm, and will be track powered as he has quite a bit of that kind of stuff! Its all built on Aristocraft track. Its a mix of European and USA style, but the difference is not noticable.

Day 2: I like to Move it, Move it!

Not as much done as planned, but there has been a difference! The morning started by removing this wee little bush:
Image
That was easier said than done as it had quite extensive and deep roots. Its a bit of a shame it had to go as this vista...
Image
...has become this...
Image
After that was removed, I set about pulling up some more slabs of stone, only to find these...
Image
Image

...and as they are red ants, not black ants, they had to be exterminated as the red ones give a nasty bite! Once that was sorted I could peg out the straight down towards the house. This is the view looking up the garden with the slabs removed, pegs in place and ant powder down to kill the ants!
Image
Once that'd all been done at least 15 bags of soil were removed from the top corner, to be used to back fill later on in the project! Continuing to dig the trench round the corner across the garden hit a bit of an obstacle. The washing line pole wasn't going to be in the way, but the 18inch deep concrete base it was mounted in was! So this took more time out of todays progress to dig it out and then rehome it! Once all that faffing had been done, I could finally dig the trench for the rest of the first sweeping curve round the top right hand corner. And here are a couple of piccies of the project at the end of day 2!

Image
Image

If you really really really want to see more pics, visit my photobucket site. Username same as on here!

Well, i've got the weekend off from railway building, but i'm back at it on Monday for Day 3! So this evening, 2moro and Sunday can be spent on Lady Anne! As well as decorating that is!
Last edited by bungle80a on Sat May 31, 2008 1:19 am, edited 1 time in total.
Bungle80a

"Who has stolen the 3 link coupling off the end of my train?!?!

.....[a few minutes pass hunting down replacements].....

"So, which comedian has uncoupled my entire train?!?!"

mhlr
Retired Director
Retired Director
Posts: 4336
Joined: Sun Oct 21, 2007 8:16 pm
Location: Shropshire, England

Post by mhlr » Fri Apr 25, 2008 8:49 pm

OMG that line looks EXCELLENT already! :D I will keep a keen eye on it! :D
Image

SillyBilly
Retired Director
Retired Director
Posts: 3536
Joined: Sat Aug 18, 2007 11:00 pm

Post by SillyBilly » Fri Apr 25, 2008 10:14 pm

Looks like a cracker of a railway, looks like it'll blend in with the garden well.

User avatar
ACLR
Retired Director
Retired Director
Posts: 1592
Joined: Wed Oct 17, 2007 6:22 am
Location: Brisbane
Contact:

Post by ACLR » Fri Apr 25, 2008 11:38 pm

wow looking great making me jelous may have to do a redesign on the aclr :lol:

User avatar
laalratty
Retired Director
Retired Director
Posts: 3887
Joined: Wed Jan 16, 2008 5:35 pm
Location: Morecambe

Post by laalratty » Sat Apr 26, 2008 11:35 am

Looks like a great railway, perhapes you should go into the garden railway building trade and get rich people to pay you to build their railways :D
"What the hell is that?"
"It's a model icebreaker sir."
"It's a bit big isn't it?"
"It's a full scale model sir....."

steamyjim
Retired Director
Retired Director
Posts: 1210
Joined: Tue Oct 16, 2007 9:19 pm

Post by steamyjim » Sat Apr 26, 2008 2:26 pm

Looks brilliant :D

ptlrcecil
Driver
Driver
Posts: 1091
Joined: Fri Oct 19, 2007 4:14 pm
Location: Cumbriasestishire
Contact:

Post by ptlrcecil » Sat Apr 26, 2008 5:07 pm

laalratty wrote:Looks like a great railway, perhapes you should go into the garden railway building trade and get rich people to pay you to build their railways :D
Dibs
http://www.freewebs.com/pinetreelightrailway/index.

Cecil your engines on Fire!

Its a Mamod it does that.

User avatar
Matt
Driver
Driver
Posts: 1978
Joined: Sat Nov 24, 2007 3:56 pm

Post by Matt » Sat Apr 26, 2008 5:30 pm

Looking good. ptlrcecil, whats your new signiture from?
Garden Railways-best hobby in the world.

User avatar
bungle80a
Trainee Driver
Trainee Driver
Posts: 516
Joined: Sun Jan 20, 2008 12:01 am
Location: Fife, Scotland
Contact:

Post by bungle80a » Sat Apr 26, 2008 7:58 pm

ptlrcecil wrote:
laalratty wrote:Looks like a great railway, perhapes you should go into the garden railway building trade and get rich people to pay you to build their railways :D
Dibs
You cant call dibs on that!
Bungle80a

"Who has stolen the 3 link coupling off the end of my train?!?!

.....[a few minutes pass hunting down replacements].....

"So, which comedian has uncoupled my entire train?!?!"

User avatar
MuzTrem
Driver
Driver
Posts: 1122
Joined: Sun Feb 10, 2008 6:51 pm
Location: Buckinghamshire
Contact:

Post by MuzTrem » Sat Apr 26, 2008 8:26 pm

He just did :P

SillyBilly
Retired Director
Retired Director
Posts: 3536
Joined: Sat Aug 18, 2007 11:00 pm

Post by SillyBilly » Sat Apr 26, 2008 8:41 pm

David Pratt did, didn't he?

ptlrcecil
Driver
Driver
Posts: 1091
Joined: Fri Oct 19, 2007 4:14 pm
Location: Cumbriasestishire
Contact:

Post by ptlrcecil » Sat Apr 26, 2008 9:04 pm

Matt wrote:Looking good.  ptlrcecil, whats your new signiture from?
From a machinima show called Red vs Blue
The PSA in which it is taken can be found here
http://uk.youtube.com/watch?v=zoP0x3AWIAE
Very funny and worth a watch.
http://www.freewebs.com/pinetreelightrailway/index.

Cecil your engines on Fire!

Its a Mamod it does that.

User avatar
bungle80a
Trainee Driver
Trainee Driver
Posts: 516
Joined: Sun Jan 20, 2008 12:01 am
Location: Fife, Scotland
Contact:

Post by bungle80a » Tue Apr 29, 2008 12:19 am

Day 3: Battle of the Somme

The day started pretty wet, and the corner we are working on lies on clay, so drainage is poor at best! But I was delighted to find that the area to be worked had been cleared of foliage over the weekend!
Image

The plan of action for today was to dig out the trench round the outside loop, which had been dug last year, but partly refilled naturally since.
Image
Image

Work was going well, until this tree...
Image

...decided it wanted to spread its substantial roots across the line of our trench!
Image

This was the worst of the roots (but there were others that weren't much smaller) This one was about the thickness of a 2 litre fizzy drink bottle. There was no alternative, we had to abandon the rear loop! Nah, who am I kidding! We got out the saw and it got well and truly chopped! Lets just hope the tree survives as it has been labelled as a 'keeper' by the 'authorities'!
Image

Once the rear tench was complete, we relaid the track to check it all fitted correctly and to see if the trench needed widening at any point.
Image

It was fine, but we did find our surveying for the straight section towards the house was well out of alignment and so that will need re-surveying and new pegs driving into the ground, but that can wait til later in the week, or possibly early next. It was then decided that the front trench for the main running line needed deeper foundations, so I had to dig out another inch or so along the full length of the original trench.
Image

In anticipation of laying a concrete foundation for the thermalite blocks on day 4 (weather permitting), a couple of trips were made to B&Q to pick up 24 bags of building sand and 8 bags of Cement. Fortunately for both my back and the owners pocket, he saved bags and bags of small stones not used when the house was recently re-pebble dashed!

Hopefully it'll be a drier start to Day 4, and I dont gain an inch or so in height through the build up of clay on the bottom of my boots! The plan is to spend 15 mins finishing the trench as it was left so we could get to B&Q, then shuttering the trench, mixing the concrete, and laying a foundation! Hopefully by the end of the week, the first of the blocks should be laid!
Bungle80a

"Who has stolen the 3 link coupling off the end of my train?!?!

.....[a few minutes pass hunting down replacements].....

"So, which comedian has uncoupled my entire train?!?!"

User avatar
laalratty
Retired Director
Retired Director
Posts: 3887
Joined: Wed Jan 16, 2008 5:35 pm
Location: Morecambe

Post by laalratty » Tue Apr 29, 2008 7:13 pm

This is all looking so similar to parts of my railway when it was built its scary :lol:
Great work there, good to see im not the only one whose hoarded bags of pebble dashing for concrete mixing 8)
"What the hell is that?"
"It's a model icebreaker sir."
"It's a bit big isn't it?"
"It's a full scale model sir....."

steamyjim
Retired Director
Retired Director
Posts: 1210
Joined: Tue Oct 16, 2007 9:19 pm

Post by steamyjim » Tue Apr 29, 2008 9:10 pm

It's realy looking good now :D

Post Reply

Who is online

Users browsing this forum: No registered users and 22 guests