Building the Fairfield Railway

-
bungle80a
- Trainee Driver

- Posts: 516
- Joined: Sun Jan 20, 2008 12:01 am
- Location: Fife, Scotland
- Contact:
Todays work has unfortunately been cancelled as I am required to care for a relative who has managed to break 1 arm and fracture another, but hopefully we'll still be able to start track laying on Saturday! (My boss and I, not my relative with broken arms obviously!)
Bungle80a
"Who has stolen the 3 link coupling off the end of my train?!?!
.....[a few minutes pass hunting down replacements].....
"So, which comedian has uncoupled my entire train?!?!"
"Who has stolen the 3 link coupling off the end of my train?!?!
.....[a few minutes pass hunting down replacements].....
"So, which comedian has uncoupled my entire train?!?!"
-
bungle80a
- Trainee Driver
- Posts: 516
- Joined: Sun Jan 20, 2008 12:01 am
- Location: Fife, Scotland
- Contact:
Day 20: On the right Tracks
Back to work today and the plan was still to start the track laying! Unfortunately, I had not been able to get the ballast material yesterday, however this wasnt an issue as we probably weren't going to need it today anyway.
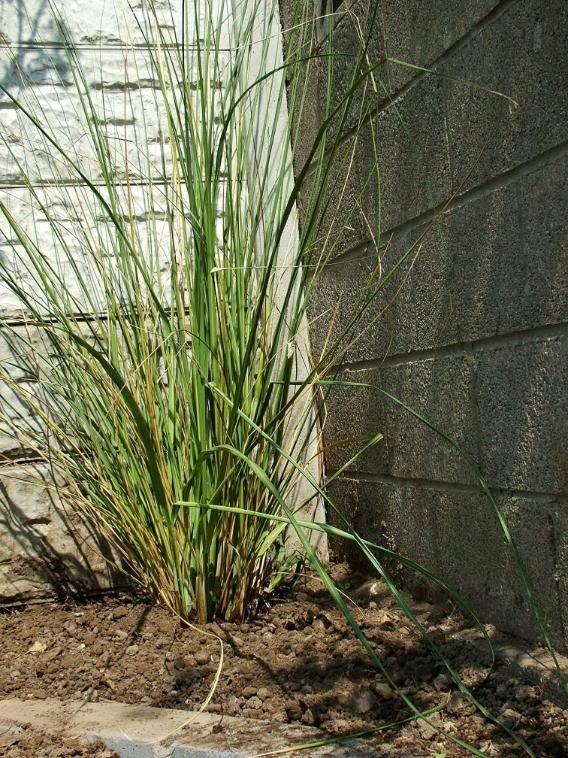
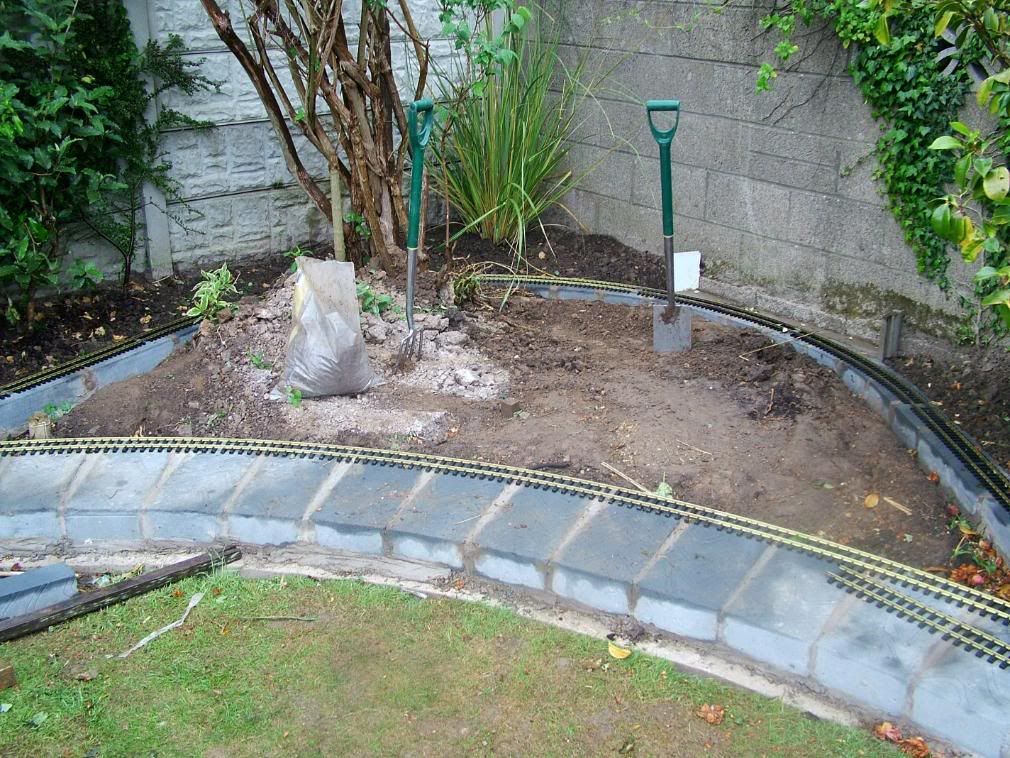
To start the day, the trackbed needed to be brushed down, as the blocks have gathered various bit'n'bobs on them over the week or so since they were laid. It was also decided that the DEVIL plant should be moved now so we didnt end up with loads of soil in our newly laid track. It is now located in the corner, thus...
The first track related job done today was to move some of the point switches to the other side of the point. This should be as simple as undo 3 screws, slide it out then slide it in the other side and reattatch the screw. The first of the points didnt want to play ball! It was not allowing the rail to go far enough over, so a little bit of filing needed doing on some of the holes for the screws and I finally got it to work. Thankfully, the mega expensive point didnt have the same problem!
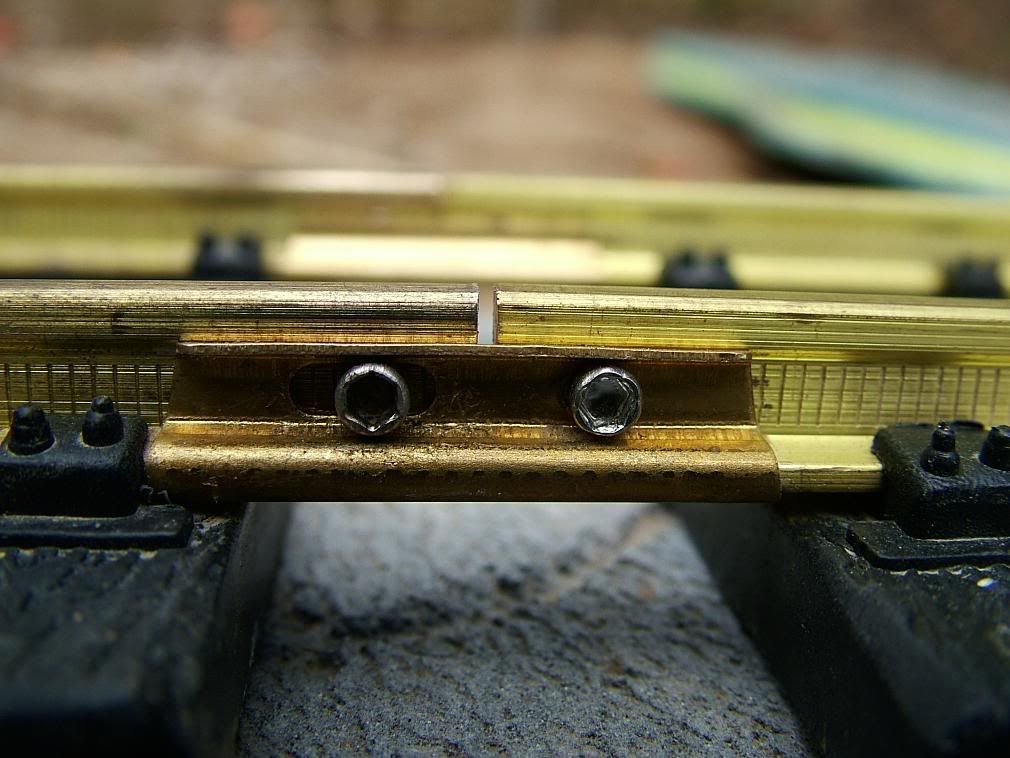
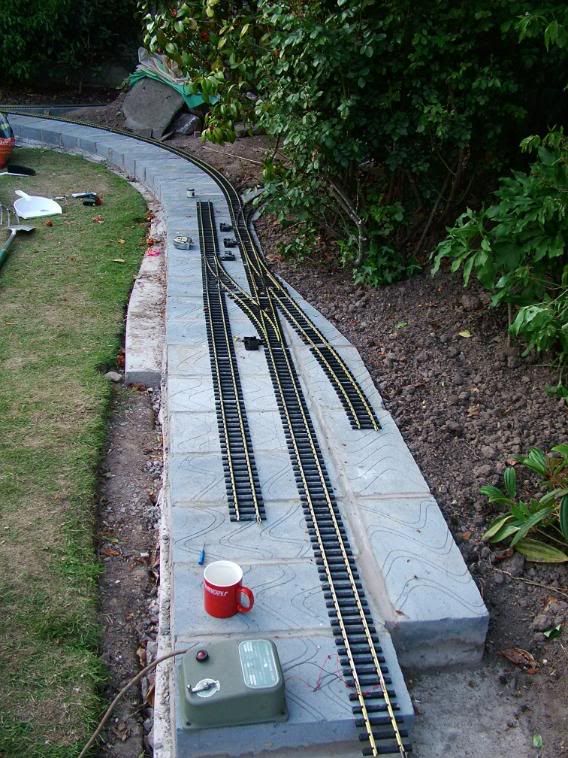
Now the thing with the Fairfield Railway is that it is primarily for track powered, with Live Steam as its secondary purpose, so it is essential that the track is electrically sound! Because of this, most of today has actually been spent removing track joiners and cleaning them, plus cleaning the end of the rails. This being Aristocraft G Scale set track, each rail has a tapped hole at the end and when joined the fishplates are screwed tight. Not a very good description. These pics probably explain it better. The first is of 2 pieces of track before joining, showing the holes in the rails and the fishplates.
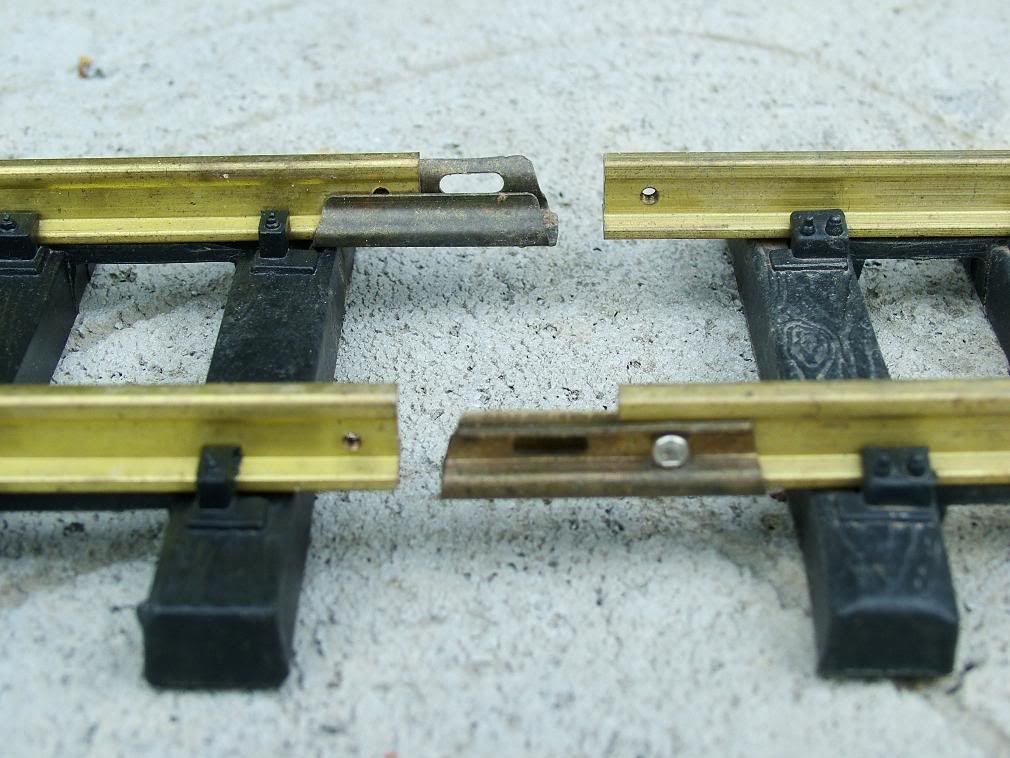
This pic shows the assembly once joined.
Mid afternoon, PTLRcecil popped round to see how things were going. He seemed quite impressed seeing it in reality rather than in photos and on here!
So today we have basically cleaned up loads of bits, reassembled them, then joined quite a bit together and laid it in place to see where we need to make a few alterations. Some bits of track however need to be cut, which means drilling and tapping new holes. This requires a special tool (an M2 tap)which we didn't have. Fortunately, Bay models in Carnforth had one, so the boss sent 'his boss aka the authorities' on the train for an afternoon out in Carnforth! By tea time we had this much done and needed to wait til the tool arrived from Bay Models.
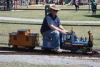
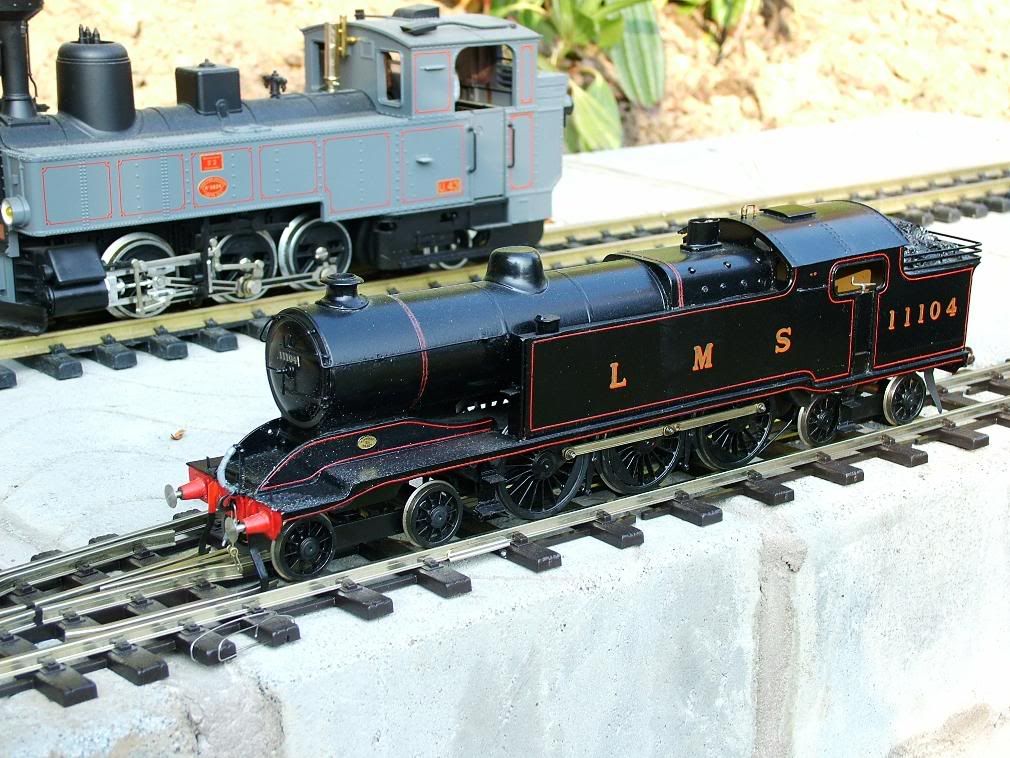
With time to play with, it was decided to test the conductivity of the track we had managed to join using this loco...
At this point everything was ok (well, after giving some of the track a bit of a rub down!)
Whilst on the phone to Bay Models earlier in the day, Bill (shop owner I believe) tried to convince the boss that fine scale 0 gauge will run ok on SM32 as long as there are no points. So we decided to test it, including a set of points, with these fine specimins...
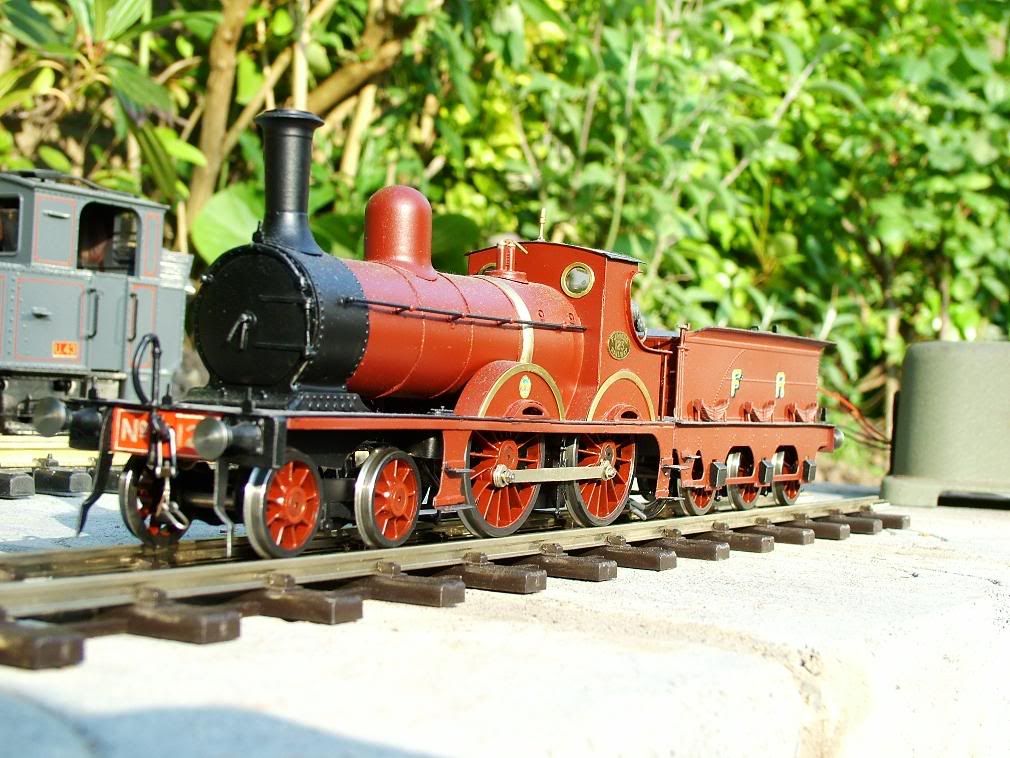
Tests of this seemed positive with no problems, however the boss has 2 live steam 0 gauge locos on order, and whether they will run over the points ok will determine whether sm32 or finescale 0 gauge is used for the inner loop. Only time will tell. I've got my fingers crossed for SM32 as my 16mm locos are not regaugable to 45mm!
I hope to have a video compiled of todays tests up by tomorrow night.
After a bit of playing trains, the tools arrived. Drilling and tapping holes was a new experience for both myself and my boss, and because of this we managed to snap the tap on the second hole! We managed to get 2 more holes drilled and tapped before it broke again and was totally unusable! Fortunately, my model engineer landlord/housemate has the appropriate tools, so i'll do a couple more bits of track that we need to do some time tomorrow, ready for going back to the FR on Monday.
Having fitted the couple of bits of track we did manage to get tapped, the whole back loop got joined, as did the vast majority of the mainline, plus a couple of other bits.
So nothing got pinned down today, and it has been a learning curve for all involved.
Next Time, on Building the FR:
Joining the bits of tracki'm hoping to get tapped tomorrow
Pinning down some (if not all the currently joined) track
Setting the cant on the curves
OR
Block laying[/i]
Back to work today and the plan was still to start the track laying! Unfortunately, I had not been able to get the ballast material yesterday, however this wasnt an issue as we probably weren't going to need it today anyway.
To start the day, the trackbed needed to be brushed down, as the blocks have gathered various bit'n'bobs on them over the week or so since they were laid. It was also decided that the DEVIL plant should be moved now so we didnt end up with loads of soil in our newly laid track. It is now located in the corner, thus...
The first track related job done today was to move some of the point switches to the other side of the point. This should be as simple as undo 3 screws, slide it out then slide it in the other side and reattatch the screw. The first of the points didnt want to play ball! It was not allowing the rail to go far enough over, so a little bit of filing needed doing on some of the holes for the screws and I finally got it to work. Thankfully, the mega expensive point didnt have the same problem!
Now the thing with the Fairfield Railway is that it is primarily for track powered, with Live Steam as its secondary purpose, so it is essential that the track is electrically sound! Because of this, most of today has actually been spent removing track joiners and cleaning them, plus cleaning the end of the rails. This being Aristocraft G Scale set track, each rail has a tapped hole at the end and when joined the fishplates are screwed tight. Not a very good description. These pics probably explain it better. The first is of 2 pieces of track before joining, showing the holes in the rails and the fishplates.
This pic shows the assembly once joined.
Mid afternoon, PTLRcecil popped round to see how things were going. He seemed quite impressed seeing it in reality rather than in photos and on here!
So today we have basically cleaned up loads of bits, reassembled them, then joined quite a bit together and laid it in place to see where we need to make a few alterations. Some bits of track however need to be cut, which means drilling and tapping new holes. This requires a special tool (an M2 tap)which we didn't have. Fortunately, Bay models in Carnforth had one, so the boss sent 'his boss aka the authorities' on the train for an afternoon out in Carnforth! By tea time we had this much done and needed to wait til the tool arrived from Bay Models.
With time to play with, it was decided to test the conductivity of the track we had managed to join using this loco...
At this point everything was ok (well, after giving some of the track a bit of a rub down!)
Whilst on the phone to Bay Models earlier in the day, Bill (shop owner I believe) tried to convince the boss that fine scale 0 gauge will run ok on SM32 as long as there are no points. So we decided to test it, including a set of points, with these fine specimins...
Tests of this seemed positive with no problems, however the boss has 2 live steam 0 gauge locos on order, and whether they will run over the points ok will determine whether sm32 or finescale 0 gauge is used for the inner loop. Only time will tell. I've got my fingers crossed for SM32 as my 16mm locos are not regaugable to 45mm!
I hope to have a video compiled of todays tests up by tomorrow night.
After a bit of playing trains, the tools arrived. Drilling and tapping holes was a new experience for both myself and my boss, and because of this we managed to snap the tap on the second hole! We managed to get 2 more holes drilled and tapped before it broke again and was totally unusable! Fortunately, my model engineer landlord/housemate has the appropriate tools, so i'll do a couple more bits of track that we need to do some time tomorrow, ready for going back to the FR on Monday.
Having fitted the couple of bits of track we did manage to get tapped, the whole back loop got joined, as did the vast majority of the mainline, plus a couple of other bits.
So nothing got pinned down today, and it has been a learning curve for all involved.
Next Time, on Building the FR:
Joining the bits of tracki'm hoping to get tapped tomorrow
Pinning down some (if not all the currently joined) track
Setting the cant on the curves
OR
Block laying[/i]
Bungle80a
"Who has stolen the 3 link coupling off the end of my train?!?!
.....[a few minutes pass hunting down replacements].....
"So, which comedian has uncoupled my entire train?!?!"
"Who has stolen the 3 link coupling off the end of my train?!?!
.....[a few minutes pass hunting down replacements].....
"So, which comedian has uncoupled my entire train?!?!"

-
bungle80a
- Trainee Driver
- Posts: 516
- Joined: Sun Jan 20, 2008 12:01 am
- Location: Fife, Scotland
- Contact:
The tedious part is cleaning up the 2 inches at the end of each rail to make sure they are good for conducting electricity before putting the rail joiner on.
Screwing the rail joiners together isn't so much tedious as frustrating trying to get the little burgers in! Thats especially a problem in the 'V' of points and by the point switches!
Screwing the rail joiners together isn't so much tedious as frustrating trying to get the little burgers in! Thats especially a problem in the 'V' of points and by the point switches!
Bungle80a
"Who has stolen the 3 link coupling off the end of my train?!?!
.....[a few minutes pass hunting down replacements].....
"So, which comedian has uncoupled my entire train?!?!"
"Who has stolen the 3 link coupling off the end of my train?!?!
.....[a few minutes pass hunting down replacements].....
"So, which comedian has uncoupled my entire train?!?!"

-
Chris Cairns

- Driver

- Posts: 2366
- Joined: Mon Oct 29, 2007 7:25 pm
- Location: Glasgow, Scotland
Great to see you have finally got a loco running, after all your hard work.
Whilst the rails are OK, it looks to me that those joiners & fixings could be subject to corrosion being left outside in all weathers (fishplates look like a dull steel material, and the hex screws are alloy?). Do you put anything on these joiners to prevent corrosion, or will they not corrode?
Whilst the rails are OK, it looks to me that those joiners & fixings could be subject to corrosion being left outside in all weathers (fishplates look like a dull steel material, and the hex screws are alloy?). Do you put anything on these joiners to prevent corrosion, or will they not corrode?
-
bungle80a
- Trainee Driver
- Posts: 516
- Joined: Sun Jan 20, 2008 12:01 am
- Location: Fife, Scotland
- Contact:
As far as I know its all brass. Will do some research and get some more precise info. We haven't treated them and I dont think there is any plan to do so.
Bungle80a
"Who has stolen the 3 link coupling off the end of my train?!?!
.....[a few minutes pass hunting down replacements].....
"So, which comedian has uncoupled my entire train?!?!"
"Who has stolen the 3 link coupling off the end of my train?!?!
.....[a few minutes pass hunting down replacements].....
"So, which comedian has uncoupled my entire train?!?!"
-
bungle80a
- Trainee Driver
- Posts: 516
- Joined: Sun Jan 20, 2008 12:01 am
- Location: Fife, Scotland
- Contact:
This is an excert from the Aristo-craft website
"The ARISTO-CRAFT SCREW/RAIL JOINER SYSTEM is a pride of Aristo-Craft design. It provides terrific conductivity where normally conductivity is a problem. . . the junction. This means there is no need for messy conductive greases, soldering between joints, or rail clamps to get electrical performance.
If you've never put two pieces of track together, the process could not be easier. Remove the screws enclosed in wax underneath the track sections. Then, simply slide the track sections together and insert the screws into the holes in the rail joiners with the screwdriver provided with each box of Aristo-Craft Track.
Aristo-Craft Track now comes with hex head stainless screws and screwdriver, making installation even easier. The rail joiners themselves are longer for better conductivity an feature elongated screw holes to allow for expansion and contraction of the metal rail."
In their catalogue it just lists them as brass!
Bungle80a
"Who has stolen the 3 link coupling off the end of my train?!?!
.....[a few minutes pass hunting down replacements].....
"So, which comedian has uncoupled my entire train?!?!"
"Who has stolen the 3 link coupling off the end of my train?!?!
.....[a few minutes pass hunting down replacements].....
"So, which comedian has uncoupled my entire train?!?!"
-
Chris Cairns
- Driver
- Posts: 2366
- Joined: Mon Oct 29, 2007 7:25 pm
- Location: Glasgow, Scotland
-
bungle80a
- Trainee Driver
- Posts: 516
- Joined: Sun Jan 20, 2008 12:01 am
- Location: Fife, Scotland
- Contact:
Just a brief update. I've managed to cut, drill and tap the rails this evening with a little bit of help from my Landlord. However he also managed to break a tap! I want a go! All this breaking stuff seems fun!
Bungle80a
"Who has stolen the 3 link coupling off the end of my train?!?!
.....[a few minutes pass hunting down replacements].....
"So, which comedian has uncoupled my entire train?!?!"
"Who has stolen the 3 link coupling off the end of my train?!?!
.....[a few minutes pass hunting down replacements].....
"So, which comedian has uncoupled my entire train?!?!"
-
bungle80a
- Trainee Driver
- Posts: 516
- Joined: Sun Jan 20, 2008 12:01 am
- Location: Fife, Scotland
- Contact:
Day 21: Pinned Down
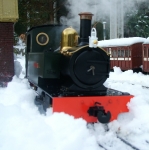
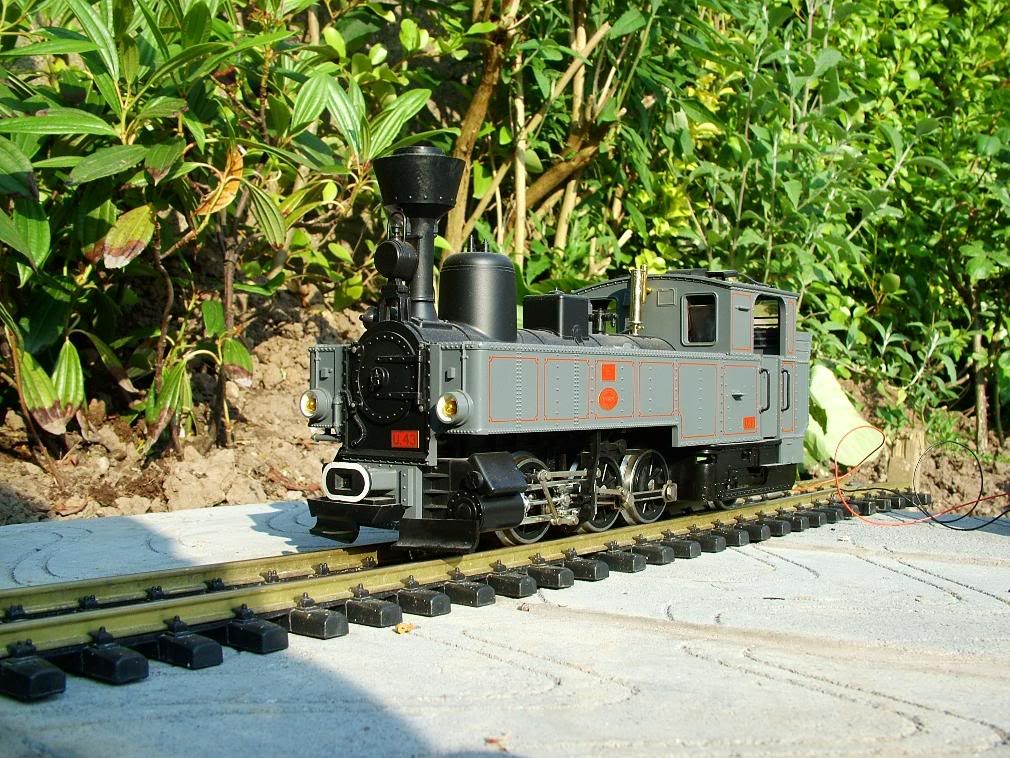
Another busy day for the Permanent Way team on the Fairfield Railway. Having drilled and tapped a couple of bits of vital track yesterday, I set about fitting them into the line so we could start pinning the track in position. We are using Galvanised Masonary Nails to hold the track in position. The nails I got are 2.5mm diameter, which is much bigger than the holes pre-drilled in the Aristocraft sleepers, so a 3mm drill was used to open up the relevant holes for pinning down. The mainline was pinned first, followed by the back loop. It took a bit of pinning the back loop as the track wasnt exactly lying centrally on the blocks, but with a little persuassion it is better than it was! At several points during the operation, the line was tested by a couple more of the FR fleet...
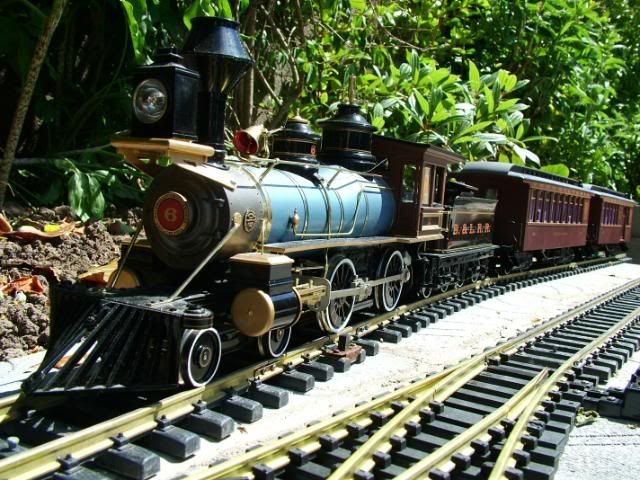
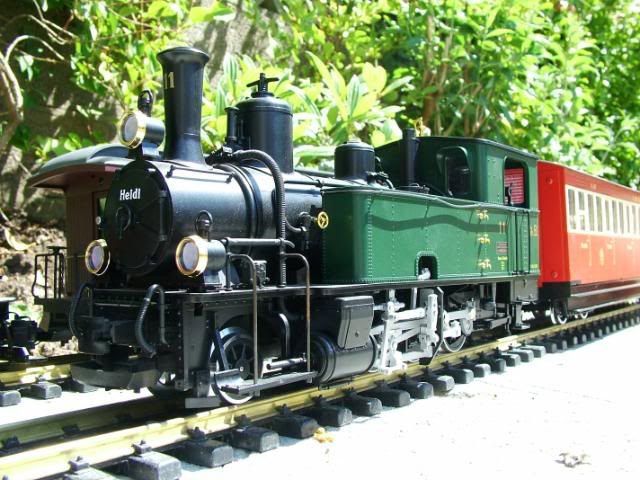
The red and cream Isle of Man carriage is on loan from the PTLR, and temporarily has 45mm wheelsets fitted to conduct clearance test. Both locos ran well over both the lines laid today, with plenty of clearance throughout.
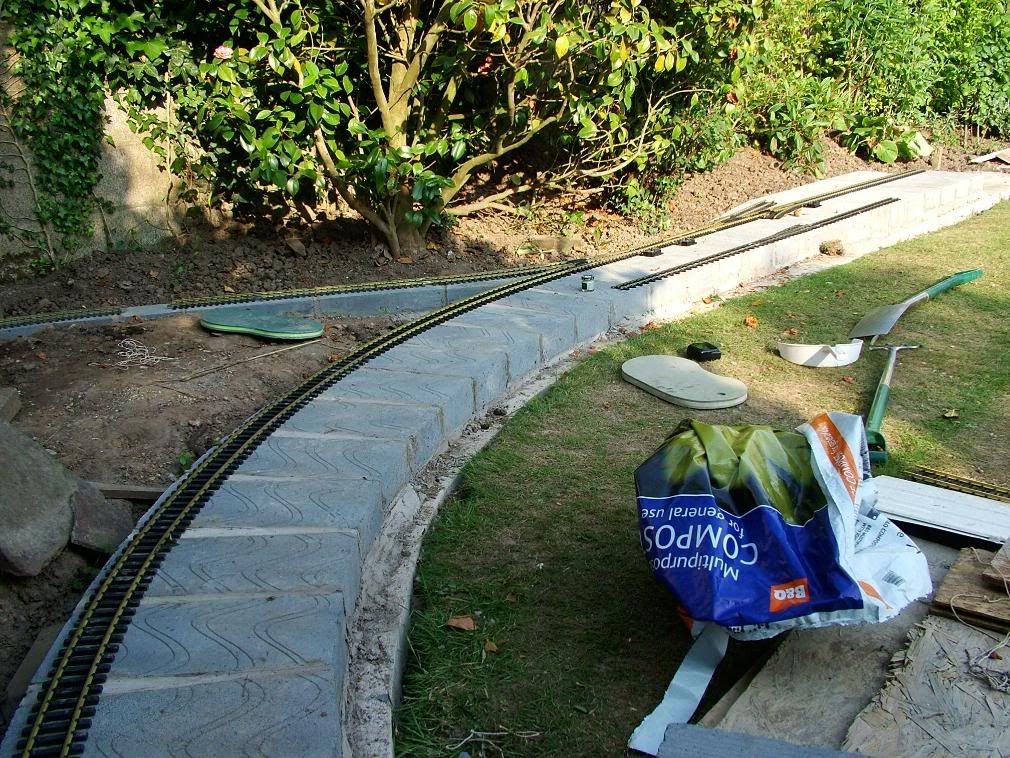
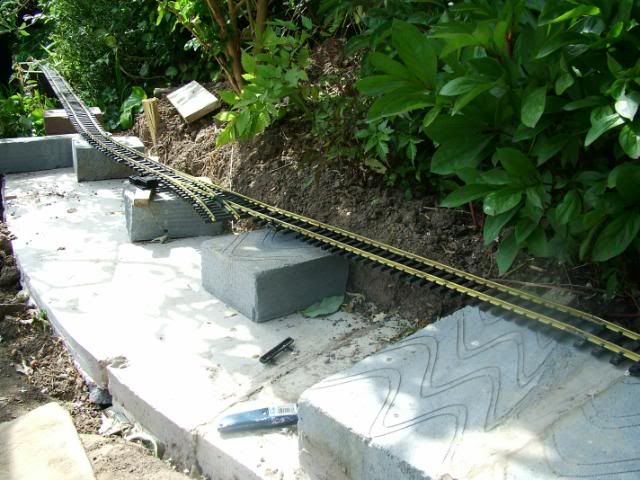
After tracklaying had been completed (for today), final decisions on the track arrangement were made on the last section to be blocked on the top end. This pic shows where we go from here...
This means a bit more concrete needs laying. In an effort to be able to lay the blocks tomorrow, I dug out the little bit extra today and filled it!
Whilst I was at it, I dug another foot at the other end so I can lay the blocks for the next 4ft of line at that end tomorrow also!
That concludes todays work. There was a slight accident today with the American Loco. The boss decided to try and run it onto the track that was loosly positioned where we were finalising the alignment and it rolled as the track wasn't properly supported! Oops! Fortunately there was no damage done!
Next Time, on Building the Fairfield Railway
Laying blocks up to the launch point at the top end of the line
Laying another 4ft of blocks on the mainline towards the house.
Gardening (if the blocks are laid quickly)
Another busy day for the Permanent Way team on the Fairfield Railway. Having drilled and tapped a couple of bits of vital track yesterday, I set about fitting them into the line so we could start pinning the track in position. We are using Galvanised Masonary Nails to hold the track in position. The nails I got are 2.5mm diameter, which is much bigger than the holes pre-drilled in the Aristocraft sleepers, so a 3mm drill was used to open up the relevant holes for pinning down. The mainline was pinned first, followed by the back loop. It took a bit of pinning the back loop as the track wasnt exactly lying centrally on the blocks, but with a little persuassion it is better than it was! At several points during the operation, the line was tested by a couple more of the FR fleet...
The red and cream Isle of Man carriage is on loan from the PTLR, and temporarily has 45mm wheelsets fitted to conduct clearance test. Both locos ran well over both the lines laid today, with plenty of clearance throughout.
After tracklaying had been completed (for today), final decisions on the track arrangement were made on the last section to be blocked on the top end. This pic shows where we go from here...
This means a bit more concrete needs laying. In an effort to be able to lay the blocks tomorrow, I dug out the little bit extra today and filled it!
Whilst I was at it, I dug another foot at the other end so I can lay the blocks for the next 4ft of line at that end tomorrow also!
That concludes todays work. There was a slight accident today with the American Loco. The boss decided to try and run it onto the track that was loosly positioned where we were finalising the alignment and it rolled as the track wasn't properly supported! Oops! Fortunately there was no damage done!
Next Time, on Building the Fairfield Railway
Laying blocks up to the launch point at the top end of the line
Laying another 4ft of blocks on the mainline towards the house.
Gardening (if the blocks are laid quickly)
Bungle80a
"Who has stolen the 3 link coupling off the end of my train?!?!
.....[a few minutes pass hunting down replacements].....
"So, which comedian has uncoupled my entire train?!?!"
"Who has stolen the 3 link coupling off the end of my train?!?!
.....[a few minutes pass hunting down replacements].....
"So, which comedian has uncoupled my entire train?!?!"
-
SillyBilly
- Retired Director

- Posts: 3536
- Joined: Sat Aug 18, 2007 11:00 pm
Hey even doing that I snapped a high speed stell tap today at work. ooops. I still havent figured out how to get it out. Im either going to have to drill it out or smash it out. Each risks damaging the partly tapped tread and scrapping the job.
http://www.freewebs.com/pinetreelightrailway/index.
Cecil your engines on Fire!
Its a Mamod it does that.
Cecil your engines on Fire!
Its a Mamod it does that.
-
bungle80a
- Trainee Driver
- Posts: 516
- Joined: Sun Jan 20, 2008 12:01 am
- Location: Fife, Scotland
- Contact:
This message vanishing thing seems to be getting contagious. I'm sure I replied to this! Oh well, in the words of a good friend "I'll repeat myself",SillyBilly wrote:Presumably when tapping you are doing quater of a turn then half a turn back, alsousing a decent cutting paste?
I have not been the one doing the tapping. I've taken advice from PTLRsam and seen him doing it, and would have done as you suggested if it had been me, but it sadly (for the taps) wasn't!
Having read your question properly, and if you take it LITERALLY, I believe that 1/4 forward, then 1/2 back would mean you wouldn't actually get anywhere! (except 1/4 turn backwards each time?!?!)
In my best YouTube Fat Contoller voice (Cecil knows what I mean) "Oh dear"!PTLRcecil wrote:Hey even doing that I snapped a high speed stell tap today at work. ooops. I still havent figured out how to get it out. Im either going to have to drill it out or smash it out. Each risks damaging the partly tapped tread and scrapping the job.
Bungle80a
"Who has stolen the 3 link coupling off the end of my train?!?!
.....[a few minutes pass hunting down replacements].....
"So, which comedian has uncoupled my entire train?!?!"
"Who has stolen the 3 link coupling off the end of my train?!?!
.....[a few minutes pass hunting down replacements].....
"So, which comedian has uncoupled my entire train?!?!"
-
SillyBilly
- Retired Director
- Posts: 3536
- Joined: Sat Aug 18, 2007 11:00 pm
-
bungle80a
- Trainee Driver
- Posts: 516
- Joined: Sun Jan 20, 2008 12:01 am
- Location: Fife, Scotland
- Contact:
He is the first person I turn to whenever I need advice on anything 16mm, and if I still need clarification, or an alternative I got to cecil. Its what families are for!
Bungle80a
"Who has stolen the 3 link coupling off the end of my train?!?!
.....[a few minutes pass hunting down replacements].....
"So, which comedian has uncoupled my entire train?!?!"
"Who has stolen the 3 link coupling off the end of my train?!?!
.....[a few minutes pass hunting down replacements].....
"So, which comedian has uncoupled my entire train?!?!"
-
bungle80a
- Trainee Driver
- Posts: 516
- Joined: Sun Jan 20, 2008 12:01 am
- Location: Fife, Scotland
- Contact:
Day 22: And the rain came down..
No, not a shameless plug for my PTLRfest video (which can be found on YouTube BTW ), but a description of the weather!
It let up mid morning, so I made my way to the FR for as much work as I could get done while the rain held off! As it was looking iffy, I didnt want to risk trying to lay blocks. It would be a shame to lay blocks, or mix cement then all the work go to pot because of the weather. So instead, my focus was to remove all the clay and poor soil from this area...
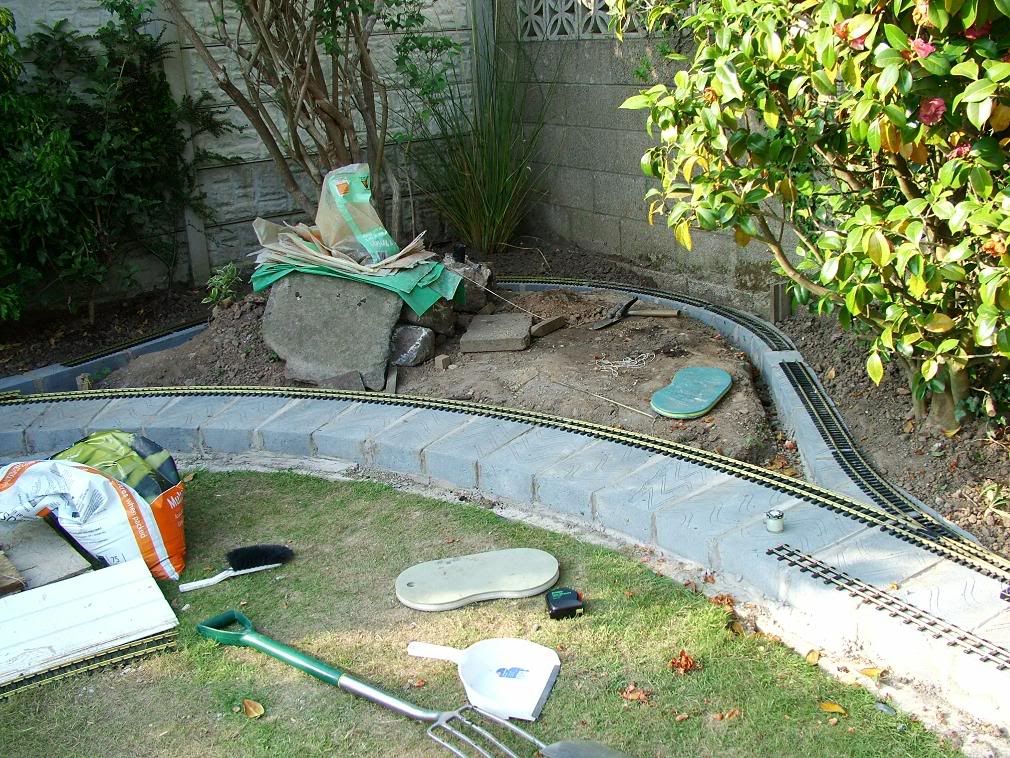
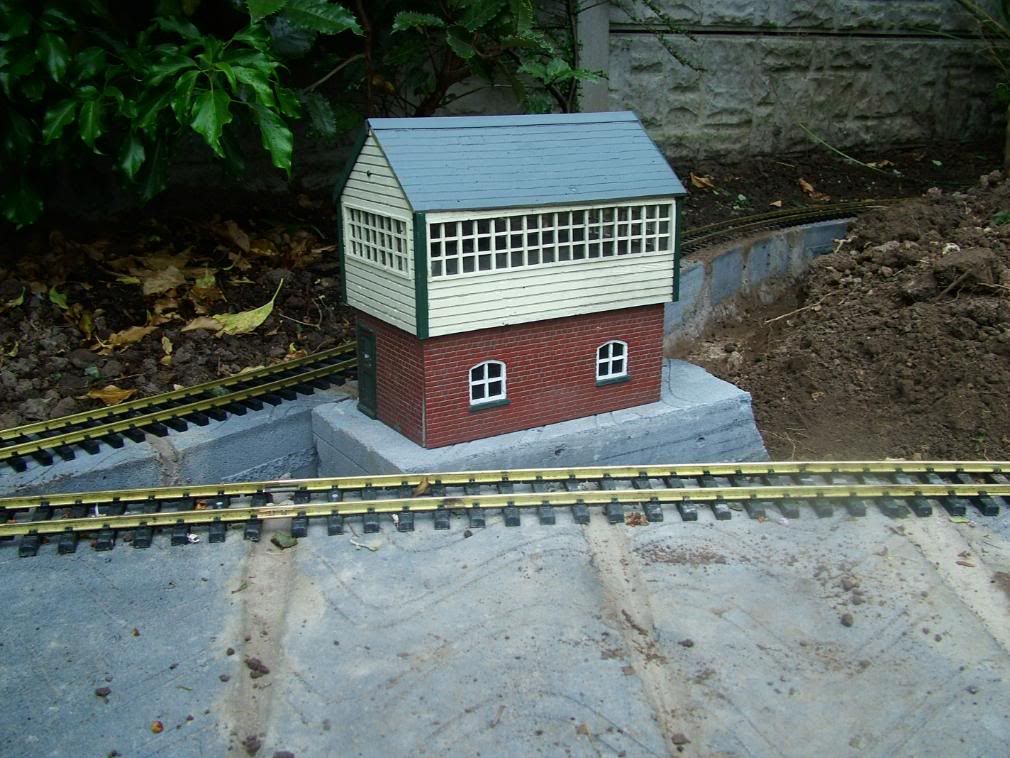
I was getting along fine with that area til mid afternoon. The rain was still holding off. The boss popped out to see me, and the topic of conversation came to signal boxes and stations! It was decided that in the area I was gardening, a signal box would be placed in the V of the point...
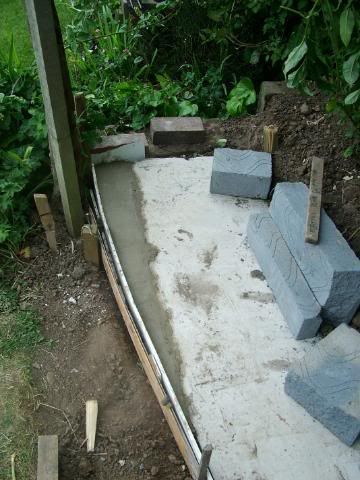
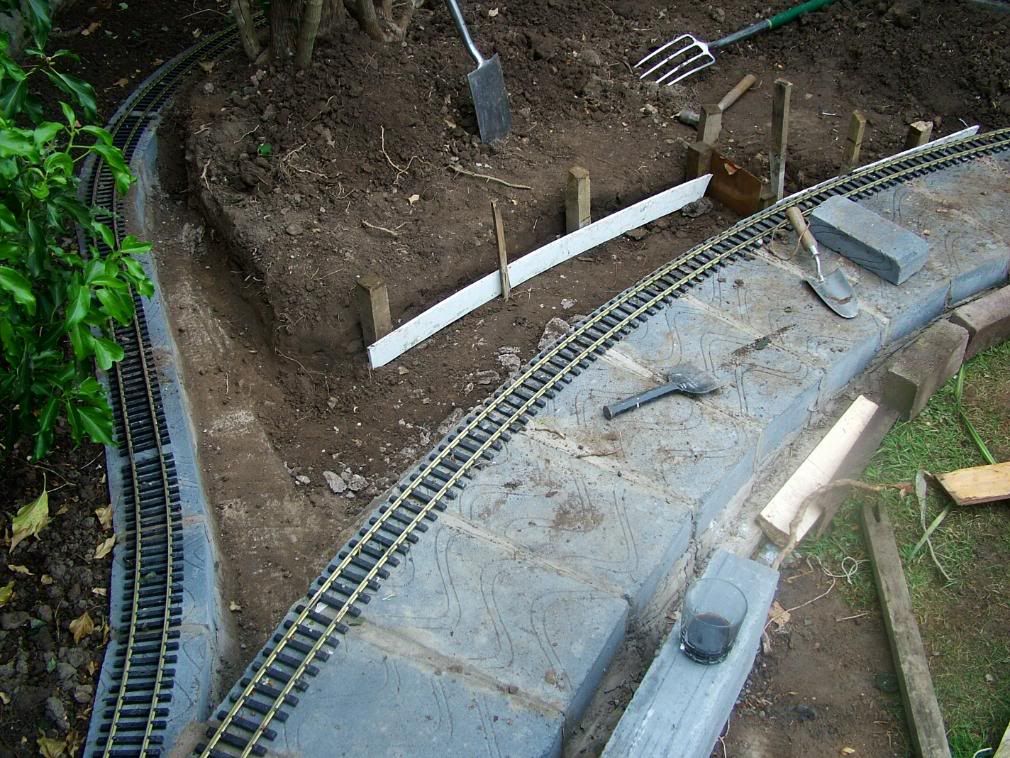
And a station be build next to it, with a long platform on the mainline, and a short one on the back loop. This will all be set on blocks like the trackbed, so The rest of my day was spent digging trenches to pour concrete for the blocks. Here you can see my progress by the end of the day...
Day 23: Next verse, same as the first, a little bit faster and a little bit worse!
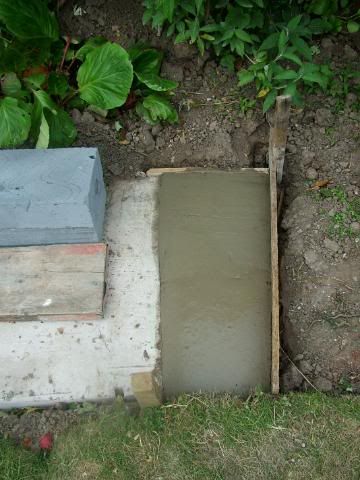
The weather today was a little bit worse than yesterday, and the rain didnt stop til lunch, so there was only half a days work done today. Basicallly, I laid the concrete in the trench I had dug yesterday.
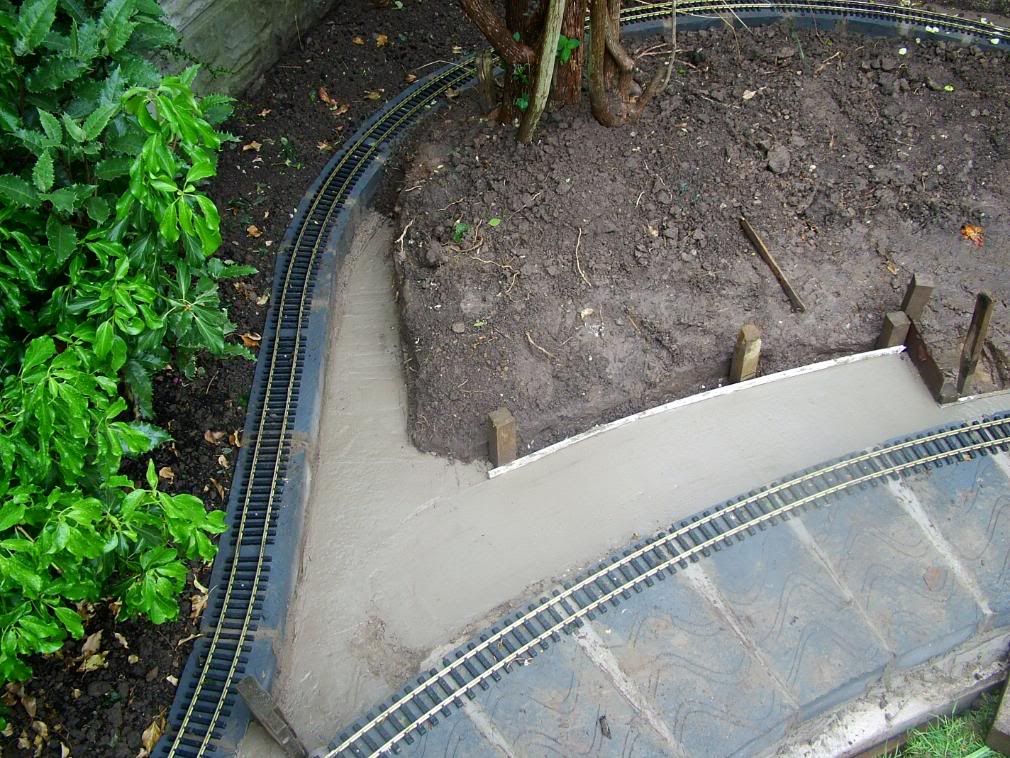
The narrow bit of concrete to the right goes on about another 2-3 feet. This bit will just have the platform as it allows access to garden the crescent of soil behind it and to get at any trains that encounter difficulties in the back loop!
If the weather had held off beyond half 4 I would have laid a few blocks on the mainline, but Mother Nature had other ideas! Instead, the boss and I discussed plans for the crossing, which may now become a bridge as we are worried about the width of the trackbed at that point and damage to the track! Details will be revealed nearer the time.
I also have some homework. I need to find a way to bend 5 ft radius curves into 9ft 4.25in (ish) radius curves! The issue will be making a smooth curve for the entire length of the rail! I have 4 lengths to play with!
Next time, on Building the FR:
Cut and Lay the blocks for the station and signal box area.
Lay blocks on the mainline. (Weather permitting)
OR
Go to the nearbly Slate Quarry and buy some bags of Small Slate Chipppings to be used as ballast,
Goto BnQ to get more concrete,
Work on easing the radius of the the 5ft curves.
No, not a shameless plug for my PTLRfest video (which can be found on YouTube BTW
It let up mid morning, so I made my way to the FR for as much work as I could get done while the rain held off! As it was looking iffy, I didnt want to risk trying to lay blocks. It would be a shame to lay blocks, or mix cement then all the work go to pot because of the weather. So instead, my focus was to remove all the clay and poor soil from this area...
I was getting along fine with that area til mid afternoon. The rain was still holding off. The boss popped out to see me, and the topic of conversation came to signal boxes and stations! It was decided that in the area I was gardening, a signal box would be placed in the V of the point...
And a station be build next to it, with a long platform on the mainline, and a short one on the back loop. This will all be set on blocks like the trackbed, so The rest of my day was spent digging trenches to pour concrete for the blocks. Here you can see my progress by the end of the day...
Day 23: Next verse, same as the first, a little bit faster and a little bit worse!
The weather today was a little bit worse than yesterday, and the rain didnt stop til lunch, so there was only half a days work done today. Basicallly, I laid the concrete in the trench I had dug yesterday.
The narrow bit of concrete to the right goes on about another 2-3 feet. This bit will just have the platform as it allows access to garden the crescent of soil behind it and to get at any trains that encounter difficulties in the back loop!
If the weather had held off beyond half 4 I would have laid a few blocks on the mainline, but Mother Nature had other ideas! Instead, the boss and I discussed plans for the crossing, which may now become a bridge as we are worried about the width of the trackbed at that point and damage to the track! Details will be revealed nearer the time.
I also have some homework. I need to find a way to bend 5 ft radius curves into 9ft 4.25in (ish) radius curves! The issue will be making a smooth curve for the entire length of the rail! I have 4 lengths to play with!
Next time, on Building the FR:
Cut and Lay the blocks for the station and signal box area.
Lay blocks on the mainline. (Weather permitting)
OR
Go to the nearbly Slate Quarry and buy some bags of Small Slate Chipppings to be used as ballast,
Goto BnQ to get more concrete,
Work on easing the radius of the the 5ft curves.
Bungle80a
"Who has stolen the 3 link coupling off the end of my train?!?!
.....[a few minutes pass hunting down replacements].....
"So, which comedian has uncoupled my entire train?!?!"
"Who has stolen the 3 link coupling off the end of my train?!?!
.....[a few minutes pass hunting down replacements].....
"So, which comedian has uncoupled my entire train?!?!"
That signal box looks familiar.
http://www.freewebs.com/pinetreelightrailway/index.
Cecil your engines on Fire!
Its a Mamod it does that.
Cecil your engines on Fire!
Its a Mamod it does that.
Who is online
Users browsing this forum: drewzero1 and 13 guests