A place for the discussion of garden railways and any garden style/scale portable and/or indoor layouts
-
laalratty
- Retired Director

- Posts: 3887
- Joined: Wed Jan 16, 2008 5:35 pm
- Location: Morecambe
Post
by laalratty » Sat Mar 22, 2008 7:38 pm
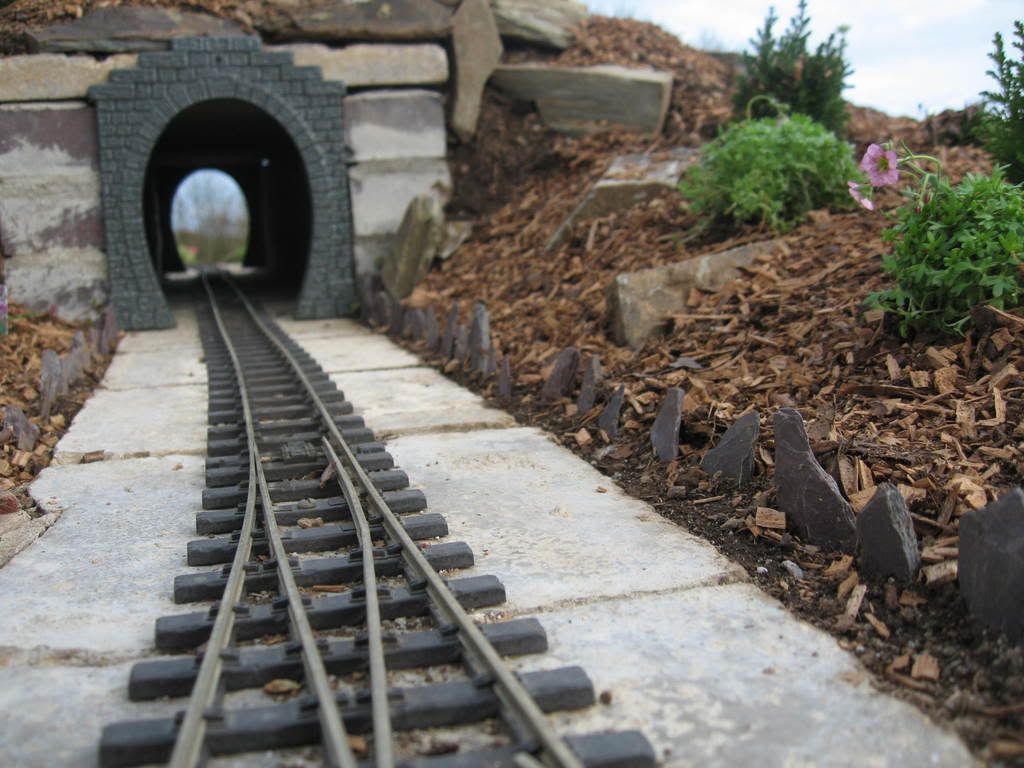
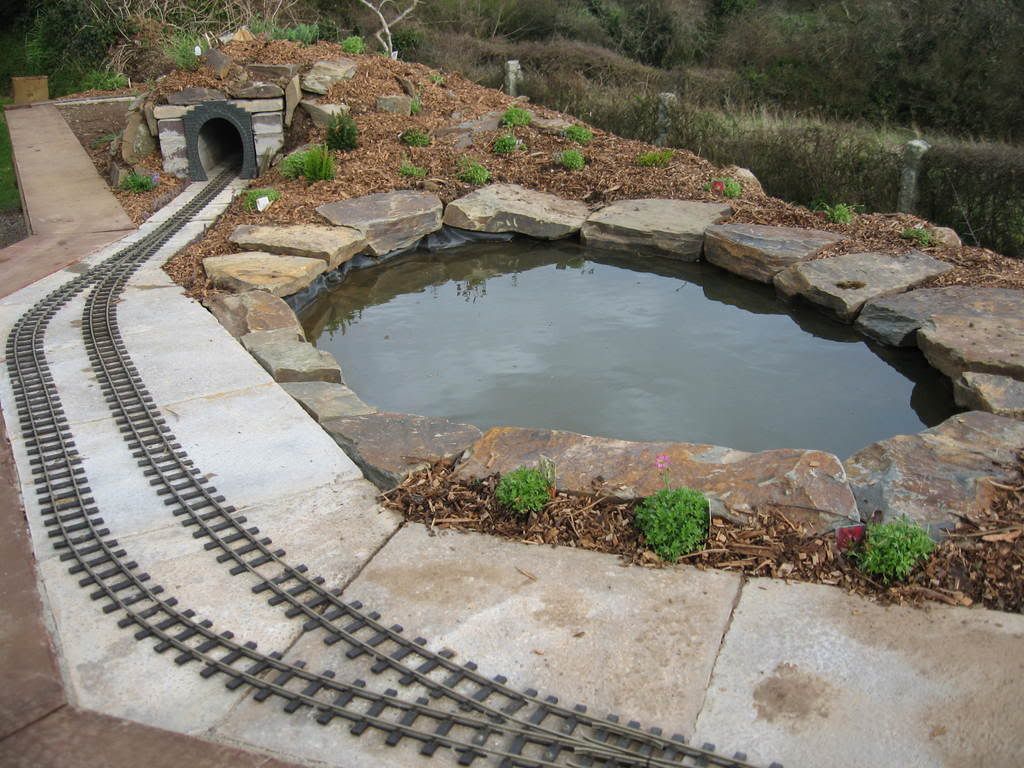
mhlr wrote:Well, I did a video as promised. Still too cold to run live steamers though...

Oh well. I finished off the tunnel too, and had a play...
You should be ashamed with yourself, too cold? I steamed Gwydion at jool's yesterday, it was so windy that the stock kept on getting blown over

, but we kept going for an hour
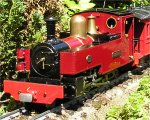
Seriously though, the MHLR looks a brilliant railway, congrats on getting it finished and its good to see it already looks pretty with a few rocks and plants. I just look forward to seeing the whole effect with Ben Ben standing proudly at the head of the first steam hauled MHLR train
-
mhlr
- Retired Director
- Posts: 4336
- Joined: Sun Oct 21, 2007 8:16 pm
- Location: Shropshire, England
Post
by mhlr » Sat Mar 22, 2008 8:21 pm
Ah, dont worry, Ben Ben will be out soon enough!

LMAO, before I made that vid, I had to right the stock behind Columbine! I looked at the forcast, doesnt look too pretty for the next few days, but hopefully be able to get BB out soon... and Columbine. May even steam both at same time, and get some proper action!
-
mhlr
- Retired Director
- Posts: 4336
- Joined: Sun Oct 21, 2007 8:16 pm
- Location: Shropshire, England
Post
by mhlr » Tue Mar 25, 2008 9:41 pm
-
laalratty
- Retired Director
- Posts: 3887
- Joined: Wed Jan 16, 2008 5:35 pm
- Location: Morecambe
Post
by laalratty » Tue Mar 25, 2008 9:57 pm
Nice collection of plants, in about a years time they should look great
Plants tend to look better when they have spread together
"What the hell is that?"
"It's a model icebreaker sir."
"It's a bit big isn't it?"
"It's a full scale model sir....."
-
mhlr
- Retired Director
- Posts: 4336
- Joined: Sun Oct 21, 2007 8:16 pm
- Location: Shropshire, England
Post
by mhlr » Tue Mar 25, 2008 10:10 pm
laalratty wrote:Nice collection of plants, in about a years time they should look great :D Plants tend to look better when they have spread together
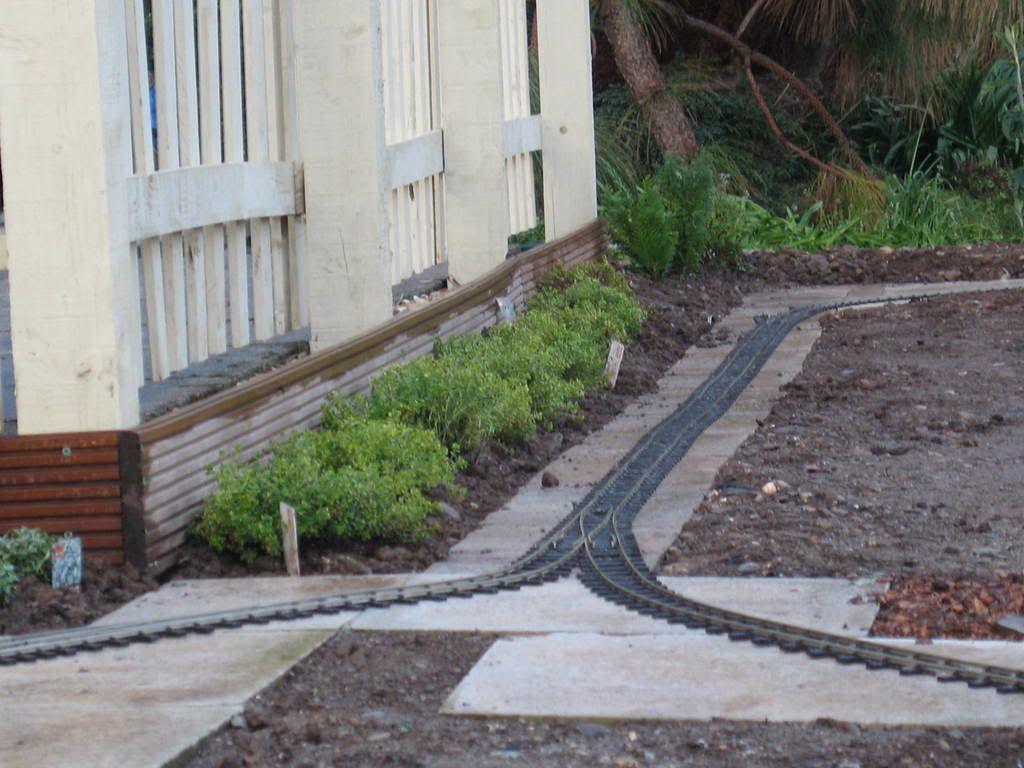
Yep, that row along the 1:1 fence should look 'hedgeish' in a coupla years hopefully!
-
Matt
- Driver

- Posts: 1978
- Joined: Sat Nov 24, 2007 3:56 pm
Post
by Matt » Tue Mar 25, 2008 10:11 pm
Looking good. I bet it'll look twice as good when the ballest is down.
Garden Railways-best hobby in the world.
-
mhlr
- Retired Director
- Posts: 4336
- Joined: Sun Oct 21, 2007 8:16 pm
- Location: Shropshire, England
Post
by mhlr » Tue Mar 25, 2008 10:12 pm
Yeah, that's the next big job (uh - I hate that type of job!)!
-
Matt
- Driver
- Posts: 1978
- Joined: Sat Nov 24, 2007 3:56 pm
Post
by Matt » Tue Mar 25, 2008 10:20 pm
Yeah, but it has to be done if you want a good looking railway.
Garden Railways-best hobby in the world.
-
laalratty
- Retired Director
- Posts: 3887
- Joined: Wed Jan 16, 2008 5:35 pm
- Location: Morecambe
Post
by laalratty » Tue Mar 25, 2008 10:29 pm
I'm sorry to say but my dad says stuff like that to me (but just got all of the track that ws laid back end of last year ballasted) Only taken 3 months to get round to
"What the hell is that?"
"It's a model icebreaker sir."
"It's a bit big isn't it?"
"It's a full scale model sir....."
-
mhlr
- Retired Director
- Posts: 4336
- Joined: Sun Oct 21, 2007 8:16 pm
- Location: Shropshire, England
Post
by mhlr » Tue Mar 25, 2008 10:36 pm
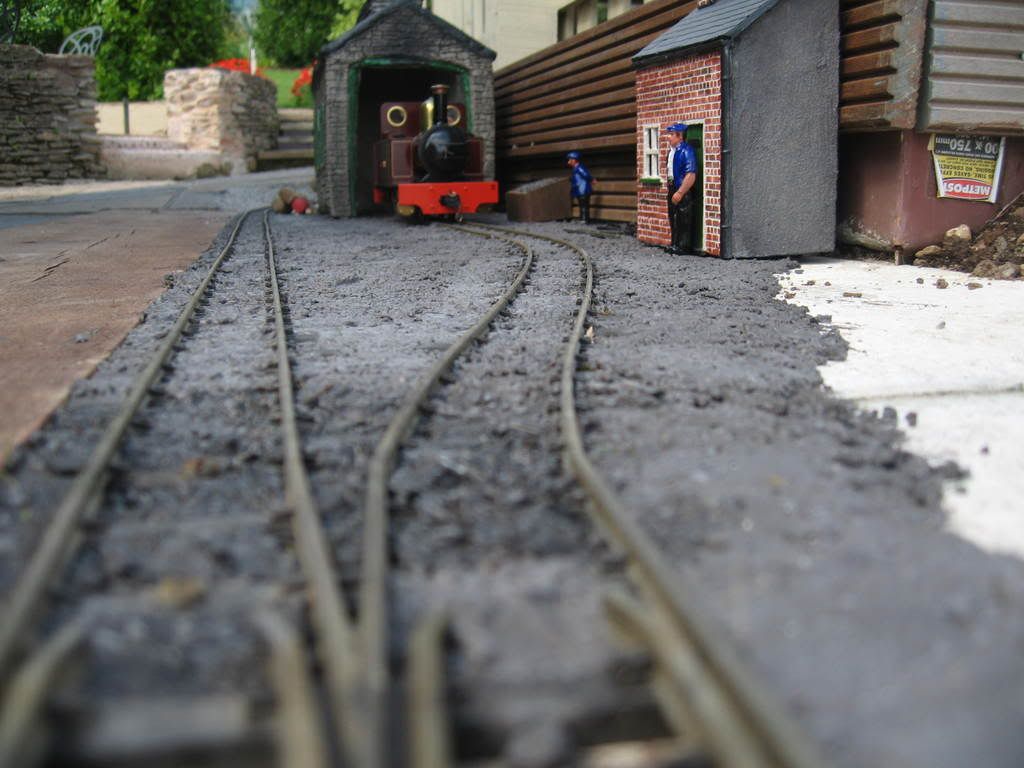
I'm definately ballasting, as it wont look right without! Im using Mortar + Fine Granite Chippings + Cemente Colouring to ballast. Should look great! Once it's done!...
-
MuzTrem
- Driver
- Posts: 1122
- Joined: Sun Feb 10, 2008 6:51 pm
- Location: Buckinghamshire
-
Contact:
Post
by MuzTrem » Wed Mar 26, 2008 4:59 pm
It's looking great already, you should have some superb photographic opportunities once it's done

-
Chris Cairns
- Driver
- Posts: 2366
- Joined: Mon Oct 29, 2007 7:25 pm
- Location: Glasgow, Scotland
Post
by Chris Cairns » Wed Mar 26, 2008 9:10 pm
That is coming along very well. I like the slate wall/fence - a very nice feature.
-
mhlr
- Retired Director
- Posts: 4336
- Joined: Sun Oct 21, 2007 8:16 pm
- Location: Shropshire, England
Post
by mhlr » Wed Mar 26, 2008 9:13 pm
CCairns wrote:That is coming along very well. I like the slate wall/fence - a very nice feature.
Cheers, I copied it from Maesffordd!
-
mhlr
- Retired Director
- Posts: 4336
- Joined: Sun Oct 21, 2007 8:16 pm
- Location: Shropshire, England
Post
by mhlr » Fri Jul 11, 2008 10:29 am
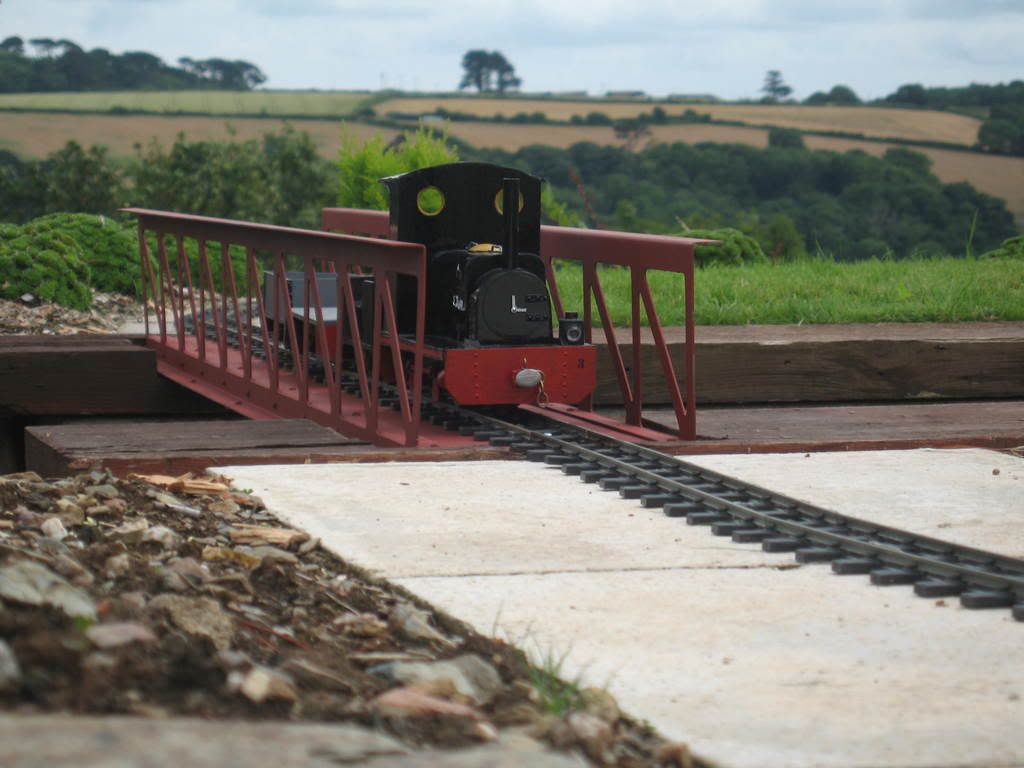
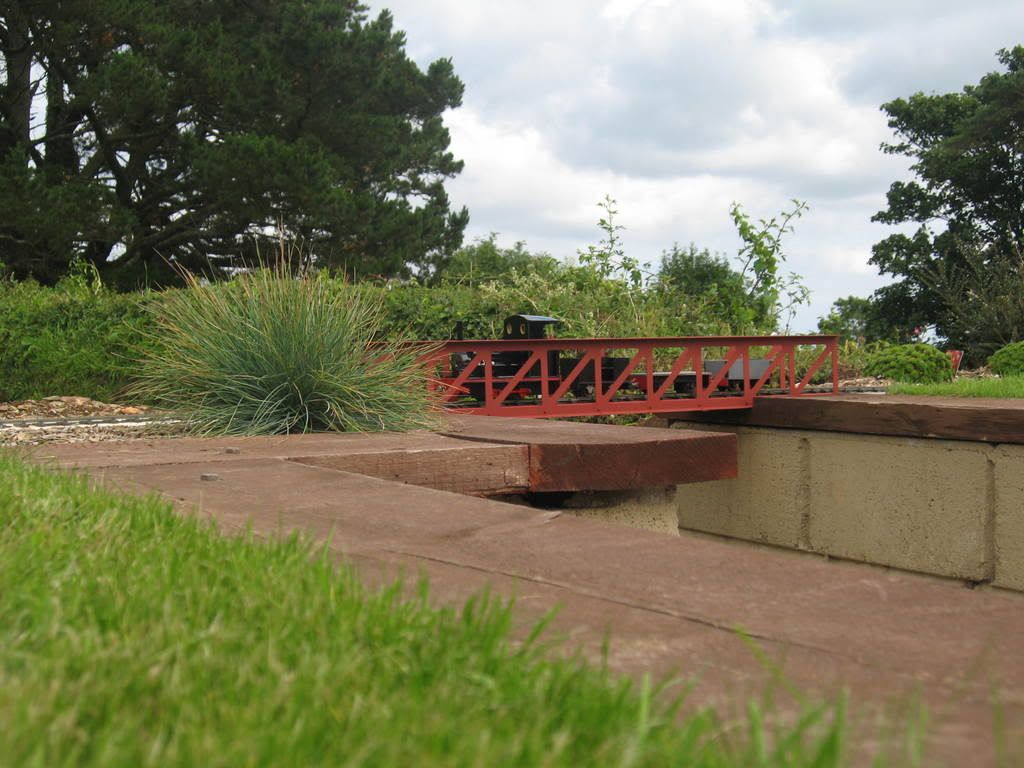
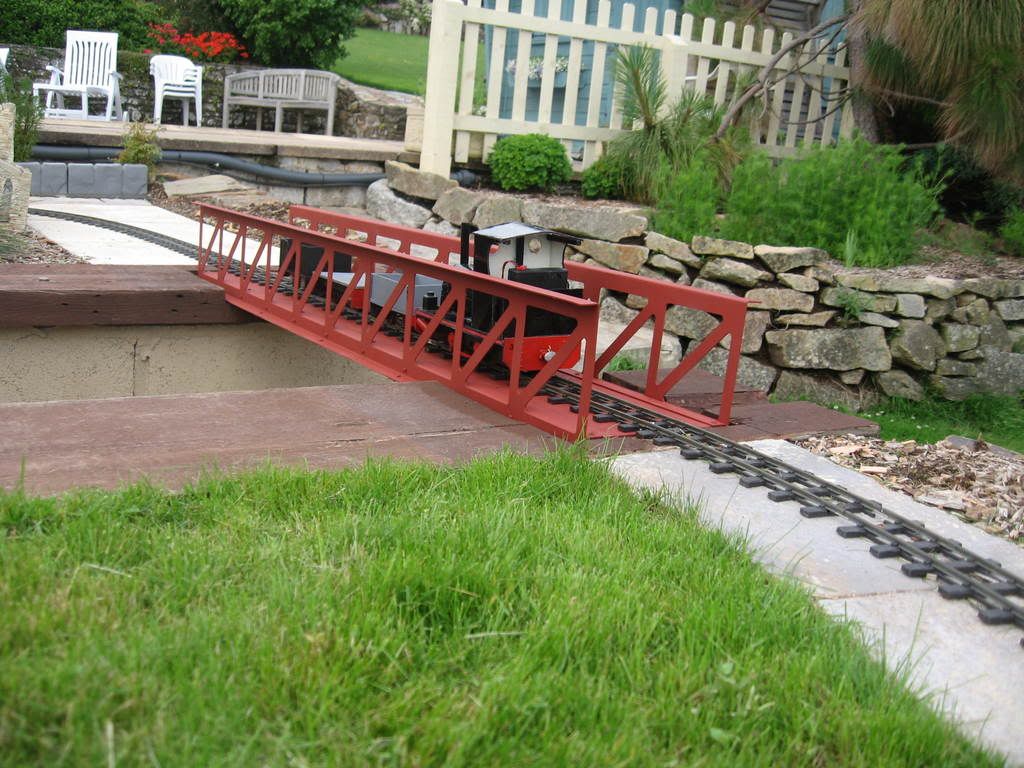
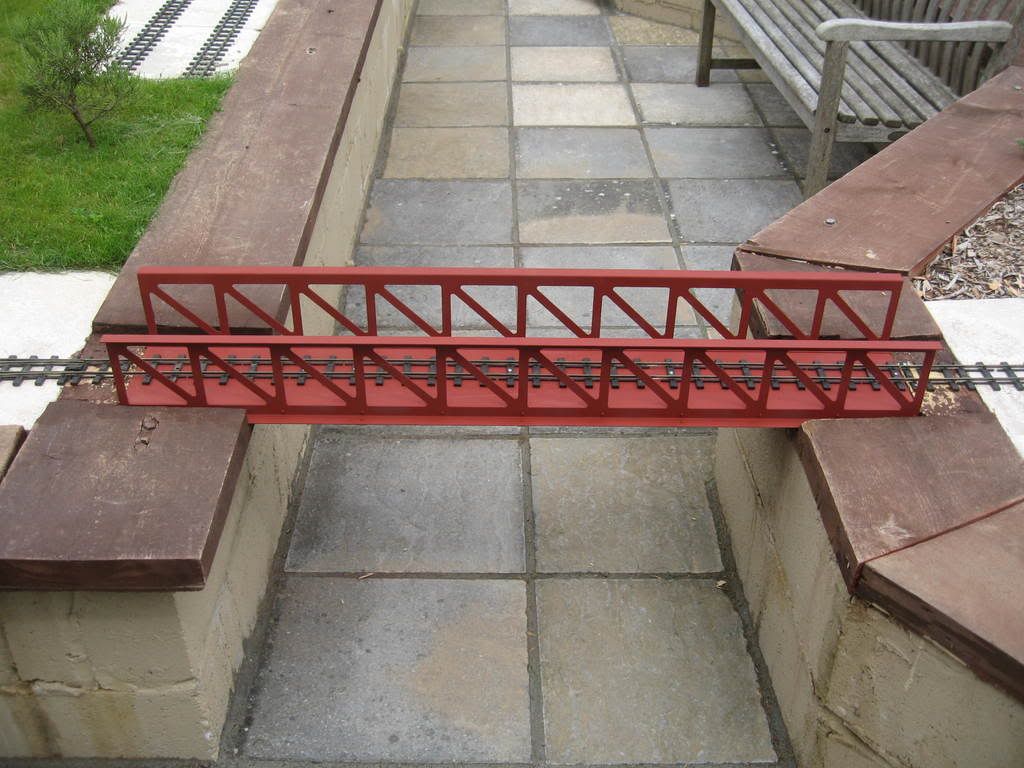
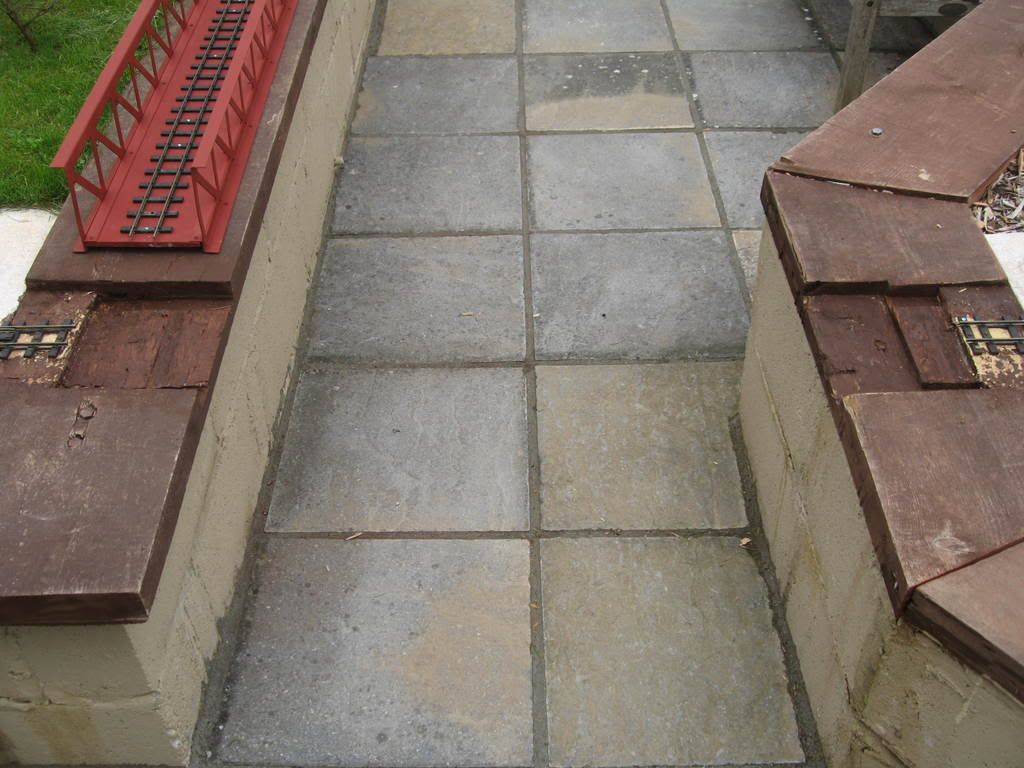
Well I have put the new bridges in yesterday, just awaiting painting today. Also did a bit of ballasting too, around the engine shed. I will take piccies later once I have removed the plastic sheeting (too keep the rain off) and painted the bridges so I can see your opinion on them!
-
mhlr
- Retired Director
- Posts: 4336
- Joined: Sun Oct 21, 2007 8:16 pm
- Location: Shropshire, England
Post
by mhlr » Fri Jul 11, 2008 8:05 pm
-
Chris Cairns
- Driver
- Posts: 2366
- Joined: Mon Oct 29, 2007 7:25 pm
- Location: Glasgow, Scotland
Post
by Chris Cairns » Fri Jul 11, 2008 8:15 pm
Coming along nicely Pete.
I like the bridge. Whenever I get my Garden Railway I need to put in a least one (probably 2) bridges so that I can still access the bit in the middle (probably going to be a small lawn).
-
Matt
- Driver
- Posts: 1978
- Joined: Sat Nov 24, 2007 3:56 pm
Post
by Matt » Fri Jul 11, 2008 9:02 pm
Like the bridge. Like the yard even more.
Garden Railways-best hobby in the world.
-
mhlr
- Retired Director
- Posts: 4336
- Joined: Sun Oct 21, 2007 8:16 pm
- Location: Shropshire, England
Post
by mhlr » Fri Jul 11, 2008 9:13 pm
CCairns wrote:Coming along nicely Pete.
I like the bridge. Whenever I get my Garden Railway I need to put in a least one (probably 2) bridges so that I can still access the bit in the middle (probably going to be a small lawn).
Thanks Chris. The bridges are from Garden Railway Specialists, but I think they are rather expensive for what they are. At least my dad bought em for me
!
Matt: Cheers mate, wait till all the ballasting is done, will look "wicked"!
-
SillyBilly
- Retired Director
- Posts: 3536
- Joined: Sat Aug 18, 2007 11:00 pm
Post
by SillyBilly » Fri Jul 11, 2008 9:44 pm
VERY nice, that ballast looks very quarry-like, I love that yard it looks beautifel. Also love the bridges, good choice of colour. Nice Work
-
ACLR
- Retired Director
- Posts: 1592
- Joined: Wed Oct 17, 2007 6:22 am
- Location: Brisbane
-
Contact:
Post
by ACLR » Fri Jul 11, 2008 10:17 pm
thats looking realy nice I love the layout
Who is online
Users browsing this forum: No registered users and 10 guests