Show me your guards vans..

Discussion of Rolling Stock related topics should go here
User avatar
ace
Fireman
Fireman
Posts: 294
Joined: Sun Jul 14, 2013 9:03 am

Post by ace » Mon Dec 02, 2013 5:08 pm

Chris Cairns:92833 wrote:ace, that is a fair chunk out of your AnDel roof. I dropped my workman's coach recently whilst trying to hold the roof down with elastic bands (using slow setting epoxy). Still glueing up the cracked fittings prior to fitting the roof again - has put me off getting any further models made from this type of resin.
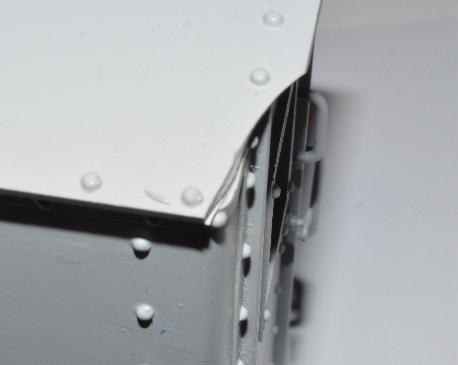
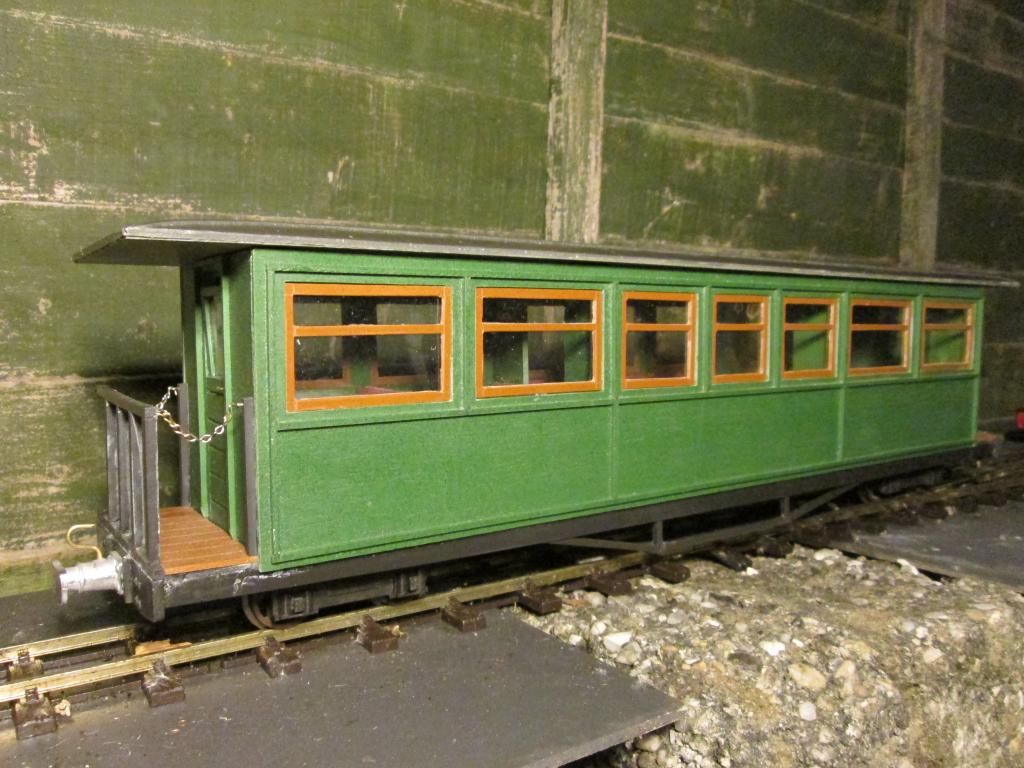
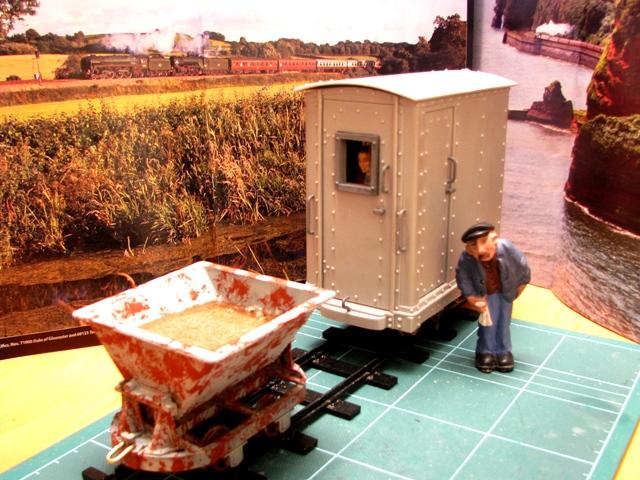
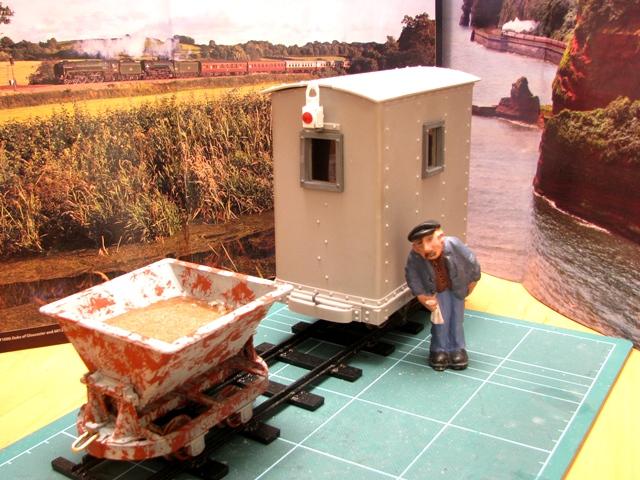
Hi Chris, That is a nice guards van you have there. In fact I find it quite inspiring. :)

Yes the roof is awful on this one. When I was building it I used elastic bands to hold the roof on and it cracked and broke right in two down the middle. I then used two weaker elastic bands and glued it all together. The chunk was taken out when the train fell over one day. I have got the piece in my box, but have not yet tried to glue it on. I find this resin plastic doesn't like sticking particularly well with cyanoacrylate. Do you use 2k glue for resin models too? What do you use?

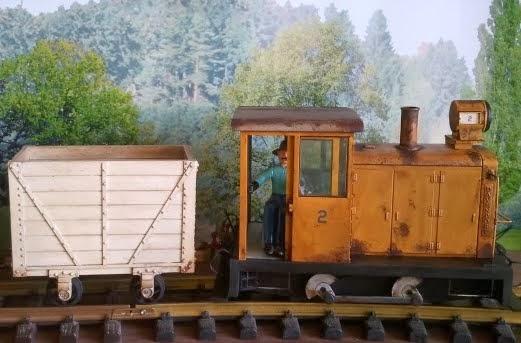
On the other hand I find the wagons are better suited to this resin. It has a nice weight and sound and being made of slightly thicker material  it tends to take the knocks better. Maybe the resin could be reinforced with glass fibre when being made and mixed, it would  certainly be alot stronger.

User avatar
WVLR
Fireman
Fireman
Posts: 362
Joined: Sun Jan 23, 2011 12:46 pm
Location: South Cheshire
Contact:

Post by WVLR » Mon Dec 02, 2013 5:21 pm

that is a fair chunk out of your AnDel roof.
I've had the same problem with a Swift Sixteen brake van, I'm
beginning to think that resin isn't the way to go.

Image
Last edited by WVLR on Tue Apr 01, 2014 11:24 pm, edited 1 time in total.
Mike

Wood Valley Works
http://www.woodvalleyworks.co.uk

Wood Valley Light Railway
http://www.wvlr.co.uk

User avatar
ace
Fireman
Fireman
Posts: 294
Joined: Sun Jul 14, 2013 9:03 am

Post by ace » Mon Dec 02, 2013 5:25 pm

WVLR:92843 wrote:I've had the same problem with a Swift Sixteen brake van, I'm beginning to think that resin isn't the way to go.
I suppose wood is better really. I wouldn't have thought resin would lend itself too well to temperature changes all the time, eg inside then outside, hot and cold weather. But that said, they make superb detailed models. :)

Peter L
Trainee Fireman
Trainee Fireman
Posts: 139
Joined: Sun Dec 02, 2012 4:56 pm
Location: Westchester, New York

Post by Peter L » Mon Dec 02, 2013 5:29 pm

I'm building a relatively stock Andel C&M brake. I do almost all of my modeling during the winter so work is just about to pick up again from where I left if back in March or April. I just picked up a little string of 10 LED Christmas Lights hooked up to a switch and two AA batteries from a dollar star to light it up.

User avatar
Chris Cairns
Driver
Driver
Posts: 2365
Joined: Mon Oct 29, 2007 7:25 pm
Location: Glasgow, Scotland

Post by Chris Cairns » Mon Dec 02, 2013 5:30 pm

Hi ace,

Like you I've found super glue is pretty useless with these resin models. I'm building the same Guards Van model and it has already had one knock where one side & one end neatly separated from the chassis without damage. So where it is possible to have it all clamped up I use NHP Epoxy 3 Hour and leave it clamped for up to 2 days. For the cracks around my windows and door frames on the workman's coach I'm using 5 minute epoxy until it is solid enough again to use those clamps (got one roof girder back in place but a door frame needs fixing before the other girder can be clamped in place).

As you say the problem with these 2 kits (Guards Van & Workman's Coach, which are both no longer available) is the resin is rather thin around the windows and door frames and thus very vulnerable to knocks or dropping.

Mike (WVLR),

That is very worrying as I'm actually building the same Swift Sixteen model. Certainly the main body is very thick. Was that damage caused by a roll-over whilst running - I've been considering adding some weight to the chassis to lower the centre of gravity?

Chris Cairns.

User avatar
WVLR
Fireman
Fireman
Posts: 362
Joined: Sun Jan 23, 2011 12:46 pm
Location: South Cheshire
Contact:

Post by WVLR » Mon Dec 02, 2013 5:48 pm

Was that damage caused by a roll-over whilst running
I think it must have happened when it rolled off the end of one of my storage tracks
and came to rest between the unit it was on and the loudspeaker standing
next to it, at most it only dropped a couple of inches, but I can't find the missing piece.

It has quite a lot of weight low down, 2 steel strips and a battery pack
for the rear light, I've run it quite a lot and it's never come off the track.
Mike

Wood Valley Works
http://www.woodvalleyworks.co.uk

Wood Valley Light Railway
http://www.wvlr.co.uk

User avatar
ace
Fireman
Fireman
Posts: 294
Joined: Sun Jul 14, 2013 9:03 am

Post by ace » Mon Dec 02, 2013 5:54 pm

Chris Cairns:92849 wrote:I use NHP Epoxy 3 Hour and leave it clamped for up to 2 days.
Chris, thanks. I'll get looking for some of that.

Chris Cairns:92849 wrote:I've been considering adding some weight to the chassis to lower the centre of gravity?.
I think this is the weigh to go (sorry for the pun :D ). In this particular circumstance, prevention is better than cure I guess. But adding weight will make a falling wagon land harder and break more of it. Then you can assess if it is a write off?! :lol:

I have two andel campbelltown and machrihanish light railway coaches that I cannot stop bits from snapping off of. I will eventually make the affected parts from wood and brass and bolt and epoxy on.

These things weigh a bloody ton! A standard mamod cannot move one of these on its own! Maybe I need to mod the bogies with some steel wheels.

Image

I am getting way off topic though... sorry :roll:

User avatar
vjoneslong5040
Trainee Fireman
Trainee Fireman
Posts: 153
Joined: Fri Feb 03, 2012 3:45 pm
Location: Nottingham

Post by vjoneslong5040 » Tue Dec 03, 2013 8:39 am

I have a Andel C&M Brake van, and I'm relatively pleased with it. Here's a photo of it ex-works.

Image

My only quibble with it are the nylon wheels. They were fine for a while, but recently it kept derailing. When I investigated the cause, I found that the wheels kept going out of gauge. Having tried to cure this several times, one of the wheels finally disintegrated, so I went to Brandbright, got some of the Accucraft adapter bearings and some Tenmille spoked wheels, and fitted those. It runs beautifully now, no rolling/wobbling, and seems positively glued to the track.

Annoyingly I can't find the picture I had of this. Typical!

User avatar
tom_tom_go
Driver
Driver
Posts: 4824
Joined: Wed Feb 23, 2011 3:08 am
Location: Kent, UK
Contact:

Post by tom_tom_go » Tue Dec 03, 2013 11:34 am

Metal wheels are a must (even for OO scale).

They add weight and you get a nice running noise when wheels go over rail joints and points :)

User avatar
vjoneslong5040
Trainee Fireman
Trainee Fireman
Posts: 153
Joined: Fri Feb 03, 2012 3:45 pm
Location: Nottingham

Post by vjoneslong5040 » Tue Dec 03, 2013 1:11 pm

tom_tom_go said:
Metal wheels are a must (even for OO scale).

They add weight and you get a nice running noise when wheels go over rail joints and points
Yes I quite agree. I fitted all my OO stuff with metal, but I thought it was less of a issue in 16mm. But its made a heck of a difference, but that might be because it now has proper bearings for the axles to sit in rather than the axles sitting straight into the plastic cosmetic axleboxes. It will be interesting to see how my Gunpowder van rides as that has Binnie Nylon wheels in copper tube. Will hopefully find out soon enough!

User avatar
Chris Cairns
Driver
Driver
Posts: 2365
Joined: Mon Oct 29, 2007 7:25 pm
Location: Glasgow, Scotland

Post by Chris Cairns » Wed Dec 04, 2013 3:53 am

Whilst building a rake of industrial wagons, including several tipper wagons & a few chassis's for modification, I sought inspiration for a suitable Guard's Van/end vehicle. After seeing some of the great scratch built industrial Guard's Van's on this Forum from the likes of the WLLR & others, I was then suitably impressed with the new Small Guards Van from Swift Sixteen and purchased one at the Peterborough AGM show.

Image

As I'm still on Page 1 of weathering techniques I did not want to spoil this excellent model, which is an accurate representation of a Padarn Railway brakeman's shelter. So I decided to paint the axle boxes black, and the window frames & door furniture dark grey as seen in a photo of this shelter which is preserved at the National Slate Museum.

Image

I've left the roof removable for now whilst I decide who will be the brakeman & whether to fit a bench which I understand was basically all that was inside this shelter.

Chris Cairns.

User avatar
Peter Butler
Driver
Driver
Posts: 5232
Joined: Sun Sep 09, 2012 10:33 pm
Location: West Wales

Post by Peter Butler » Wed Dec 04, 2013 4:33 pm

Nice model but not so much a breakman's shelter, more a prison van in appearance.
I would not have liked spending my workdays in that.

REIGNAC.
Cleaner
Cleaner
Posts: 6
Joined: Mon Dec 02, 2013 5:01 pm
Location: France.

Post by REIGNAC. » Wed Dec 04, 2013 5:06 pm

Peter Butler:92996 wrote:I would not have liked spending my workdays in that.
Me too !:lol:
It's a great work.

User avatar
ace
Fireman
Fireman
Posts: 294
Joined: Sun Jul 14, 2013 9:03 am

Post by ace » Wed Dec 04, 2013 6:02 pm

That is a rather dandy looking van Chris,

I didn't realise how small is actually was! :shock:

It isn't quite 'prison transport' though, it has a door at the other end. :D I found this picture on the swift sixteen website, see below. It is quite a fair price too, how well did it go together?

Image taken from:

http://www.swiftsixteen.co.uk/productDe ... oductID=65


Image

User avatar
ruby
Cleaner
Cleaner
Posts: 50
Joined: Thu Oct 04, 2012 7:34 pm
Location: Russia Moscow
Contact:

Post by ruby » Wed Dec 04, 2013 6:47 pm

Here is my wagon guards. But I made it with traces of exploitation and contamination.


Image

User avatar
ace
Fireman
Fireman
Posts: 294
Joined: Sun Jul 14, 2013 9:03 am

Post by ace » Wed Dec 04, 2013 9:37 pm

Ruby, Loving what you have done with the 'van. What loco is that in the background? I like the look of it. :)

User avatar
Chris Cairns
Driver
Driver
Posts: 2365
Joined: Mon Oct 29, 2007 7:25 pm
Location: Glasgow, Scotland

Post by Chris Cairns » Thu Dec 05, 2013 12:52 am

ace wrote:how well did it go together?
Very easy indeed. There was very little casting mark to be removed from the main body, only one very small visible air bubble mark (easily filled with Milliput putty), wheel assembly straight forward. On-line instructions explain how to make up the door furniture very well. Just took awhile to actually paint it up.

I suspect it would benefit from a bit of extra weight added to the bottom of the chassis to lower the centre of gravity. Be a few days before I can run it as I'm relaying my test loop in the kitchen.

Chris Cairns.

User avatar
ruby
Cleaner
Cleaner
Posts: 50
Joined: Thu Oct 04, 2012 7:34 pm
Location: Russia Moscow
Contact:

Post by ruby » Thu Dec 05, 2013 6:14 am

ace:93031 wrote:Ruby, Loving what you have done with the 'van. What loco is that in the background? I like the look of it. :)
This bachmann g scale 1:20.3 davenport 0-4-0. I removed the automatic coupler. Has inserted decoder with sound traces of and struck operation and rust.


Image

User avatar
Andrew
Moderator
Moderator
Posts: 3247
Joined: Tue Jul 03, 2012 1:33 pm
Location: Bristol, UK
Contact:

Post by Andrew » Sat Dec 07, 2013 10:43 am

That's excellent, the weathering on both van and loco are great.

I've just noticed the axleboxes on the very nice open wagon in your picture - they're just what I need for a wagon-building project. Do you recall where they're from?

Thanks,

Andrew.

User avatar
ruby
Cleaner
Cleaner
Posts: 50
Joined: Thu Oct 04, 2012 7:34 pm
Location: Russia Moscow
Contact:

Post by ruby » Sat Dec 07, 2013 12:04 pm

I unfortunately badly understand English. If I understand correctly, the wagon of 'Swift Sixteen' http://www.swiftsixteen.com/productDeta ... oductID=62 .

Post Reply

Who is online

Users browsing this forum: No registered users and 6 guests