Those of you who have been following the 3D printing thread will know that the process I am going to describe is about finishing off a 3 D printed coach. However it is irrelevant how the coach was built, I use the same process.
So to start off what am I trying to represent in a model for use on a garden railway?
- 821f11d8-0691-4c95-804a-cdf83c312c10.jpg (184.82 KiB) Viewed 2653 times
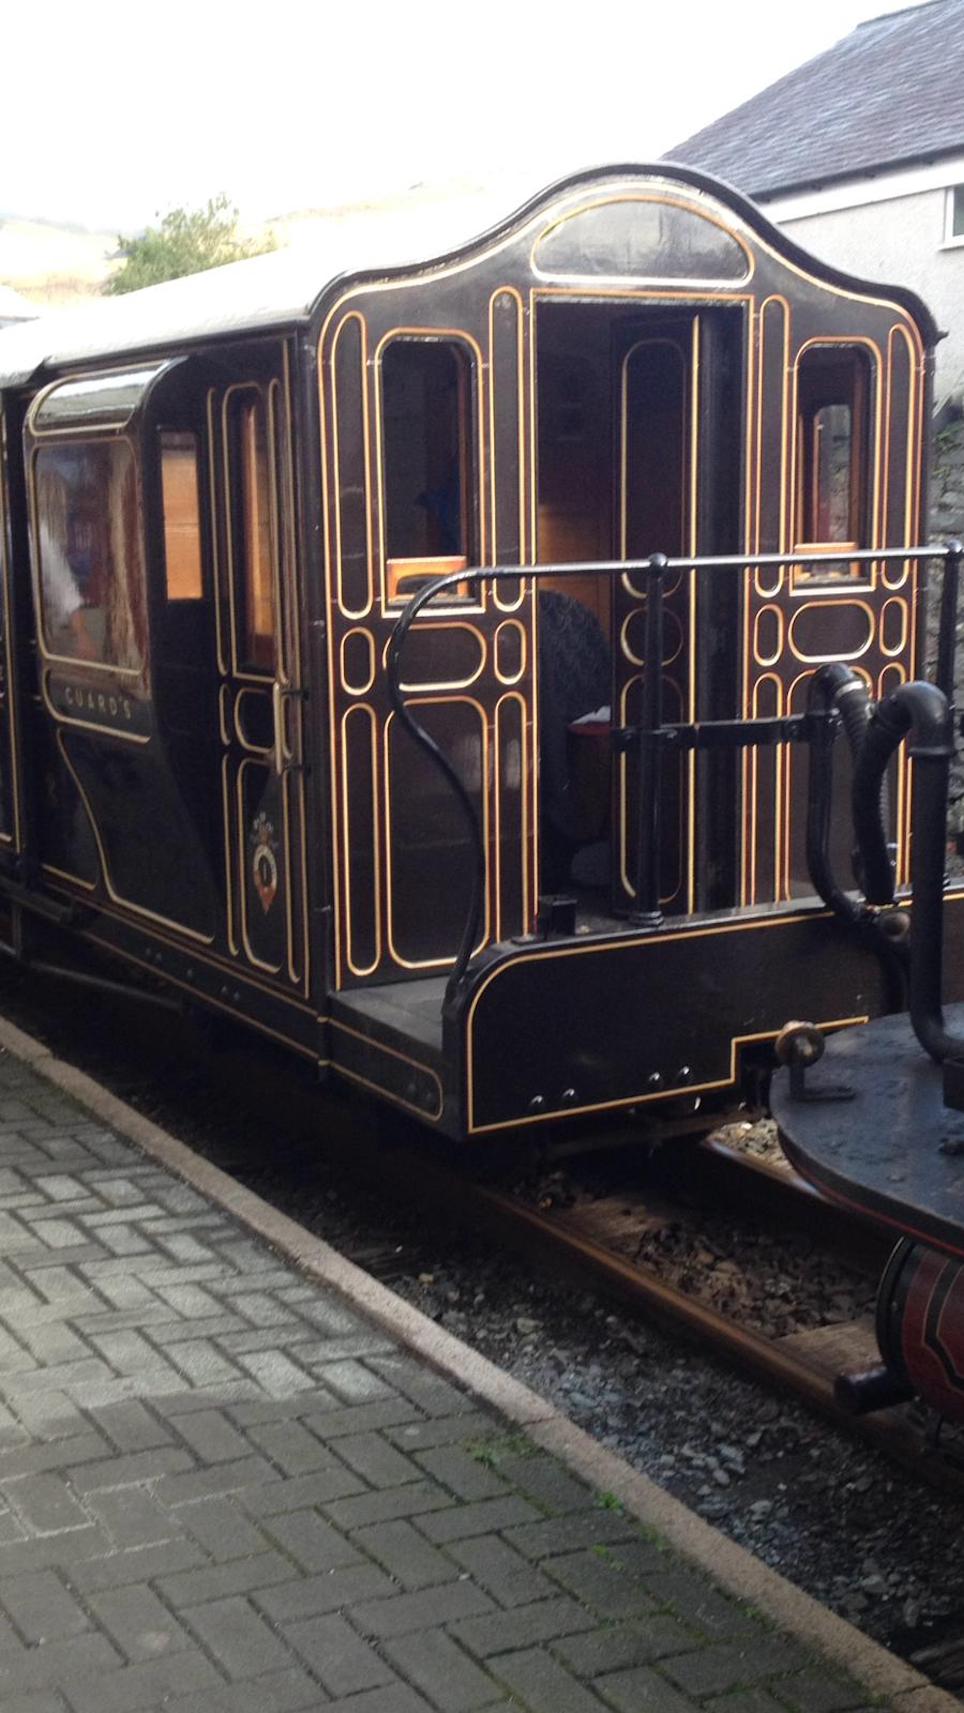
This is the replica curly roofed brake van on the Ffestiniog railway. This is what I want my model coaches to look like!
So to give you an idea of what I end up with, here is a plywood model of one of the Birmingham 4 wheelers which I made some years ago:

- IMG_0948.jpg (344.84 KiB) Viewed 2653 times
There it is warts and all. You can see it isn't perfect - but its as close as I can get it. The lining is two tone gold and red. The Festiniog crest is hand painted. The class designations are hand painted.
So let me explain how I go about doing this. Not the best way. Not the only way. But it is my way!
Firstly the tools. 45 years ago I used to do this sort of thing with a draftsmans bow pen. It can be done with one of those - but it is easier to get consistent line thicknesses with a purpose made lining pen.
So the first stage was to paint the window frames. For that I used a brush for in the openings and the lining pen held at 90 degrees to the surface for the rest.
On to the lining:
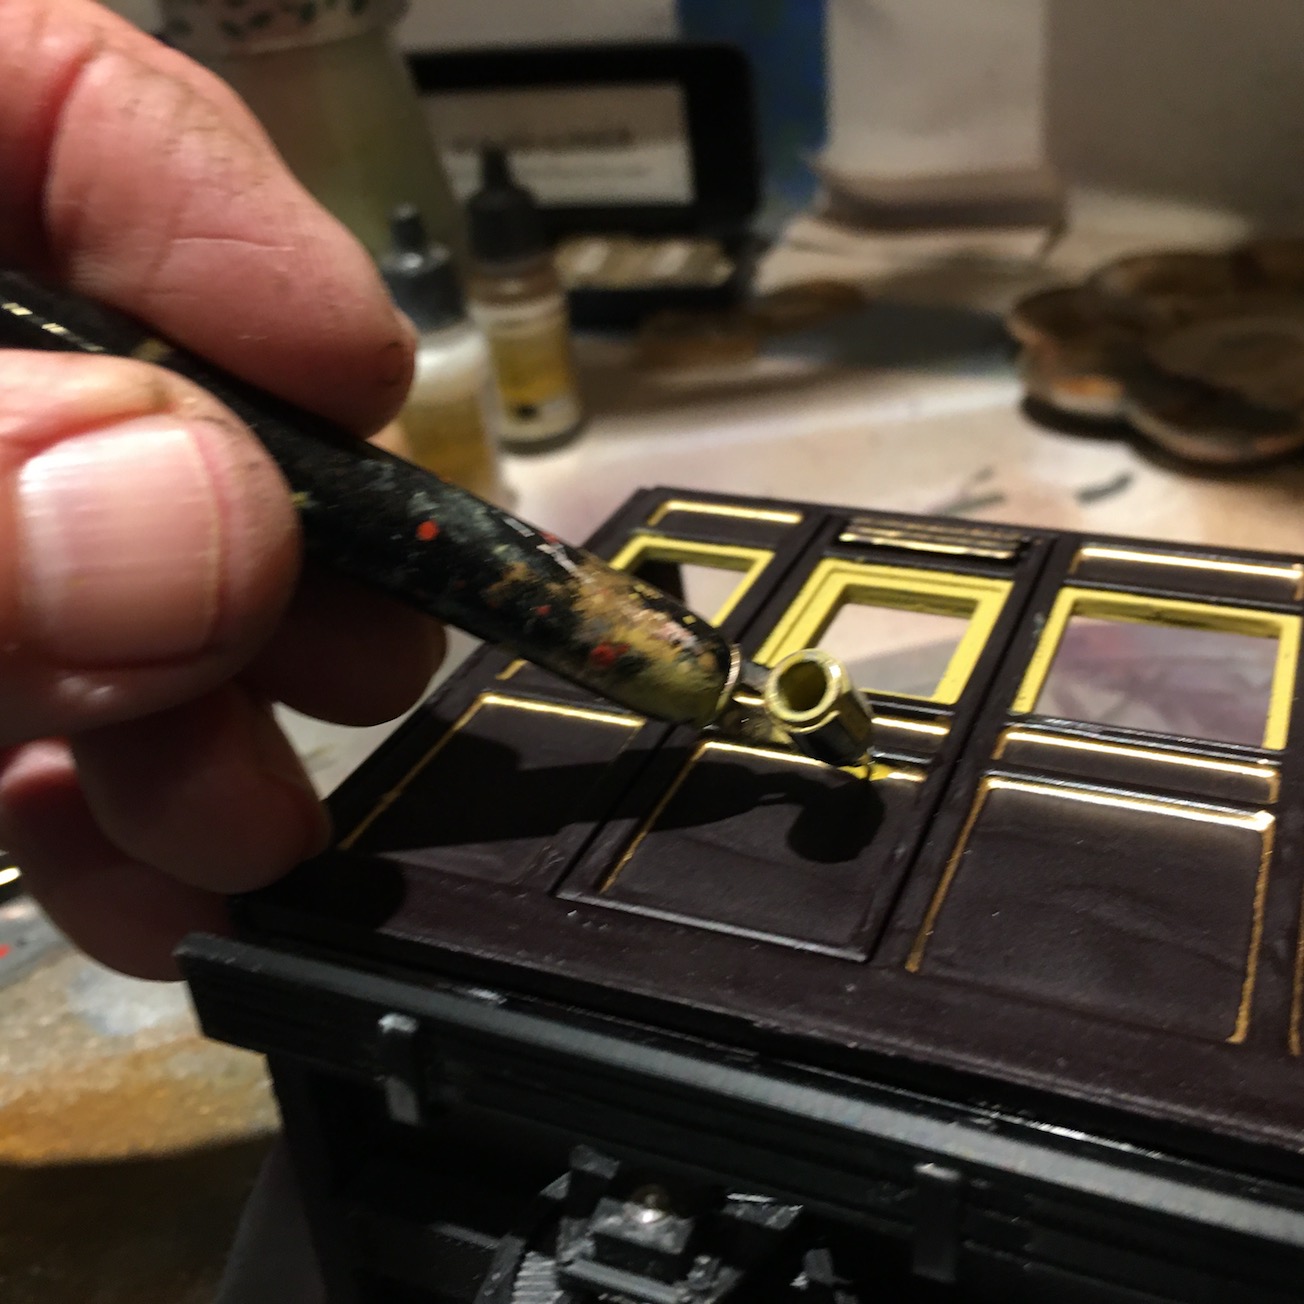
- IMG_0942.jpg (267.19 KiB) Viewed 2653 times
Ignore the pool of thinners coming out of the end of the pen. The purpose of this photo it to show you what a lining pen looks like and the angle I am holding it at for this second stage.
This is what it looks like after the second stage:
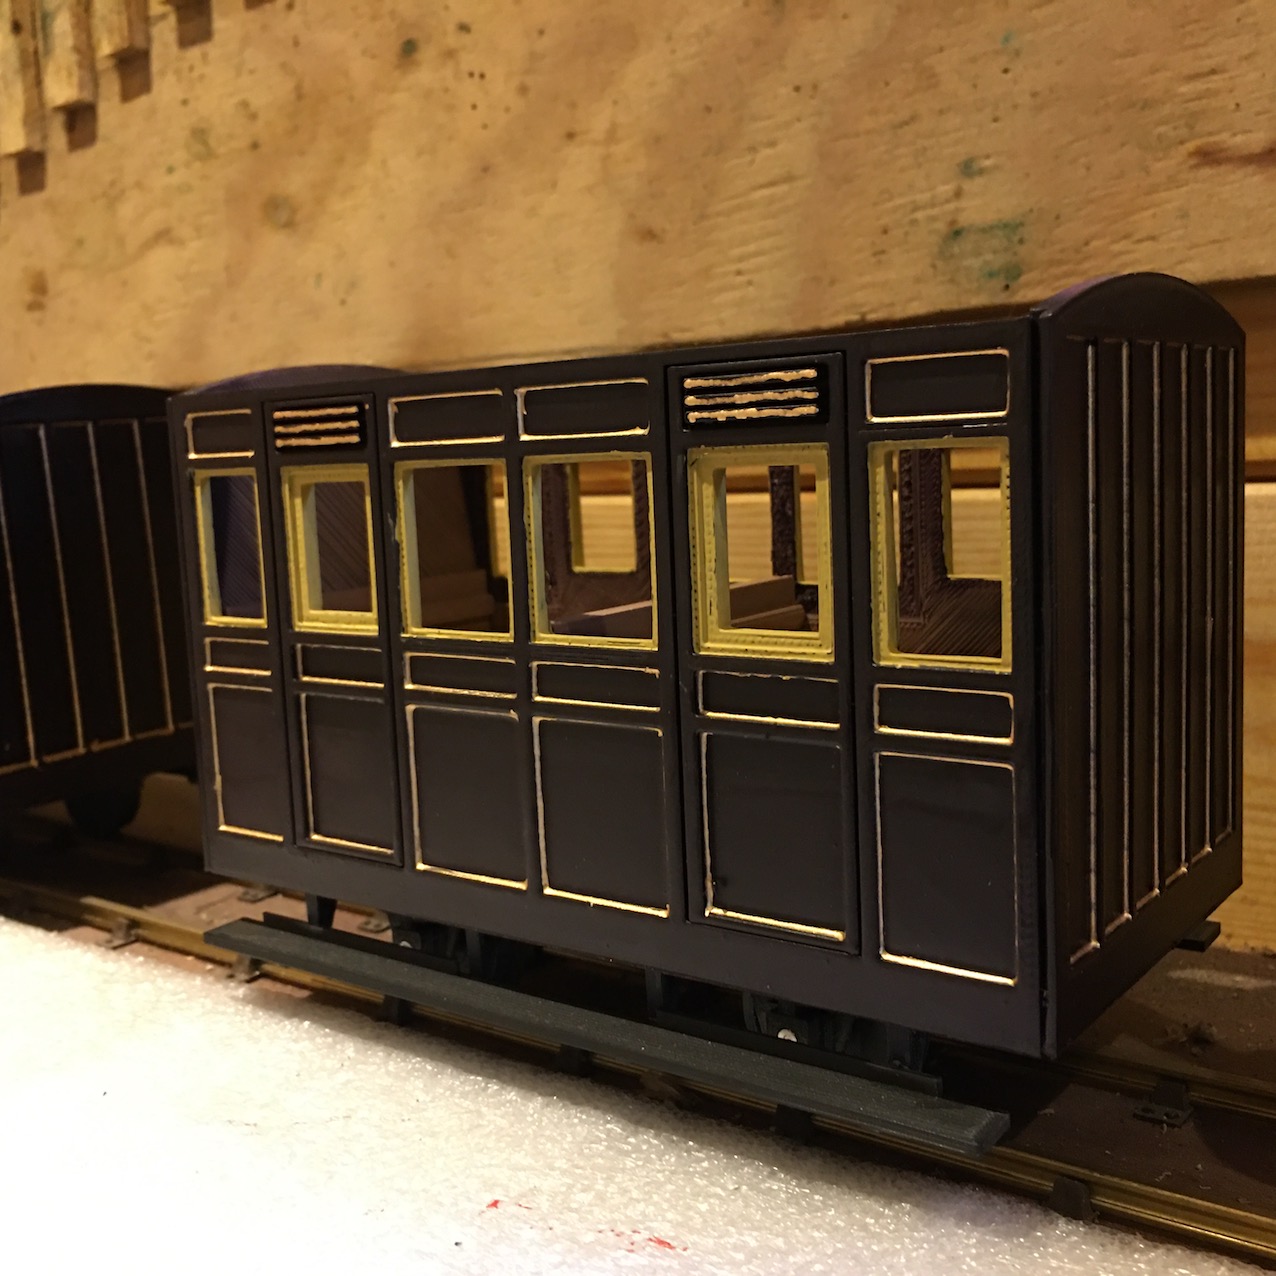
- IMG_0934.jpg (292.79 KiB) Viewed 2653 times
I have used the pen held at the angle shown in the photo to trace around the panels I want to line. It is a bit rough in places but that will get corrected as the process develops. That was fairly easy to do because the place where the paint comes out of was following in the corner between the panel and the framing. In this case gold paint. Freehand. In this case a 0.25mm nib, for thicker framing a 0.5mm nib.
From now on it gets trickier. The thin red line on the outside:
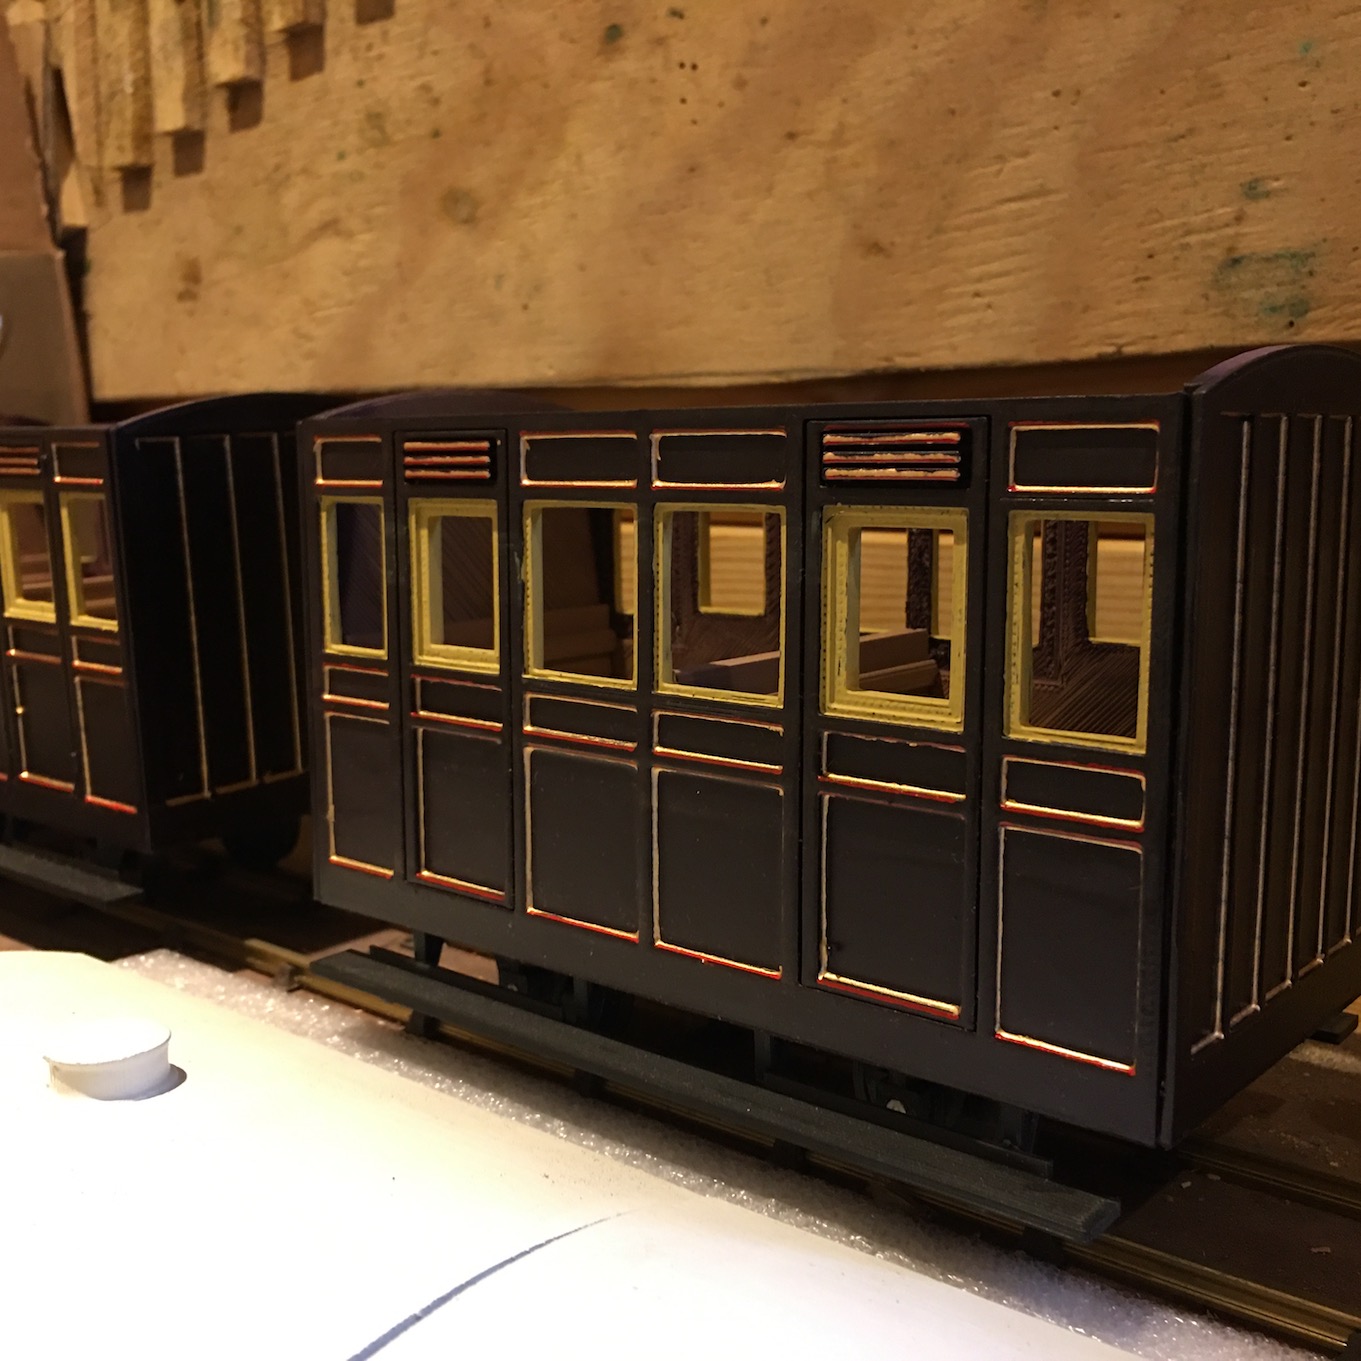
- IMG_0945.jpg (313.74 KiB) Viewed 2653 times
You can see that I have only painted the horizontal lines. Right on the corner of each frame, with the pen at 45 degrees. That was done with a ruler fixed in place with blueback (to stop it slipping). The ruler is important here because this is a final line.
Now to let it alone while the paint dries.
To be continued
Trevor


