BRAKE VAN
-
Peter Butler

- Driver

- Posts: 5243
- Joined: Sun Sep 09, 2012 10:33 pm
- Location: West Wales
Re: BRAKE VAN
Thanks for editing the posts, I can now see the pictures and very good they are too! Nice looking vehicle and well built.
The best things in life are free.... so why am I doing this?

Re: BRAKE VAN
Thank you for the pics. I agree with the grey too, a real service colour.
Grant.
Grant.

Re: BRAKE VAN
Some updates
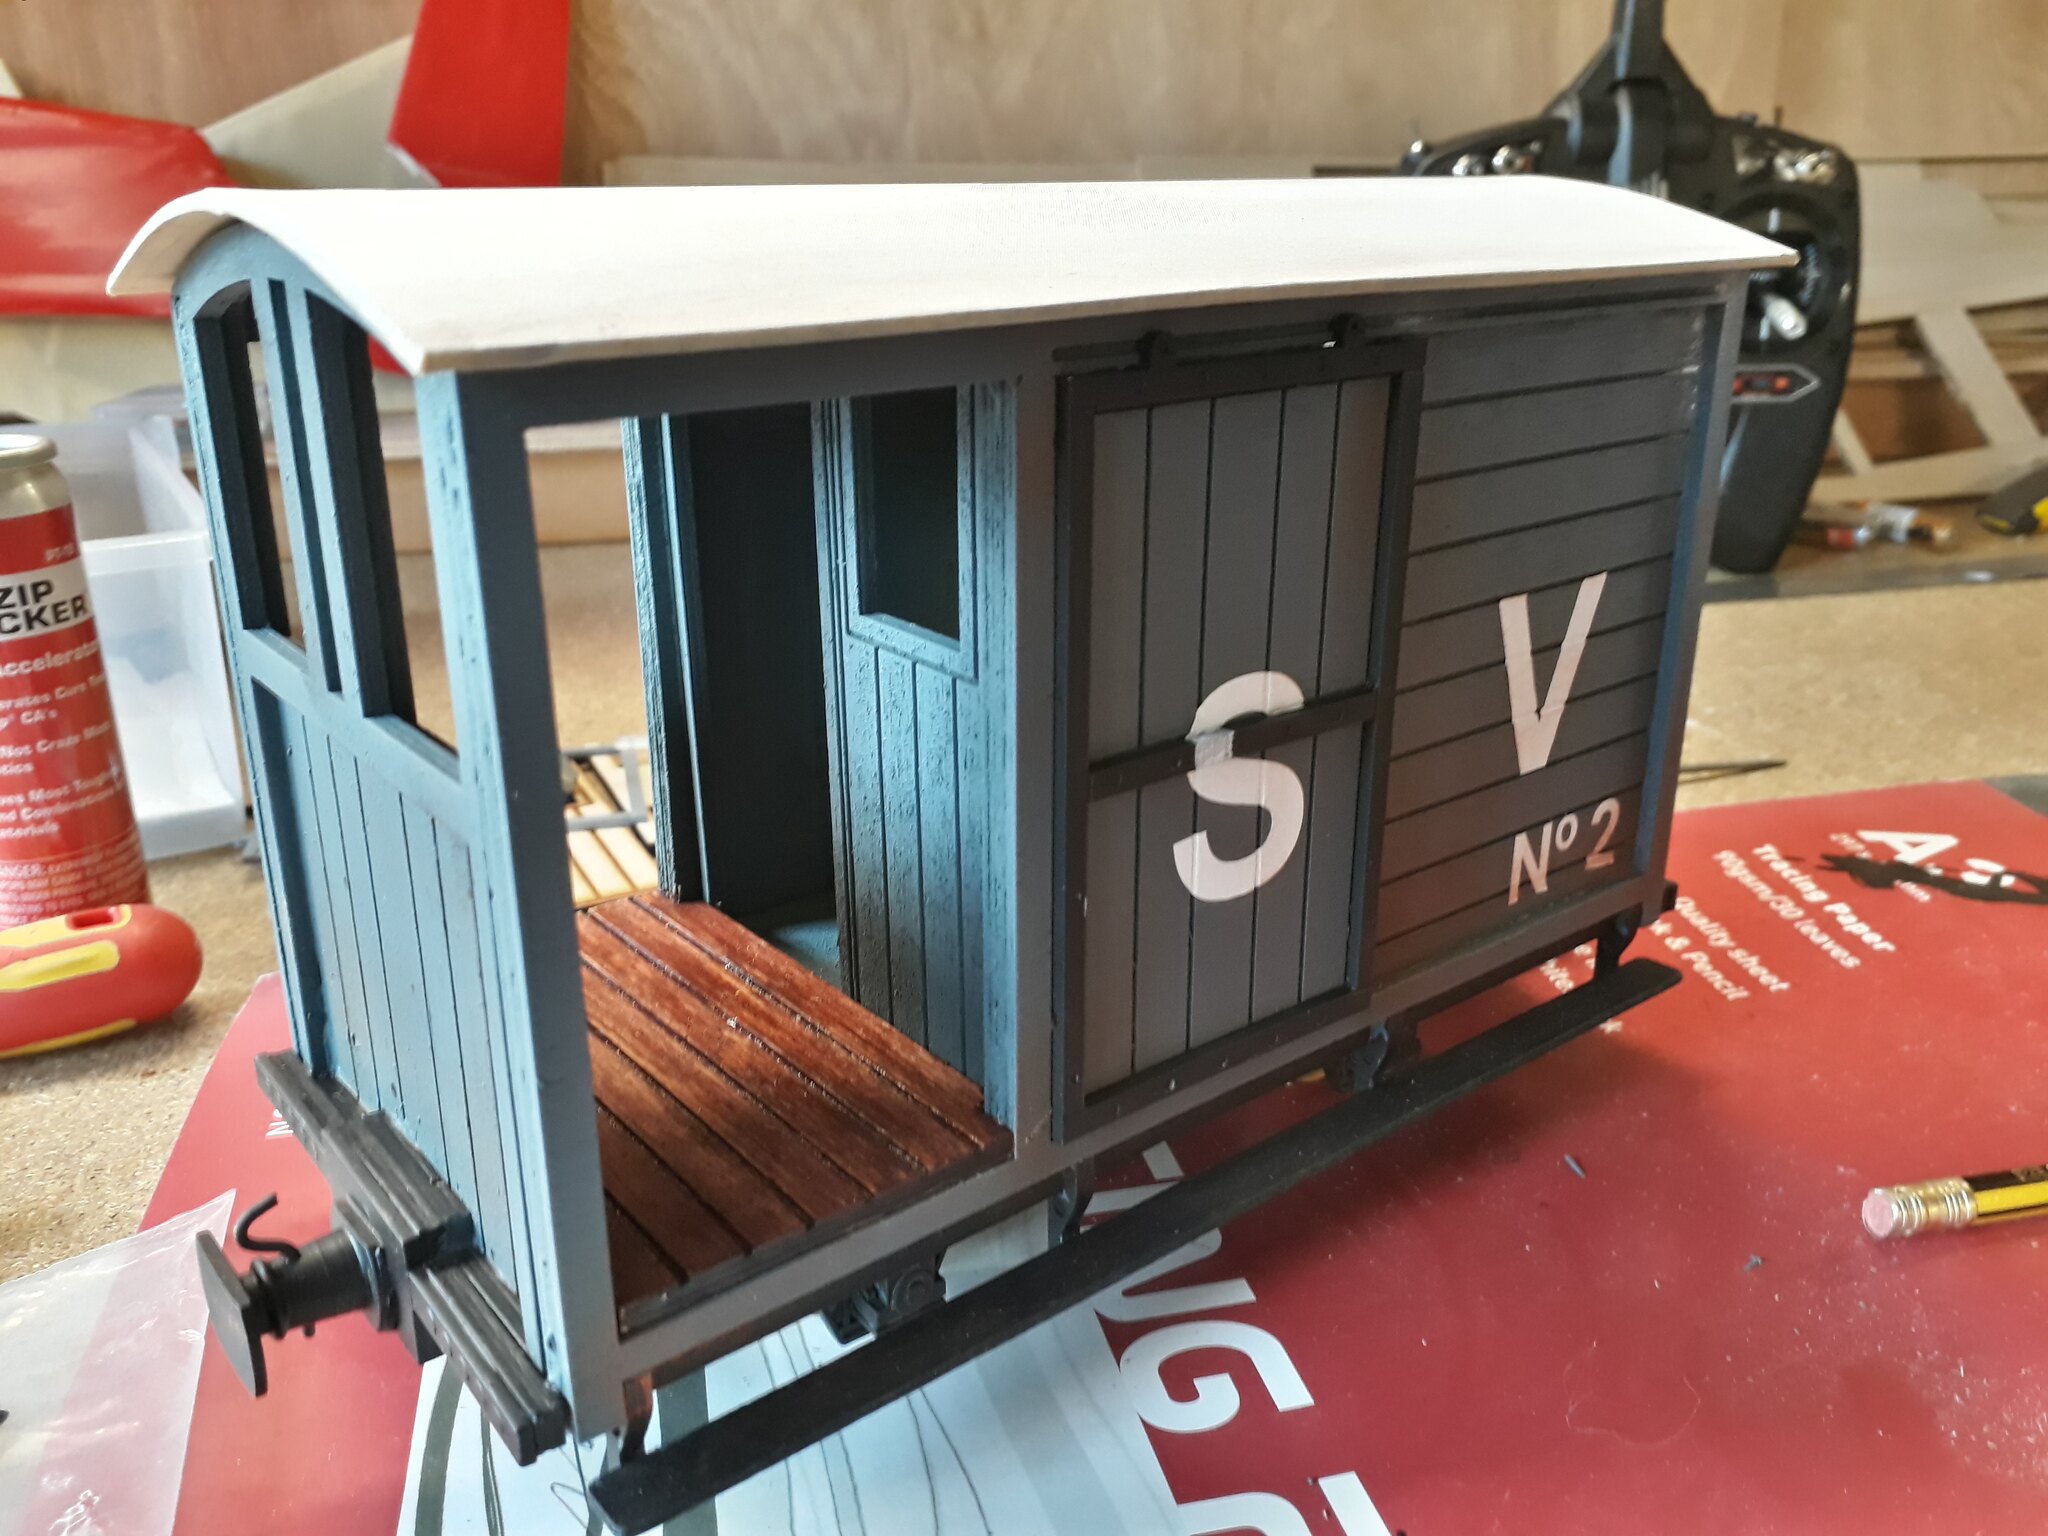
I have cut out some decals using white gloss vinyl, before cutting I flatted back an area using 1200 grade wet and dry. Once fitted I made sure to rub the letters into the planking detail using a cocktail stick. The main body was then given an all over coat of Humbrol clear matt aerosol. Running boards, underside, axle boxes etc were then painted using brush on black acrylic. I used a selection of weathering powders to give a feeling of wear and tear, this was finished off with a dusting of satin clear varnish. The roof as mentioned before was covered in Solartex fabric, this was then sprayed white and weathered using powders again and coated in clear varnish. Interior has been painted white and stained laser cut floorboards installed. I have also added some windows.
 20170819_184137 by Jonathan Demery, on Flickr
 20170819_184203 by Jonathan Demery, on Flickr
Next job detail the interior maybe add some lighting and install the chimney. Hopefully, you can all see the pictures as I have tried a different setup.
I have cut out some decals using white gloss vinyl, before cutting I flatted back an area using 1200 grade wet and dry. Once fitted I made sure to rub the letters into the planking detail using a cocktail stick. The main body was then given an all over coat of Humbrol clear matt aerosol. Running boards, underside, axle boxes etc were then painted using brush on black acrylic. I used a selection of weathering powders to give a feeling of wear and tear, this was finished off with a dusting of satin clear varnish. The roof as mentioned before was covered in Solartex fabric, this was then sprayed white and weathered using powders again and coated in clear varnish. Interior has been painted white and stained laser cut floorboards installed. I have also added some windows.
20170819_184137 by Jonathan Demery, on Flickr20170819_184203 by Jonathan Demery, on FlickrNext job detail the interior maybe add some lighting and install the chimney. Hopefully, you can all see the pictures as I have tried a different setup.


-
Peter Butler
- Driver
- Posts: 5243
- Joined: Sun Sep 09, 2012 10:33 pm
- Location: West Wales
Re: BRAKE VAN
Constant improvement and attention to detail.... love it!
The best things in life are free.... so why am I doing this?
Re: BRAKE VAN
Nice subtle weathering job, and those letters and numbers are very professional looking. Did you set out and cut them entirely by hand? top job!
Grant.
Grant.
Re: BRAKE VAN
Thanks all for the positive comments, it's my first full scratch build apart from some fixtures (axle boxes, wheels and buffers) as I am a newbie railway modeller, I have built plenty of RC gliders though.
LNR re the letters, I cheated slightly as I have access to a Roland Camm 1 in work.
-
Busted Bricks

- Trainee Driver

- Posts: 750
- Joined: Sat Jan 22, 2011 9:16 pm
- Location: Denmark
- Contact:
Re: BRAKE VAN
It looks great, well done.
Who is online
Users browsing this forum: No registered users and 3 guests