Newqida LGB Coach Conversions

Discussion of Rolling Stock related topics should go here
User avatar
dougrail
Driver
Driver
Posts: 1532
Joined: Mon Mar 14, 2011 5:11 pm
Location: Salopia; on the edge of Arcadia

Post by dougrail » Thu Feb 25, 2016 2:25 pm

IanC:116404 wrote:Great thread. I have been in need of some passenger stock and this has convinced me to have a go at converting some. Please can you let me know what wheels you ordered from GRS (wheel and axle diameter) and what mods are required to change the couplings? Thanks,

Ian
Ian, I would recommend these thoroughly, even if some work is needed should it be required. My costings and supplies are losted in my first article for your references. :) As seen elsewhere, rakes that have already been finished look fantastic when repainted and made garden railworthy.

The wheels I ordered from GRS are here:-http://www.grsuk.com/PG504_Wheels_28mm_ ... 32mm-M2782 and the couplers I ordered are the Accucraft Choppers.

For SpudUK I have put up photos of the converted stock, but basically I take the Accucraft copper, remove the buffer from the square holding and then drill a hole in the 'tongue' of the Newqida bogie which holds the buckeye couplers. I then sit the Accucraft buffer ontop, thread the bolt through and screw the bolt onto the thread beneath the Newqida tongue. I hope my photos on my previous post help.

User avatar
IanC
Trainee Driver
Trainee Driver
Posts: 798
Joined: Mon Feb 15, 2016 9:15 am
Location: Nr. Warrington, Cheshire

Post by IanC » Thu Feb 25, 2016 3:27 pm

Dougrail,

Many thanks for your reply and the information. I must admit following my first reading of your thread I ordered one which I am awaiting delivery of, to take a closer look at them. I will almost certainly order 2 or 3 more.

One will be converted to a brake coach. Possibly along the lines of the one you have done. I have already done a similar conversion to an unfinished rake of short coaches.

Your help is very much appreciated.

Regards,

Ian

SpudUk
Fireman
Fireman
Posts: 329
Joined: Thu Feb 27, 2014 4:25 pm
Location: Bridgend

Post by SpudUk » Thu Feb 25, 2016 5:46 pm

dougrail:116455 wrote:For SpudUK I have put up photos of the converted stock, but basically I take the Accucraft copper, remove the buffer from the square holding and then drill a hole in the 'tongue' of the Newqida bogie which holds the buckeye couplers. I then sit the Accucraft buffer ontop, thread the bolt through and screw the bolt onto the thread beneath the Newqida tongue. I hope my photos on my previous post help.
Thanks, bit cheeky but you don't happen to have a close up photo of the couplings and how they're mounted do you?
Chris Auckland

User avatar
dougrail
Driver
Driver
Posts: 1532
Joined: Mon Mar 14, 2011 5:11 pm
Location: Salopia; on the edge of Arcadia

Post by dougrail » Thu Feb 25, 2016 8:18 pm

On the photos that I have provided on the previous page SpudUK...! :)

User avatar
Dannypenguin
Trainee Driver
Trainee Driver
Posts: 632
Joined: Tue Feb 26, 2013 9:57 am
Location: Forest of Dean, UK
Contact:

Post by Dannypenguin » Thu Feb 25, 2016 9:08 pm

Regarding the couplings - the version I have has a buffer on, which with some wire to form a hook, can be converted into the centre type Roundhouse buffer very easily :-) Hope that helps
Dan

Visit the PFLR website - http://poultonfarmlightrailway.webs.com/
Dean Forest Railway Society website - http://dfrsociety.org/

merlin2
Cleaner
Cleaner
Posts: 38
Joined: Tue Aug 13, 2013 12:40 pm
Location: S. Somerset

Post by merlin2 » Sun Feb 28, 2016 1:53 pm

We have 2 rakes of 3 Newqida coaches.
My wife's maroon rake, obtained '2nd hand' (never been out the boxes!) at a Plymouth G Scale event for £60, is as produced except for the recent addition of passengers, motion switched lighting, including tail lights, and a toilet compartment to hide the motion sensor PCB. The rechargeable 9v battery is mounted to the under-frame. The lighting power is taken from coach to coach by jumper cables. A respray is on the to-do list.
The other rake is green and, as it always runs as a rake, is fitted with buckeyes at the inter-coach positions. The centre coach has been modified into a brake end with side double doors. A toilet compartment was included but I'm not happy with the window frosting so will be revisited. This coach was resprayed so the colour is very slightly different. The Sino-Euro logos have been removed and replaced with S.L.R branding. The coaches have been populated but the lighting mod has yet to be incorporated and, along with a possible re-spray, is also on the to-do list. All of these tasks, and others, come under the general heading 'Get a round tuit' My wife used to sell these in her craft shop but they don't do them any more!
Image
Click to see full size image
Merlin

User avatar
dougrail
Driver
Driver
Posts: 1532
Joined: Mon Mar 14, 2011 5:11 pm
Location: Salopia; on the edge of Arcadia

Post by dougrail » Mon Mar 21, 2016 1:11 pm

Finally, an update on these coaches, spurred on by the finishing of 'Cadno's redecoration.

Image

The GWR / VoR Black and gold waistlines were painted on using Tamiya acrylics, applied via my Peter Spooerer lining pen and a 3ft steel ruler bought especially at Brighton Modelworld for this purpose. :)

Image

The three passenger cars are all treated now. Alas the Guards composite languishes in cream only, awaiting a sunny day to get the chocolate on, then it can be lined up as these have.

Moving back to the three passenger cars, the GRS Waterslide transfers had arrived. I chose the GRS Welshpool & Llanfair 1923-1931 GWR Passenger set as it had everything I required - GWR, numbers, cllasifications. The crests were from Fox Transfers and were also carefully applied.

Image

Image

With all three done for transfers, the next stage is to get some Halfords clear acrylic varnish and apply a couple of layers when the weather is suitable.

User avatar
IanC
Trainee Driver
Trainee Driver
Posts: 798
Joined: Mon Feb 15, 2016 9:15 am
Location: Nr. Warrington, Cheshire

Post by IanC » Mon Mar 21, 2016 5:33 pm

They're looking good Doug. I can't wait to see some pictures of the guards coach and the finished rake.

Mine have arrived and I am slowly acquiring all the necessary parts to start work on them.

Ian

User avatar
dougrail
Driver
Driver
Posts: 1532
Joined: Mon Mar 14, 2011 5:11 pm
Location: Salopia; on the edge of Arcadia

Post by dougrail » Thu Mar 24, 2016 3:13 pm

IanC:116904 wrote:They're looking good Doug. I can't wait to see some pictures of the guards coach and the finished rake.

Mine have arrived and I am slowly acquiring all the necessary parts to start work on them.

Ian
Thanks Ian. Mine is 'slowly as they come' -with the wet weather, I cannot varnish the passenger coaches nor paint the roofs nor add the chocolate to the guards alas.

What are your plans for your rake? :)

User avatar
IanC
Trainee Driver
Trainee Driver
Posts: 798
Joined: Mon Feb 15, 2016 9:15 am
Location: Nr. Warrington, Cheshire

Post by IanC » Thu Mar 24, 2016 6:46 pm

Hi Doug,

My rake will be finished in a livery approximating to BR blood and custard. They will run behind my Lady Anne which is in maroon.

One of the coaches will be modified into a brake vehicle but I haven't yet finalised any plans for it.

I looked at the GRS vents and they appeared to need a lot of cleaning up so I will probably make replacements.

All my stock has large centre buffers so I will see if the existing ones are suitable or can be modified. If not then I will fit the GRS ones.

It will be a while before I am at the painting stage for mine as I haven't started dismantling them yet.

Regards,

Ian

User avatar
rebelego
Trainee Fireman
Trainee Fireman
Posts: 196
Joined: Thu Aug 29, 2013 3:00 pm
Location: Norway

Post by rebelego » Sun Apr 03, 2016 11:14 am

Very nice conversion!

What is the size of the Newqida coach?
If it comes in a box it would be nice to know the size of the box as well.
Thanks.

User avatar
dougrail
Driver
Driver
Posts: 1532
Joined: Mon Mar 14, 2011 5:11 pm
Location: Salopia; on the edge of Arcadia

Post by dougrail » Tue Apr 05, 2016 12:03 am

Hi Rebelego,

Coaches including couplers are no longer than 2ft long .

Roofs have all been stripped and are awaiting GWR vents and painting.

Guards van has had its luggage compartment doors glued on and now awaits the chocolate.

User avatar
IanC
Trainee Driver
Trainee Driver
Posts: 798
Joined: Mon Feb 15, 2016 9:15 am
Location: Nr. Warrington, Cheshire

Post by IanC » Tue Apr 05, 2016 7:26 am

rebelego:117153 wrote:Very nice conversion!

What is the size of the Newqida coach?
If it comes in a box it would be nice to know the size of the box as well.
Thanks.
Hi Rebelego,

I will measure mine up including the boxes as they are still in their boxes. I haven't got round to doing anything with them yet.

Regards,

Ian

User avatar
dougrail
Driver
Driver
Posts: 1532
Joined: Mon Mar 14, 2011 5:11 pm
Location: Salopia; on the edge of Arcadia

Post by dougrail » Wed Apr 13, 2016 9:53 pm

Now with decent painting weather available, work could progress on this rake once more after another long pause...

Roofs

Image

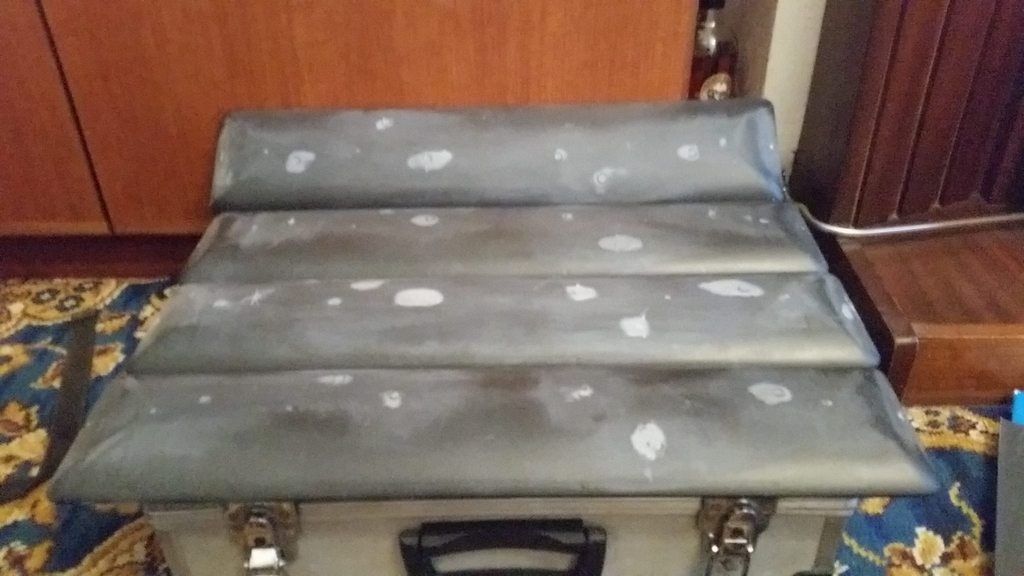
Roofs had all their German vents pulled off and the two chimney sockets hacksawed off. Plasticard was glued underneath each socket and hole, creating a 'dead end' in the plastic roof. The roofs were then sanded flat. Finally a load of ISO Carfiller was smotered over the gaps to create several areas of hardened plastic, in peaks and ridges, but importantly, covering over the holes. These were sanded down flat, as per the above photo.

Finally, a set of GWR Coach vents were glued on using Gorilla Glue and allowed to set on the now totally smooth and solid roofs. That was followed by 3 coats of Halfords grey primer, and 4 coachs each of Halfords Renault Glacier White.

Image

Image

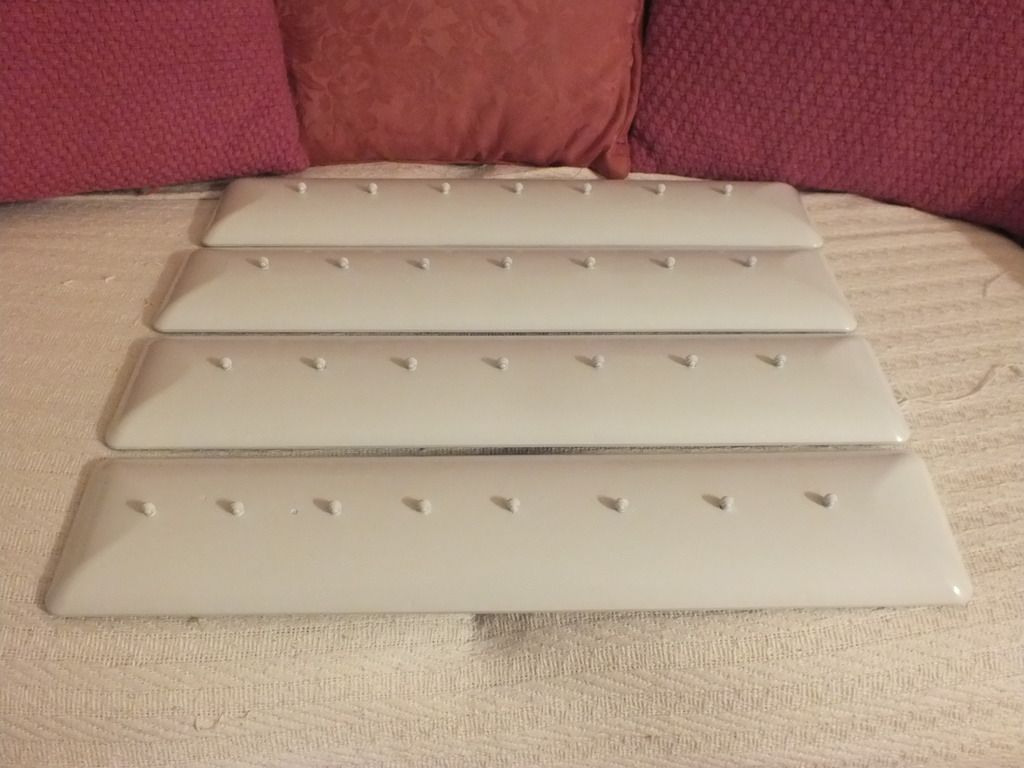
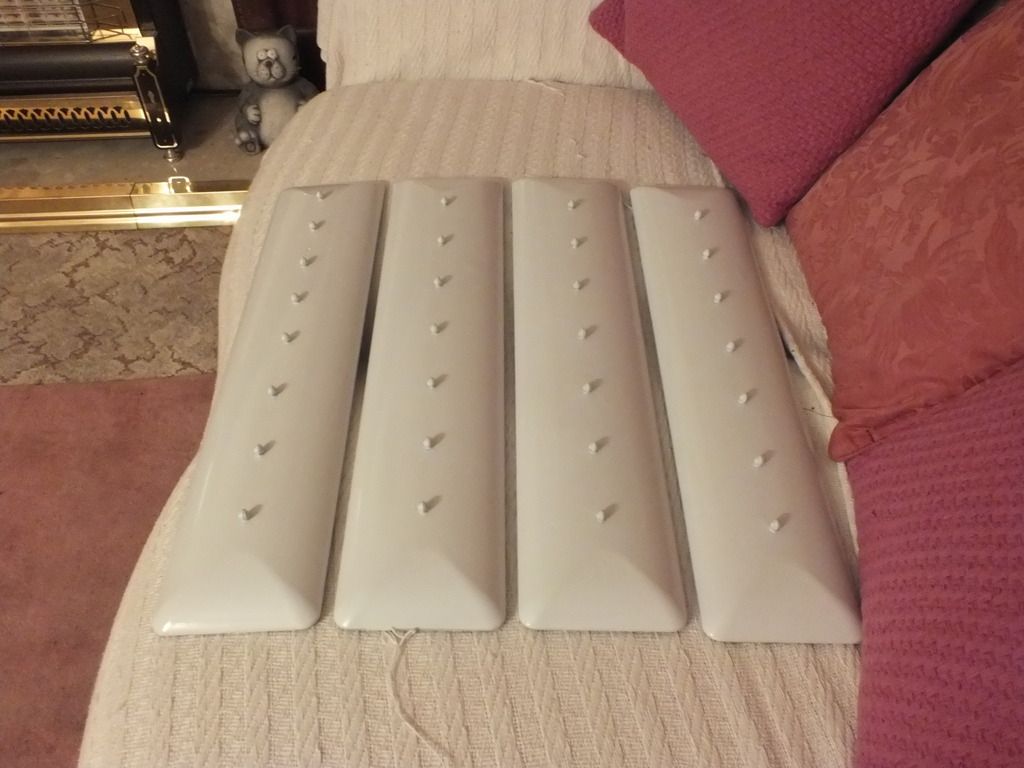
The observant amongst you might spot that there are seven vents on three roofs - one vent per window on each side as per many prototypes but one vent has eight vents. This is the Guard composite - four are in line with the windows in the passenger section, and the four closer together are the Guards and luggage section.

~~~~~~~~~~~~~~~~~~~~~~

In tandem, the Guards Composite Body finally received its compartment doors.

Image

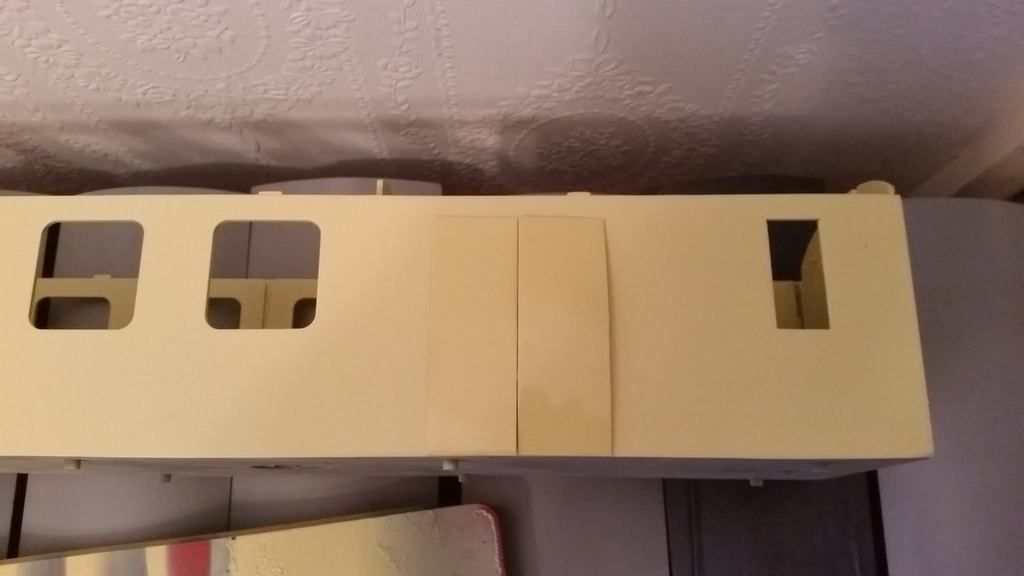
This is simply, two sets of finely thin plasticard cut out, primed and painted in the Halfords Primula Yellow. Handles to be attached via glue.


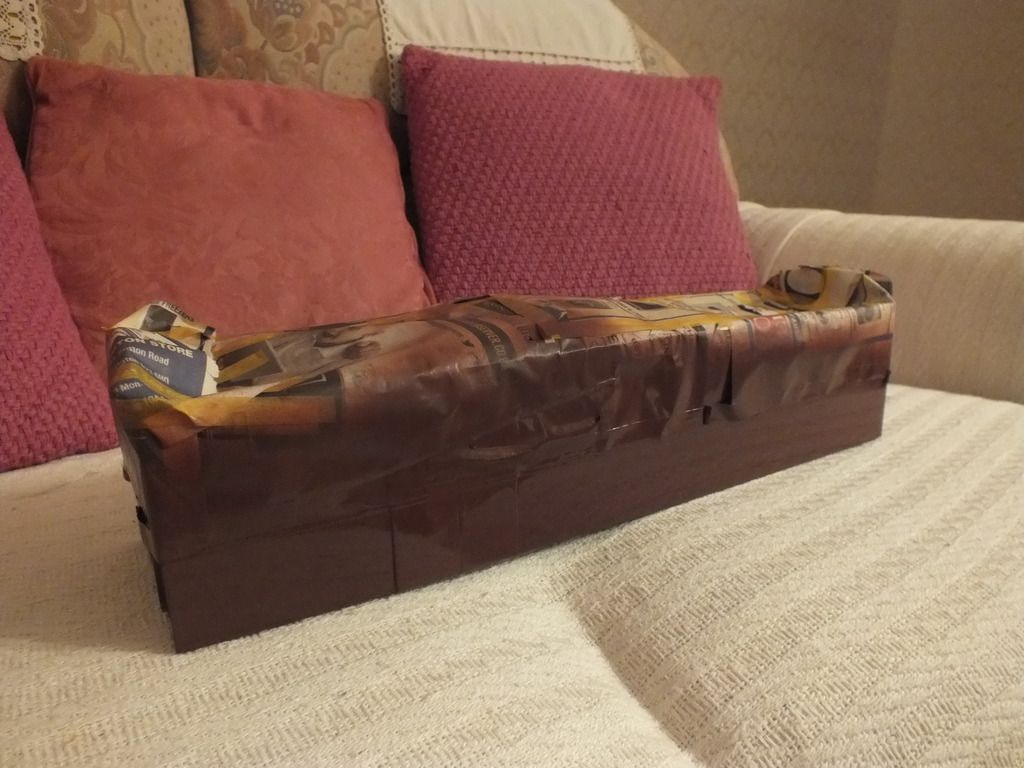
Next, the Guards composite only today received its chocolate lower coat.
Image

~~~~~~

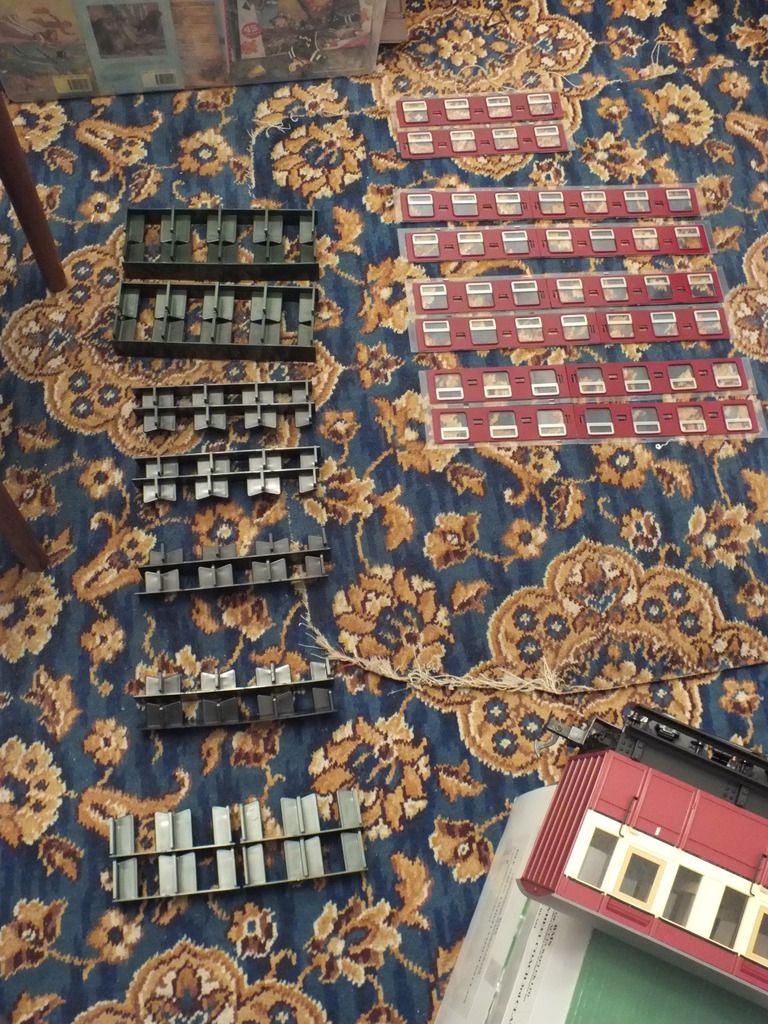
The three main coaches, having now had transfers and protective lacquer, were essentially complete. Time to bring out the box that had all the parts in during the storage period. Cue a fifty plus piece jigsaw puzzle over the floor of my living room...!

Image

Seen after the glazing was matched to the window frames, and each window frame and glazing set was matched to an opposite to create three pairs of full glazing and window frame lines, to fit in each carriage. You can see how these window frames have been painted burgundy red / maroon to match GWR practice, both mainline and Welshpool and Llanfair especially.


On the three main coaches, the bodies have been lacquered and roofs painted, merely awaiting lacquering. With that, they were rebuilt with all the bits inside - the seating pieces screwed back in, followed by the glazing slid and pushfitted into place, restoring the stiffness of the bodywork.

A preview of what is on the way.

Image

User avatar
IanC
Trainee Driver
Trainee Driver
Posts: 798
Joined: Mon Feb 15, 2016 9:15 am
Location: Nr. Warrington, Cheshire

Post by IanC » Wed Apr 13, 2016 10:25 pm

Very impressive Doug. I really must press on with mine.

User avatar
Peter Butler
Driver
Driver
Posts: 5245
Joined: Sun Sep 09, 2012 10:33 pm
Location: West Wales

Post by Peter Butler » Thu Apr 14, 2016 12:03 am

The coaches look wonderful Doug, but the workshop is luxurious!
The best things in life are free.... so why am I doing this?

User avatar
Dannypenguin
Trainee Driver
Trainee Driver
Posts: 632
Joined: Tue Feb 26, 2013 9:57 am
Location: Forest of Dean, UK
Contact:

Post by Dannypenguin » Thu Apr 14, 2016 11:36 am

IanC:117487 wrote:Very impressive Doug. I really must press on with mine.
Same here...
Dan

Visit the PFLR website - http://poultonfarmlightrailway.webs.com/
Dean Forest Railway Society website - http://dfrsociety.org/

User avatar
Andrew
Moderator
Moderator
Posts: 3276
Joined: Tue Jul 03, 2012 1:33 pm
Location: Bristol, UK
Contact:

Post by Andrew » Thu Apr 14, 2016 5:18 pm

The full rake is going to look really impressive...

User avatar
IanC
Trainee Driver
Trainee Driver
Posts: 798
Joined: Mon Feb 15, 2016 9:15 am
Location: Nr. Warrington, Cheshire

Post by IanC » Fri Apr 15, 2016 1:38 pm

rebelego:117153 wrote:Very nice conversion!

What is the size of the Newqida coach?
If it comes in a box it would be nice to know the size of the box as well.
Thanks.
Hi Rebelego,

sorry for the delay.

The coaches are approx 575mm long over the couplings/buffers (23 5/8"), 110mm wide (4 5/16") and 165mm tall (6 1/2").

The box measures 680 x 190 x 130 (26 3/4" x 7 1/4" x 5")

Hope this is of use.

Ian

User avatar
rebelego
Trainee Fireman
Trainee Fireman
Posts: 196
Joined: Thu Aug 29, 2013 3:00 pm
Location: Norway

Post by rebelego » Fri Apr 15, 2016 2:50 pm

A bit late. I brought a folding ruler and found that it wouldn't fit in my suitcase, so no purchase. Thanks anyway.

Post Reply

Who is online

Users browsing this forum: No registered users and 16 guests