Page 1 of 6
Gauge 1 ‘project’
Posted: Mon Nov 23, 2020 9:08 am
by Garethh
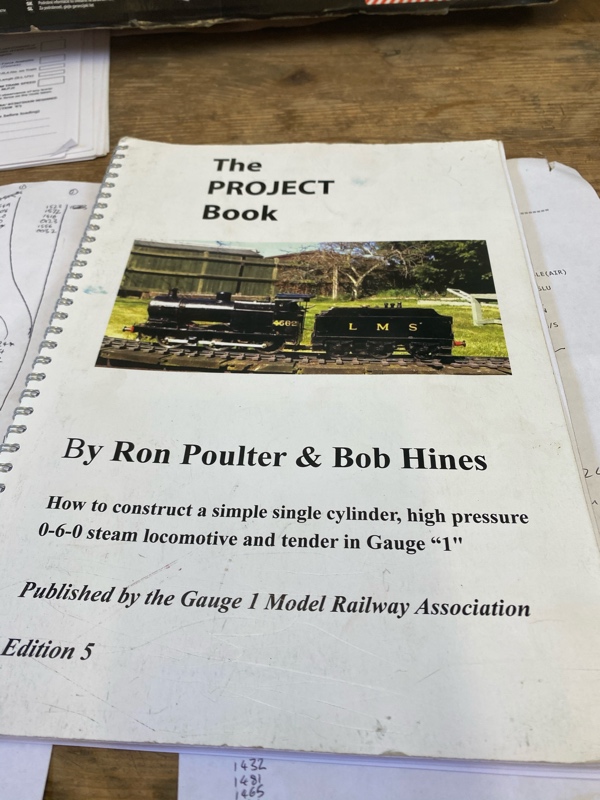
Not sure how much interest in gauge 1 there is on here but thought I’d stick this up anyway, mostly because I’ll probably need to ask for advice at some point! A while back I bought the g1mra ‘project’ book, out of curiosity really as I thought the info in there might be helpful for other things I had in mind. A trip to guildford model engineering society sparked an interest so I went back to the book and decided I’d give it a go, primarily to forces myself to learn some new skills.
- 5EFC202D-1CC8-4D4E-9FE5-84E3AFCDEEE1.jpeg (180.18 KiB) Viewed 10169 times
I decided to order some ready machined bits from Walsall model industries, namely wheels, axles and buffers as I’ve turned wheels before anyway and I liked the idea of the squared axles making quartering easy.

- 8FBB2174-3560-4614-A5F7-E2CF90F33C5A.jpeg (286.58 KiB) Viewed 10169 times
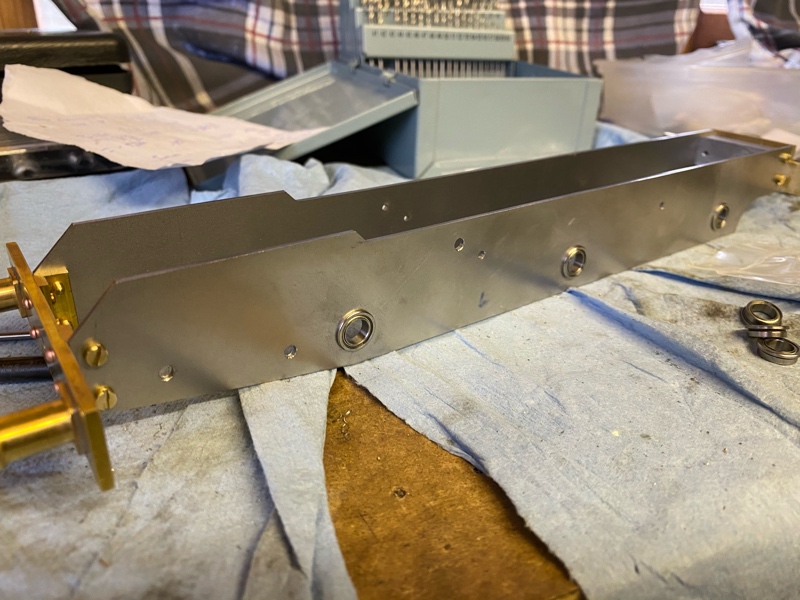
At the same time I ordered so laser cut frames and bits and pieces from model engineers laser, and while waiting for those to arrive cracked on with the buffer and drag beam:

- 6121B7CD-6AFE-4825-80C1-697B291E7586.jpeg (187.73 KiB) Viewed 10169 times
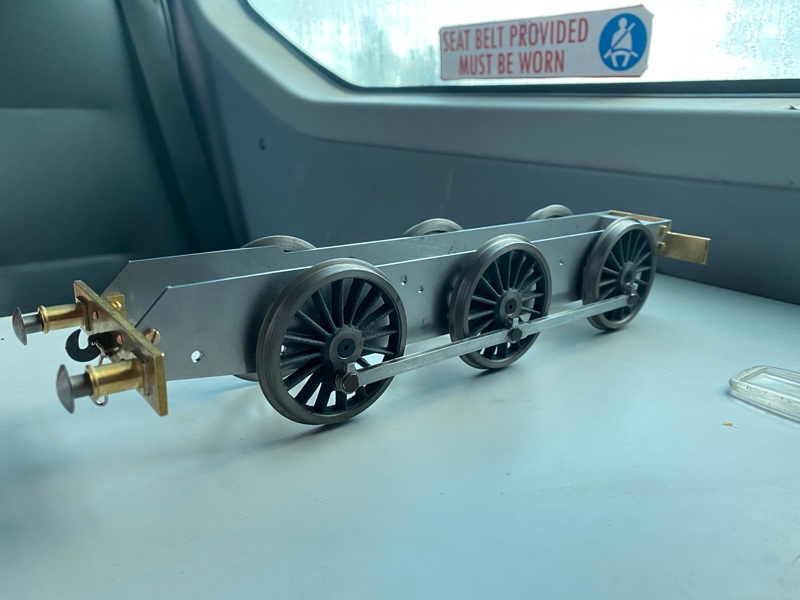
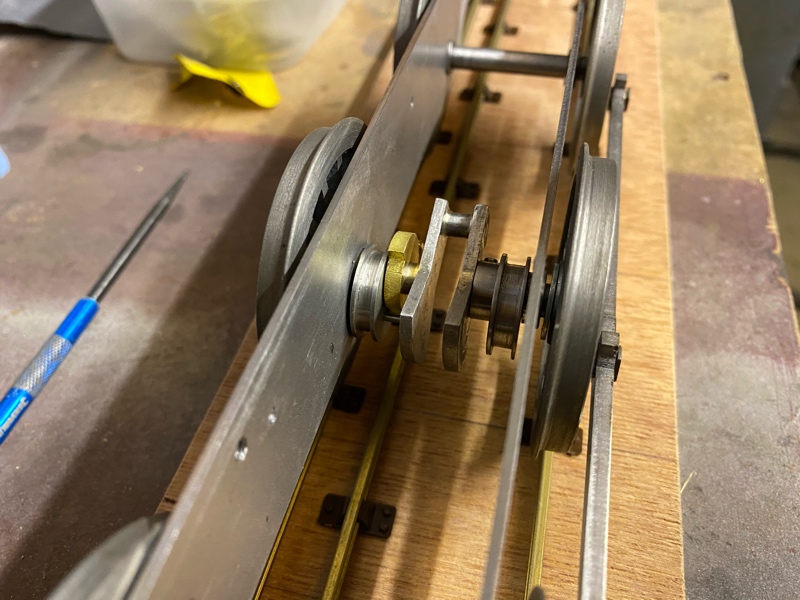
This meant that when the laser cuts arrived I was pretty much ready to bolt a rolling chassis together, after drilling out some holes to the correct sizes. I decided to use ball races rather than bushes as this has worked nicely on battery locos in the past.
- 92178490-1A35-487A-887E-AC5769B47BD0.jpeg (191.54 KiB) Viewed 10169 times

- 5A012E93-1DD8-4D63-A323-102410342556.jpeg (243.76 KiB) Viewed 10169 times
Next up coupling rods, I had the laser cuts for these so just enlarged the holes and turned some bushes to be a nice press fit.

- B2D48068-5B11-4D1C-B2D1-EB96F818628D.jpeg (263.16 KiB) Viewed 10169 times
They needed a little opening out to get the chassis to roll smoothly but not enough that there’s and noticeable slop.
- 156CEBC3-F92C-4F80-BE2F-99CFE1BCE6D0.jpeg (125.17 KiB) Viewed 10169 times
And that’s where I’m at as of last night... I’m toying with the idea of drilling the coupling rods from the top for an oil way into the bushes, just wondering if anyone has done this and whether it was worth it?
Re: Gauge 1 ‘project’
Posted: Mon Nov 23, 2020 9:45 am
by ge_rik
That does look like an impressive start. Looking forward to seeing how it develops.
If I remember rightly, Dazza has drilled oiling points into the bearings on his live steam loco build which is described on this thread. There's quite a few posts to wade through but I think you'll find it referred to somewhere.
https://gardenrails.org/forum/viewtopic ... 36&t=11432
If you ask Dazza nicely, he might send you some relevant photos......

Rik
PS I think this might be the relevant post -
https://gardenrails.org/forum/viewtopic ... 20#p133018
Re: Gauge 1 ‘project’
Posted: Mon Nov 23, 2020 9:51 am
by bambuko
Garethh wrote: ↑Mon Nov 23, 2020 9:08 am
Not sure how much interest in gauge 1 there is on here ...
Quite a lot

so keep "sticking this up"

Re: Gauge 1 ‘project’
Posted: Mon Nov 23, 2020 10:27 am
by Garethh
ge_rik wrote: ↑Mon Nov 23, 2020 9:45 am
That does look like an impressive start. Looking forward to seeing how it develops.
If I remember rightly, Dazza has drilled oiling points into the bearings on his live steam loco build which is described on this thread. There's quite a few posts to wade through but I think you'll find it referred to somewhere.
https://gardenrails.org/forum/viewtopic ... 36&t=11432
If you ask Dazza nicely, he might send you some relevant photos......
Rik
PS I think this might be the relevant post -
https://gardenrails.org/forum/viewtopic ... 20#p133018
Cheees for that, exactly what I was thinking!
Re: Gauge 1 ‘project’
Posted: Mon Nov 23, 2020 12:15 pm
by Tom85
Hi Garethh, thanks for posting this. I'll certainly be following this thread closely, as I too have a copy of this book and have an admittedly long term ambition to build this loco (after the small matter of teaching myself how to use a lathe etc!). Plenty of people seem to use this as a first loco build, and it'd be great to see one come together on here. Please keep the updates coming!
Re: Gauge 1 ‘project’
Posted: Mon Nov 23, 2020 12:29 pm
by -steves-
Also looking forward to updates in this thread as I have a most parts for a Juliet in the shed that needs building "at some point".
Re: Gauge 1 ‘project’
Posted: Mon Nov 23, 2020 12:58 pm
by Garethh
Updates may be a little slow as Christmas will definitely impact funding for tooling and materials... it’s crossed my mind that the basic cylinder design could be used in a 16mm loco, although can’t think of any inside cylinder prototypes
Re: Gauge 1 ‘project’
Posted: Mon Nov 23, 2020 1:20 pm
by GTB
Garethh wrote: ↑Mon Nov 23, 2020 12:58 pm
it’s crossed my mind that the basic cylinder design could be used in a 16mm loco, although can’t think of any inside cylinder prototypes
A prototype doesn't necessarily need to have inside cylinders.......
Stewart Brown at Archangel Model Locomotives used a single inside cylinder, with dummy outside cylinders, in some of his early SM32 models. eg. Rheidol. You'll find others on the same site.
http://www.sidestreet.info/locos/loco73.html
Regards,
Graeme
Re: Gauge 1 ‘project’
Posted: Tue Nov 24, 2020 6:52 am
by Garethh
Interesting Graeme, maybe I’ll do a spare cylinder at the same time if I manage to get the first one right!
Re: Gauge 1 ‘project’
Posted: Tue Nov 24, 2020 10:31 am
by Tom85
I've enjoyed browsing the locos profiled on the site linked above too. There's really something about those old Archeangel locos, isn't there? There must be significant potential for scratchbuilding 16mm locos with a single, big, inside cylinder with dummy outside ones. Not for the purists perhaps but live steam is live steam.
Re: Gauge 1 ‘project’
Posted: Thu Nov 26, 2020 12:41 pm
by angr607
Hi,
Guildford Model Engineering are a dangerous bunch aren't they! They're the reason I got into Gauge 1. Always good to see someone else doing it on here. I look forward to seeing how your Project turns out!
Jon
Re: Gauge 1 ‘project’
Posted: Thu Nov 26, 2020 3:29 pm
by Garethh
angr607 wrote: ↑Thu Nov 26, 2020 12:41 pm
Hi,
Guildford Model Engineering are a dangerous bunch aren't they! They're the reason I got into Gauge 1. Always good to see someone else doing it on here. I look forward to seeing how your Project turns out!
Jon
They certainly are, I think I’ll be joining up once all this restriction stuff starts to ease! I’ve been watching the development of your G1 range with interest as at some point hopefully I’ll need something for this to pull!
Re: Gauge 1 ‘project’
Posted: Thu Nov 26, 2020 8:34 pm
by Hydrostatic Dazza
ge_rik wrote: ↑Mon Nov 23, 2020 9:45 am
That does look like an impressive start. Looking forward to seeing how it develops.
If I remember rightly, Dazza has drilled oiling points into the bearings on his live steam loco build which is described on this thread. There's quite a few posts to wade through but I think you'll find it referred to somewhere.
https://gardenrails.org/forum/viewtopic ... 36&t=11432
If you ask Dazza nicely, he might send you some relevant photos......
Rik
PS I think this might be the relevant post -
https://gardenrails.org/forum/viewtopic ... 20#p133018
Page one of Llewellyn Loco Works # 1 thread. Scroll down. 0.50 PCB drill. Printed circuit drills beat the usual twist drills hands down for small holes, due to their geometry. Important to use collets and not have runout. I would think the oil will have to have the viscosity of Kerosene to flow down a 0.50mm hole. It is just for kicks and giggles and I even cut some tooth pic points and used them as corks when some one said I needed corks in the oil holes. I use PCB carbide drills for a holes 1/8" and smaller. Unless the length of the PCB drill will not reach for some reason.
http://www.gardenrails.org/forum/viewto ... 0116a8ac3a
Re: Gauge 1 ‘project’
Posted: Sat Nov 28, 2020 8:27 am
by Garethh
Re: Gauge 1 ‘project’
Posted: Sun Nov 29, 2020 2:43 am
by dewintondave
Garethh wrote: ↑Sat Nov 28, 2020 8:27 am
The process of turning the eccentrics in case it’s useful to anyone, made up a little spring loaded thing which sits between the tailstock centre and a center pop on the workpiece, dial indicator mounted in the tool holder as I seem to have misplaced my magnetic stand and used to clock in the 4 jaw until it runs true:
That's a great idea
Re: Gauge 1 ‘project’
Posted: Tue Dec 01, 2020 6:49 pm
by angr607
Garethh, GMES has now reopened after the last lockdown and our next open day is the 13th. I'm planning to be running on the Gauge one (I'm the one will all the small electric mice) if you wanted to come say hello! We're a lovely bunch and always looking for more members!
Jon
Re: Gauge 1 ‘project’
Posted: Wed Dec 02, 2020 9:46 am
by Garethh
angr607 wrote: ↑Tue Dec 01, 2020 6:49 pm
Garethh, GMES has now reopened after the last lockdown and our next open day is the 13th. I'm planning to be running on the Gauge one (I'm the one will all the small electric mice) if you wanted to come say hello! We're a lovely bunch and always looking for more members!
Jon
Thanks Jon, I’m planning on becoming a member just waiting for new year when hopefully funds will allow! May well try and pop down on the 13th though, always fun to watch some trains!
Re: Gauge 1 ‘project’
Posted: Thu Dec 03, 2020 8:32 am
by Garethh
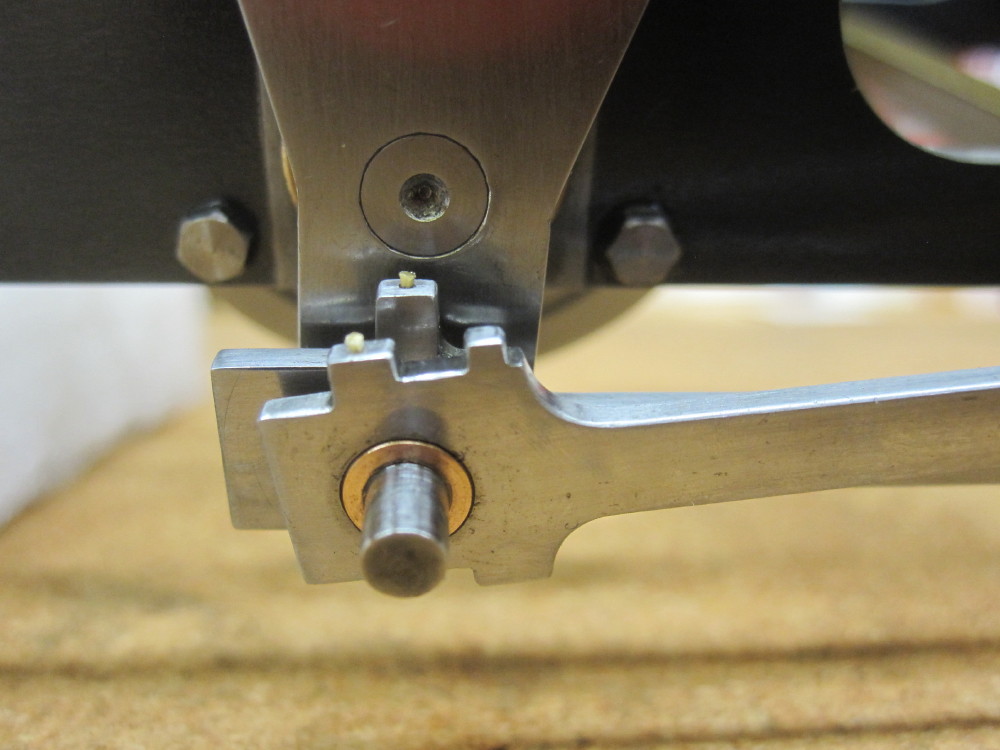
Managed to borrow a propane torch to get the crank web silver soldered, then cut out and cleaned up the center bit of axle, drive axle is now complete and back in the frames.
- 1681550C-2DC6-4671-ABAF-A7243B99BB79.jpeg (185.56 KiB) Viewed 8463 times
Re: Gauge 1 ‘project’
Posted: Sat Dec 05, 2020 7:51 am
by Garethh
Made a start on the cylinder last night, first step was to face off a chunk of brass in the 4 jaw down to the correct dimensions

- 4256BA19-276A-4068-94EA-B0E8C828A342.jpeg (159.89 KiB) Viewed 8397 times
Then the bore center was center popped and set up in the 4 jaw in the same way as the eccentric

- 164CA40C-E6C8-458E-828B-2D0F7B8E0C69.jpeg (199.89 KiB) Viewed 8397 times
Then opened up gradually with drills until the boring tool could fit in

- ECDF67DB-0D00-4E72-8F03-F0D04720F2C9.jpeg (224.66 KiB) Viewed 8397 times
Next I bored it out to 3/4” on a fine feed taking very light cuts at the end

- 996FA4DC-E799-4111-BF93-9C21A04BD8CB.jpeg (157.76 KiB) Viewed 8397 times
Where I’m at now, bore finish is pretty good but it’s going to get lapped just to be sure. Next stage will be drilling the passageways and turning the end covers.

- 16E509CF-52AD-4D1C-9430-2E832F89686A.jpeg (160.85 KiB) Viewed 8397 times
Re: Gauge 1 ‘project’
Posted: Sat Dec 05, 2020 3:40 pm
by -steves-
Looking superb, love the live photo's. Please do keep us up to date with this as it is without a doubt right up my street.
