Page 1 of 2
Lift up bridge questions
Posted: Sun May 10, 2020 10:14 pm
by GAP
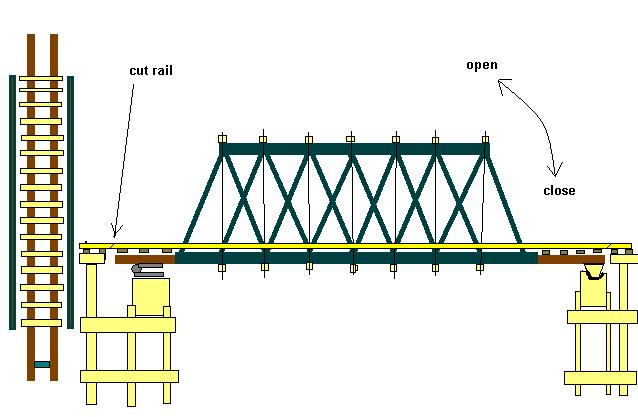
I am installing a lift up (as opposed to lift out) bridge to allow access to the centre of the loop.
It will be hinged at one end and aligned at the non hinged end with lift out rail clamps.
I am concerned that at the hinged end the rail on the bridge will foul the rail on the base when the bridge is lifted.
Has anybody done something like this and are there any tips/suggestions that could be passed on?
Re: Lift up bridge questions
Posted: Mon May 11, 2020 6:56 am
by philipy
There are various types/shapes of cranked or offset hinges available which do exactly what you need. Mainly intended for things like windows to allow the to swing back fluch into the frame but work equally well horizontally as vertically. I used them for railway flaps in front of doors and windows many years ago, when we built a railway line round their bedroom for my young sons, many years ago.
It's too long agao for me to remember exactly what I used but a search on ebay and/or amazon should find plenty of options.
Re: Lift up bridge questions
Posted: Mon May 11, 2020 6:57 am
by Nojahoda
I haven't done it, but if you have the hinge axis above the railhead then there will be no issue with the bridge rails fouling the fixed rails.
Re: Lift up bridge questions
Posted: Mon May 11, 2020 6:57 am
by gregh
You have seen my bridges.
The 'trick' is to have the hinge pivot ABOVE the top of the rails.
These pics are of my alum bar rail, but I did have a bridge with normal rails at Ti-tree, (now demolished and no pics.)
My 'hinge' is just a few bits of steel with 1/4" bolts - rough and ready but been there for 25 years!

- hinge3.JPG (119.49 KiB) Viewed 6952 times

- hinge combined 2.jpg (215.16 KiB) Viewed 6952 times
Note that I used 'outriggers' to align the rails as the rough hinge had a lot of play. Easy with the alum bar, but it's not hard to do with normal rails - I just ground the foot down to the width of the head and soldered some 2mm brass on.
I used the same method at the 'lifting' end to align the rails automatically.
Re: Lift up bridge questions
Posted: Mon May 11, 2020 9:23 am
by RylstonLight
The Rylston Light Mark 1 had a complicated aluminium through-truss lift-bridge, but the mechanics were simple as per the previous posts with the hinge pivot just above the rail top level, the only thing I would add would be to think about expansion and contraction. I fitted mine on a cold day and then couldn’t close the bridge when I wanted to run it on the first nice sunny day!

Newbie mistake, I then worried (after trimming the rails) that the gap would be too great on cold days, but suprisingly that seemed to be ok. I have no science/maths to offer but a tight fit on a hot day seemed to be just right; but the bridge was under the shade of a Leylandi weed.
Other may offer better advice about the optimum gap but it can be an issue if not planned for. It might be worse in a sunny spot.
The bridge worked well, but as time went on It bothered me that such a grand design was out of keeping of the RLR, so was scrapped and has not been reserved for mark 2.
Andy
Re: Lift up bridge questions
Posted: Mon May 11, 2020 2:34 pm
by Jimmyb
Never done a lift up bridge for the garden, but similar to the above, it hinged portable layouts, the hinges are higher that the highest fixed point to allow the items to "swing" away from each other, your bridge should be no different.
Re: Lift up bridge questions
Posted: Mon May 11, 2020 10:27 pm
by GAP
Thank you all for the suggestions.
I have 2 options;
1. hinges on top of the bridge seems to be the norm
2. and one suggestion where the hinge is below the bridge.
- Korms Bridge.jpg (38.48 KiB) Viewed 6903 times
Bit more thinking/planning to be carried out
Re: Lift up bridge questions
Posted: Tue May 12, 2020 6:24 am
by philipy
Either should work. The 'below' option will be potentially less visually obtrusive but more complicated to implement, I think.
Re: Lift up bridge questions
Posted: Tue May 12, 2020 9:37 am
by Jimmyb
I agree with Philip, the hinge below does look good, but could be complicated, but if you have the skill *and i am sure you have) go for it.
Re: Lift up bridge questions
Posted: Wed May 13, 2020 10:48 am
by RylstonLight
Like the under-bridge solution, would like to see the development of this bridge. Looks like it would work.
Andy
Re: Lift up bridge questions
Posted: Wed May 13, 2020 11:26 am
by GAP
This will be no problem for Ben Hur constructions.

Re: Lift up bridge questions
Posted: Wed May 20, 2020 9:23 am
by GAP
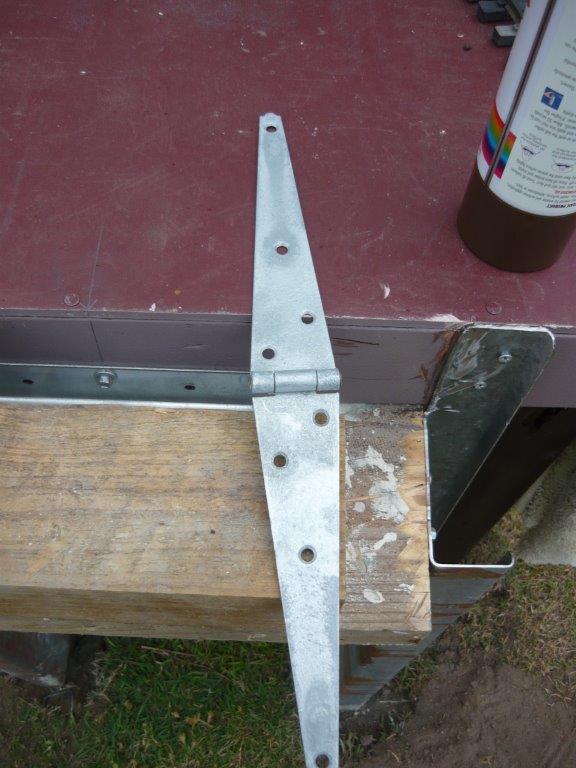
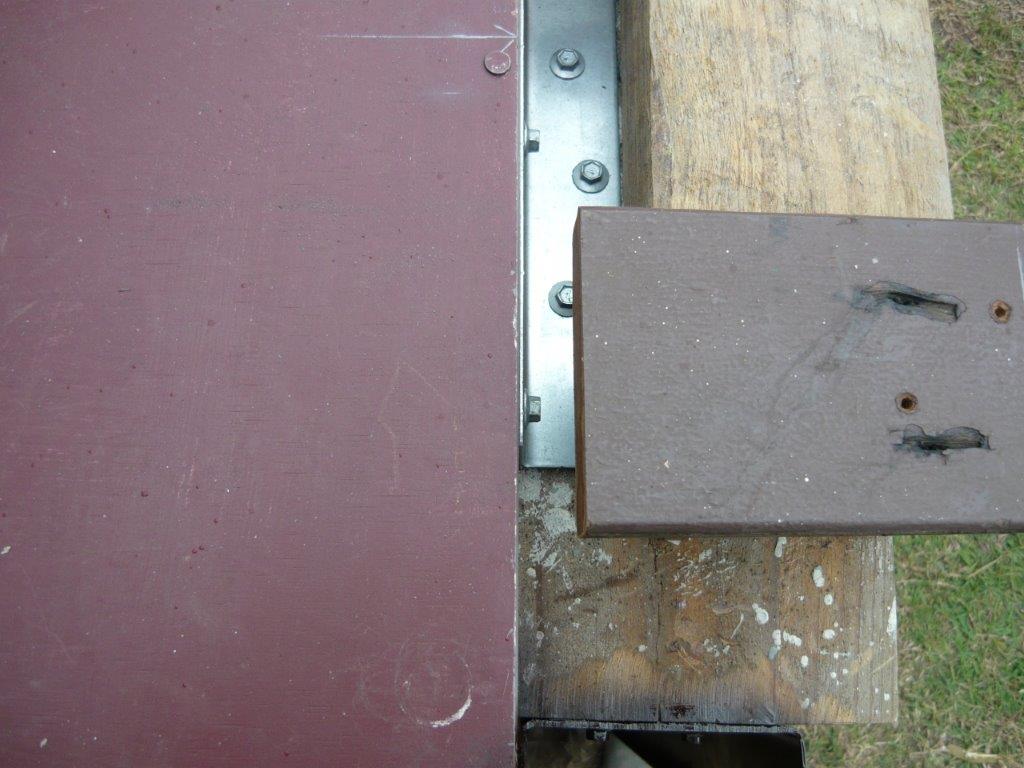
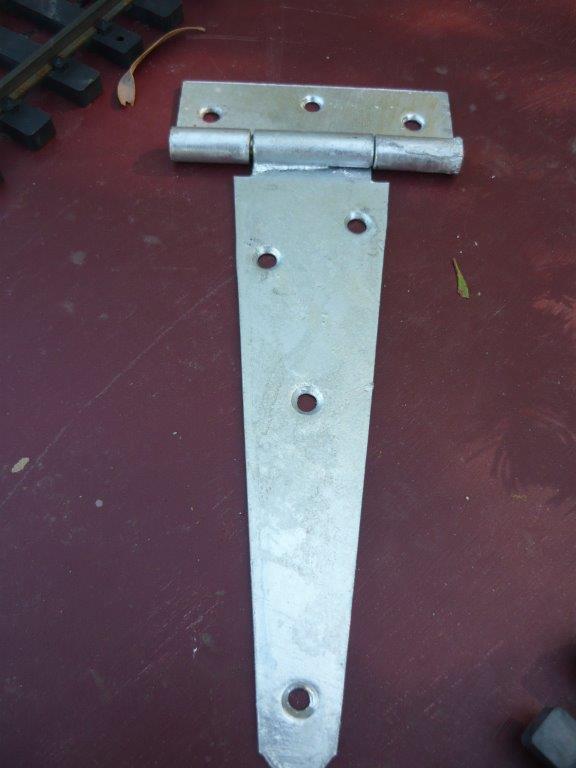
I went with a hinges under the bridge option using this suggestion.

- Korms Bridge.jpg (38.48 KiB) Viewed 6748 times
I have started building the hinge area and it is working out well so far.
I am using gate hinges
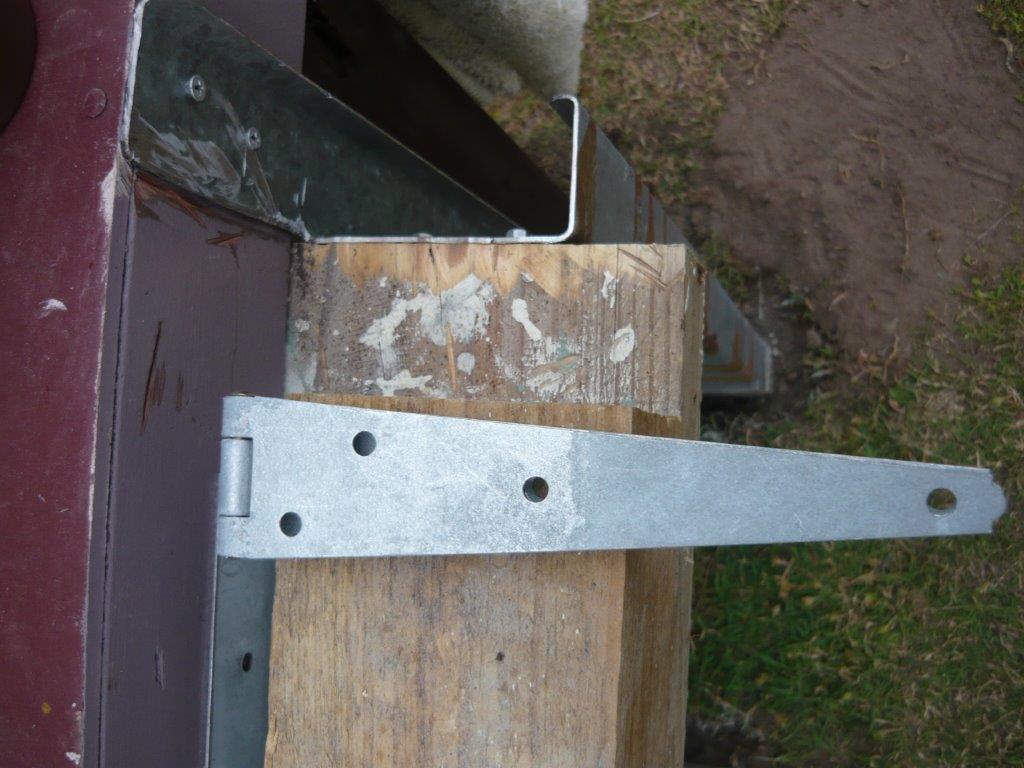
- P1050743.JPG (103.22 KiB) Viewed 6748 times
- P1050744.JPG (66.28 KiB) Viewed 6748 times
The gap needed to allow opening is not really that wide it is slightly wider than the thickness of the board.
- P1050745.JPG (101.15 KiB) Viewed 6748 times
The bridge will be made out of hardwood reinforced with steel angle.
To get a level, the hinges will be recessed into the mounting block.
The lower part of the hinges will be cut off to remove the piece protruding into the walkway.

- P1050741.JPG (105.31 KiB) Viewed 6748 times
This is part of Stage 2 of the build and details will be put on my blog in due course.
Re: Lift up bridge questions
Posted: Wed May 20, 2020 6:05 pm
by Jimmyb
This certainly looks a robust build

Re: Lift up bridge questions
Posted: Mon May 25, 2020 10:35 am
by GAP
Jimmyb wrote: ↑Wed May 20, 2020 6:05 pm
This certainly looks a robust build
Wait till you see the MkII version it is getting bigger than the Sydney Harbour Bridge.
Wood goes and steel is a replacement
Re: Lift up bridge questions
Posted: Mon May 25, 2020 10:26 pm
by Jimmyb
GAP wrote: ↑Mon May 25, 2020 10:35 am
Jimmyb wrote: ↑Wed May 20, 2020 6:05 pm
This certainly looks a robust build
Wait till you see the MkII version it is getting bigger than the Sydney Harbour Bridge.
Wood goes and steel is a replacement
WOW can’t wait to see that.
Re: Lift up bridge questions
Posted: Mon May 25, 2020 10:43 pm
by GAP
Pictures of the mounting block made from "C" Purlins and the new more robust hinge.
Type of Purlin pieces used
- C purlin pieces.JPG (149.63 KiB) Viewed 6254 times
The mounting block

- C Purlin Mounting Block.JPG (99.7 KiB) Viewed 6254 times
New hinge
- Second Hinge.JPG (42.27 KiB) Viewed 6254 times
Re: Lift up bridge questions
Posted: Wed May 27, 2020 12:31 am
by GAP
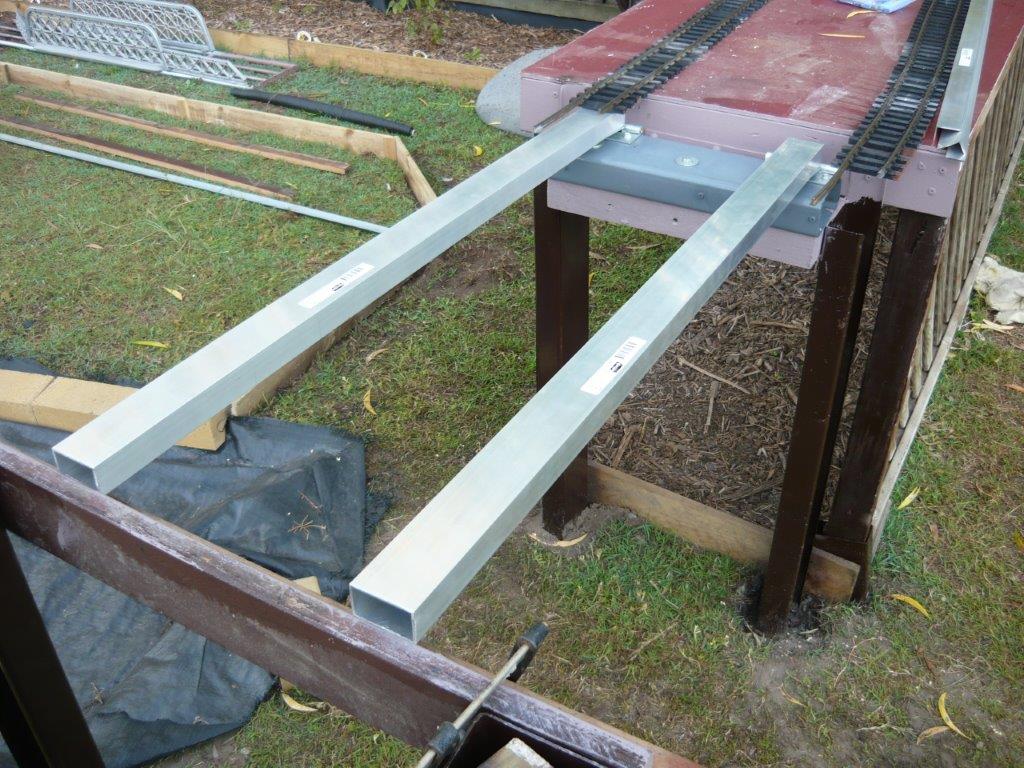
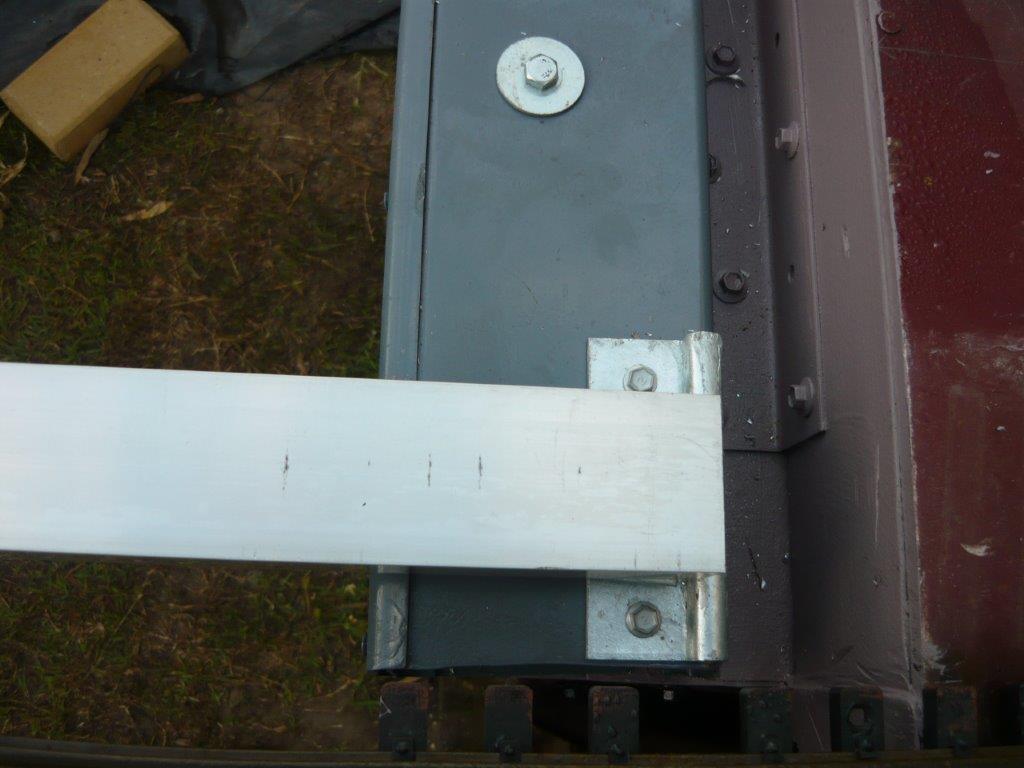
I built the bridge supports out of aluminium box section to reduce the weight so SWMBO can open it, if I made it out of hardwood it would be to heavy for her.
The whole bridge will be made out of aluminium.
Some pictures of the supports an hinges also showing mounting block attaching bolts.
- Bridge Supports.jpg (170.12 KiB) Viewed 6228 times

- Bridge Support Open Position.jpg (156 KiB) Viewed 6228 times
- Hinge with Support.jpg (75.9 KiB) Viewed 6228 times
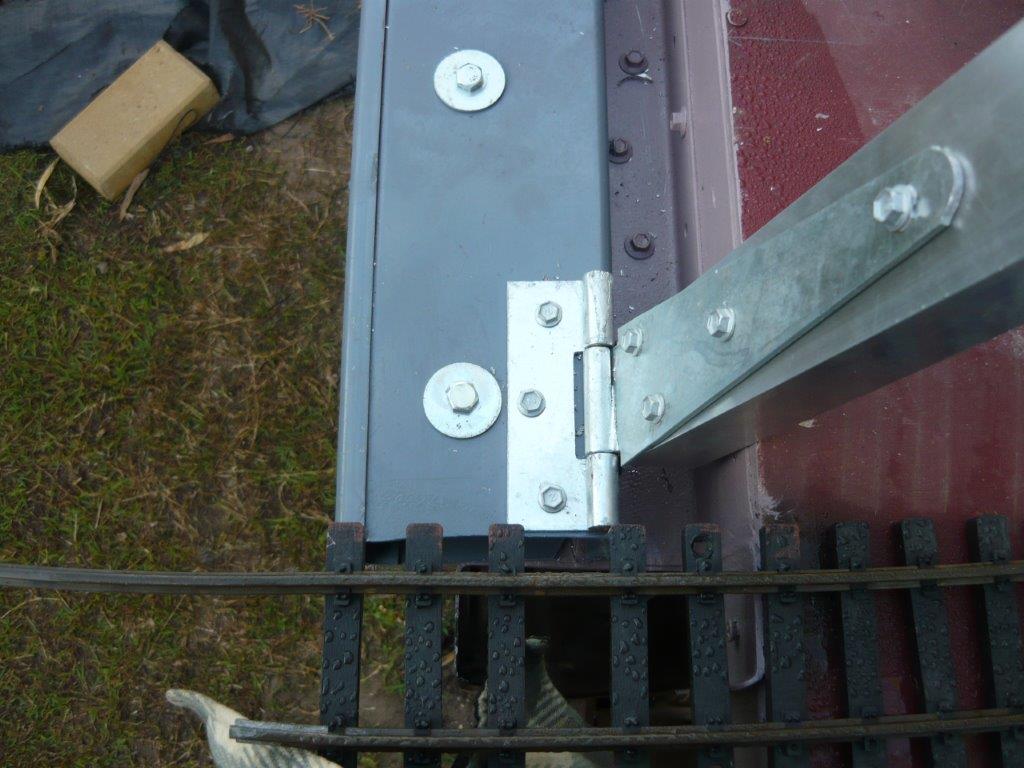
- Hinge with Support (Open).jpg (106.38 KiB) Viewed 6228 times
Re: Lift up bridge questions
Posted: Wed May 27, 2020 10:30 am
by GAP
After some testing of the track alignment, the supports will have to be re aligned but that is all OK as it is just a simple re-drill of 2 of the 3 hinge mount holes and re attach.
This will allow the track to run straight across the opening with curves either side.
Re: Lift up bridge questions
Posted: Thu May 28, 2020 8:51 am
by GAP
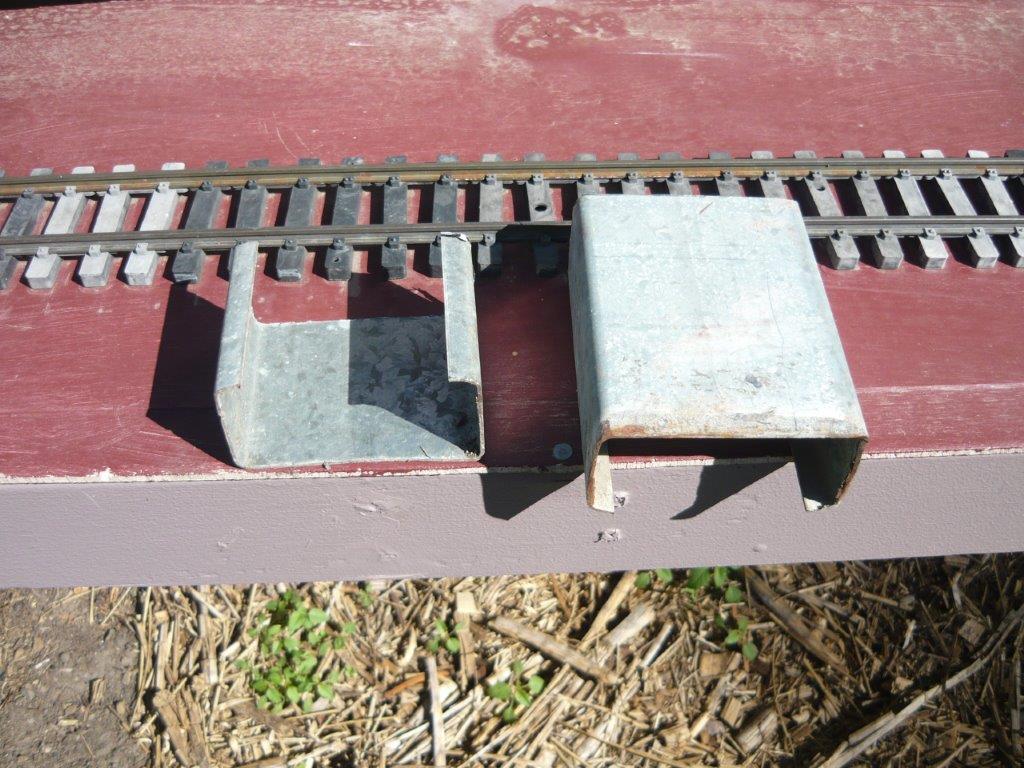
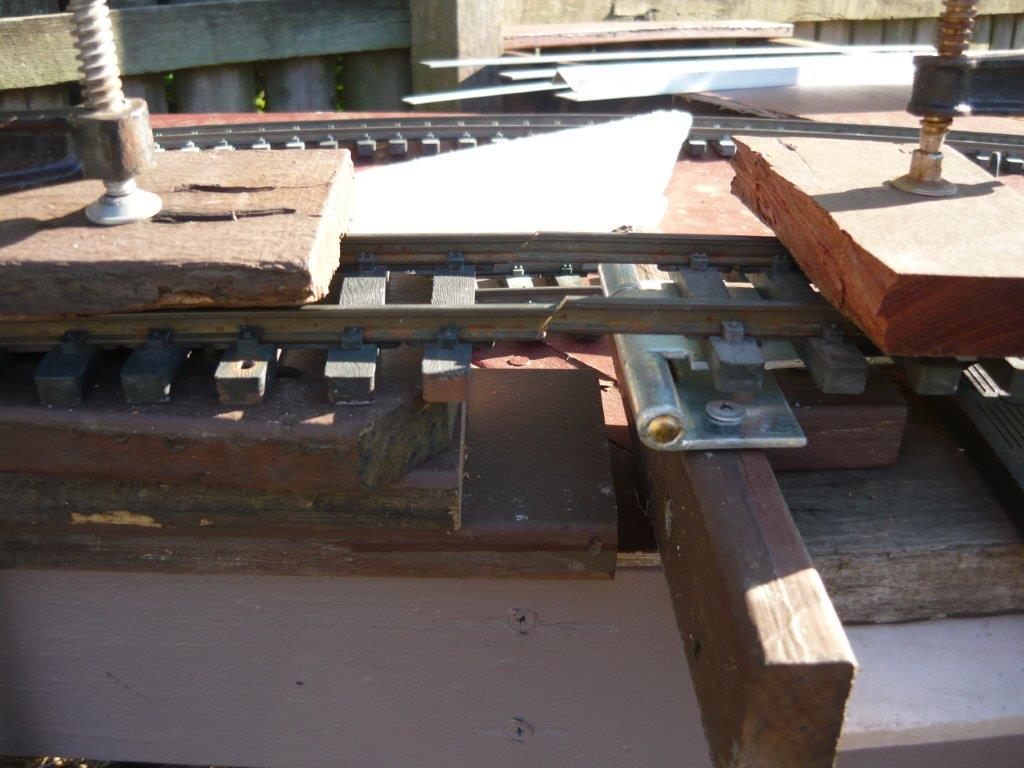
A question was asked on another forum about the pivot height and when I revisited it I found that when track is attached to the supports there is a yawning gap that just does not work.
I have built a proof of concept jig to test the opening method and so far it appears that the secrets to having the hinge below the track is the angle of the cut made to the track, 45 degrees as opposed to vertical seems to work the best with no fouling.
So it is back to the drawing board for this little project.
Re: Lift up bridge questions
Posted: Fri May 29, 2020 1:18 am
by GAP
Bridge Design MkIII proof of concept jig has been built and the design has been tested with positive results.
As previously stated the secret of the opening is the 45 Degree cuts in the rail which allows the moving rail to drop away from the fixed rail without fouling.
The moving arm of the hinge is level with the baseboard and the gap that the rail folds into is not real wide.
The error I made with the MkII was that I put the bridge support on top of the hinge and when the rail was added the gap was just unworkable as the support folded into it, the bridge support will now be level with the top of the hinge and will not fold into the gap.
So now the bridge construction can now begin following the concept principles.
Closed
- Proof of Concept Jig (Closed).jpg (97.21 KiB) Viewed 6149 times
Open

- Proof of Concept Jig (Open).jpg (90.58 KiB) Viewed 6149 times
Close up (closed)
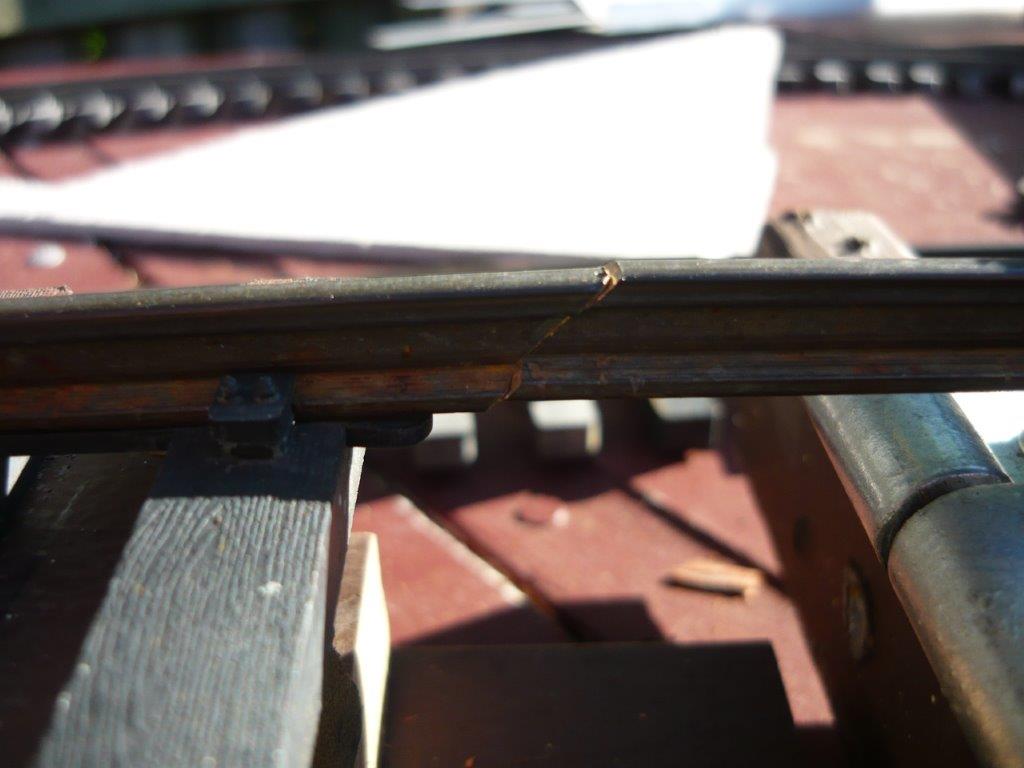
- Proof of Concept Jig (Rails Close Close Up).jpg (66.25 KiB) Viewed 6149 times
Close up (Semi Open)