Mamod William - A First Review

Announcements on new models and reviews should be posted here
Post Reply
User avatar
Chris Cairns
Driver
Driver
Posts: 2366
Joined: Mon Oct 29, 2007 7:25 pm
Location: Glasgow, Scotland

Mamod William - A First Review

Post by Chris Cairns » Wed Nov 07, 2007 9:58 pm

Having bought several Mamod SL Locos recently, I thought I would try and get a 'William' to see how these compare with the previous models.

So what do you get - A Purple Cardboard Box with polystyrene inner with the loco, a 50ml bottle of steam oil, a plastic funnel, a safety sheet containing basic 'Does and Do Nots' for Mamod models, operating instructions for the loco on 2 sides of A4 plus attached notice about Gas Control, and an A3 leaflet of the latest models available.

So here's the box lid: -

Image

However when you remove the lid you find that what you see is not what you get, and here is my William instead: -

Image

Image

Image

Image

Image

So what's are the differences. On the lid it shows the traditional green with trim lining and transfer on side tanks, however mine is a darker green, no trim lining and a badge which has been poorly placed on the sidetanks. And the wheels are not brass colour but black - lid also does not show gas burner, but I do not see how this model could have been fired by any other method. And finally the boiler strap does not go onto the running plate like on the lid photo. This points to the lid being a mock-up which has obviously been modified, but they cannot afford (or be bothered) to update the box lid photo - Americans would be suing over this mis-representation.

So a quick check around to make sure everything is tight and secure, remove the gas tank from the rear and fill it with Butane/Propane mix (Mamod say only use this in cold weather but I find it much better than pure butane, and there is a cutout in the cab roof to allow you to fill the tank in situ, but the hole does not line up with the filler without rotating the tank, and the provided hole rubber grommit is too small and keeps falling out when you clean up the mess on the loco, and of course you have to provide your own gas and filler! ). Displacement lubricator has 2 halves which unscrew, and you fill it with the top half removed up to the level of the steam pipe (top half is a little to close to front of boiler, so care is required when replacing). Oil the wheels, axle bearings, coupling rods, and the eccentric and connecting rods on rear axles. Boiler is filled through removal of a standard Mamod Safety Valve, and level is checked through a standard Mamod Sight Glass, although no reflector fitted so hard to see as gas tank blocks the light.

Apply flame to gas burner and turn on gas. Once lit, wait about 30secs for the burner to warm up and then turn it up between a quarter to half a turn. Knob is not marked, and I did not mark it until after my second run, which was somewhat wild as I had the gas too high at one point! Once safety valve starts to weep open and close the regulator a couple of times (to help warm up pipes, etc.) Now move wheels at least half a turn in the desired direction of travel. Open the regulator and the loco should start to move! (again no markings on regulator which I have now added).

So what happenned on my first run. I was going to try the loco on my rolling road but it appears the different wheel profile does not like my rolling road. So I ended up pushing the loco against a piece of wood and once the condensate had cleared (the instructions warn that it may jam up or behave jerkily due to this condensate) I got the wheels spinning quite fast. Putting it on my oval of track it started to run slowly with a characteristic Mamod wobble. Soon runs out of steam so turned up the burner a bit more. Water runs out well before gas does at present. On the second run I had not cleared the condensate prior to placing it on the track so it jerked forward a bit, then burst away into a runaway loco (I had not marked the regulator at this point) and derailed on the other side of the oval - fortunately not a meths burner so just replaced on the track without a towering inferno!

Decided to give it a couple of runs on blocks, and it is obvious that like the previous locos this will need proper running in.

Very easy to overdo the gas burner as you attempt to correct slow running (Probably due to not being run in yet) which leads so some spectacular flames licking around the bodywork. I also think the fact that the cylinders exhaust the steam towards the track does not help the air flow around the gas burner.

So I was actually impressed that this loco made it round my oval of track on its' very first run, and hope that it well settle down and run in properly.

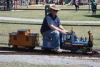
Big disadvantage with this loco is that it can only currently couple up to the new Mamod Rolling Stock without some metal surgery at present (couplings just visible in above photos).

And in the instructions it states - 'BE AWARE AT ALL TIMES THAT THE LOCOMOTIVE IS HOT! It is imperative that gloves be worn or the hands are protected by rags or cloth.'

This is an understatement - it gets extremely hot and small fingers will get burnt if not monitored all of the time - wonder when the first Parent will be suing Mamod for first degree burns!

And this loco will not easily be modified like its' predecessor.

And a final thought for just now - why is there a cutout in the cab front like the old loco (was a whistle going to be fitted?), and similarly there is a slot cut on the right of the cab floor that seems to serve no purpose.

As my experience grows with this loco I'll post updates, but other projects, contract work and my next overseas steam tour are all fighting for my time as well!

Chris Cairns.

(edited to correct image links)
Last edited by Chris Cairns on Wed May 23, 2012 4:22 pm, edited 1 time in total.

User avatar
ACLR
Retired Director
Retired Director
Posts: 1592
Joined: Wed Oct 17, 2007 6:22 am
Location: Brisbane
Contact:

Post by ACLR » Thu Nov 08, 2007 7:19 am

Thanks for that very informative description of the loco Chris.
seems to me they have taken a step backwards realy in its design.
time will tell I guess and a good run in may improve it some what.
look forward to future trials of this engine
cheers Graham

SillyBilly
Retired Director
Retired Director
Posts: 3536
Joined: Sat Aug 18, 2007 11:00 pm

Post by SillyBilly » Thu Nov 08, 2007 5:37 pm

Interesting. I'd be quite annoyed if I didn't get what I was told I was getting. Surely you could whack an increased pressure saftey valve in there. Thanks for posting the review, it was a great read, good luck!

steamyjim
Retired Director
Retired Director
Posts: 1210
Joined: Tue Oct 16, 2007 9:19 pm

Post by steamyjim » Thu Nov 08, 2007 6:18 pm

I realy like the look of that :D

Id want a water top of valve thats the problem. :?

steamyjim
Retired Director
Retired Director
Posts: 1210
Joined: Tue Oct 16, 2007 9:19 pm

Post by steamyjim » Thu Nov 08, 2007 6:19 pm

The cutout in the cab by the way is because when they origionally made the new style loco (and on my prototype) it had a whistle instead of a regulator ;)

User avatar
Chris Cairns
Driver
Driver
Posts: 2366
Joined: Mon Oct 29, 2007 7:25 pm
Location: Glasgow, Scotland

Post by Chris Cairns » Thu Nov 08, 2007 8:41 pm

Thanks for your comments.

steamyjim - Looking at your Mamod prototype I can see that they obviously had the bodywork already made up for these new locos, but then decided on fitting a different boiler (no whistle or steam dome). I guess the regulator must have been fitted in the cab which might explain the slot that is cut out on the right side of the floor. Yes this new boiler only has one aperture so safety valve must be fitted - anyway a water top-up valve would be no use as it is not safe to refill a gas tank whilst the burner is lit.

sillybilly - Yes an uprated safety valve could be fitted but this would need to be removed for each boiler refill. Do not see this to be an advantage at present as the burner fails to keep the standard safety valve blowing all the time.

In between doing some work on some stationary engines I've just acquired, I've manage a couple more runs with this loco. I was wrong about the old rolling stock not being compatible. You can use it by attaching the standard coupling ring to the hook at the back of this loco. However this loco is wider than the old Mamod stock. After clearing the condensate with some jerkiness, with the safety valve blowing the loco will complete about 5 laps of my standard Mamod oval track before steam output cannot keep up with demand. I am currently only using the gas burner at a half turn open, and any further gets flames licking around bodywork. Paint used on chassis is not gas proof and is already bubbling. I only open the regulator a full turn as this loco can get away from you just like the old SL locos. Been getting the odd squeaking towards the end of a session, which indicates something is still tight and not getting enough lubrication, capacity of lubricator needs increasing. Still refuses to run on my rolling road, so running in is a short run or two on the track plus running on blocks until water level approaches minimum.

Chris Cairns.

steamyjim
Retired Director
Retired Director
Posts: 1210
Joined: Tue Oct 16, 2007 9:19 pm

Post by steamyjim » Thu Nov 08, 2007 8:45 pm

Hmmmmmm thats a shame. But with enough running in it should get better ;)

steamyjim
Retired Director
Retired Director
Posts: 1210
Joined: Tue Oct 16, 2007 9:19 pm

Post by steamyjim » Thu Nov 08, 2007 8:46 pm

Can you put a vid up?

User avatar
Chris Cairns
Driver
Driver
Posts: 2366
Joined: Mon Oct 29, 2007 7:25 pm
Location: Glasgow, Scotland

Post by Chris Cairns » Thu Jan 24, 2008 7:12 pm

Not posted an update on this loco for some time.

Firstly I found the source of my squeak -

Image

In this photo at Point D you will see a spare washer that Mamod decided should be squeezed between the valve and cylinder block. Thanks very much!!!

Here's a short video to introduce the William.

Image

I am getting this loco ready to take to STIA2008, to hopefully run on one of the 'O' gauge layouts, and get some video of it in action.

So I've been running it again today and it is finally now run in, and it actually continues around my test oval until the water reaches the minimum level. Probably because I am using a butane/propane gas mix, the gas does not run out before the water at present.

I've managed to straighten the front coupling back into the buffer beam and fitted a multi height coupling instead. It was a tight squeeze as a 6BA nut only just fitted between the buffer beam and the front of the steam block. Just waiting to paint the other coupling and then fit that to the rear buffer beam.

I have been unsuccessful in my request for a Mamod loco water level reflector, so I'll need to borrow one from another of my locos for just now.

I will post any action at STIA2008 with this loco in this posting soon.

Chris Cairns.

(edited to correct image & video links)
Last edited by Chris Cairns on Wed May 23, 2012 4:26 pm, edited 1 time in total.

User avatar
ACLR
Retired Director
Retired Director
Posts: 1592
Joined: Wed Oct 17, 2007 6:22 am
Location: Brisbane
Contact:

Post by ACLR » Thu Jan 24, 2008 7:40 pm

thanks for posting that excelent video and description Chris
they look more like a toy than the old models :? :roll:

Post Reply

Who is online

Users browsing this forum: No registered users and 6 guests