Glad you like it Ben. I am enjoying the larger size of 7/8ths!
Summerlands chuffer now fitted and test run today, sounds brilliant:
http://youtu.be/4KC3yuK1KcQ
With every run the performance improves...
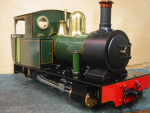
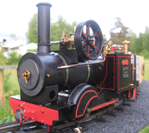
Accucraft 7/8ths Ragleth 'Baldrig'
-
tom_tom_go

- Driver

- Posts: 4824
- Joined: Wed Feb 23, 2011 3:08 am
- Location: Kent, UK
- Contact:


-
tom_tom_go
- Driver
- Posts: 4824
- Joined: Wed Feb 23, 2011 3:08 am
- Location: Kent, UK
- Contact:
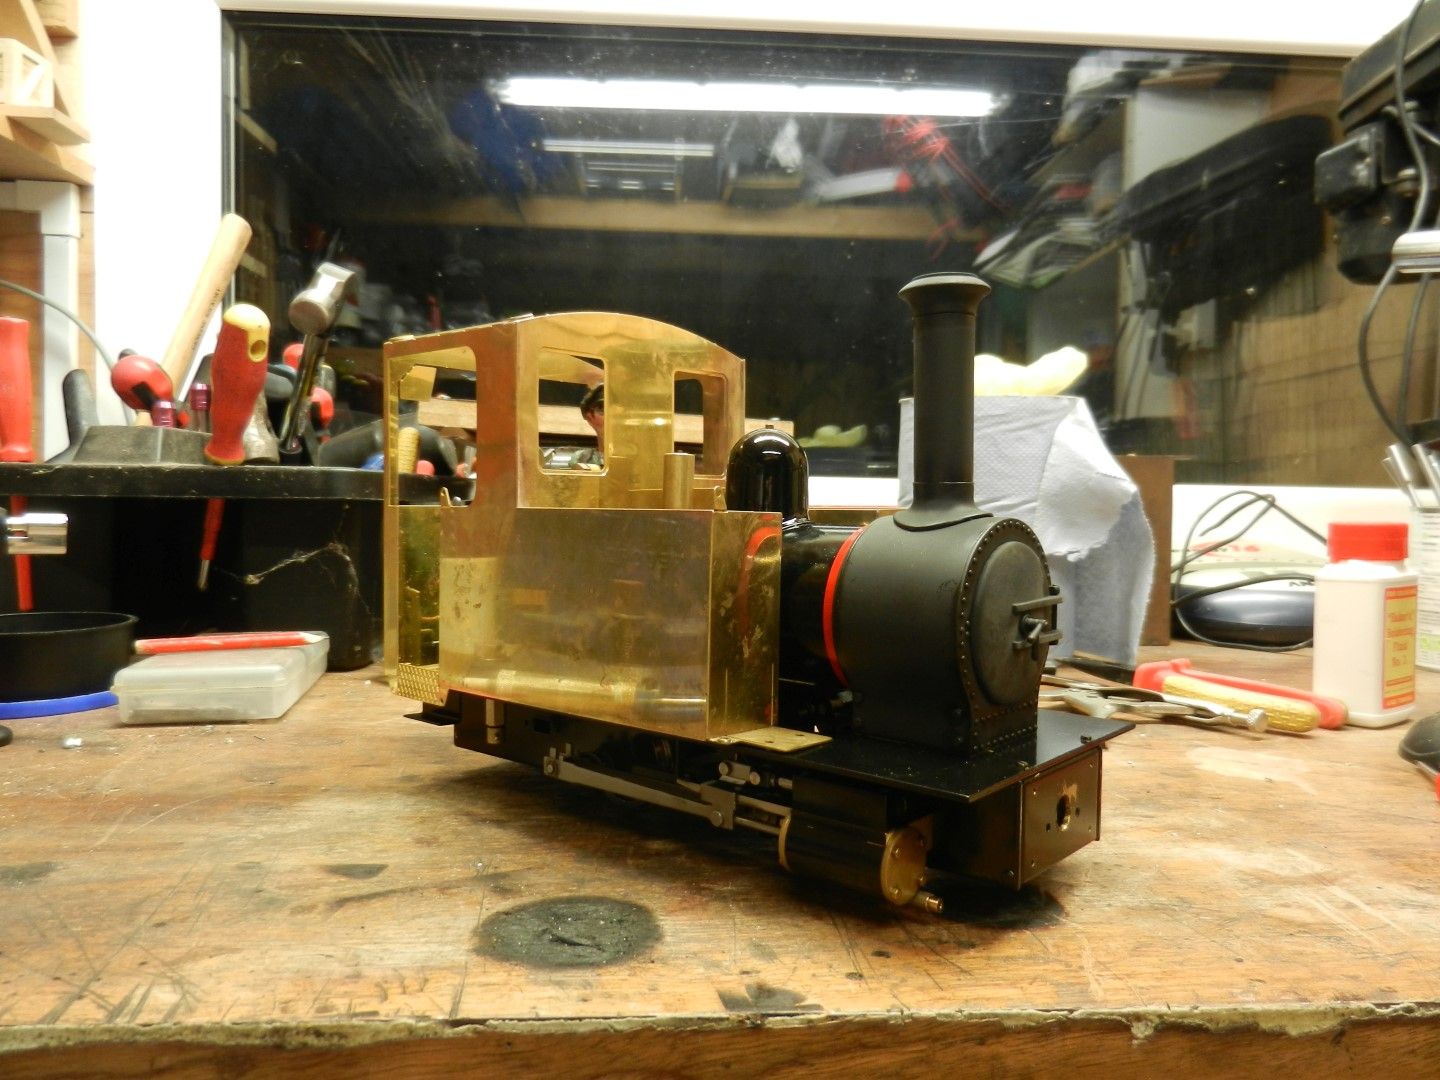
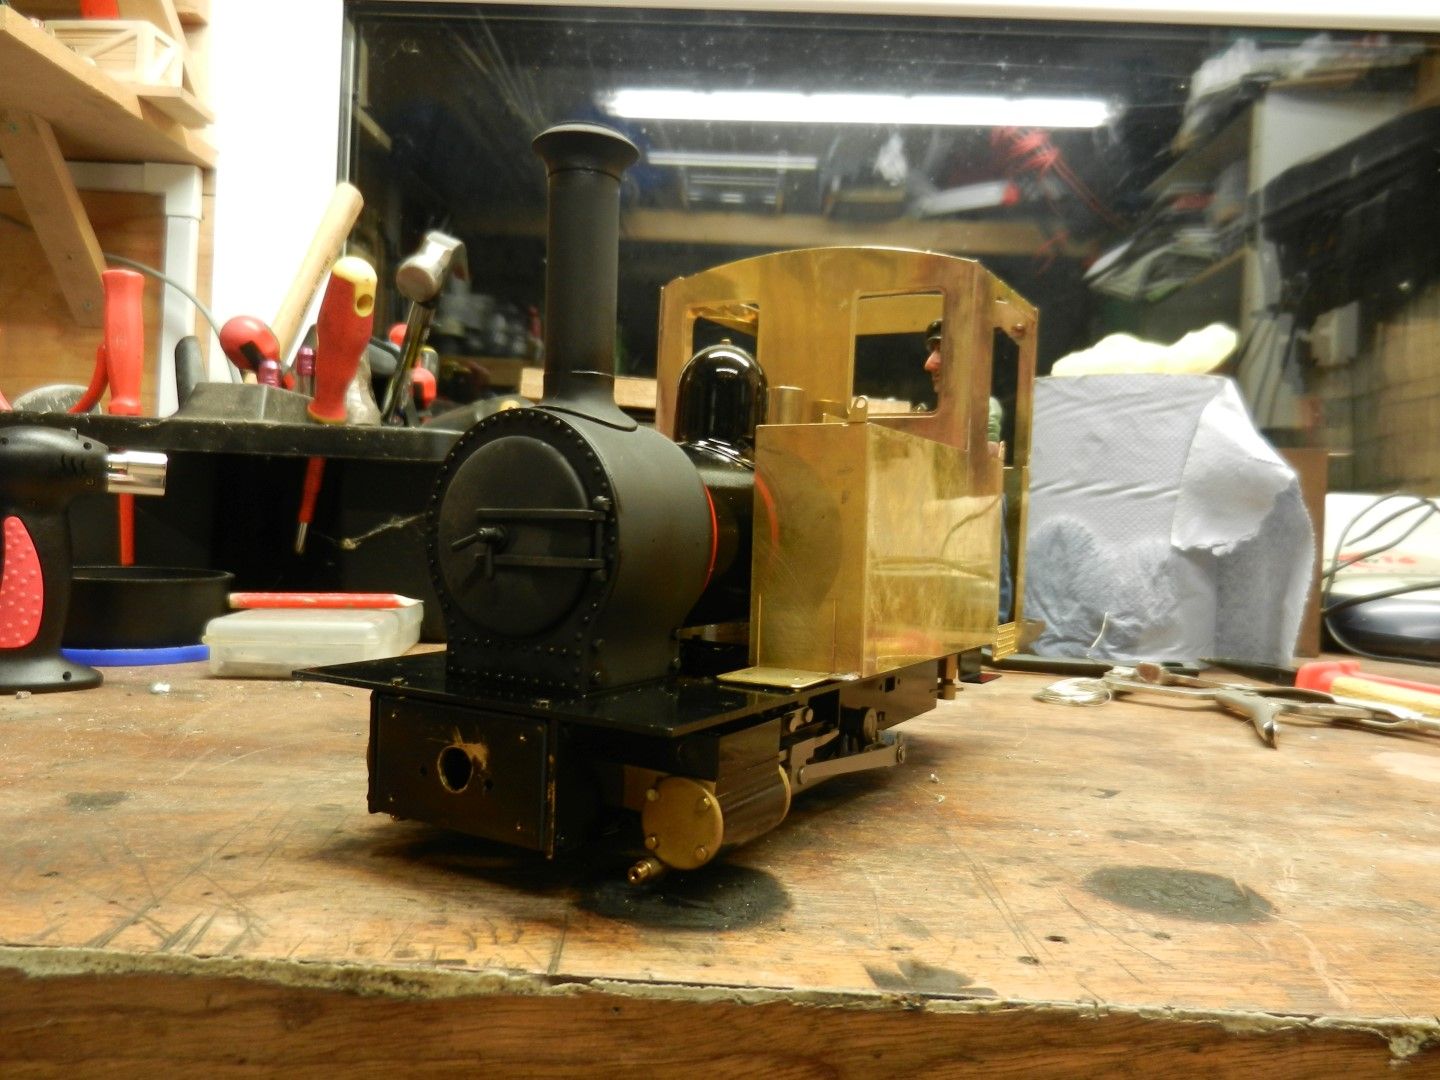
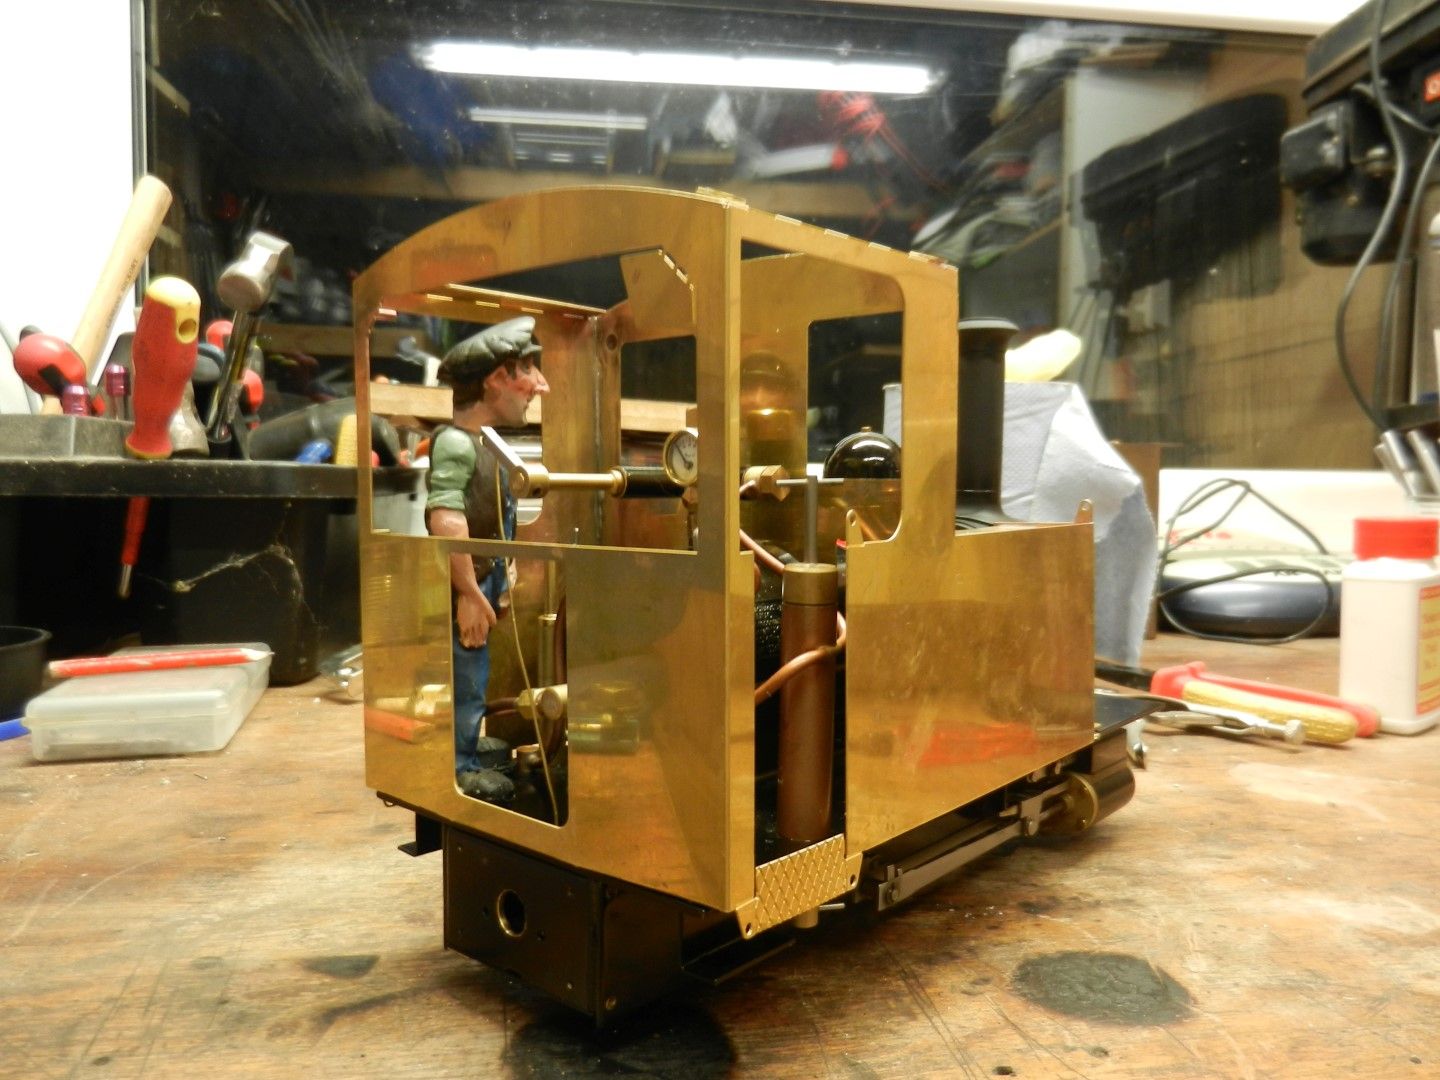
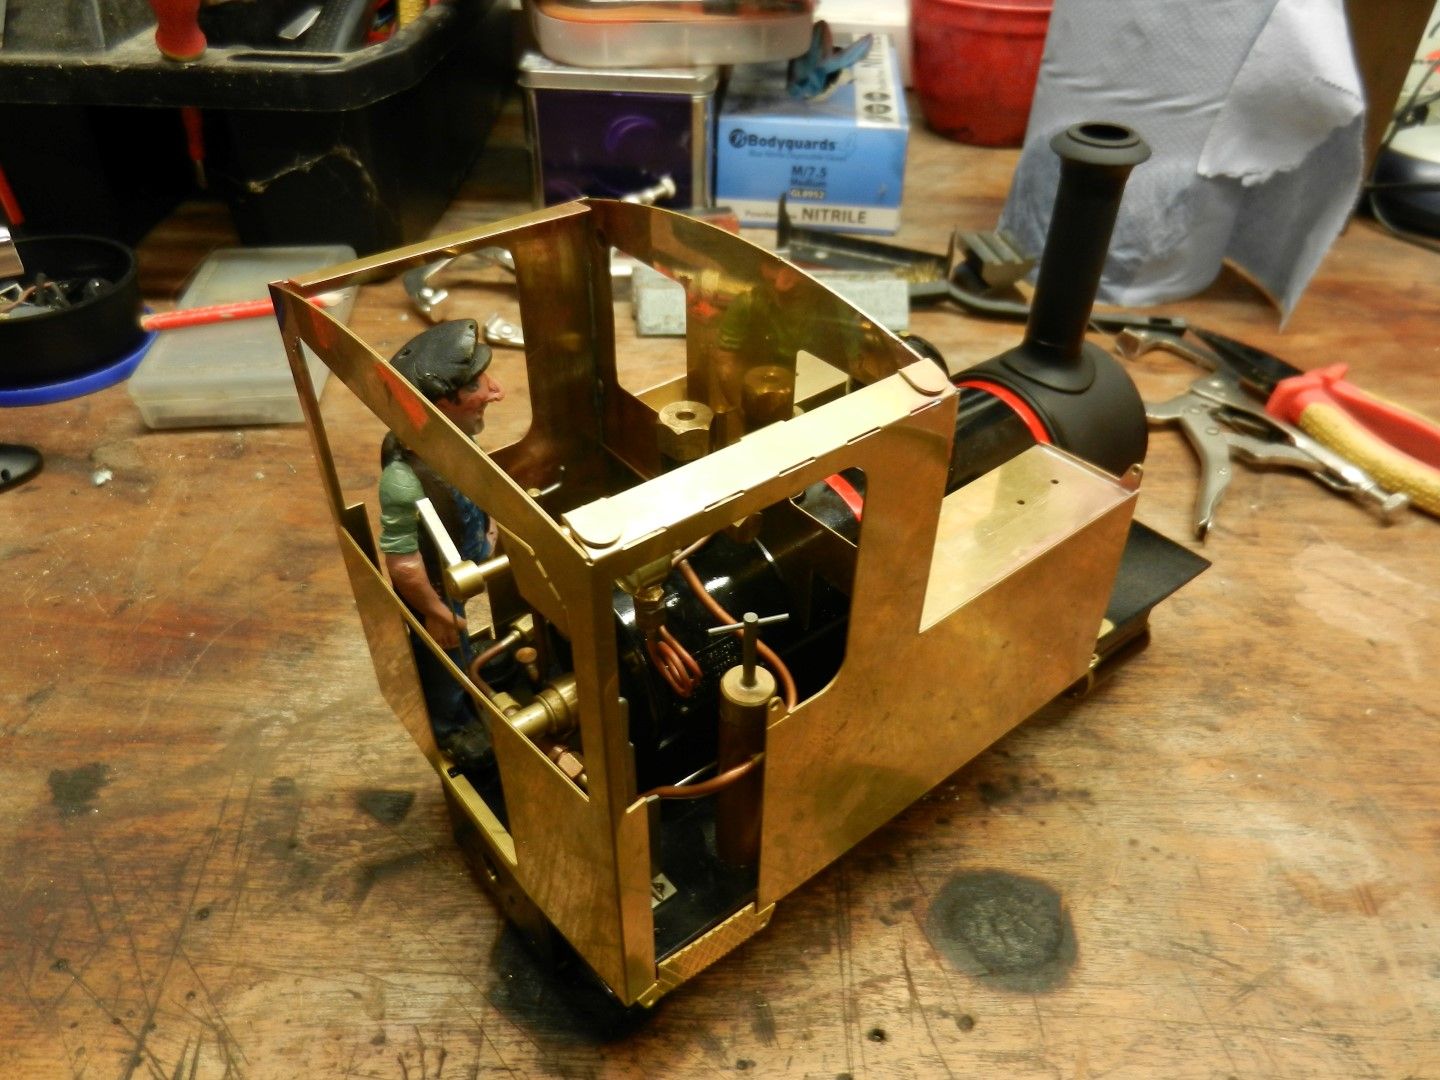
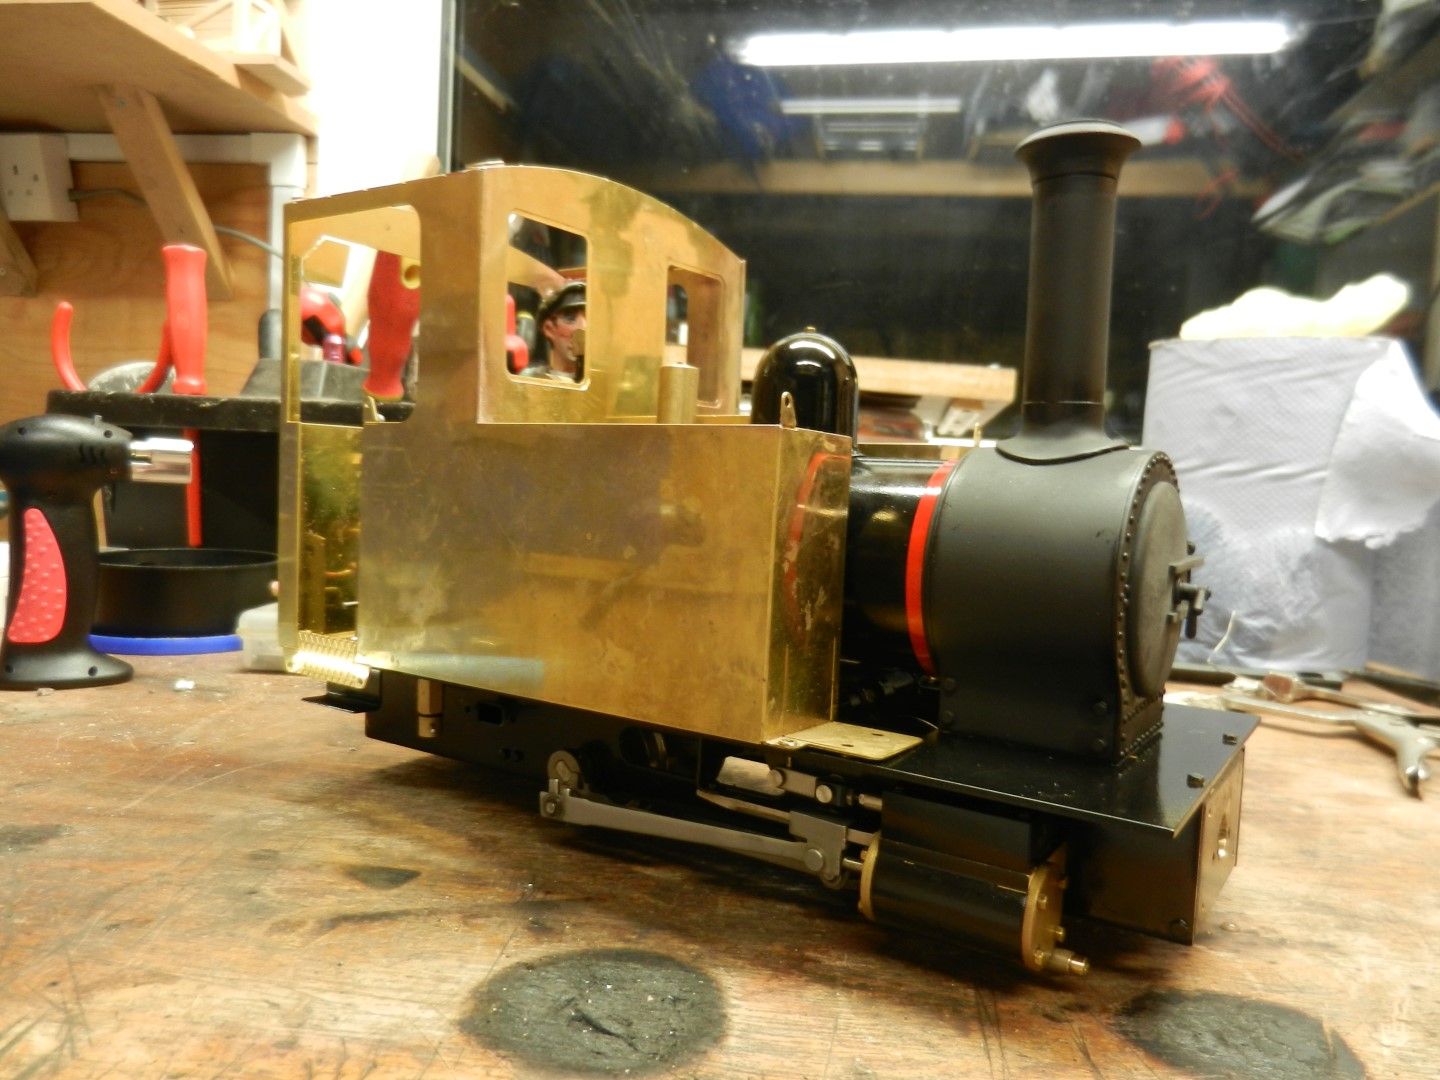
Bit of soldering and folding tonight had me up to this stage so you can get an idea of the size of the thing:
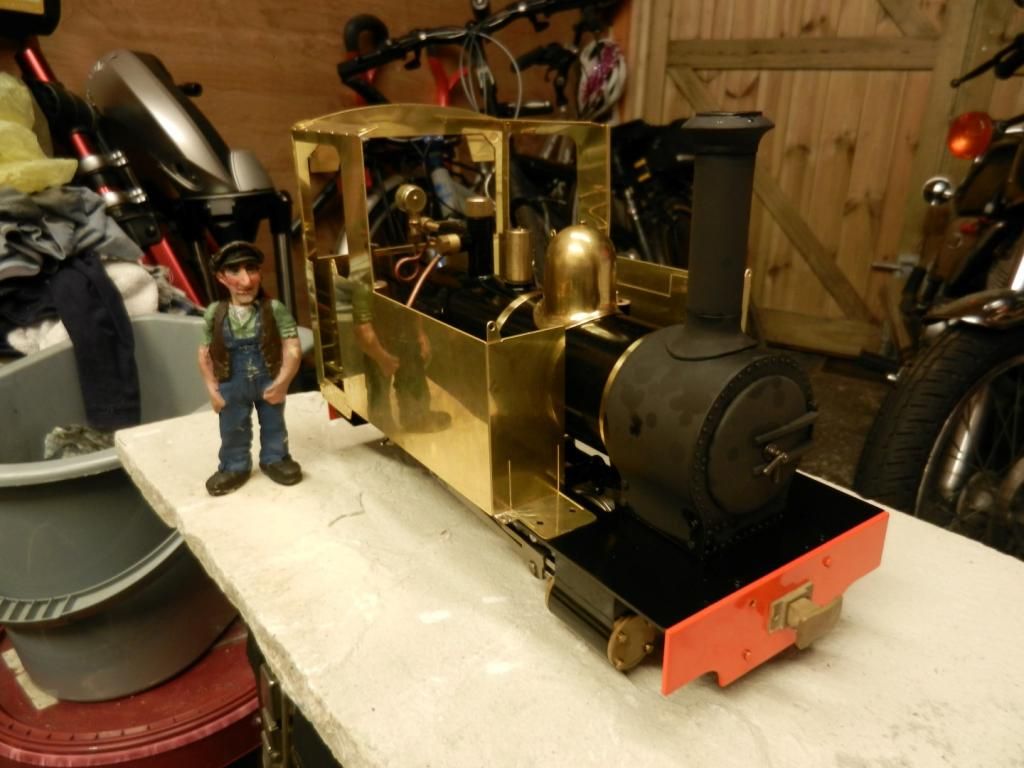
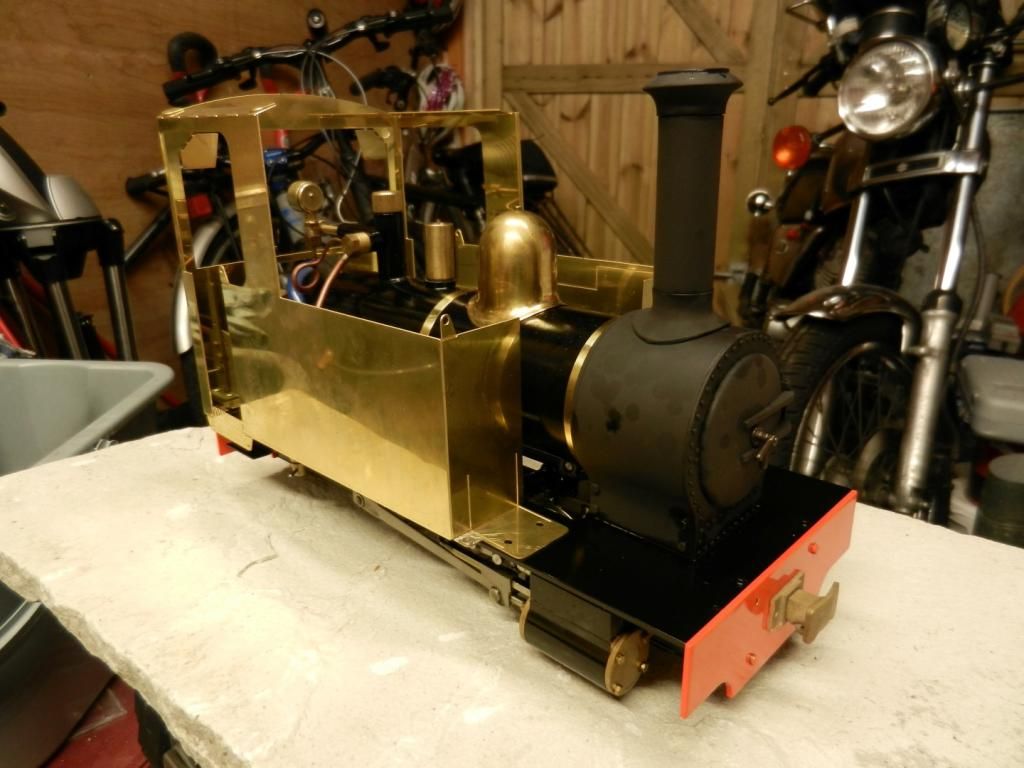
The figure is 7/8ths scale so it is going to be quite large!
I am using this guide for soft soldering:
http://www.steves-workshop.co.uk/tips/s ... gindex.htm
If you look at my pics you will see I had to solder really small brass washers for the hand rails (where the sand boxes are going to be, you can see the two screws hold on the front of each tank) and this was very difficult, loads of excess I had to file away.
How do others solder really fine parts so it looks like as if it was simply glued into place?

Practice, a good hot iron, clean metal, decent flux and solder and a fair amount of luck!How do others solder really fine parts so it looks like as if it was simply glued into place?
Seriously though, I have built up brass kits in the past when there were little bits of detail that I just could not get right (cylinder wrappers on 7mm ng stuff mainly). It sometimes helped to use a solder with a slightly lower melting point than normal, I think it is called detailing solder, (try Carr's).
The loco is looking good, don't worry.
If at first you don't succeed, use a bigger hammer!


Looks good, I can't see any excess solder......tom_tom_go:106236 wrote: How do others solder really fine parts so it looks like as if it was simply glued into place?
When attaching small parts, I tin both parts first, put a bit of liquid flux in the joint and heat until I see any excess solder squeeze out of the joint. If possible, heat from the back. When it cools down I clean off any excess solder with a fibreglass brush (then pick the bits of glass out of my fingers with fine tweezers
it also helps in large scale to have a soldering iron that can generate a decent amount of heat. Mine is a 100W soldering station and with a 3mm chisel tip I can solder seams in 0.8mm brass bodywork with that. I had one person argue with me that you can do everything you need with a 25W iron. I can only assume he had never tried soldering a garden scale size body together.....
Regards,
Graeme
-
Chris Cairns

- Driver
- Posts: 2366
- Joined: Mon Oct 29, 2007 7:25 pm
- Location: Glasgow, Scotland
Hopefully the Help & Advice theatres that were video'd at this year's Peterborough show will make it onto a 16mm NGM DVD at some point (MDLR?). I attended the Soldering theatre which included how to fit those small parts - the body kit being used in the demonstration was Brian's (MDLR).
Chris Cairns
Chris Cairns
-
MDLR

- Driver
- Posts: 4027
- Joined: Thu Jan 15, 2009 10:38 pm
- Location: Near Ripley, Derbyshire, UK
- Contact:
The editing is ongoing as I type this - there was an awful lot to edit!
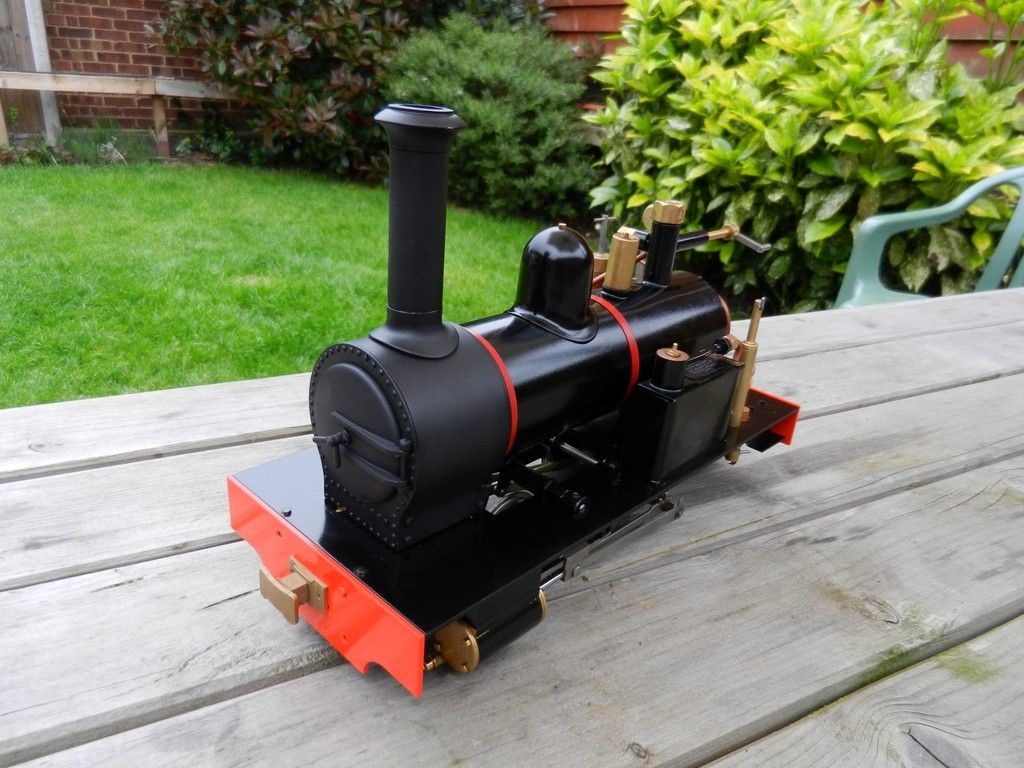
Now, a question for all you Accucraft owners. I'm an Accucraft virgin - always ran Roundhouse and Mamod in the past. With a Mamod, you watch it like a hawk. With a Roundhouse, if you start off with full gas and water, the gas runs out first with just a little water left in the boiler. I find that if I do this with the Baldrig, there's only about a syringe-and-a-bit of water used - I can happily get away with two fillings of gas without the water running dry. Is this to be expected?
Now, a question for all you Accucraft owners. I'm an Accucraft virgin - always ran Roundhouse and Mamod in the past. With a Mamod, you watch it like a hawk. With a Roundhouse, if you start off with full gas and water, the gas runs out first with just a little water left in the boiler. I find that if I do this with the Baldrig, there's only about a syringe-and-a-bit of water used - I can happily get away with two fillings of gas without the water running dry. Is this to be expected?
-
tom_tom_go
- Driver
- Posts: 4824
- Joined: Wed Feb 23, 2011 3:08 am
- Location: Kent, UK
- Contact:
-
St.Michael
- Fireman

- Posts: 343
- Joined: Tue May 08, 2012 9:13 pm
- Location: Norway
-
tom_tom_go
- Driver
- Posts: 4824
- Joined: Wed Feb 23, 2011 3:08 am
- Location: Kent, UK
- Contact:
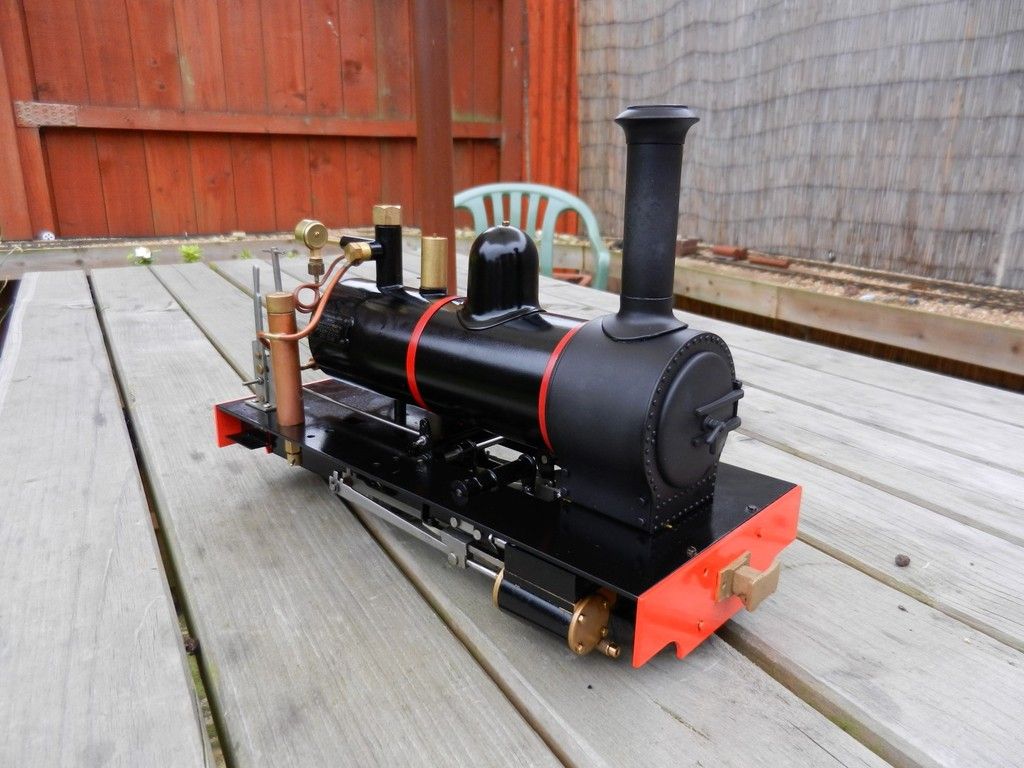
I have fitted TTD steam & gas valves, makes a big difference:
http://www.thetraindepartment.com/ttd-upgrade-valves/
The gas is very easy to adjust now and the regulator has much finer control.
Cheap upgrades, including shipping (from the US) was under £25.00
http://www.thetraindepartment.com/ttd-upgrade-valves/
The gas is very easy to adjust now and the regulator has much finer control.
Cheap upgrades, including shipping (from the US) was under £25.00
-
Chris Cairns
- Driver
- Posts: 2366
- Joined: Mon Oct 29, 2007 7:25 pm
- Location: Glasgow, Scotland
Thanks very much for the link.tom_tom_go:106236 wrote:
I am using this guide for soft soldering:
http://www.steves-workshop.co.uk/tips/s ... gindex.htm
-
tom_tom_go
- Driver
- Posts: 4824
- Joined: Wed Feb 23, 2011 3:08 am
- Location: Kent, UK
- Contact:
-
tom_tom_go
- Driver
- Posts: 4824
- Joined: Wed Feb 23, 2011 3:08 am
- Location: Kent, UK
- Contact:
Time for R/C:

As I have replaced the regulator for one of TTD versions it should not take much effort to move it so the micro servo should be sufficient. Hopefully, I can get away with just using servo tape to attach the servo to the side of the frame.
I will drill a hole through the foot plate and modify the existing Accucraft regulator handle to take a linkage rod connector.
Giving Ripmax a go this time servo wise as this was cheaper than the Hitec equivalent and even has metal gears.
Safety valve bonnet on order from DJB as well.
-
Chris Cairns
- Driver
- Posts: 2366
- Joined: Mon Oct 29, 2007 7:25 pm
- Location: Glasgow, Scotland
-
tom_tom_go
- Driver
- Posts: 4824
- Joined: Wed Feb 23, 2011 3:08 am
- Location: Kent, UK
- Contact:
Progressing with the body kit although I am still trying to perfect my soldering skills:
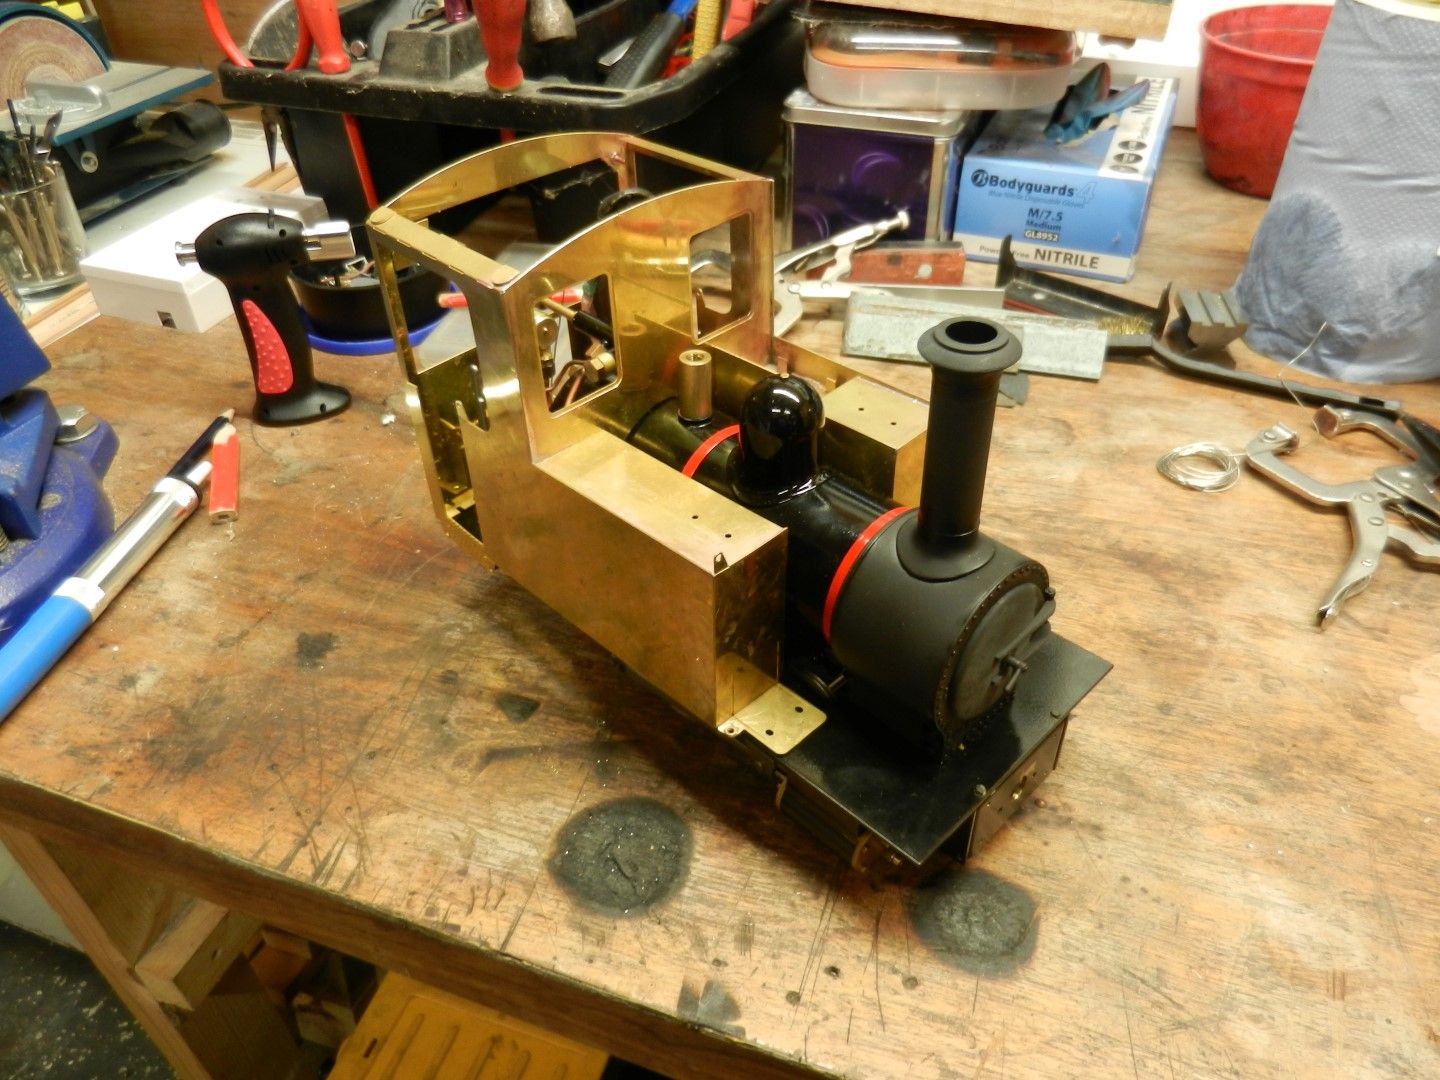
The mini blow torch I bought does not get the solder hot enough and cuts out so I have gone back to the larger Go-Gas torch although having to be careful not to get everything too hot.
Having a wet rag to hand to cool parts after soldering seems to help.
The mini blow torch I bought does not get the solder hot enough and cuts out so I have gone back to the larger Go-Gas torch although having to be careful not to get everything too hot.
Having a wet rag to hand to cool parts after soldering seems to help.
Who is online
Users browsing this forum: No registered users and 13 guests