A few weeks ago I posted about possible methods for re-roofing my thatched cottage. I the end I opted for something completely different to what was discussed, although in essence it's very similar.
Not sure where the idea came from but I actually ended up using artificial grass mat. Ideally I would have liked to use a 'dead grass' colour and much to my surprise I found that you can actually buy brown grass matting ( not sure who would want it?) but the smallest quantity I could get was 2 x 5 metres at an astronomical price and it was a mixture of dark reddish brown and black fibres. I did find one product which was exactly the dried grass colour I was looking for and is apparently available in smallish quantities, unfortunately it was on the website of a company in Quebec! I spent hours searching but couldn't find a similar product available anywhere else, so in the end, I had to go with green grass. Even so it is mainly available as a minimum of 1metre off the roll, but fortunately I found a fleabay seller with offcuts for a tenner.
The drawback with this stuff is that it is mostly polypropylene and as such it doesn't take paint well. Halfords do a Bumper paint which is allegedly suitable for Polypropylene car bumpers, so I degreased and prepped the grass mat as instructed and sprayed it with a dark grey Bumper paint as an undercoat. I also found in Halfords a can described as "Textured Paint Sand", which sounded like a good idea so I gave it a blast of that, and I'm really quite pleased with the result. I should add that I tried all this on a 99pence sample before commiting myself to the actual cottage!
The following pictures show the stages, starting with the wreck of the original roof:

- DSC_0002 (3) small.jpg (203.59 KiB) Viewed 4768 times
Old thatch stripped off and damage under layer repaired. The rear pitch has had the grass glued on and can be seen at the edges.

- DSC_0003 small.jpg (189.58 KiB) Viewed 4768 times
I made paper templates of the shape of the dormers and used that to cut sections of mat which were pinned and glued on.

- DSC_0008 small.jpg (230.99 KiB) Viewed 4768 times
The flat shape was then cut from the mat for the main roof and the whole lot glued on. The edges were wrapped around the foamboard and held in place by big bulldog clips and pins, whilst it dried.
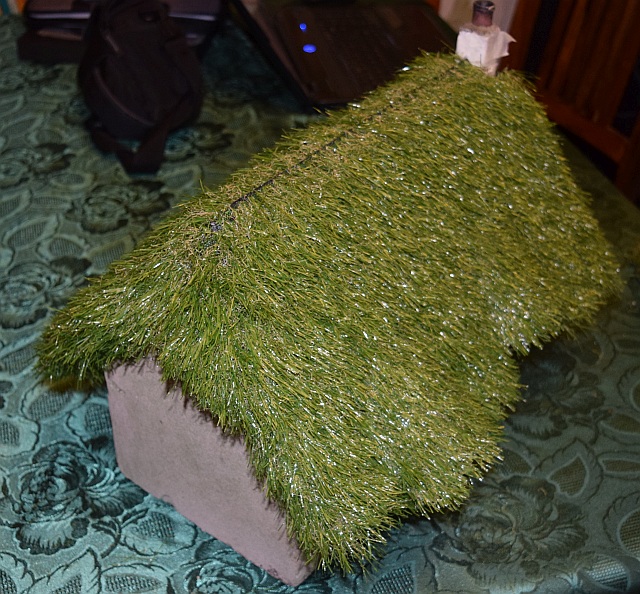
- DSC_0009 small.jpg (254.72 KiB) Viewed 4768 times
Once it had all set I used scissors to trim the edges.

- DSC_0003 (2) small.jpg (202.47 KiB) Viewed 4768 times
The whole of the body of the cottage was then masked using tape and paper and the roof given a thorough spraying of the Bumper paint.
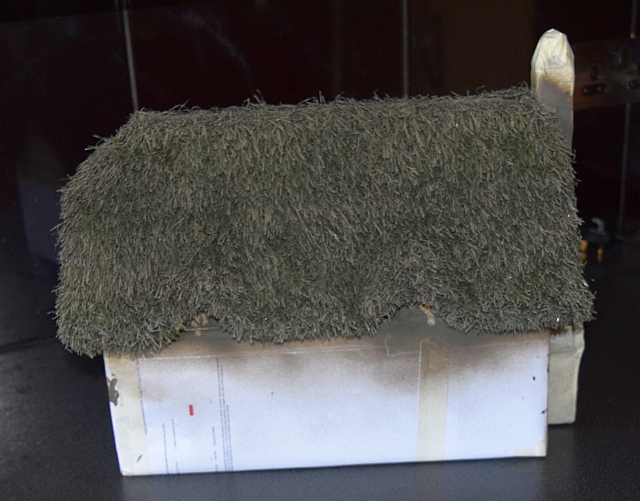
- DSC_0004 (2) small.jpg (212.43 KiB) Viewed 4768 times
The ridge piece was made from some spare foamboard and covered with grass in the same way. The spars are represented by sewing fine waxed cord in an X pattern, and then tit was sprayed to match and glued on top.

- DSC_0001 small 1.png (218.78 KiB) Viewed 4768 times
Time will tell how well the paint adheres but it should be fairly simple to re-spray when necessary.
Obviously the building need some general refurbing but I didn't want to waste time on that until was happy with the roof.