The RHBR fleet

What is your latest project?
User avatar
williamfj
Trainee Driver
Trainee Driver
Posts: 605
Joined: Sat Nov 20, 2010 9:20 pm
Location: York

Post by williamfj » Fri Aug 23, 2013 9:32 pm

Offler is alive once again, hopefully it'll be the last time I have to rip the croc god apart to get the him running for some time! :lol:
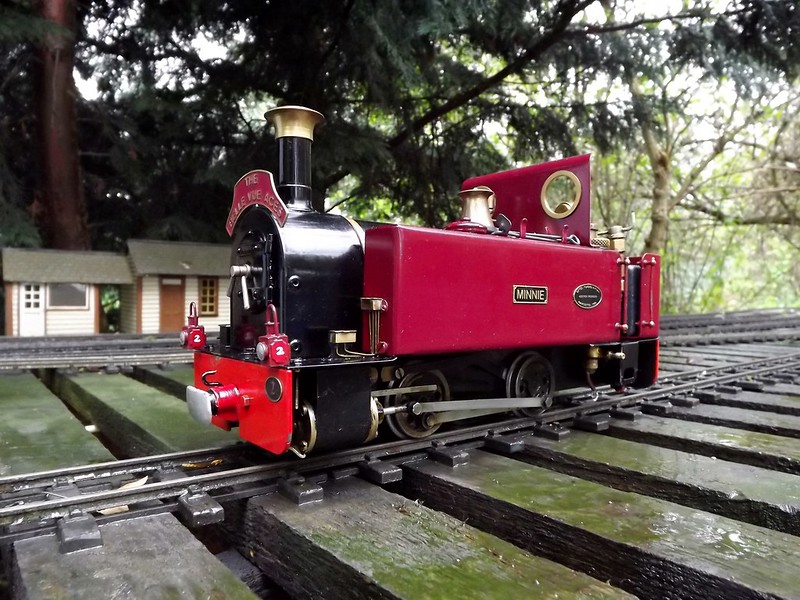
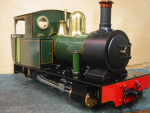
Minnie continues to plod along merrily, even more so now that I finally got a new pair of couplings. As the photo & moving photo show I've also grown out of my habit of giving Minnie a ridiculously large train (for a small 0-4-0) to haul. The front vacuum pipe fell off not too long ago and I've given up on trying to keep it glued to the bufferbeam.
I've got some modelling drive back as I'm currently working on an IPE freelance 3 comp coach, I made cracking progress yesterday but I've done nothing on it today. Still I reckon if I knuckle down (a BIG if then!) it'll be ready for the Yorkshire Group's visit to York on the September 1st, I'm sure a newly built coach with the potential to fall apart will be welcome when the line is busy! :twisted:
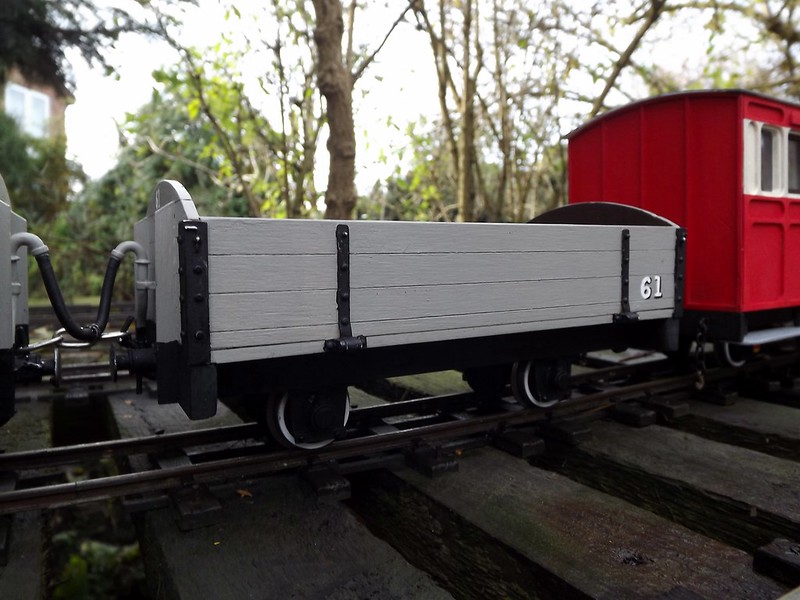
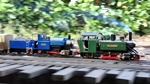
Minnie & the mixed rake pause to bask in the summer sun, well you have to make the best of it!
Image
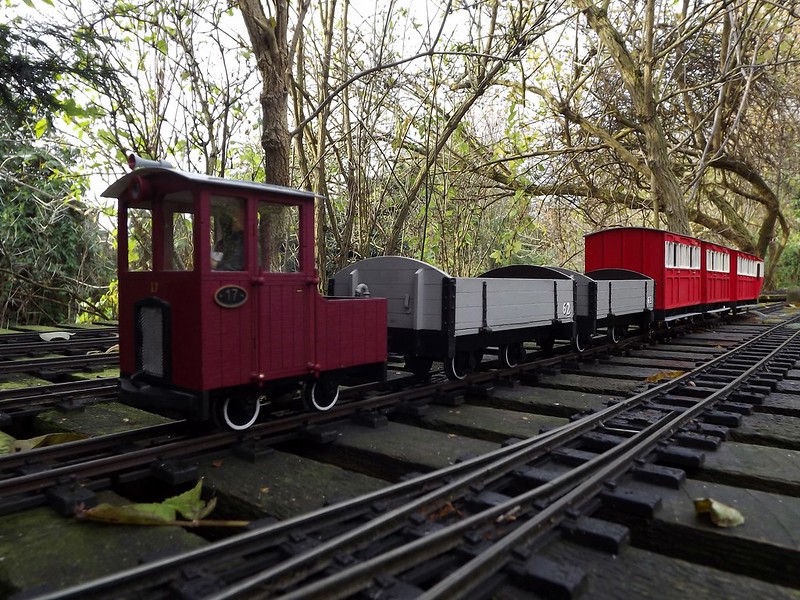
Minnie tackles one of the gradients on the line.
<object width="640" height="480"><param name="movie" value="//www.youtube.com/v/FbaMsIdKRJ8?hl=en_GB& ... ram><param name="allowFullScreen" value="true"></param><param name="allowscriptaccess" value="always"></param><embed src="//www.youtube.com/v/FbaMsIdKRJ8?hl=en_GB&version=3&rel=0" type="application/x-shockwave-flash" width="640" height="480" allowscriptaccess="always" allowfullscreen="true"></embed></object>
I haven't made proper videos of the action on the line as I lack the skill to film more when running my stuff and the patience to film others while my stuff stands idle!

User avatar
williamfj
Trainee Driver
Trainee Driver
Posts: 605
Joined: Sat Nov 20, 2010 9:20 pm
Location: York

Post by williamfj » Sun Sep 29, 2013 11:04 pm

At Elsecar I bought an Atropos Schull & Skibbereen open cattle wagon kit, unfortunately they didn't have any with them so I'll have to wait a couple of days to see what I've let myself in for. I don't think painting the hinges and upper door rails would be a sensible or long term way to blacken the brass. The only effective way of blackening them I can think of is one of the blackening chemical mixes so that'll be another learning curve for me. When I mentioned at the IP stand that a coach kit I bought earlier in the year was missing the side overlays I was kindly given a free 2 comp, that should keep me busy until my van from Atropos arrives.
Minnie's last outstanding problem is now sorted, for a while her gas filler valve has infrequently dribbled after filling so I fitted a new one after getting back yesterday, now I wait to see what she'll throw up next! :lol:

User avatar
williamfj
Trainee Driver
Trainee Driver
Posts: 605
Joined: Sat Nov 20, 2010 9:20 pm
Location: York

Post by williamfj » Sun Nov 03, 2013 11:32 pm

A work placement with Mitie on a contract for Network Rail has put a stop to my modelling for now, the IP 2 comp is in the painting stage and I am confident that I can build the Atropos cattle wagon after some concern that it was too advanced for me. Just about the only thing I've got off the workbench since Elsecar is the painting of 3 Brandright lamps, 2 of which are now Minnie's and the third is another tail lamp, shows how exciting my modelling has been recently that I'm discussing the allocation of white metal lamps! :oops:

Image

Yet another 3/4 view, and it will probably be done all over again if I fit a Swift Sixteen replacement coupling and buffer beam overlay, I need some imagination when it comes to photos of Minnie. :help:

User avatar
Keith S
Driver
Driver
Posts: 1627
Joined: Thu Feb 24, 2011 11:44 pm
Location: Canada

Post by Keith S » Mon Nov 04, 2013 1:47 am

You've done a really good job with that "Millie". It's hard to imagine anything you could do to make it look nicer! I do like those swift sixteen couplers though. I guess that will make the engine look even better!

User avatar
williamfj
Trainee Driver
Trainee Driver
Posts: 605
Joined: Sat Nov 20, 2010 9:20 pm
Location: York

Post by williamfj » Mon Nov 04, 2013 5:46 pm

Thanks Keith, the only thing that I should do before the old girl's out again is repaint her handrails. I did toy with the idea of painting her wheels but the grime on them gives her a bit of a working loco look.

User avatar
williamfj
Trainee Driver
Trainee Driver
Posts: 605
Joined: Sat Nov 20, 2010 9:20 pm
Location: York

Post by williamfj » Sat Nov 30, 2013 6:45 pm

williamfj:87259 wrote:Offler is alive once again, hopefully it'll be the last time I have to rip the croc god apart to get the him running for some time! 
Ummmmm, nope!
I think I have thoroughly knackered the croc god, during the running session after a working Wednesday he was running well but cut out abruptly, after a while he would run again before cutting out again, it wasn't the batteries and the connections are fine strip. I might strip the R/C gear and make him a simple on/off forward/reverse loco, although I've now got my heart set on purchasing a Essel chassis and scratchbuilding a larger body with the same features.
Luckily on Wednesday I also brought the revived shed a.k.a No.17 which last ran in February with some new batteries and a dose of oil it plodded along merrily with an extended rake of skips or a pair of opens.
Enough off my guff, how bout some snaps?
Débutante No.1, my 4th MOD open that's all there is to be said about this one really. :lol:
Image
Débutante No.2, the free IPE 2 comp that has been the cause of a few late nights in the run up to Wednesday!
Image
Débutante No.3, a Binnie skip with metal wheels I'm using a different assortment of paints since building the last skip so for now 58 is the odd one out.
Image
Surprisingly the shed could pull this lot, although I thought it best not to do so for long.
Image
Roughly a year separates these two kits, I think I've done a better job on N.47 than her elder twin
Image
To round it up a nice sunny shot
Image

User avatar
Lner fan Sam
Fireman
Fireman
Posts: 491
Joined: Sun Nov 25, 2012 7:57 pm
Location: Sunderland, north east of England

Post by Lner fan Sam » Sat Nov 30, 2013 7:37 pm

Your lettering on your rolling stock is superb William. :D
my first live steam engine build thread:
http://gardenrails.myfreeforum.org/about6685.html

Sam Wake

User avatar
williamfj
Trainee Driver
Trainee Driver
Posts: 605
Joined: Sat Nov 20, 2010 9:20 pm
Location: York

Post by williamfj » Sat Nov 30, 2013 7:55 pm

Thanks Sam, it's all brushed on and undiluted, it helps that the numbers I chose for the coach only had straight sides though! The numbering on the skips isn't as good because frankly I don't put as much effort into them, but they're supposed to look rough and ready.

User avatar
Lner fan Sam
Fireman
Fireman
Posts: 491
Joined: Sun Nov 25, 2012 7:57 pm
Location: Sunderland, north east of England

Post by Lner fan Sam » Sat Nov 30, 2013 8:03 pm

Yes the skips look very rustic you should be very proud of your modelling skills William. 8)
my first live steam engine build thread:
http://gardenrails.myfreeforum.org/about6685.html

Sam Wake

TTHLRMatt
Fireman
Fireman
Posts: 321
Joined: Wed Oct 26, 2011 10:20 am
Location: South Shields

Post by TTHLRMatt » Sat Nov 30, 2013 8:38 pm

How does the white edging to your wheels last, I have it on my fowler but would only add it to my stock if it were to last and not come off in short order.

User avatar
williamfj
Trainee Driver
Trainee Driver
Posts: 605
Joined: Sat Nov 20, 2010 9:20 pm
Location: York

Post by williamfj » Sat Nov 30, 2013 8:39 pm

Thanks Sam, I'll have trouble getting my head through doors for a while now! :lol:

User avatar
williamfj
Trainee Driver
Trainee Driver
Posts: 605
Joined: Sat Nov 20, 2010 9:20 pm
Location: York

Post by williamfj » Mon Dec 02, 2013 11:20 pm

TTHLRMatt:92613 wrote:How does the white edging to your wheels last, I have it on my fowler but would only add it to my stock if it were to last and not come off in short order.
Hello Matt, I'm really sorry it's taken me so long to reply to you, I didn't notice that you posted while I was writing my reply to Sam! :oops:  
The white tyre walls seem to last relatively well, but most of them get repainted every now and again so I can't authoritatively state just how well.

User avatar
dougrail
Driver
Driver
Posts: 1532
Joined: Mon Mar 14, 2011 5:11 pm
Location: Salopia; on the edge of Arcadia

Post by dougrail » Tue Dec 03, 2013 12:15 am

Looking impressive there, especially the IPE kit! May I ask how difficult it was to build and whether you experienced any 'wood warp'?

User avatar
williamfj
Trainee Driver
Trainee Driver
Posts: 605
Joined: Sat Nov 20, 2010 9:20 pm
Location: York

Post by williamfj » Tue Dec 03, 2013 9:12 am

dougrail:92907 wrote:Looking impressive there, especially the IPE kit! May I ask how difficult it was to build and whether you experienced any 'wood warp'?
Which one? ;)

The only kits I've found warping to be a problem are the coaches and the only parts that have warped are the side overlays. Although the overlays are that thin that when you glue them on they will stay straight as long as you secure them properly.

User avatar
Gremlin
Trainee Driver
Trainee Driver
Posts: 695
Joined: Sun Feb 08, 2009 2:46 pm
Location: Kent

Post by Gremlin » Tue Dec 03, 2013 12:26 pm

You've made a really good job of Millie with all the details. I think safety chains would look good and not too much.
Have you considered a full cab at some point, it almost gives you a new loco as it changes it so much.

Which coach kits did you prefer building, IP or Brandbright

User avatar
williamfj
Trainee Driver
Trainee Driver
Posts: 605
Joined: Sat Nov 20, 2010 9:20 pm
Location: York

Post by williamfj » Tue Dec 03, 2013 1:47 pm

Gremlin:92919 wrote:You've made a really good job of Millie with all the details. I think safety chains would look good and not too much.
Have you considered a full cab at some point, it almost gives you a new loco as it changes it so much.

Which coach kits did you prefer building, IP or Brandbright
Thanks, I have thought about safety chains as my coaches are all fitted with them, and I hope to fit them to my wagons in time but I'm not keen on drilling into the bufferbeams as the only drills I've got are pin vices but it can be done. At the moment a full cab isn't an option as I like been able to easily see the water & pressure gauges although I have thought about scratchbuilding an IMR style cab for Minnie at some point.
Funnily despite not finishing any of them I would say I prefer the Brandbright kits to build as they are sturdier and more precise. I lost all momentum with the Brandbrights, I don't suppose it helps that they're part finished in purple lake & cream so I can't really repaint them to fit in with the fleet now but then again it was always my plan to have a rake of red and cream and one of purple and cream. I don't think either the 3 comp or the directors saloon are that far off being finished really, I decided some time ago not to use the transfers, most if not all the wood is stained, and the interiors are mostly done, but the directors saloon needs an overlay cleaned before painting. In quite a few respects their easier to build than the IP kits, the instructions are great, they use slot and tab construction and the livery I chose doesn't require much masking, I've just realised I'm making it hard for myself not to finish at least one of them! :lol:

User avatar
williamfj
Trainee Driver
Trainee Driver
Posts: 605
Joined: Sat Nov 20, 2010 9:20 pm
Location: York

Post by williamfj » Sun Dec 15, 2013 10:35 pm

That's 2013 done and dusted for the RHBR fleet, Minnie has worked hard, River Ankh has done nothing at all, No.17 made it's début and has impressed on occasion, and Offler will never be the same again.
The last running day of the year saw Minnie with the extended passenger rake, although N.47 had to be withdrawn after a derailment might have sorta kinda left it with a loose end, I say loose end, it's only held on by the glue on the roof! :banghead:

My efforts to decorate Minnie for Christmas do leave something to be desired, like even writing!
Image
Even Albert got into the festive spirit, although he still didn't look too happy, must be the open cab and cold weather.
Image
Things might have got silly again later in the day, too much festive cheer perhaps.
Image
The heavy load and greasy rails lead to an inevitable outcome
Image

:hello2:

User avatar
laalratty
Retired Director
Retired Director
Posts: 3887
Joined: Wed Jan 16, 2008 5:35 pm
Location: Morecambe

Post by laalratty » Sun Dec 15, 2013 10:40 pm

Silly? That's not silly, that's a decent length train!
Like the drivers Santa Hat
"What the hell is that?"
"It's a model icebreaker sir."
"It's a bit big isn't it?"
"It's a full scale model sir....."

User avatar
williamfj
Trainee Driver
Trainee Driver
Posts: 605
Joined: Sat Nov 20, 2010 9:20 pm
Location: York

Post by williamfj » Sun Dec 15, 2013 10:58 pm

If I'd removed the wood (and gas bottle) from the wagons then Minnie might not have spun so much, although a banking or piloting loco would have been very useful, a job for my new diesel when built.
The hat was the one suitable decoration I could find in York, luckily it was on a chocolate Santa so it was worth looking for! :lol:

User avatar
Gremlin
Trainee Driver
Trainee Driver
Posts: 695
Joined: Sun Feb 08, 2009 2:46 pm
Location: Kent

Post by Gremlin » Mon Dec 16, 2013 10:00 am

that's always a good excuse for gaining accessories.
"Oh look just what I need, just happens to be in a pack of 12 chocolate santas, what will I have to do with all the chocolate"

the hat's a perfect fit

Post Reply

Who is online

Users browsing this forum: No registered users and 4 guests