Yeah its just a case of getting the right material for the wicks.bungle80a wrote:She's got a 4 wick burner! Thats gonna pump out some heat to the boiler! Going to do some cosmetic bit on her tonight! Will post pics later if there is any significant differences!
RE-Building my Lady Anne
http://www.freewebs.com/pinetreelightrailway/index.
Cecil your engines on Fire!
Its a Mamod it does that.
Cecil your engines on Fire!
Its a Mamod it does that.
-
bungle80a
- Trainee Driver

- Posts: 516
- Joined: Sun Jan 20, 2008 12:01 am
- Location: Fife, Scotland
- Contact:
There willl be some experimenting with different materials for the wicks!
Well, yesterday same quite a lot of progress thanks to PTLRsam! All engineering work is being carried out by him while I do cosmetic jobs and act as photographer!
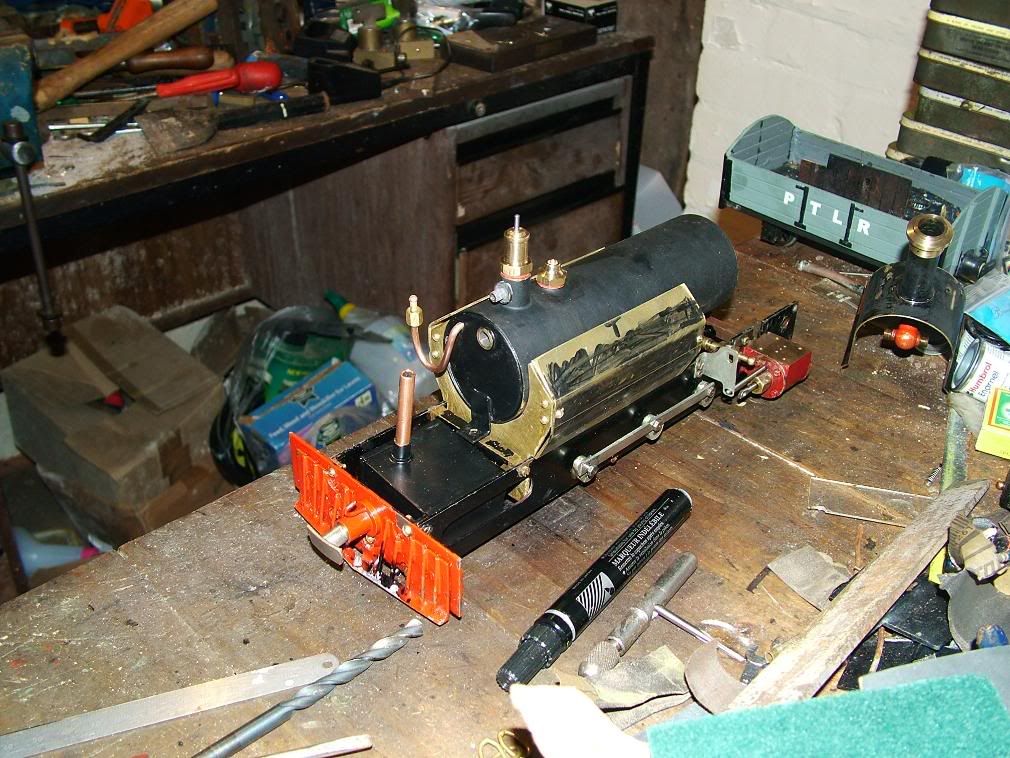
The work startd by cleaning up and siver soldering the meths burner as it was previously soft soldered and the pipe with the wicks was disconnected. The original filler pipe was removed and a bush put in for a new one!
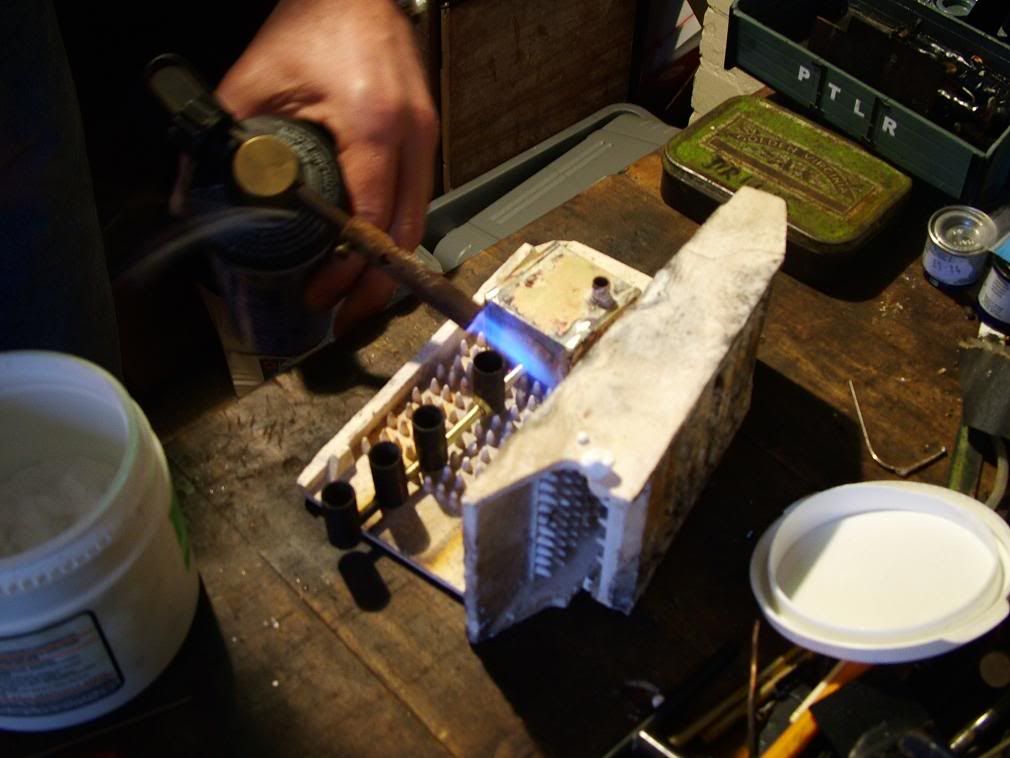
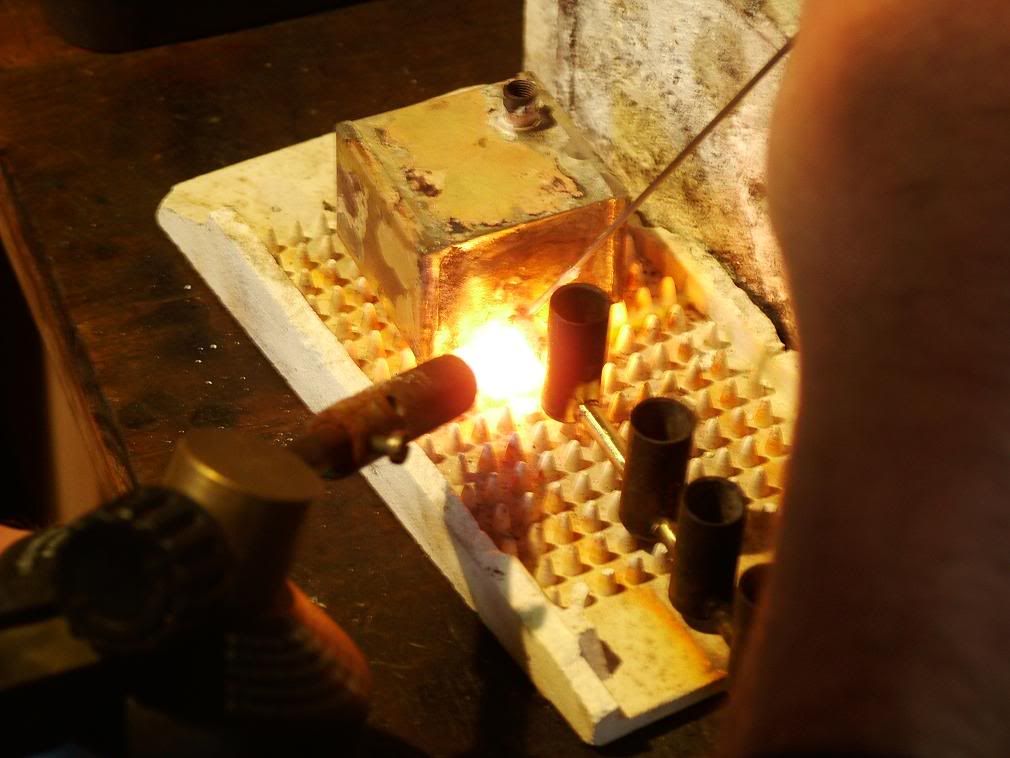
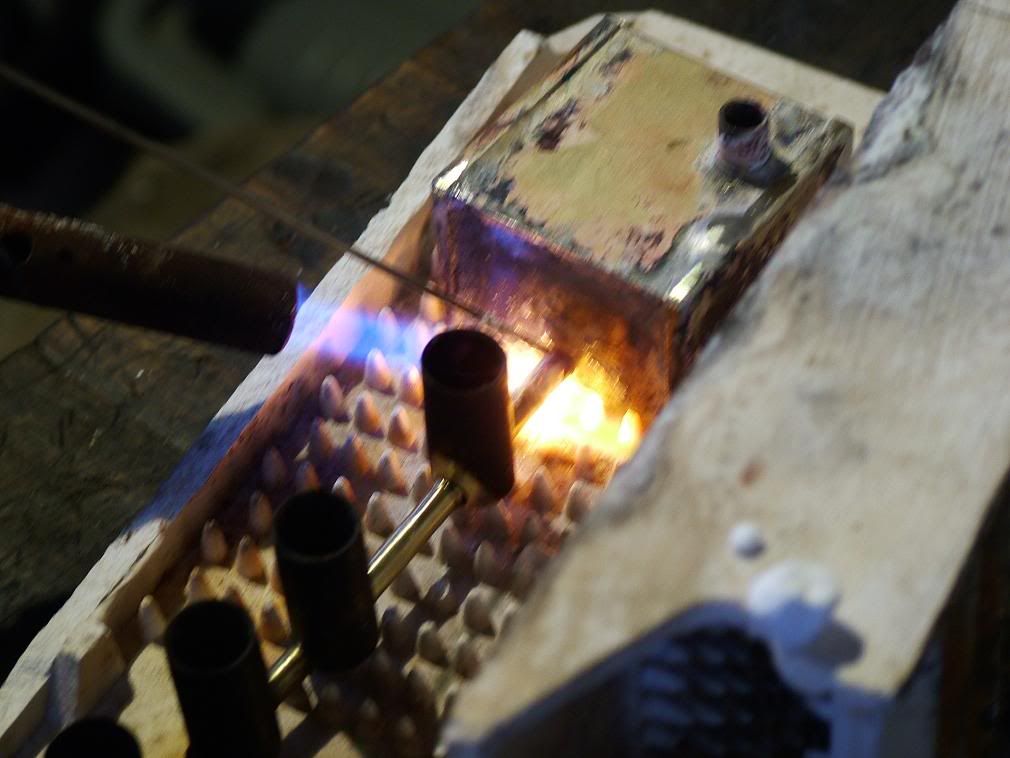
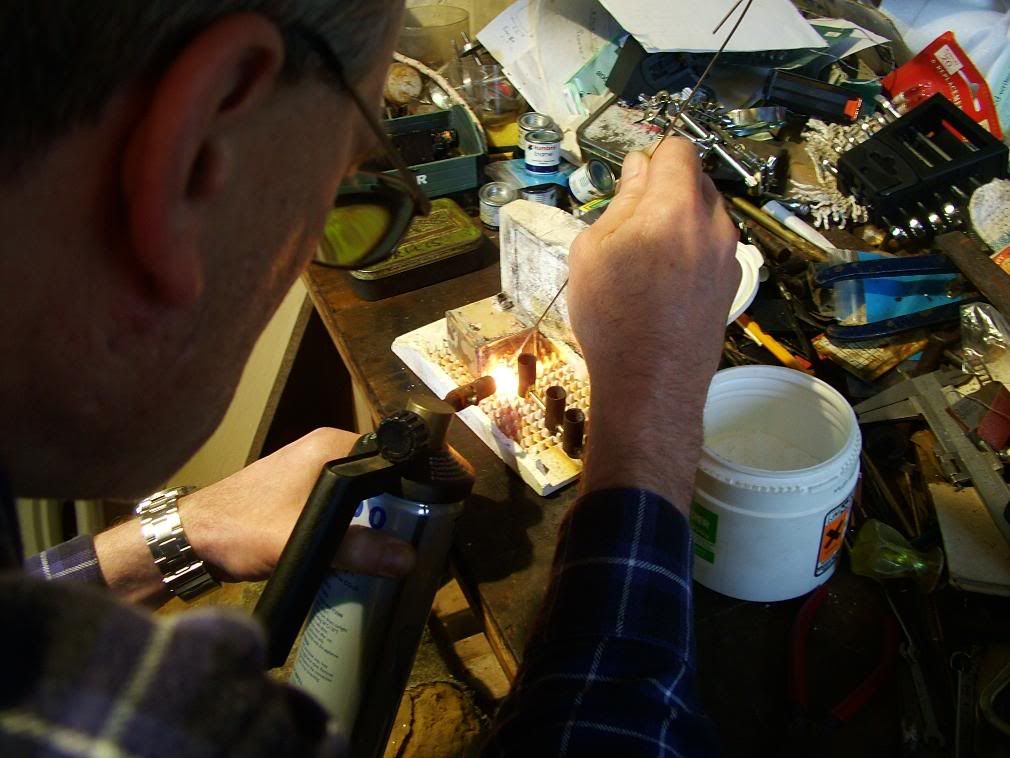
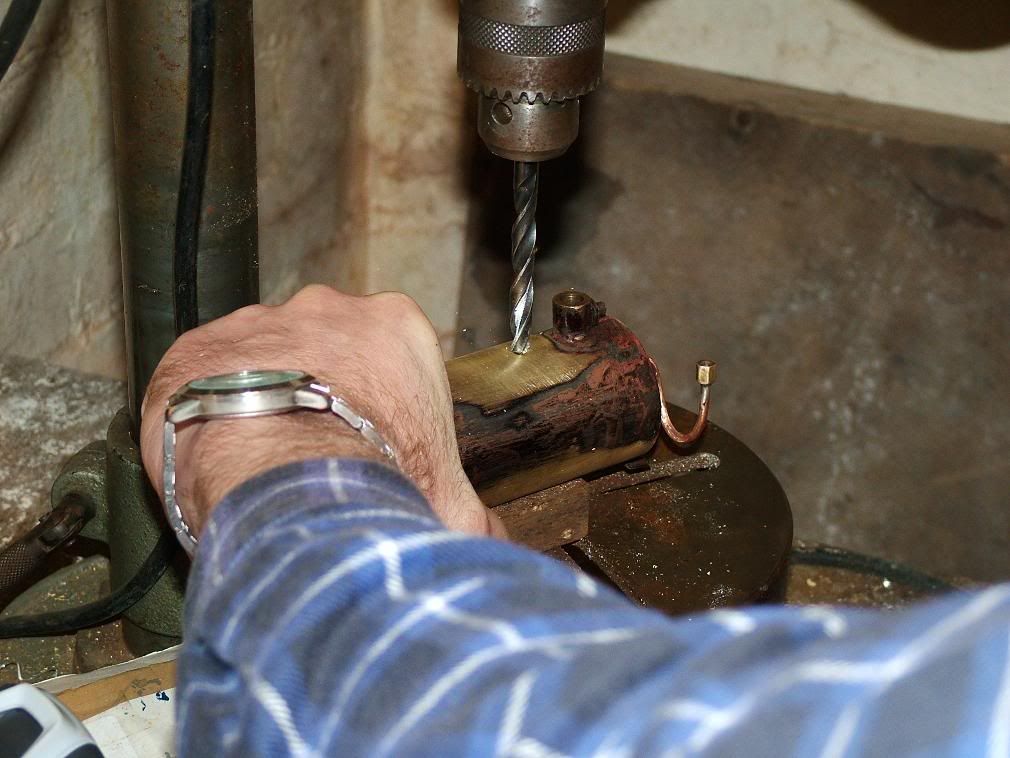
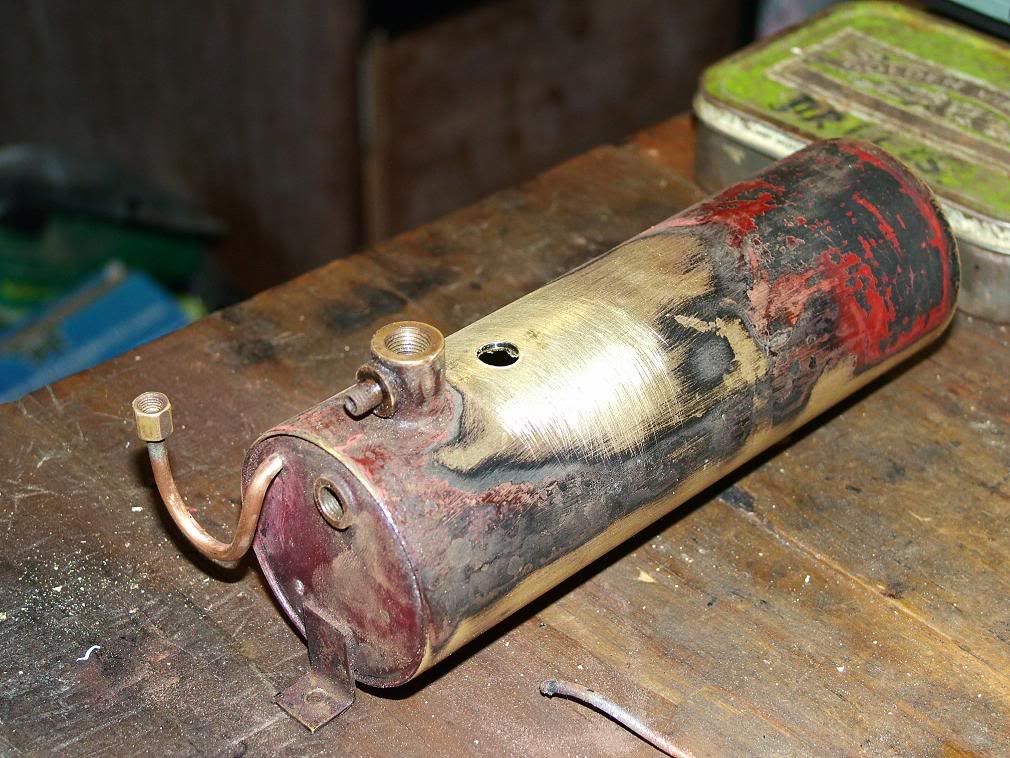
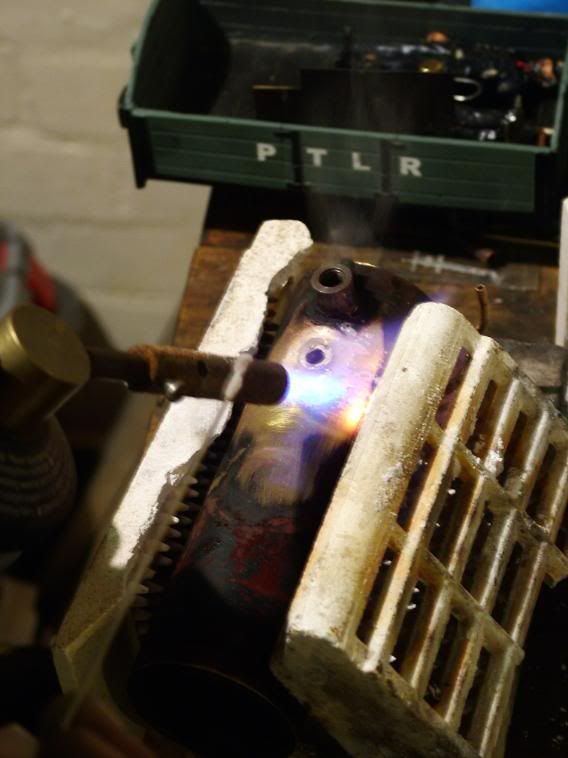
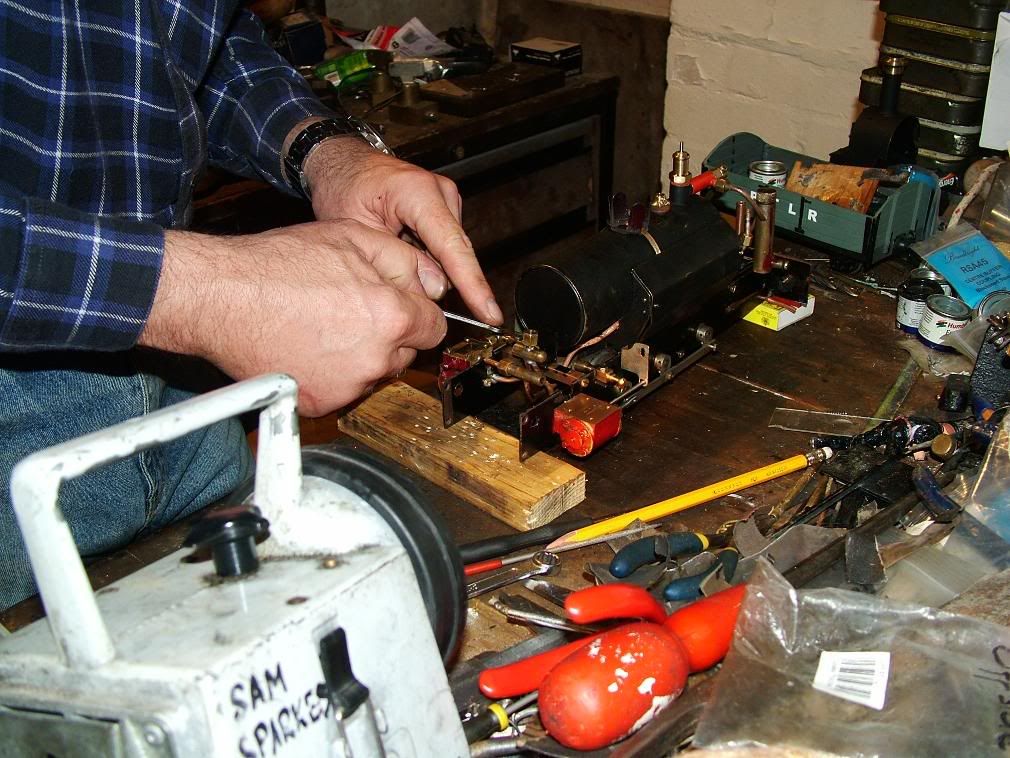
The next job was to put a bush in the boiler to accept a water filler valve, In piccies below show the moment of truth with the boiler being drilled (arrrghhhh! He's putting a Fur Cough big hole in my boiler!) and the boiler once drilled!
It was also decided by Mr Engineer to alter the pipe for the pressure gauge as the gauge screwed into a fixed nut and should I come to change the gauge at some point, it could end up pointing in any direction. So the end was cut off, a nipple produced and silver soldered in and a union nut fitted to the pipe. Production of the union nut is shown here...
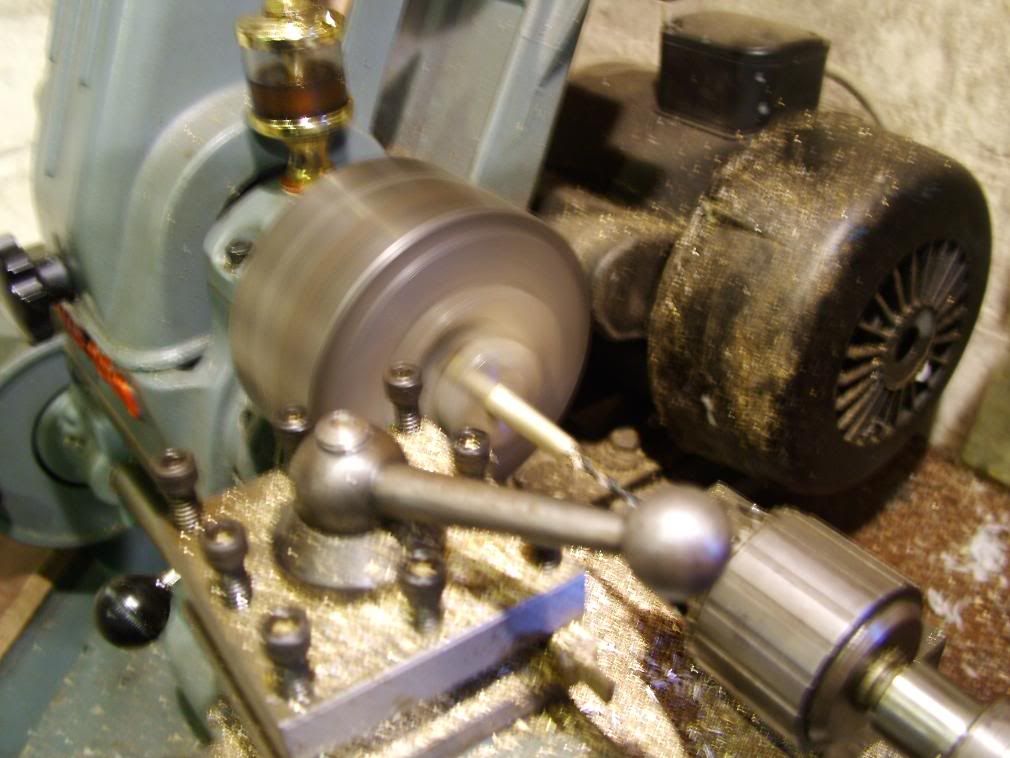
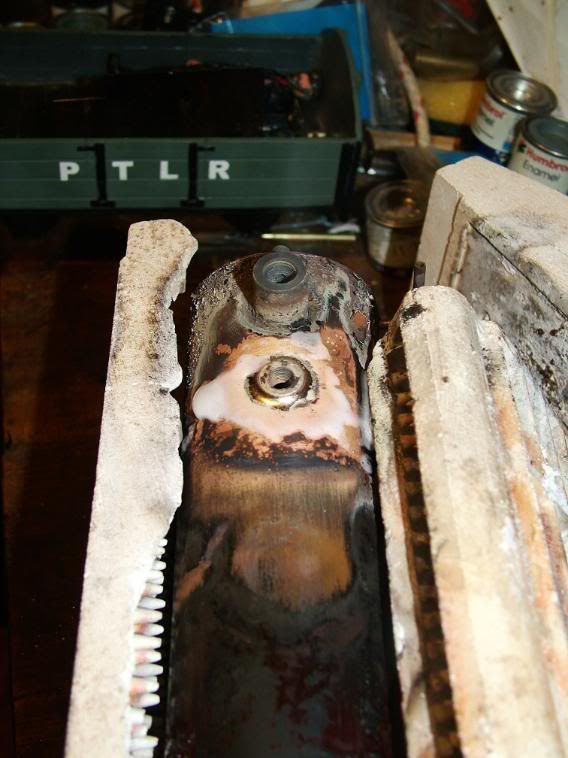
The bush was produced for the feed valve and silver soldered in. Below also shows it once done. (The actual feed valve is being produced at the PTLR workshop as I write this)
MY cosmetic works for the day are shown in the picccies below. I've painted footplate and cab inside, along with tank tops and sanding pot lids.
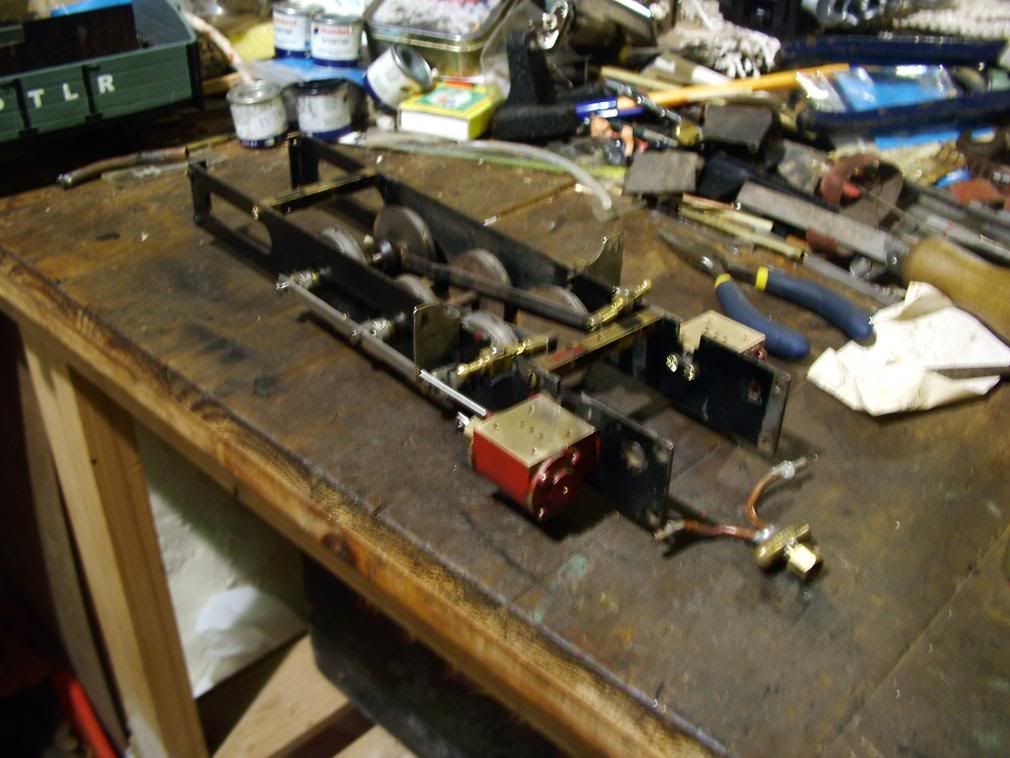
Then rather late at night, I painted the boiler and meths burner, ready for reassembly some point today. While I was doing that, PTLRsam started working on re-assembling the cylinders and eccentrics.
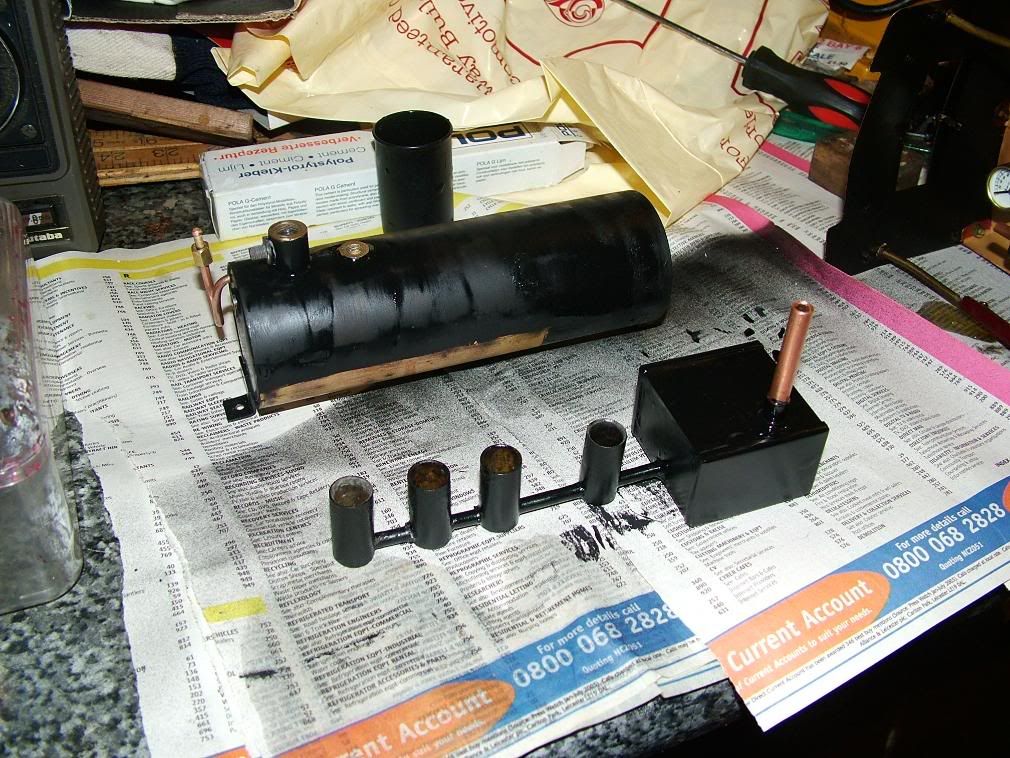
Also late at night, we realised we are missing a couple of rather important pieces which could delay the project! The safety valve is missing, as is the flame guard!
We will see what happens. Well, thats it for yesterdays progress. Time to get up to the PTLR and check on todays progress!
If you want to to see even more photos then goto my photobucket...
http://s294.photobucket.com/albums/mm92/bungle80a/
Well, yesterday same quite a lot of progress thanks to PTLRsam! All engineering work is being carried out by him while I do cosmetic jobs and act as photographer!
The work startd by cleaning up and siver soldering the meths burner as it was previously soft soldered and the pipe with the wicks was disconnected. The original filler pipe was removed and a bush put in for a new one!
The next job was to put a bush in the boiler to accept a water filler valve, In piccies below show the moment of truth with the boiler being drilled (arrrghhhh! He's putting a Fur Cough big hole in my boiler!) and the boiler once drilled!
It was also decided by Mr Engineer to alter the pipe for the pressure gauge as the gauge screwed into a fixed nut and should I come to change the gauge at some point, it could end up pointing in any direction. So the end was cut off, a nipple produced and silver soldered in and a union nut fitted to the pipe. Production of the union nut is shown here...
The bush was produced for the feed valve and silver soldered in. Below also shows it once done. (The actual feed valve is being produced at the PTLR workshop as I write this)
MY cosmetic works for the day are shown in the picccies below. I've painted footplate and cab inside, along with tank tops and sanding pot lids.
Then rather late at night, I painted the boiler and meths burner, ready for reassembly some point today. While I was doing that, PTLRsam started working on re-assembling the cylinders and eccentrics.
Also late at night, we realised we are missing a couple of rather important pieces which could delay the project! The safety valve is missing, as is the flame guard!
We will see what happens. Well, thats it for yesterdays progress. Time to get up to the PTLR and check on todays progress!
If you want to to see even more photos then goto my photobucket...
http://s294.photobucket.com/albums/mm92/bungle80a/
Bungle80a
"Who has stolen the 3 link coupling off the end of my train?!?!
.....[a few minutes pass hunting down replacements].....
"So, which comedian has uncoupled my entire train?!?!"
"Who has stolen the 3 link coupling off the end of my train?!?!
.....[a few minutes pass hunting down replacements].....
"So, which comedian has uncoupled my entire train?!?!"
Aye and who bought the engine with the safety valve and the cow catcher  .
.
http://www.freewebs.com/pinetreelightrailway/index.
Cecil your engines on Fire!
Its a Mamod it does that.
Cecil your engines on Fire!
Its a Mamod it does that.
-
SillyBilly
- Retired Director

- Posts: 3536
- Joined: Sat Aug 18, 2007 11:00 pm
-
bungle80a
- Trainee Driver
- Posts: 516
- Joined: Sun Jan 20, 2008 12:01 am
- Location: Fife, Scotland
- Contact:
Today's progress!
I got up to the PTLR workshops around noon and when I got there I was greeted by this...
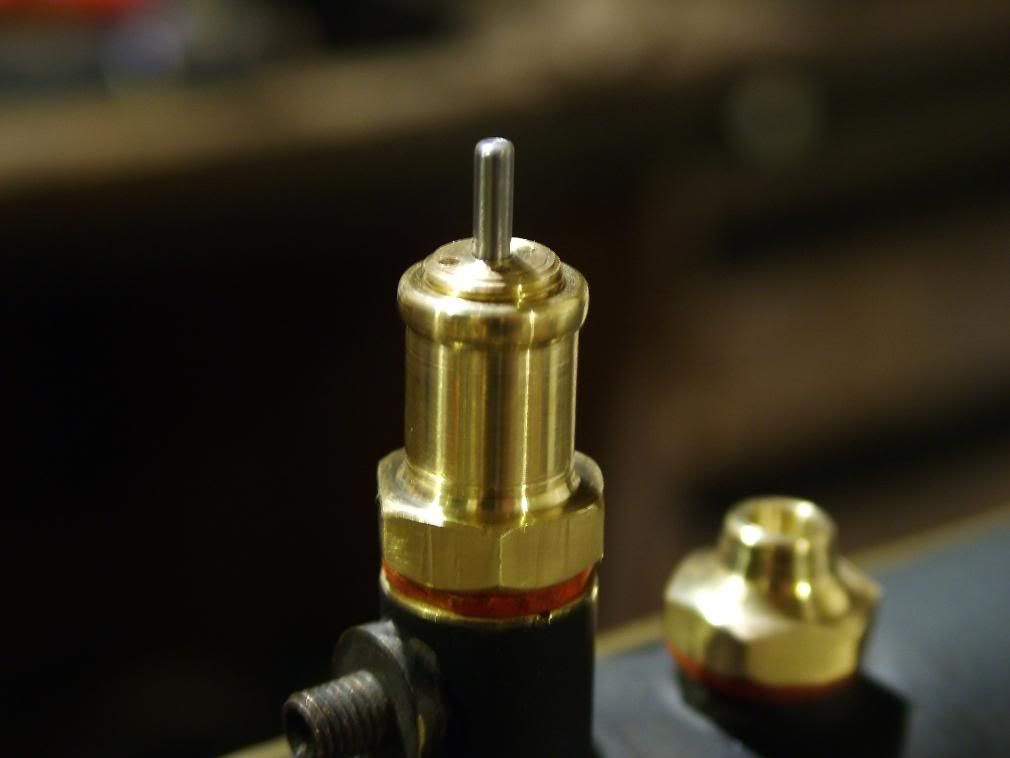
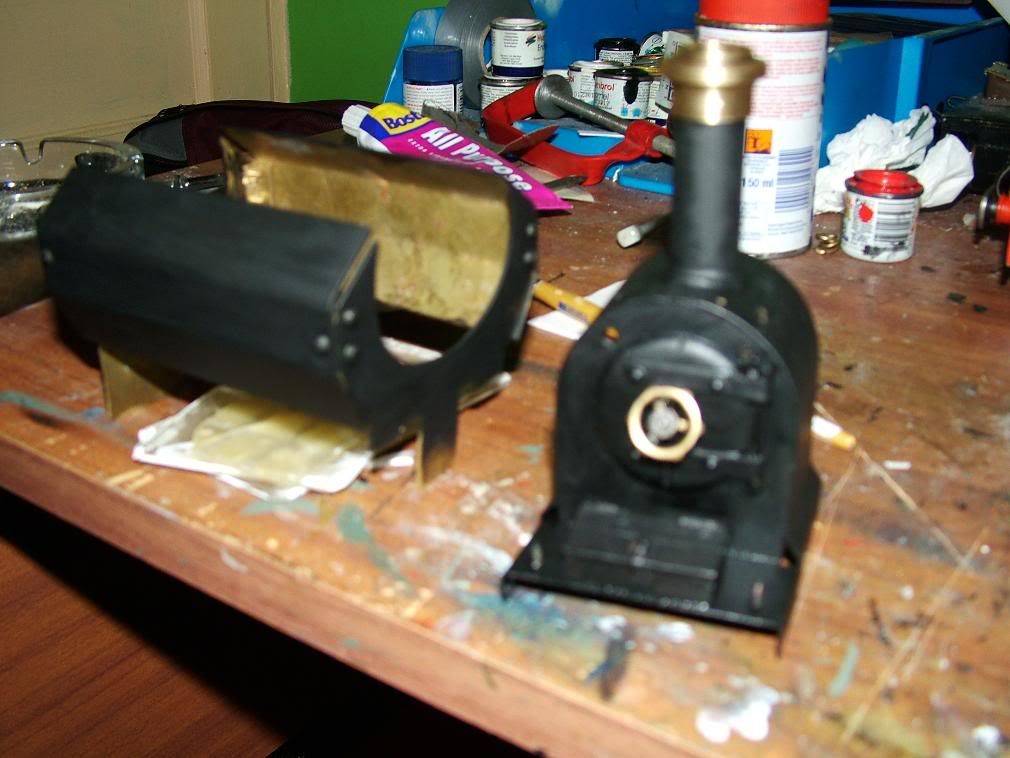
Half hour later and the safety valve was complete. It is very similar to a Roundhouse safety valve, though it is slightly taller. Turns out Cecil's loco almost certainly got my safety valve as well as the cow catcher!!! The filler valve had also been produced, and it is nice to see some shiny metal on the top of the matt black boiler.
The wicks have been fitted to the burner, and it is temporarily back in place to assist with the next job.
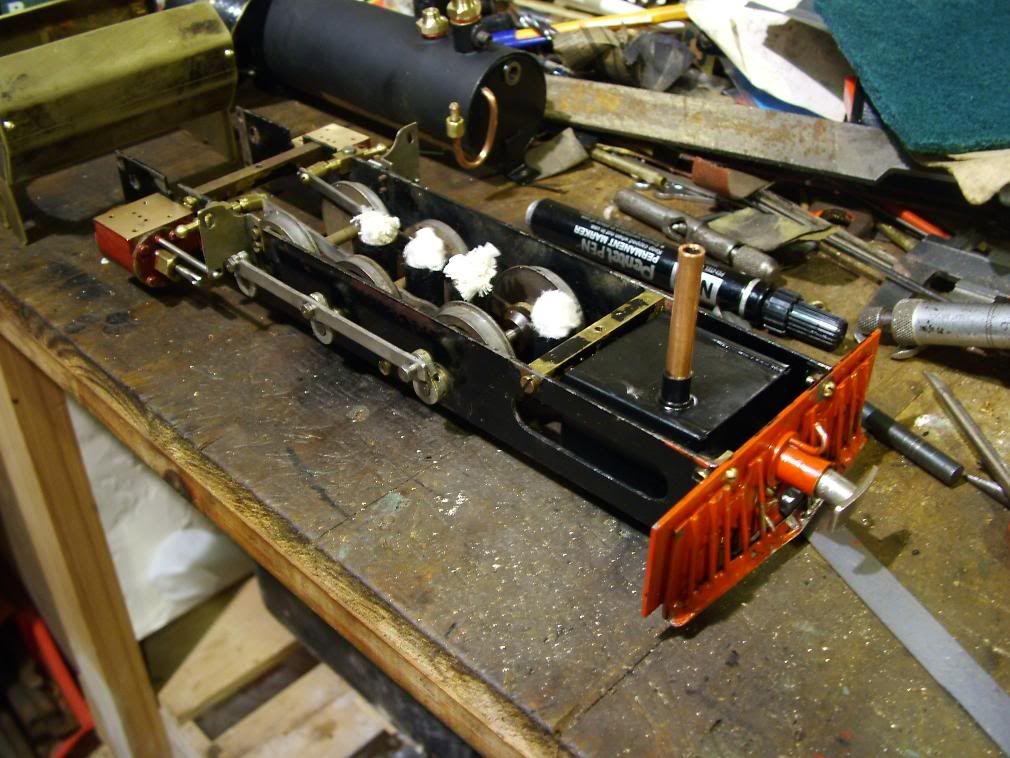
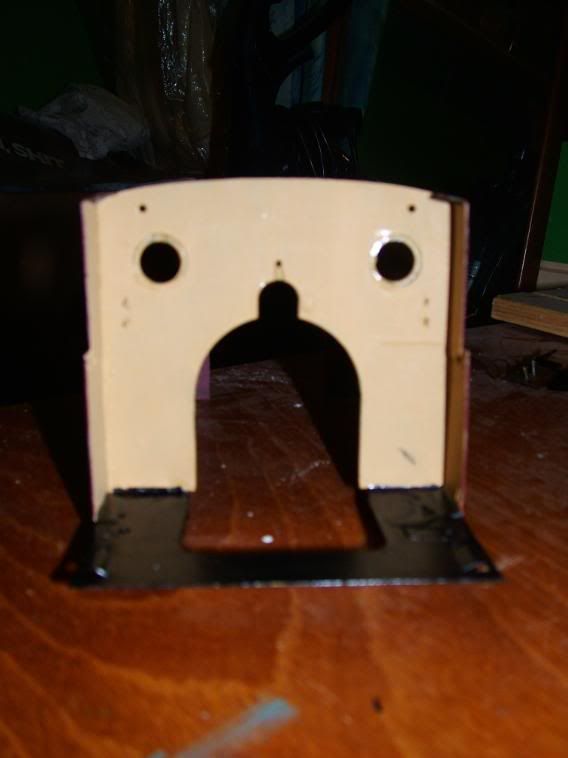
The rest of the days work was replacing the missing flame guard, which was easier said than done. It had to be designed, produced and fettled! Fortunately, another meths fired Lady Anne was on hand to assist in the design process, although it is a later one and has a slightly different design.
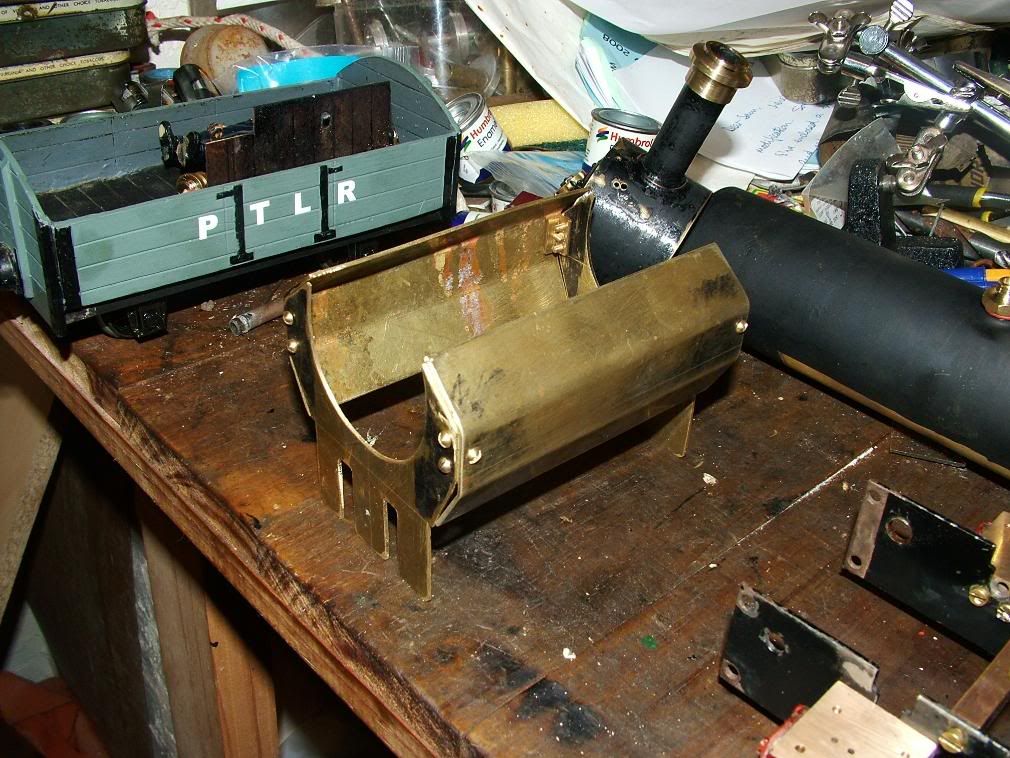
By 11pm tonight the guard was complete (although it needs a coat of matt black paint) and fits.
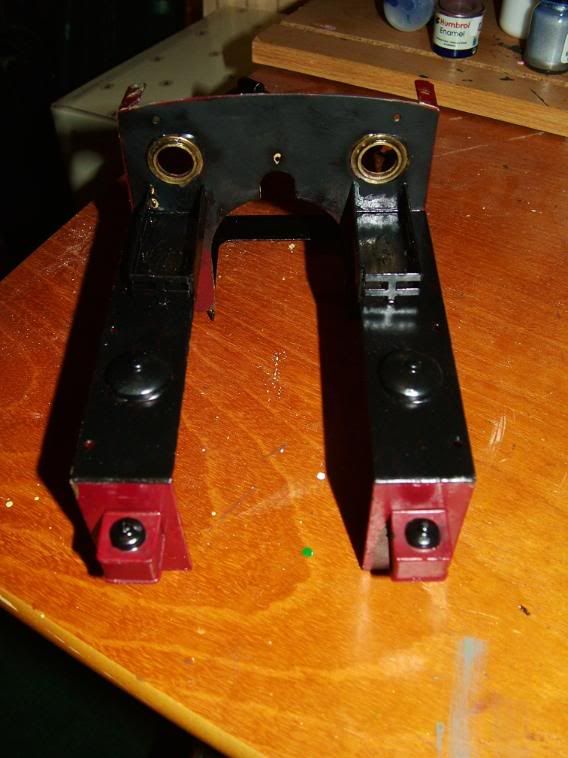
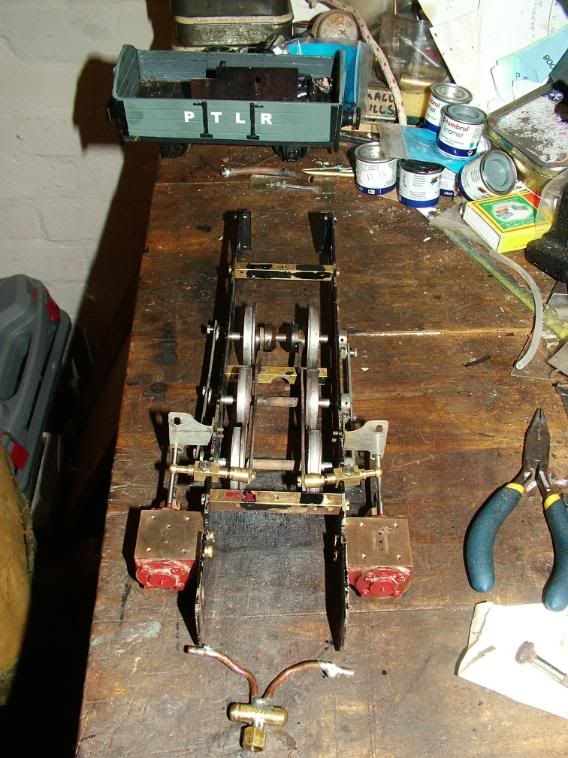
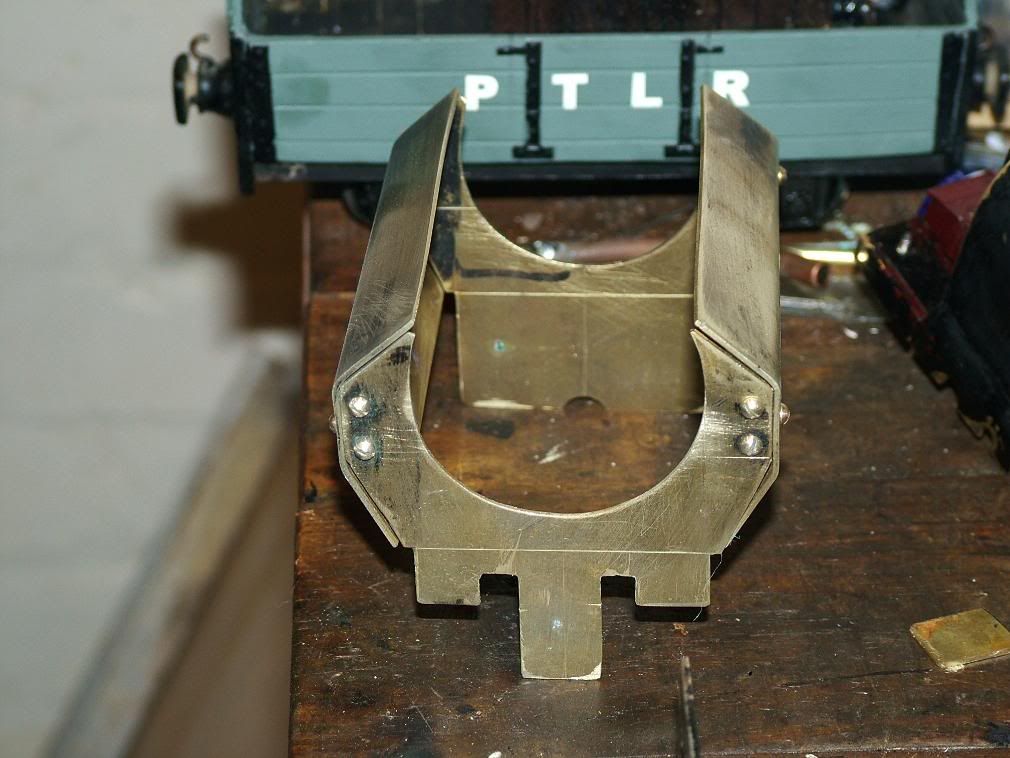
The front end of the guard needed some adapting so that it didn't interfere with the eccentrics and front wheels. Shown here with the extra work done.
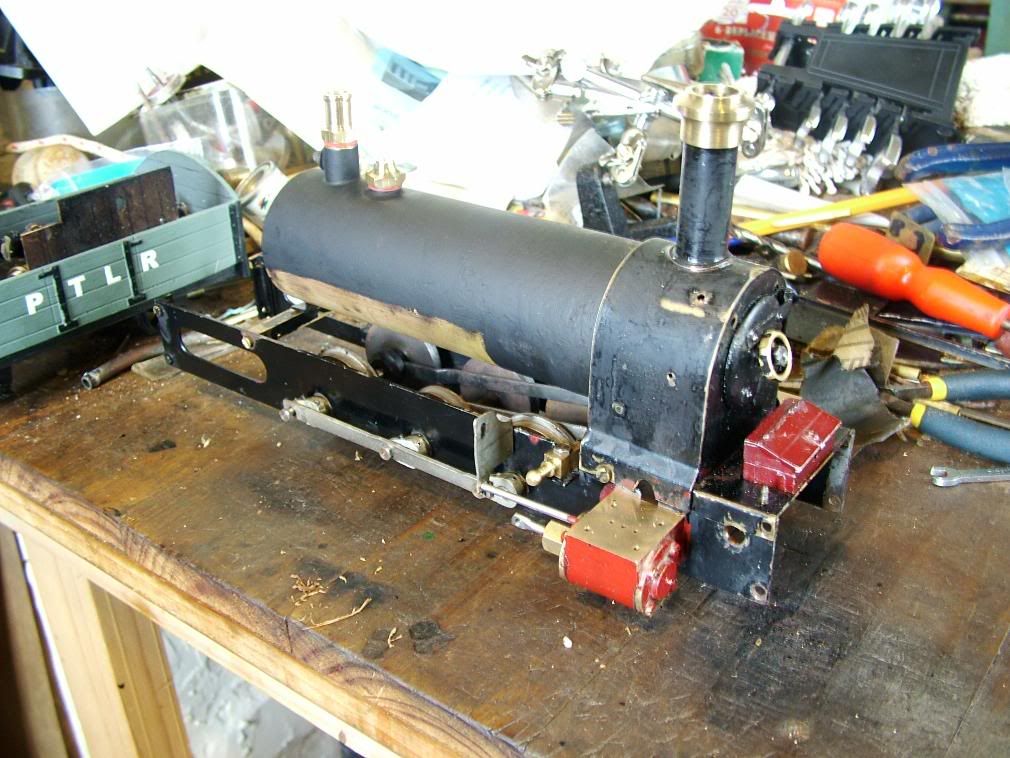
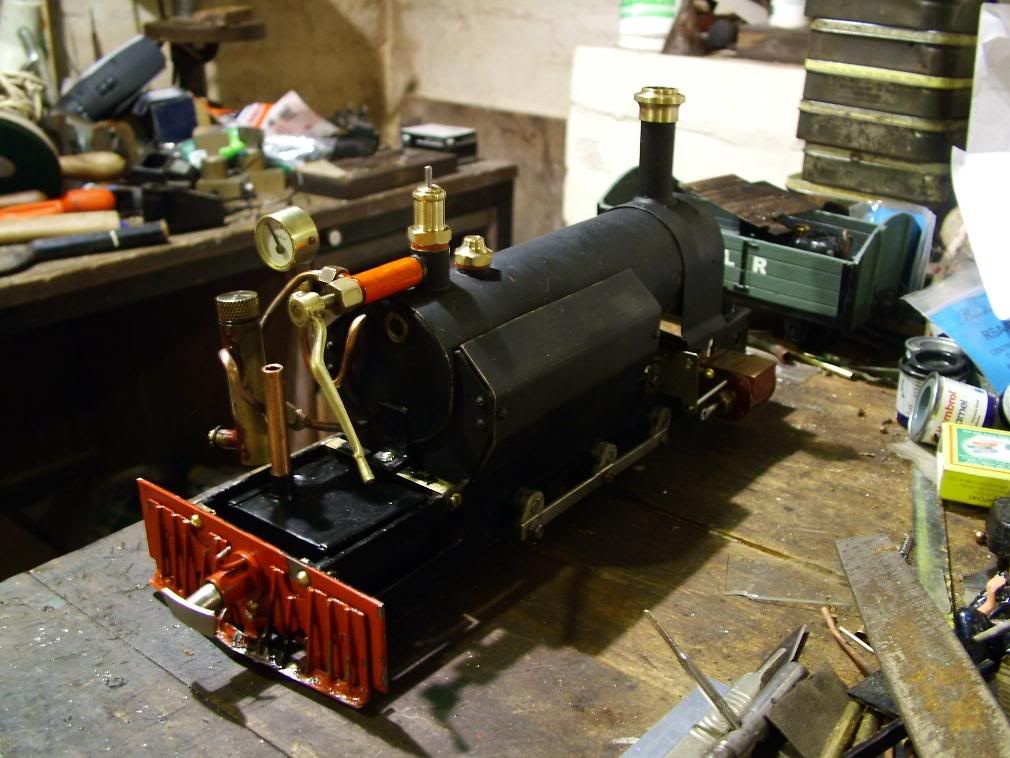
So by the end of the day, this is how she looks. The smoke box is just put in place for effect!
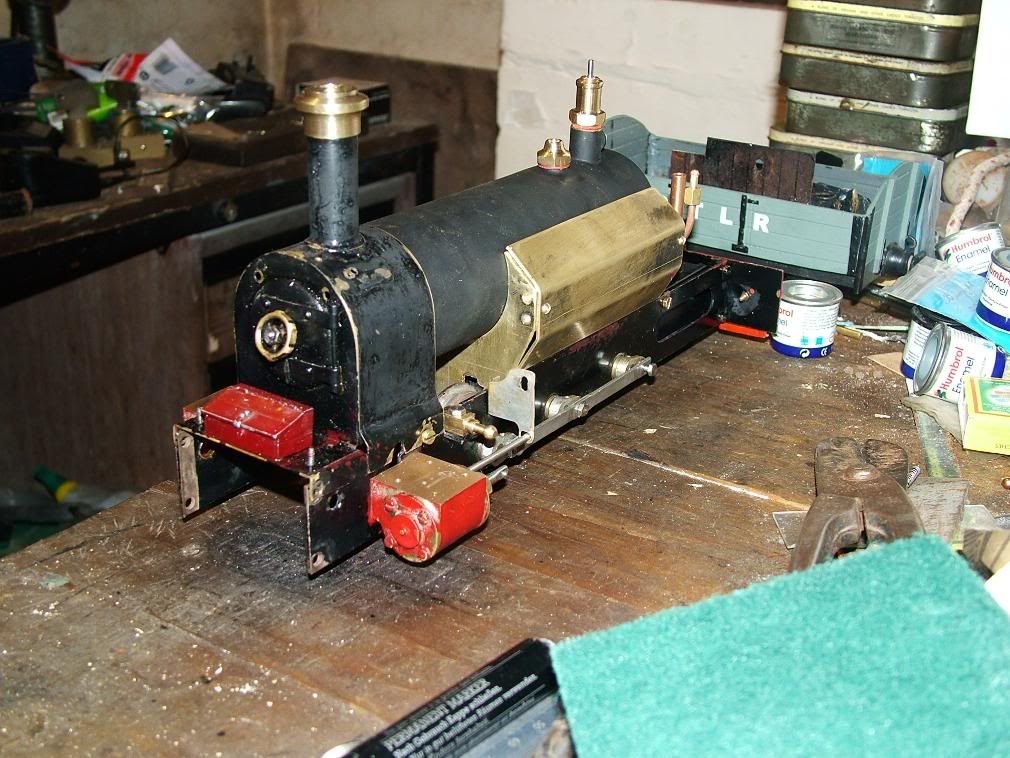
She is really beginning to come back together! As always, there are more pics in my photobucket. The link is in an earlier post.
I got up to the PTLR workshops around noon and when I got there I was greeted by this...
Half hour later and the safety valve was complete. It is very similar to a Roundhouse safety valve, though it is slightly taller. Turns out Cecil's loco almost certainly got my safety valve as well as the cow catcher!!! The filler valve had also been produced, and it is nice to see some shiny metal on the top of the matt black boiler.
The wicks have been fitted to the burner, and it is temporarily back in place to assist with the next job.
The rest of the days work was replacing the missing flame guard, which was easier said than done. It had to be designed, produced and fettled! Fortunately, another meths fired Lady Anne was on hand to assist in the design process, although it is a later one and has a slightly different design.
By 11pm tonight the guard was complete (although it needs a coat of matt black paint) and fits.
The front end of the guard needed some adapting so that it didn't interfere with the eccentrics and front wheels. Shown here with the extra work done.
So by the end of the day, this is how she looks. The smoke box is just put in place for effect!
She is really beginning to come back together! As always, there are more pics in my photobucket. The link is in an earlier post.
Bungle80a
"Who has stolen the 3 link coupling off the end of my train?!?!
.....[a few minutes pass hunting down replacements].....
"So, which comedian has uncoupled my entire train?!?!"
"Who has stolen the 3 link coupling off the end of my train?!?!
.....[a few minutes pass hunting down replacements].....
"So, which comedian has uncoupled my entire train?!?!"

-
bungle80a
- Trainee Driver
- Posts: 516
- Joined: Sun Jan 20, 2008 12:01 am
- Location: Fife, Scotland
- Contact:
There has been some progress again today on the 'Lady Anne' class Loco (more on that later). Her smoke box assembly, including the wee toolbox has been given a coat of matt black, as has the flame guard.
The first engineeringy job done this evening was refitting of the exhaust pipes into the cylinders.
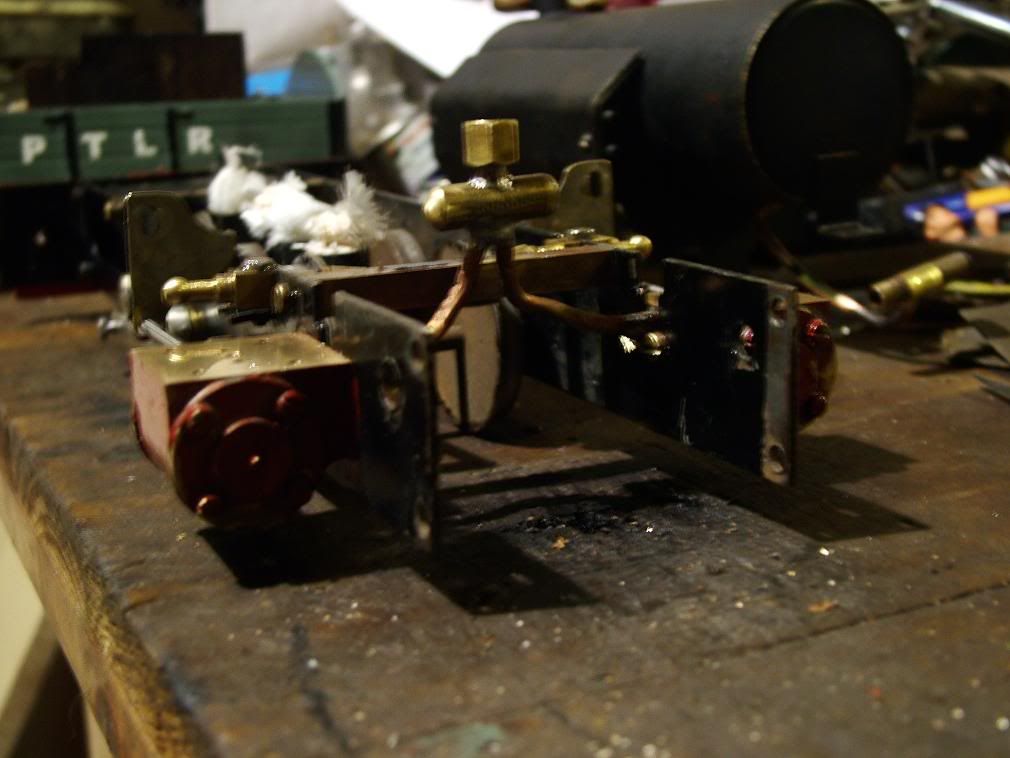
Once that was complete, various other bits of pipework started to be attatched. The super heater pipe needed slots cutting into the flame guard, and the pipework to connect the lubricator needed a little reshaping. A few other bits were temporarily attatched for a photo opportunity...
Finally, while all this engineering work was going on in the workshop, I was busy preparing nameplates and numbers for her!
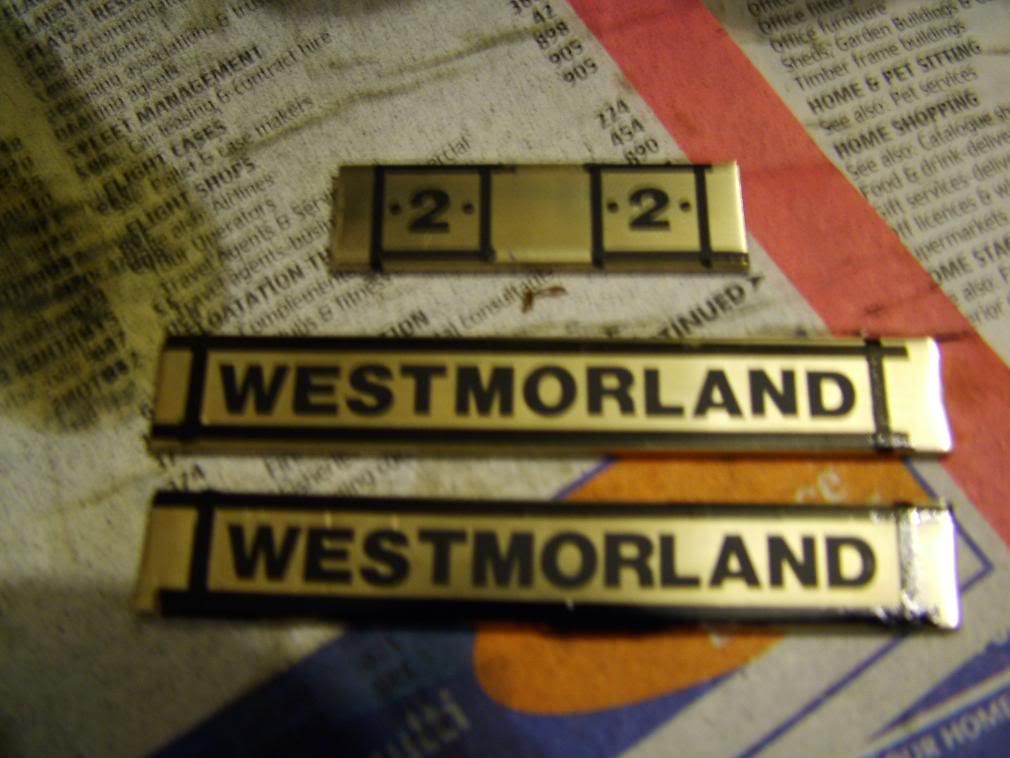
So from here on in, this loco will now be referred to as 'Westmorland'. I'll explain the significance another day as its half past midnight and I have to be up early for railway building.
The first engineeringy job done this evening was refitting of the exhaust pipes into the cylinders.
Once that was complete, various other bits of pipework started to be attatched. The super heater pipe needed slots cutting into the flame guard, and the pipework to connect the lubricator needed a little reshaping. A few other bits were temporarily attatched for a photo opportunity...
Finally, while all this engineering work was going on in the workshop, I was busy preparing nameplates and numbers for her!
So from here on in, this loco will now be referred to as 'Westmorland'. I'll explain the significance another day as its half past midnight and I have to be up early for railway building.
Bungle80a
"Who has stolen the 3 link coupling off the end of my train?!?!
.....[a few minutes pass hunting down replacements].....
"So, which comedian has uncoupled my entire train?!?!"
"Who has stolen the 3 link coupling off the end of my train?!?!
.....[a few minutes pass hunting down replacements].....
"So, which comedian has uncoupled my entire train?!?!"
-
Chris Cairns

- Driver

- Posts: 2366
- Joined: Mon Oct 29, 2007 7:25 pm
- Location: Glasgow, Scotland
It is great to return from an overseas steam tour to read this expanded and very informative posting.
The photos on the work being undertaken are very good, and it was great to see silver soldering in action - a skill I've yet to master.
Looking forward to more postings and its first steaming after rebuild.
The photos on the work being undertaken are very good, and it was great to see silver soldering in action - a skill I've yet to master.
Looking forward to more postings and its first steaming after rebuild.
-
bungle80a
- Trainee Driver
- Posts: 516
- Joined: Sun Jan 20, 2008 12:01 am
- Location: Fife, Scotland
- Contact:
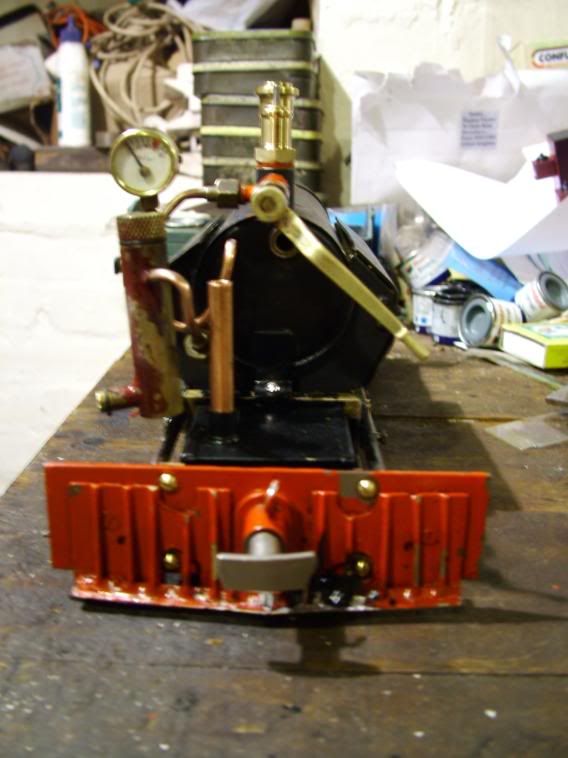
Been a funny ol' night! There were a few set backs this evening, with things going wrong. The newly fitted nipple on the pressure gauge pipe broke off while another job was being done and the meths overflow pipe snapped while trying to bend it down! The nipple was reattatched and the meths overflow pipe was plugged and a new one fitted in the side of the tank, so the pipe doesnt have to run through the rear buffer beam, which if ignited, melts the white metal cow catcher (as it appears to have in the past!)
So neither of those jobs were planned for tonight, but had to be done! The work that was scheduled for tonight, was refitting of the motion and valves.
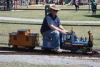
It took a lot of fettling, as it kept locking, but by about 11:45 it was done. In the state she was now in, there was only 1 thing left to do! STEAM TEST!
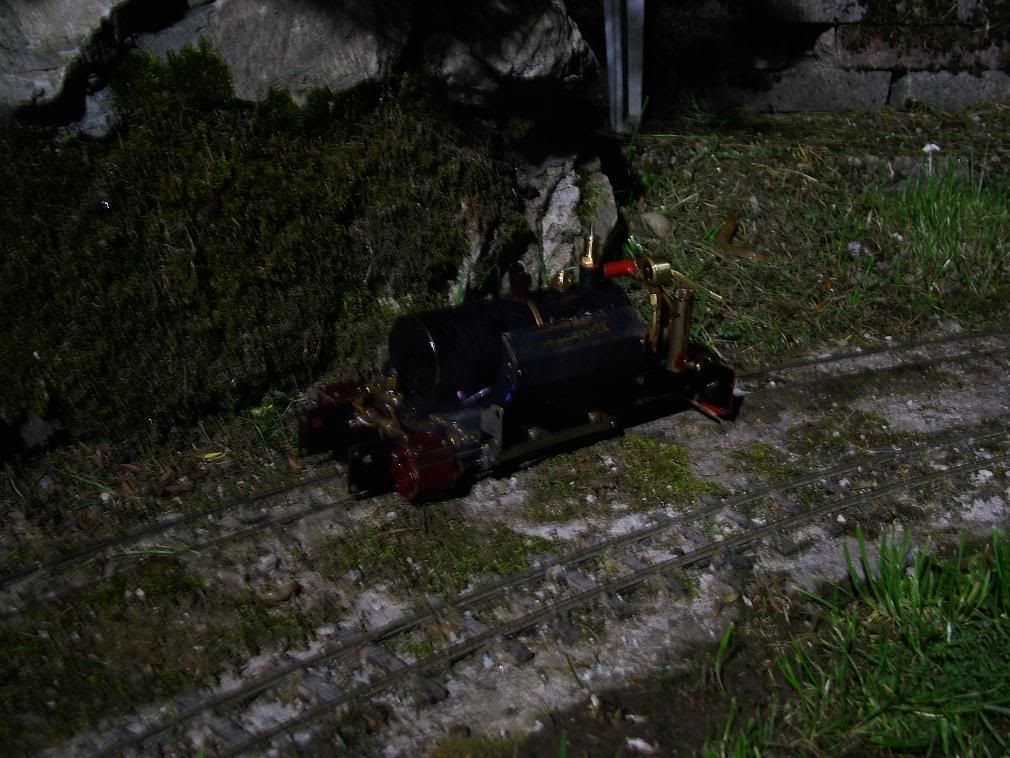
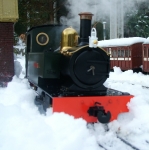
The piccy below was taken on her maiden voyage since rebuilding, and apart from needing somthing doing with the wicks (currently, she appears as a ball of fire travelling round the garden in the dark!), she runs very well.
I'll post a vid 2moro, but its late and again, i've got to be up early to go build a railway!
So neither of those jobs were planned for tonight, but had to be done! The work that was scheduled for tonight, was refitting of the motion and valves.
It took a lot of fettling, as it kept locking, but by about 11:45 it was done. In the state she was now in, there was only 1 thing left to do! STEAM TEST!
The piccy below was taken on her maiden voyage since rebuilding, and apart from needing somthing doing with the wicks (currently, she appears as a ball of fire travelling round the garden in the dark!), she runs very well.
I'll post a vid 2moro, but its late and again, i've got to be up early to go build a railway!
Bungle80a
"Who has stolen the 3 link coupling off the end of my train?!?!
.....[a few minutes pass hunting down replacements].....
"So, which comedian has uncoupled my entire train?!?!"
"Who has stolen the 3 link coupling off the end of my train?!?!
.....[a few minutes pass hunting down replacements].....
"So, which comedian has uncoupled my entire train?!?!"
A fireball XL5 jobbie then.
http://www.freewebs.com/pinetreelightrailway/index.
Cecil your engines on Fire!
Its a Mamod it does that.
Cecil your engines on Fire!
Its a Mamod it does that.
-
bungle80a
- Trainee Driver
- Posts: 516
- Joined: Sun Jan 20, 2008 12:01 am
- Location: Fife, Scotland
- Contact:
ERm, somthing like that! Put it this way, "get it outside...NOW!" was hollered when it started to seriously set fire to the workbench!
Bungle80a
"Who has stolen the 3 link coupling off the end of my train?!?!
.....[a few minutes pass hunting down replacements].....
"So, which comedian has uncoupled my entire train?!?!"
"Who has stolen the 3 link coupling off the end of my train?!?!
.....[a few minutes pass hunting down replacements].....
"So, which comedian has uncoupled my entire train?!?!"
I've done a similar job myself on an old Lady Anne and an old Dylan in my collection.

If you do decide to put new axles on it you will also need to get new wheels, cranks, crank pins and axle bearings. The old-style axles that your loco currently has are smaller (3/16 inch) than the current design (1/4 inch), hence the need for new axle bearings. You will need to drill the frames for the new bearings to fit. The bearings should have some Loctite 603 applied and then have the backs "squeezed" with an old ball bearing to flare out the back lip on the bearing, all to stop the bearing coming out or rotating in the frame hole. This may mean that you have to take the frames apart to do this.
You will also have to modify the slip-eccentric valve gear to take the larger axles. Roundhouse made a new design of slip-eccentric gear to fit the new axles, but I think these were all sold years ago.
While you are at it, it would probably be a good idea to have new coupling and connecting rods, and those from the current model of Lady Anne will fit your loco.
The current style of wheel has a boss on the back that contains the locking grub screw that is used when changing the gauge. Due to the width of the bosses the existing 4-pot burner will not fit as there is insufficient room between the wheels for one of the pots. When Roundhouse went to the current style of wheel on their meths locos they re-designed the meths burner to have only three pots, but numbers 1 and 3 were made larger in diameter, with number 2 remaining the same as those on your burner.
Finally, a word of warning about brass boilers.... DO NOT, and I repeat, DO NOT leave water in this boiler for any long length of time. The water reacts - slowly - with the brass and leeches the zinc out of it, leaving the copper behind but full of tiny holes. A friend's Roundhouse Pooter has just had a new boiler because he left it with the water in for a couple of years.![Image]()
If you do decide to put new axles on it you will also need to get new wheels, cranks, crank pins and axle bearings. The old-style axles that your loco currently has are smaller (3/16 inch) than the current design (1/4 inch), hence the need for new axle bearings. You will need to drill the frames for the new bearings to fit. The bearings should have some Loctite 603 applied and then have the backs "squeezed" with an old ball bearing to flare out the back lip on the bearing, all to stop the bearing coming out or rotating in the frame hole. This may mean that you have to take the frames apart to do this.
You will also have to modify the slip-eccentric valve gear to take the larger axles. Roundhouse made a new design of slip-eccentric gear to fit the new axles, but I think these were all sold years ago.
While you are at it, it would probably be a good idea to have new coupling and connecting rods, and those from the current model of Lady Anne will fit your loco.
The current style of wheel has a boss on the back that contains the locking grub screw that is used when changing the gauge. Due to the width of the bosses the existing 4-pot burner will not fit as there is insufficient room between the wheels for one of the pots. When Roundhouse went to the current style of wheel on their meths locos they re-designed the meths burner to have only three pots, but numbers 1 and 3 were made larger in diameter, with number 2 remaining the same as those on your burner.
Finally, a word of warning about brass boilers.... DO NOT, and I repeat, DO NOT leave water in this boiler for any long length of time. The water reacts - slowly - with the brass and leeches the zinc out of it, leaving the copper behind but full of tiny holes. A friend's Roundhouse Pooter has just had a new boiler because he left it with the water in for a couple of years.
Tony Willmore
Rhos Helyg Locomotive Works: http://www.rhoshelyg.me.uk
Facebook: https://www.facebook.com/RhosHelygLocoWorks
Rhos Helyg Locomotive Works: http://www.rhoshelyg.me.uk
Facebook: https://www.facebook.com/RhosHelygLocoWorks
Who is online
Users browsing this forum: No registered users and 7 guests