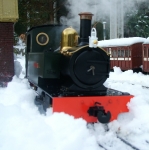
RE-Building my Lady Anne
-
bungle80a
- Trainee Driver

- Posts: 516
- Joined: Sun Jan 20, 2008 12:01 am
- Location: Fife, Scotland
- Contact:
I shall post some 2moro. It is currently in pieces but with a bit of luck and some grafting it should be ready to steam test by Sunday. I've already started to clean up a few parts. The underside of the boiler has been cleaned down to bare metal and the pipework for the pressure gauge has been made shiny, as has the single boiler band. For the time being she will only get a clean up and the burner sorted in time for PTLRfest, then next winter will get a new paint job, from maroon to dark blue.
Bungle80a
"Who has stolen the 3 link coupling off the end of my train?!?!
.....[a few minutes pass hunting down replacements].....
"So, which comedian has uncoupled my entire train?!?!"
"Who has stolen the 3 link coupling off the end of my train?!?!
.....[a few minutes pass hunting down replacements].....
"So, which comedian has uncoupled my entire train?!?!"
-
bungle80a
- Trainee Driver
- Posts: 516
- Joined: Sun Jan 20, 2008 12:01 am
- Location: Fife, Scotland
- Contact:
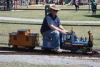
Its now 2moro! and here are the pics. The first one shows a box of bits. She arrived in carrier bags, so in an effort to keep all the parts she was moved into the box. The boiler is missing from this shot as it was in the workshop having work done!
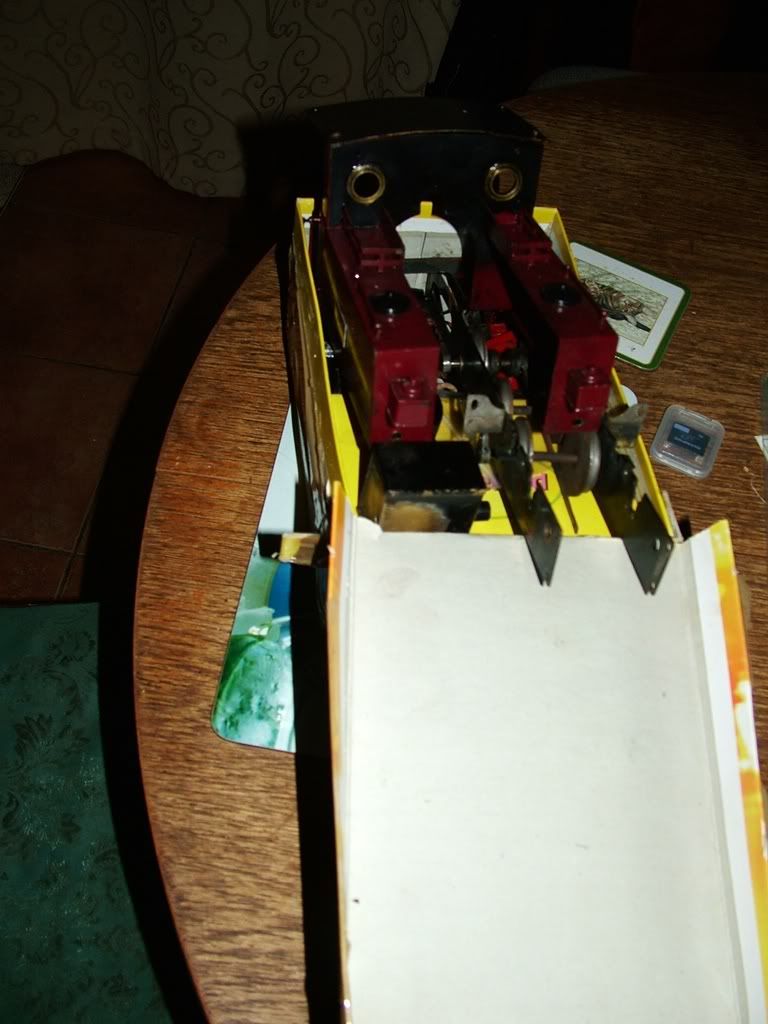
This shot shows some of the parts laid out. The smoke box has a whacking great headlanp attatched, and i've tested it! It works! One less job to fettle with! The lamp can be seen better in the 3rd photo.
This is a different angle of the same shot. She is currently set to 32mm, but at some point, maybe when she gets her cosmetic overhaul at the end of the running season, I will get some new Roundhouse axles, wheels and cranks and make it gauge changable so I can run on both 32mm and 45mm.
I know they are not the best photos, I will try to get some more oday, including the work I have done so far! Today's task is cleaning all the parts with a toothbrush and parafin, and getting some paint stripper on the dome and meths tank (so that it can be checked out and then silver soldered back to the burner).
Last edited by bungle80a on Tue Apr 22, 2008 11:42 am, edited 1 time in total.
Bungle80a
"Who has stolen the 3 link coupling off the end of my train?!?!
.....[a few minutes pass hunting down replacements].....
"So, which comedian has uncoupled my entire train?!?!"
"Who has stolen the 3 link coupling off the end of my train?!?!
.....[a few minutes pass hunting down replacements].....
"So, which comedian has uncoupled my entire train?!?!"
-
bungle80a
- Trainee Driver
- Posts: 516
- Joined: Sun Jan 20, 2008 12:01 am
- Location: Fife, Scotland
- Contact:
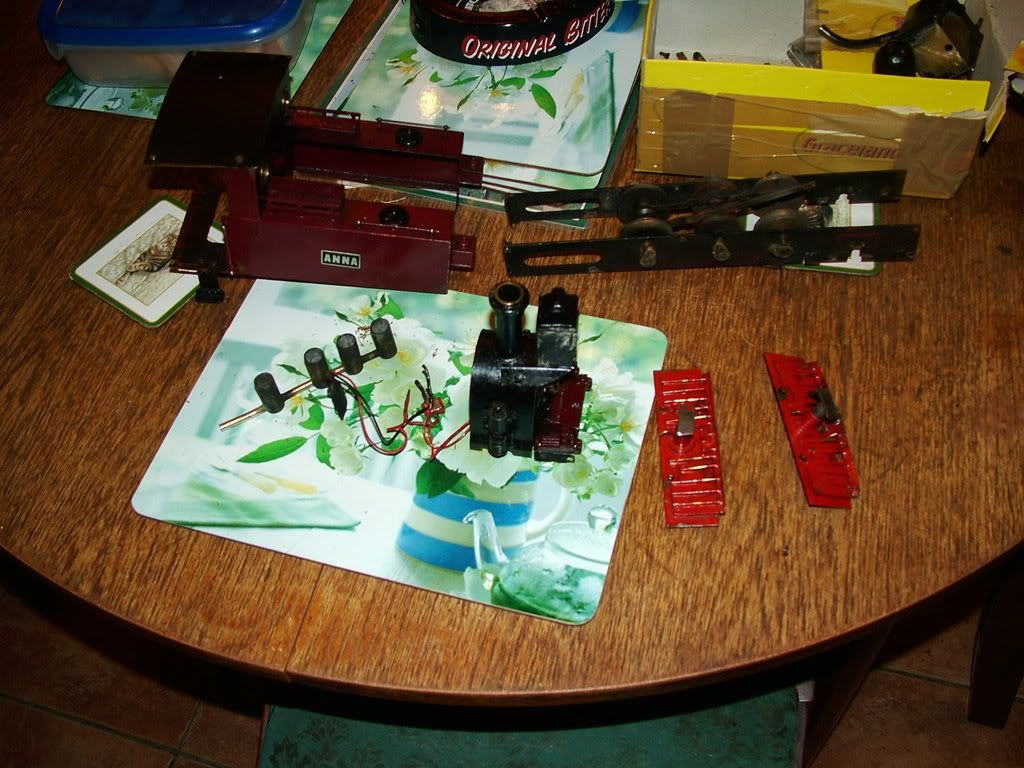
Got a few bits done today, mainly cleaning everything up and degreasing it! Took a few more bits off like handrails and the lamp to make things a bit more accessible! So here are some pics of the progress made today, plus some piccies of yesterday's work.
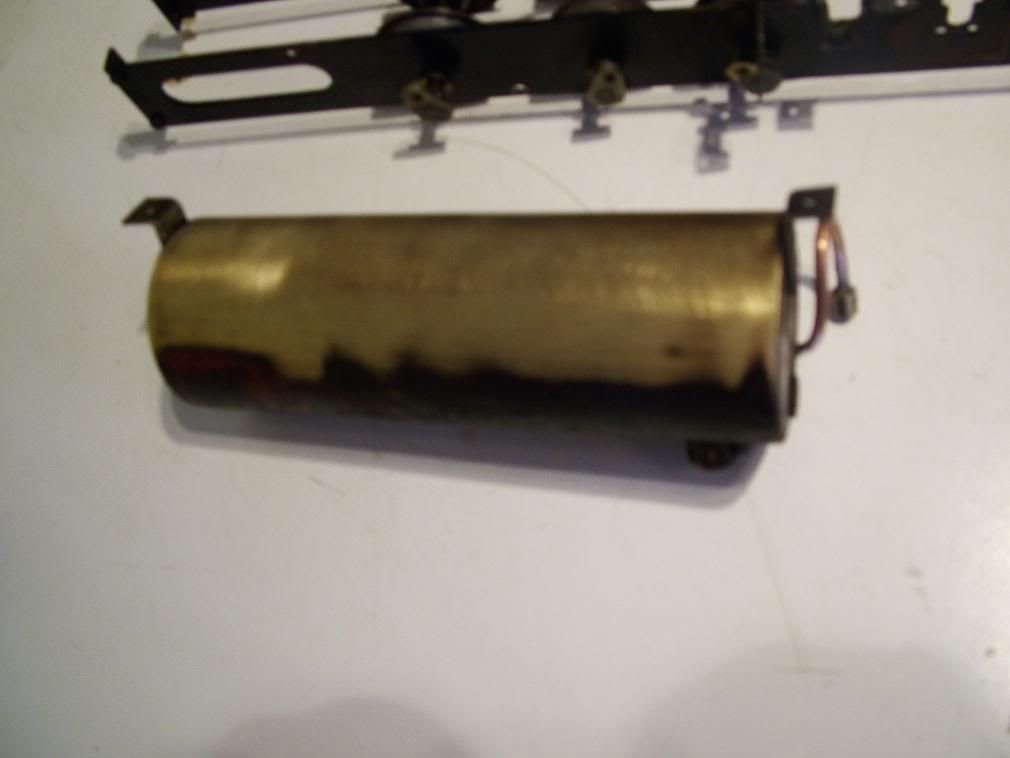
The underside of the boiler has been cleaned back to allow more heat to pass to the boiler!
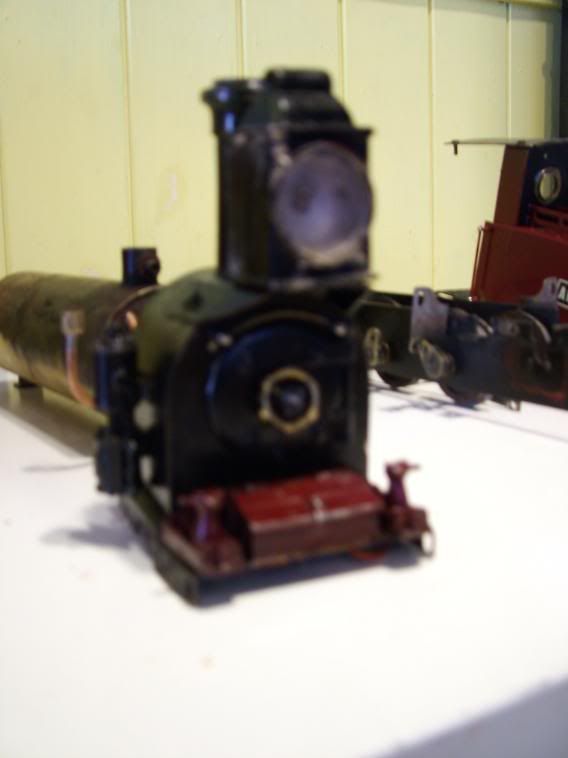
A better view of the smoke box and headlamp. The wheel on the smoke box door is connected to an exhaust regulator.
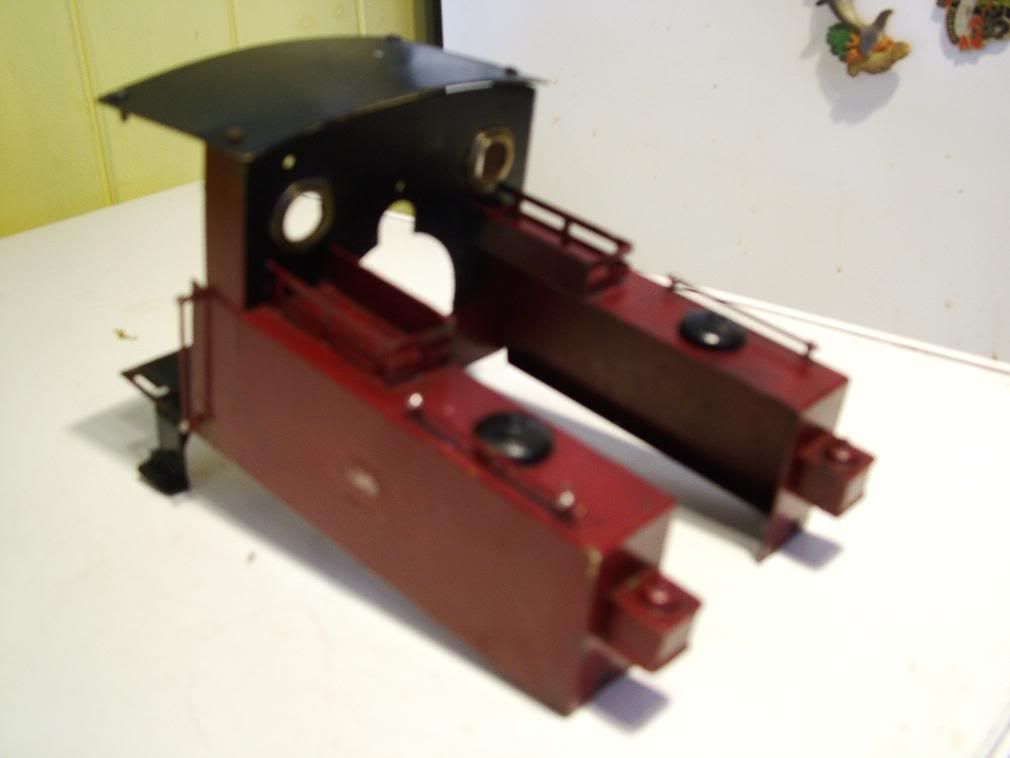
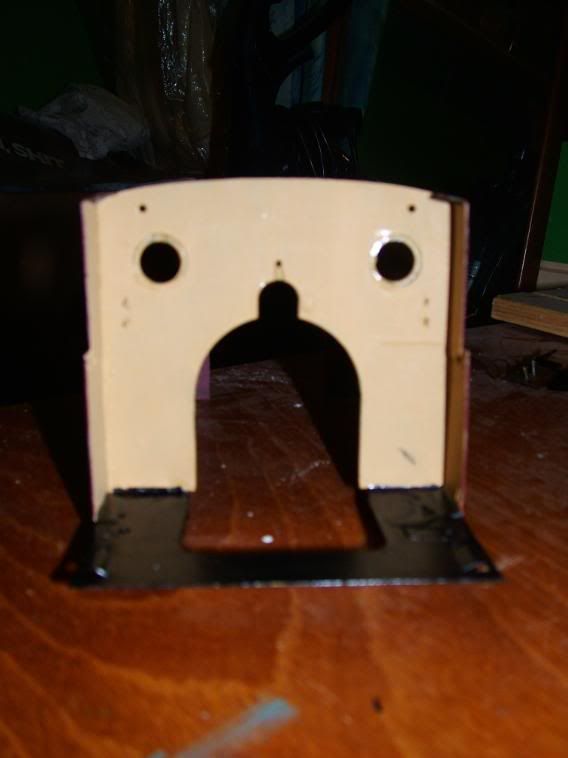
The early Lady Anne body, without cutouts near the front, as this loco is Slip Eccentric and obviously doesnt have the modified Walschaerts valve gear. The plan is to paint the tank tops black, and I think she needs some coal in the bunkers!
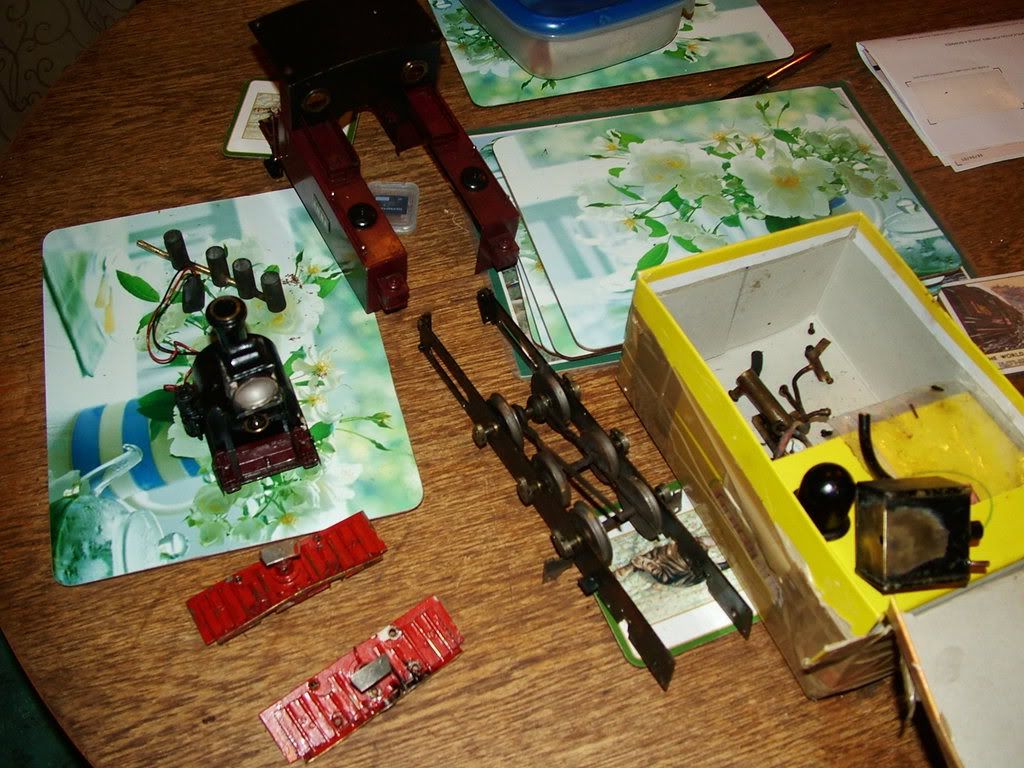
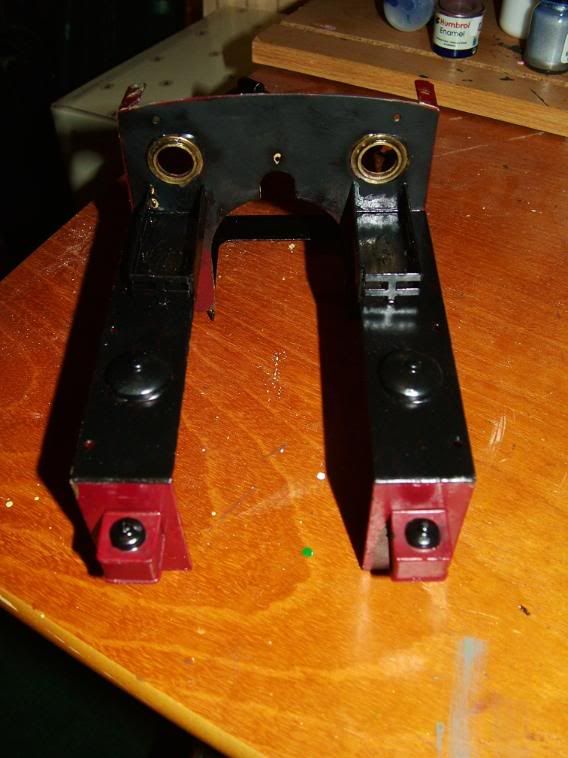
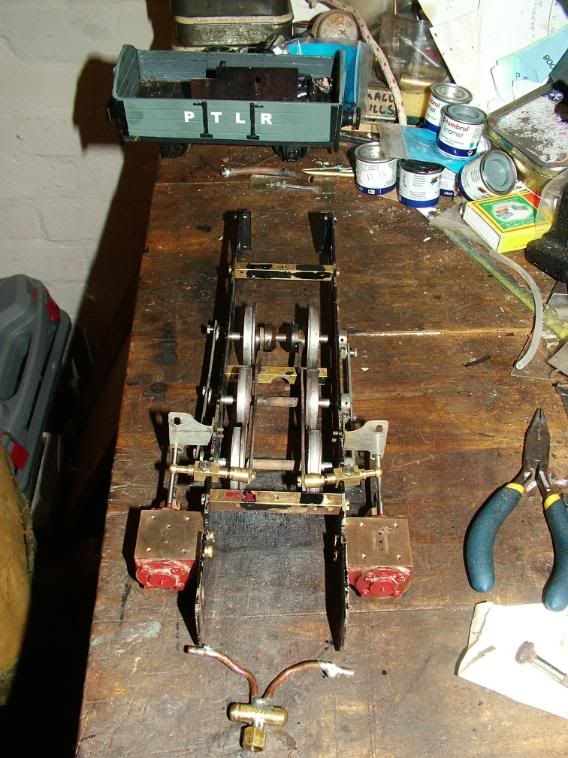
This evening I started to refit the frame spacers. This was to make the chassis a bit more rigid, and therefore easier to clean!
With the spacers refitted, the boiler will sit in place!
Once finished for the evening, the chassis, boiler and body were placed together in situe. It will be interesting to take the same shot on completion and compare the difference!
The underside of the boiler has been cleaned back to allow more heat to pass to the boiler!
A better view of the smoke box and headlamp. The wheel on the smoke box door is connected to an exhaust regulator.
The early Lady Anne body, without cutouts near the front, as this loco is Slip Eccentric and obviously doesnt have the modified Walschaerts valve gear. The plan is to paint the tank tops black, and I think she needs some coal in the bunkers!
This evening I started to refit the frame spacers. This was to make the chassis a bit more rigid, and therefore easier to clean!
With the spacers refitted, the boiler will sit in place!
Once finished for the evening, the chassis, boiler and body were placed together in situe. It will be interesting to take the same shot on completion and compare the difference!
Last edited by bungle80a on Fri Apr 25, 2008 7:56 pm, edited 1 time in total.
Bungle80a
"Who has stolen the 3 link coupling off the end of my train?!?!
.....[a few minutes pass hunting down replacements].....
"So, which comedian has uncoupled my entire train?!?!"
"Who has stolen the 3 link coupling off the end of my train?!?!
.....[a few minutes pass hunting down replacements].....
"So, which comedian has uncoupled my entire train?!?!"


-
bungle80a
- Trainee Driver
- Posts: 516
- Joined: Sun Jan 20, 2008 12:01 am
- Location: Fife, Scotland
- Contact:
They have been removed now. Should have some new ones made by PTLRfest if I find the time between gardening, decorating and getting Lady A into a state where she will run. We think (but not sure) the Anna nameplates were originally on PTLRcecil's newest loco, the Gussie, as its built on a Beck Anna chassis and came from the same place!
Bungle80a
"Who has stolen the 3 link coupling off the end of my train?!?!
.....[a few minutes pass hunting down replacements].....
"So, which comedian has uncoupled my entire train?!?!"
"Who has stolen the 3 link coupling off the end of my train?!?!
.....[a few minutes pass hunting down replacements].....
"So, which comedian has uncoupled my entire train?!?!"
-
bungle80a
- Trainee Driver
- Posts: 516
- Joined: Sun Jan 20, 2008 12:01 am
- Location: Fife, Scotland
- Contact:
Sorry but no pictoral update tonight as there wasnt much to photograph really. Cleaned up all the running gear, and removed a few other bits off the body for cleaning and repainting. Should get some of them done 2moro night. And 2moro afternoon I start doing some ground work for the as yet un-named railway I mentioned in an earlier post.Will ask his permission to take some piccys to put on here somewhere.
Bungle80a
"Who has stolen the 3 link coupling off the end of my train?!?!
.....[a few minutes pass hunting down replacements].....
"So, which comedian has uncoupled my entire train?!?!"
"Who has stolen the 3 link coupling off the end of my train?!?!
.....[a few minutes pass hunting down replacements].....
"So, which comedian has uncoupled my entire train?!?!"
-
bungle80a
- Trainee Driver
- Posts: 516
- Joined: Sun Jan 20, 2008 12:01 am
- Location: Fife, Scotland
- Contact:
Nowt done today on Lady, been too busy decoratin and starting to build the garden railway previously mentioned. Construction of that railway in now in its own thread in the Railways and Layouts (?) section.
Bungle80a
"Who has stolen the 3 link coupling off the end of my train?!?!
.....[a few minutes pass hunting down replacements].....
"So, which comedian has uncoupled my entire train?!?!"
"Who has stolen the 3 link coupling off the end of my train?!?!
.....[a few minutes pass hunting down replacements].....
"So, which comedian has uncoupled my entire train?!?!"
-
bungle80a
- Trainee Driver
- Posts: 516
- Joined: Sun Jan 20, 2008 12:01 am
- Location: Fife, Scotland
- Contact:
She's got a 4 wick burner! Thats gonna pump out some heat to the boiler! Going to do some cosmetic bit on her tonight! Will post pics later if there is any significant differences!
Bungle80a
"Who has stolen the 3 link coupling off the end of my train?!?!
.....[a few minutes pass hunting down replacements].....
"So, which comedian has uncoupled my entire train?!?!"
"Who has stolen the 3 link coupling off the end of my train?!?!
.....[a few minutes pass hunting down replacements].....
"So, which comedian has uncoupled my entire train?!?!"

Yeah its just a case of getting the right material for the wicks.bungle80a wrote:She's got a 4 wick burner! Thats gonna pump out some heat to the boiler! Going to do some cosmetic bit on her tonight! Will post pics later if there is any significant differences!
http://www.freewebs.com/pinetreelightrailway/index.
Cecil your engines on Fire!
Its a Mamod it does that.
Cecil your engines on Fire!
Its a Mamod it does that.
-
bungle80a
- Trainee Driver
- Posts: 516
- Joined: Sun Jan 20, 2008 12:01 am
- Location: Fife, Scotland
- Contact:
There willl be some experimenting with different materials for the wicks!
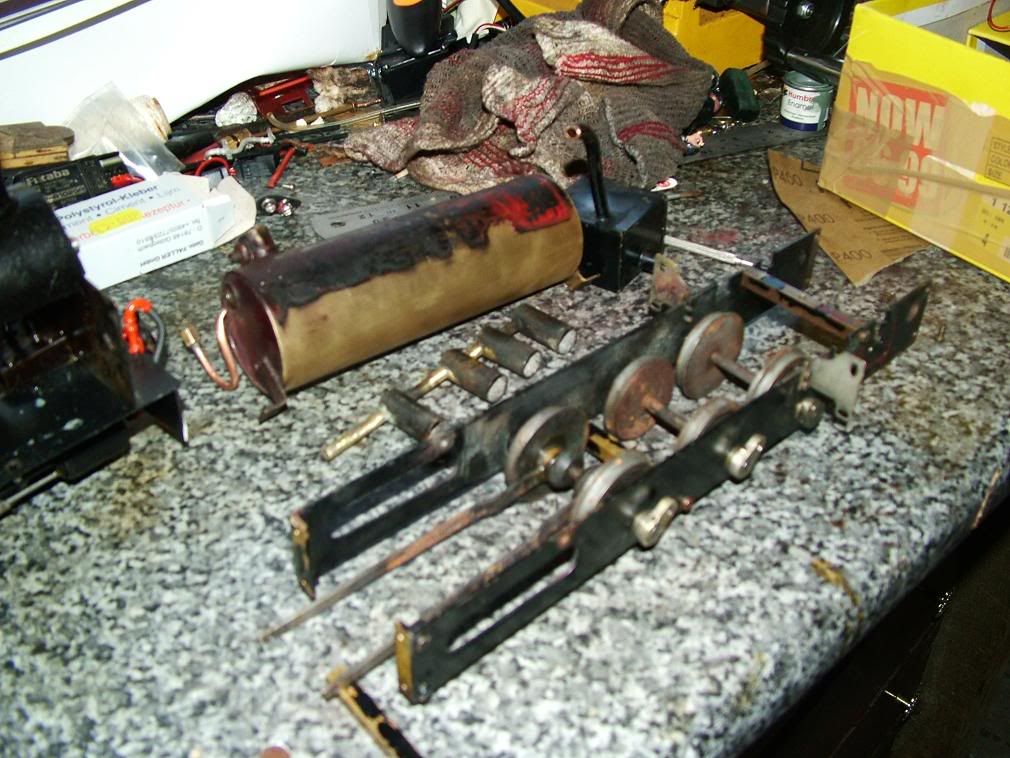
Well, yesterday same quite a lot of progress thanks to PTLRsam! All engineering work is being carried out by him while I do cosmetic jobs and act as photographer!
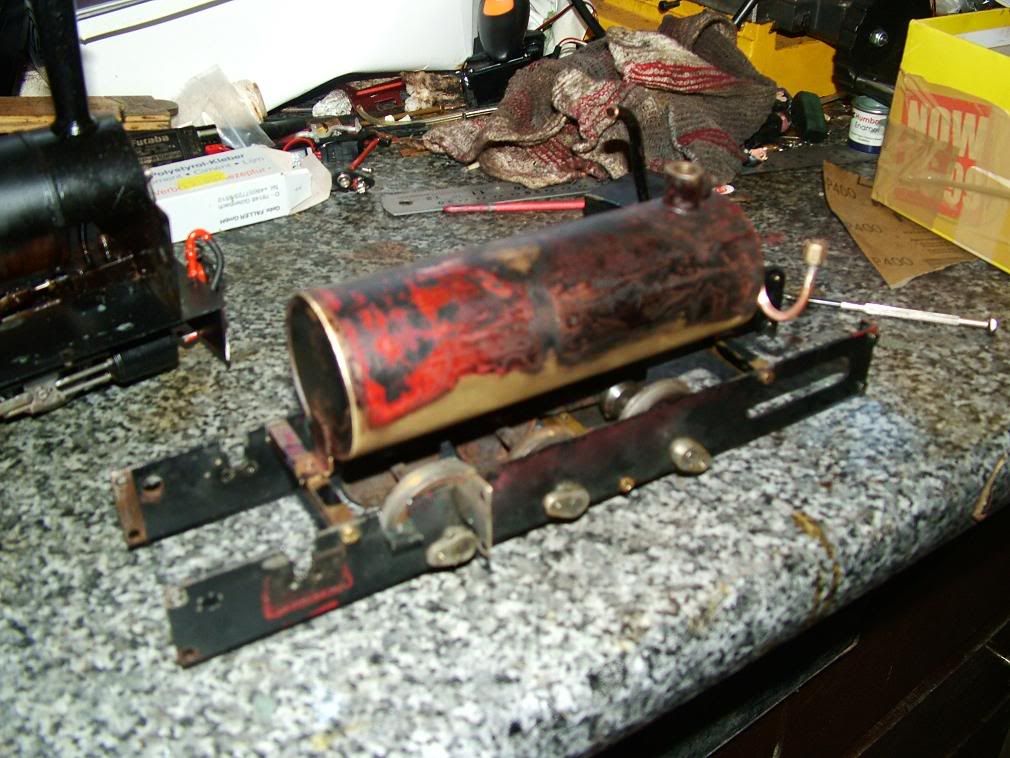
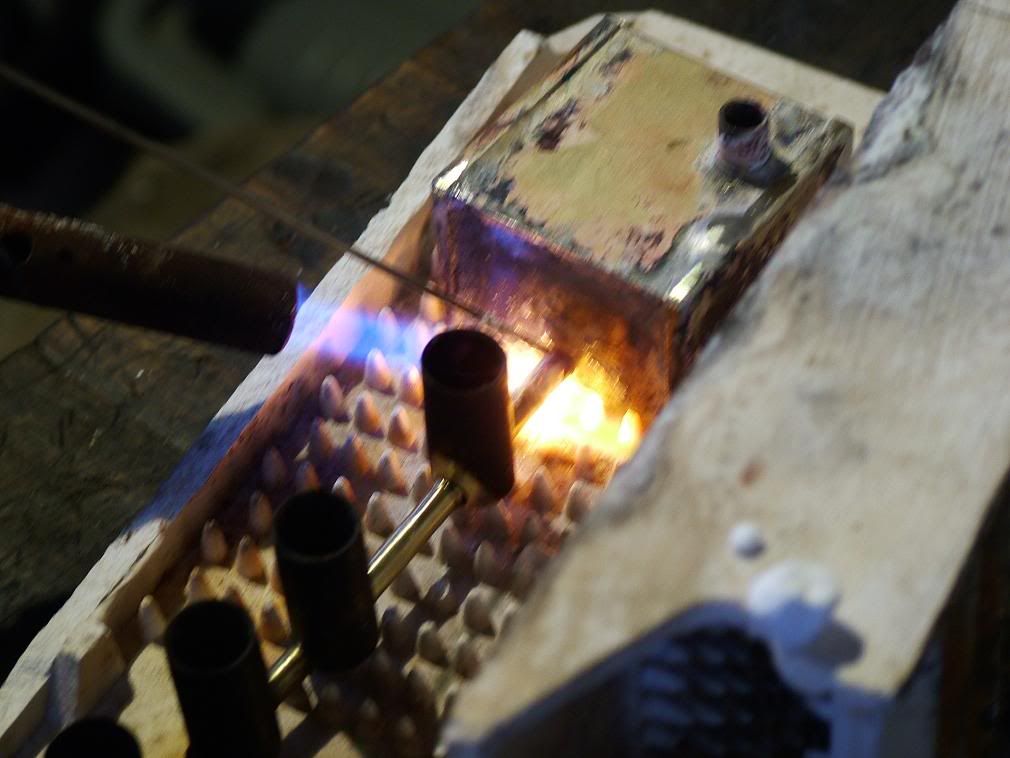
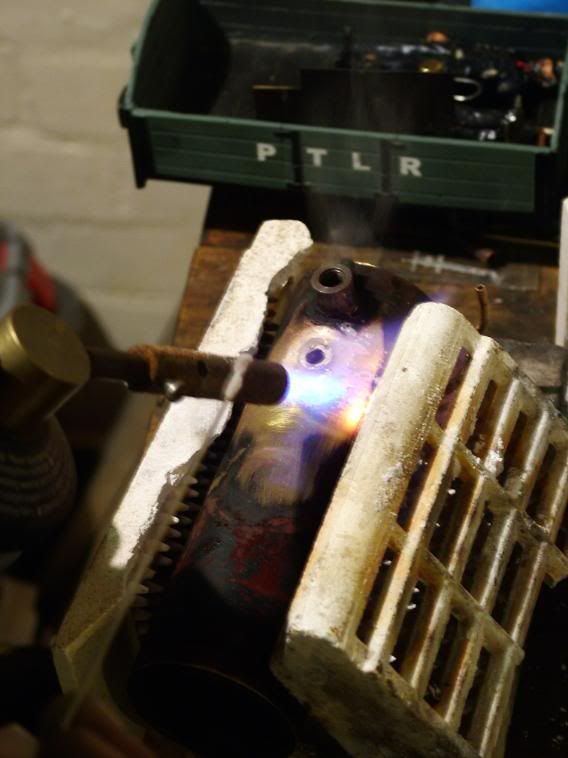
The work startd by cleaning up and siver soldering the meths burner as it was previously soft soldered and the pipe with the wicks was disconnected. The original filler pipe was removed and a bush put in for a new one!
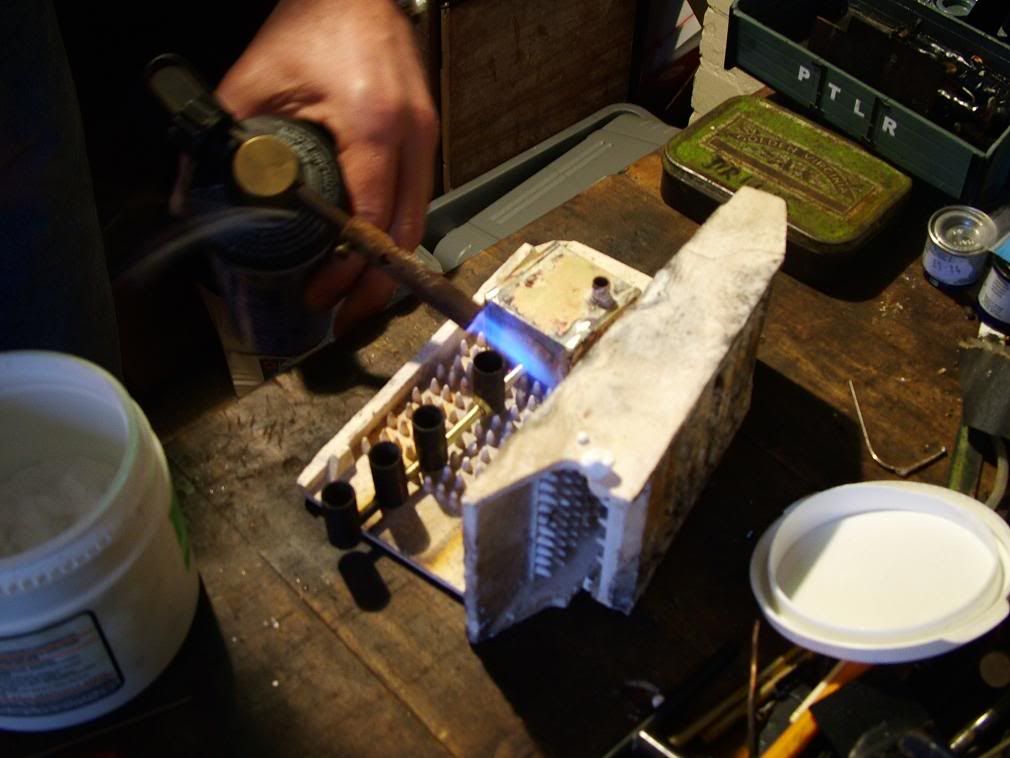
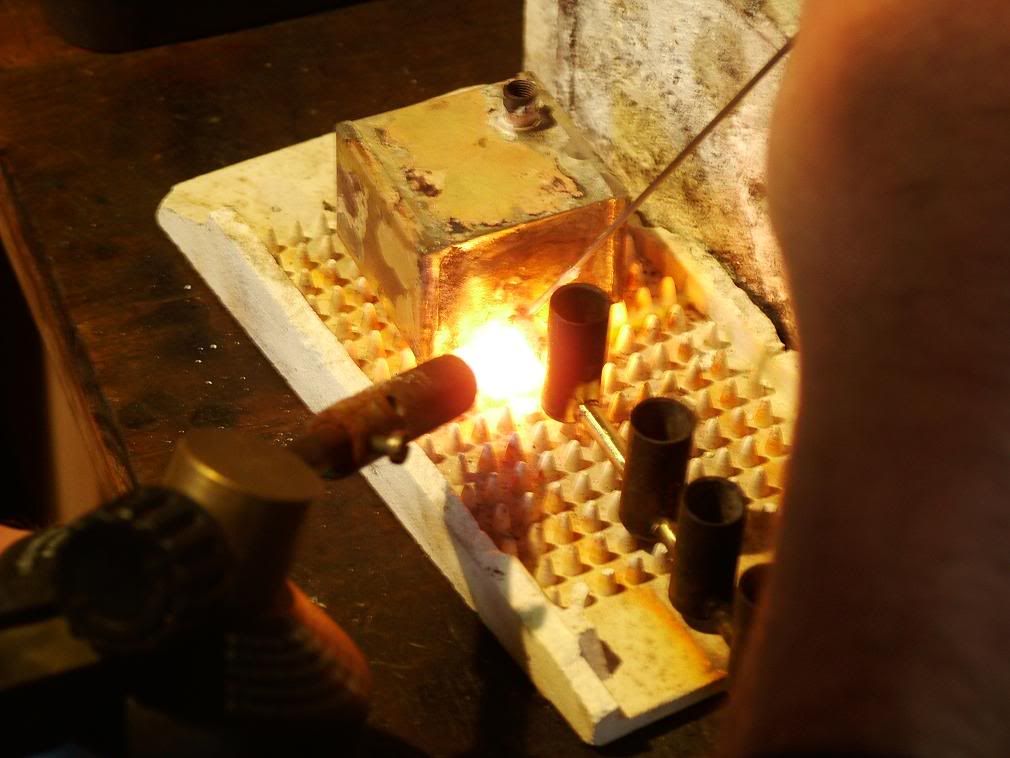
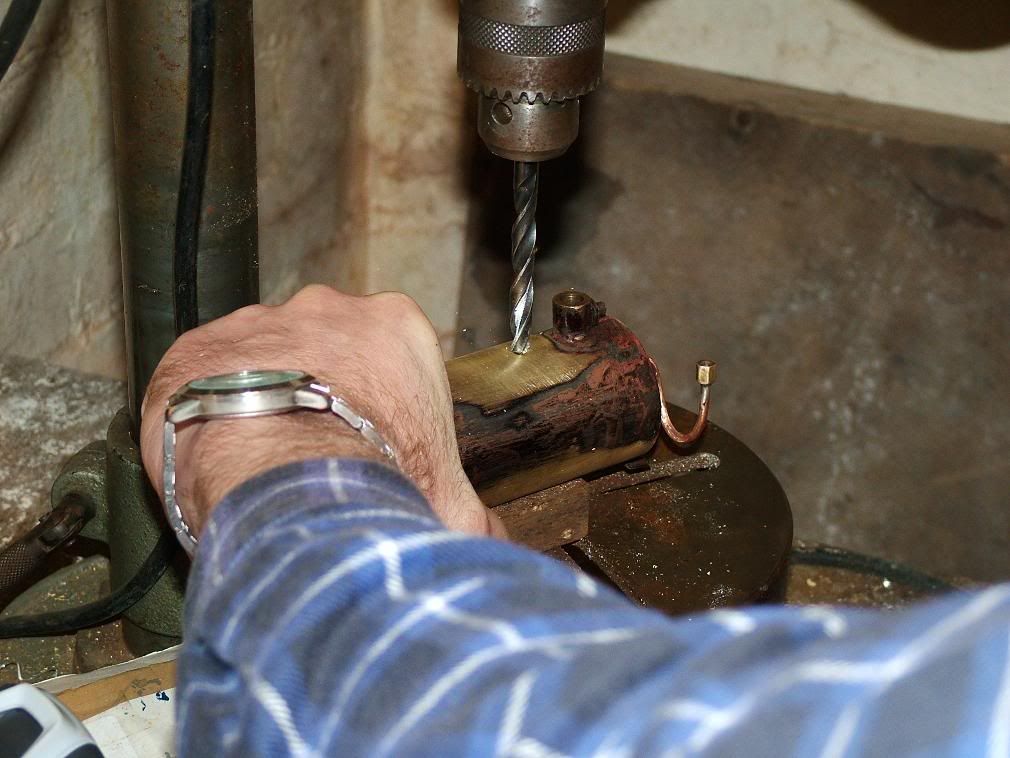
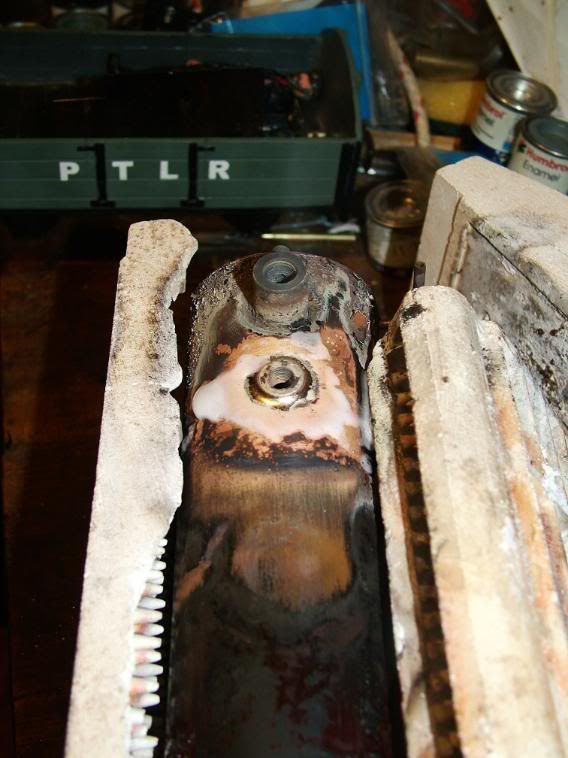
The next job was to put a bush in the boiler to accept a water filler valve, In piccies below show the moment of truth with the boiler being drilled (arrrghhhh! He's putting a Fur Cough big hole in my boiler!) and the boiler once drilled!
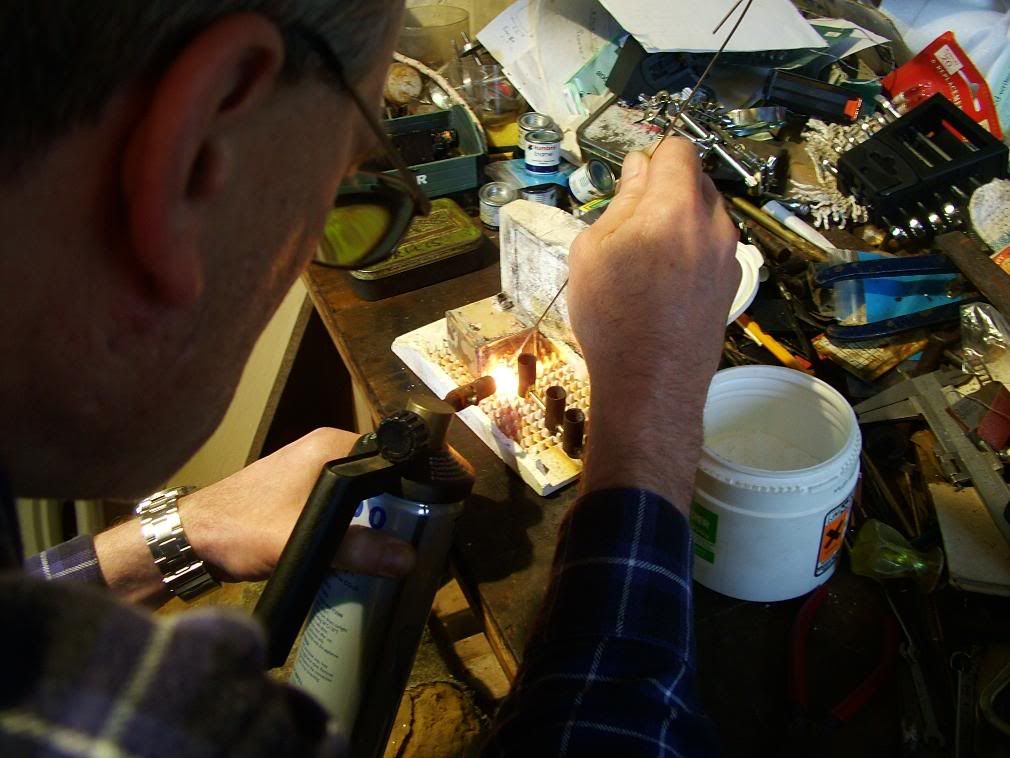
It was also decided by Mr Engineer to alter the pipe for the pressure gauge as the gauge screwed into a fixed nut and should I come to change the gauge at some point, it could end up pointing in any direction. So the end was cut off, a nipple produced and silver soldered in and a union nut fitted to the pipe. Production of the union nut is shown here...
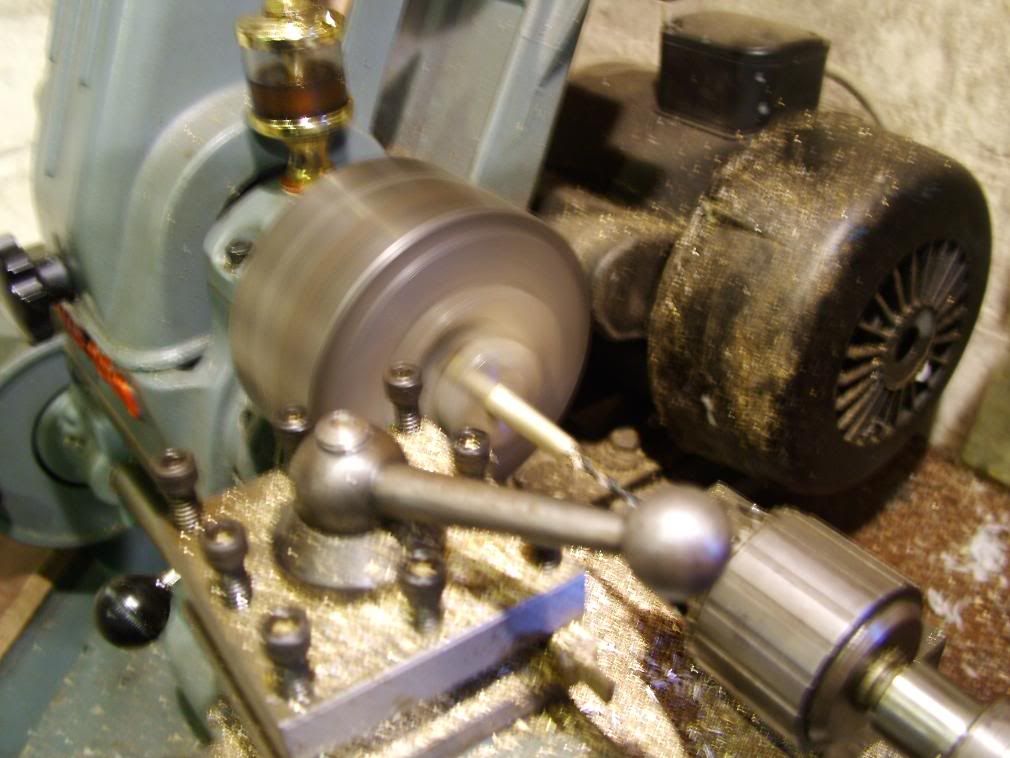
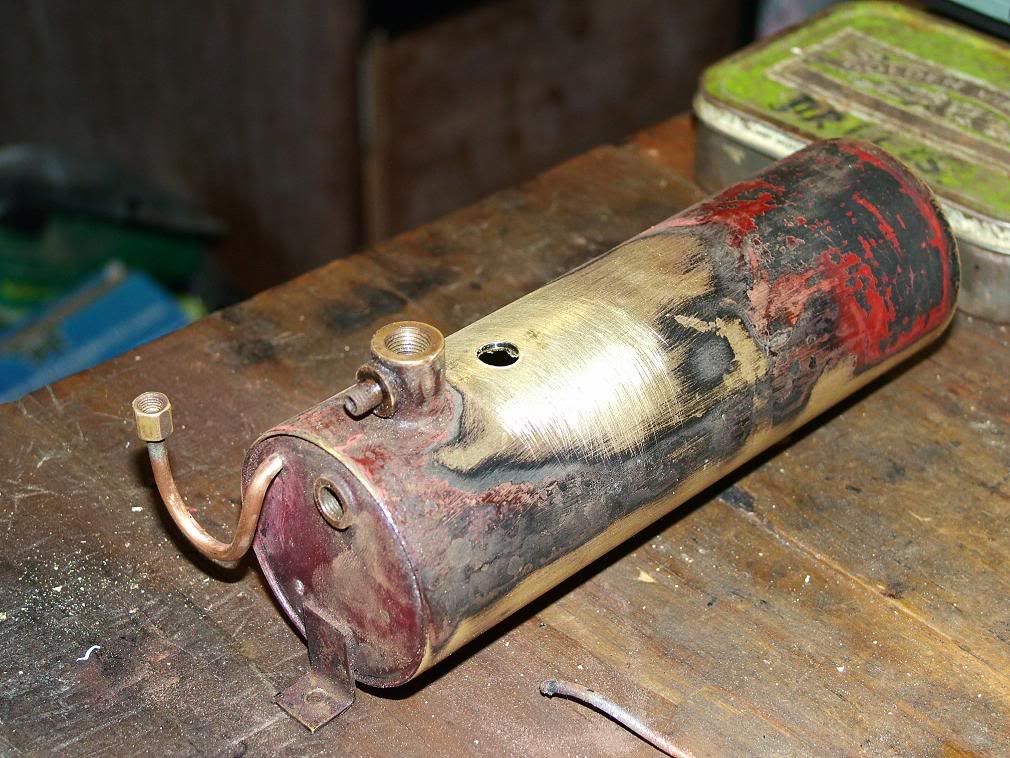
The bush was produced for the feed valve and silver soldered in. Below also shows it once done. (The actual feed valve is being produced at the PTLR workshop as I write this)
MY cosmetic works for the day are shown in the picccies below. I've painted footplate and cab inside, along with tank tops and sanding pot lids.
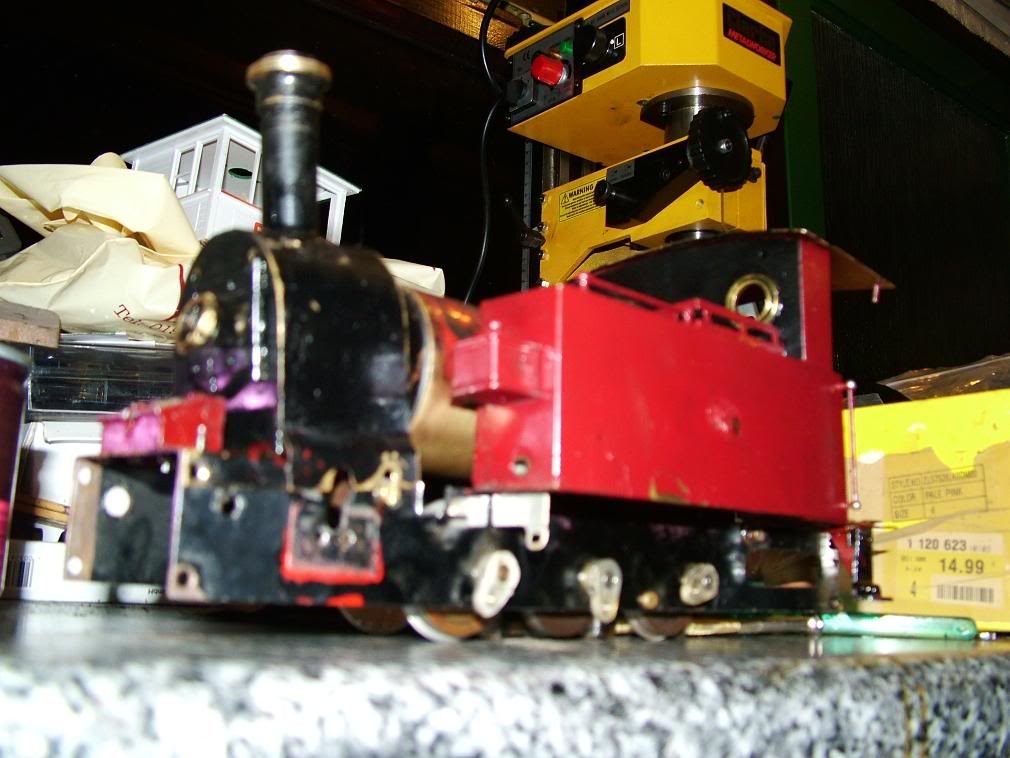
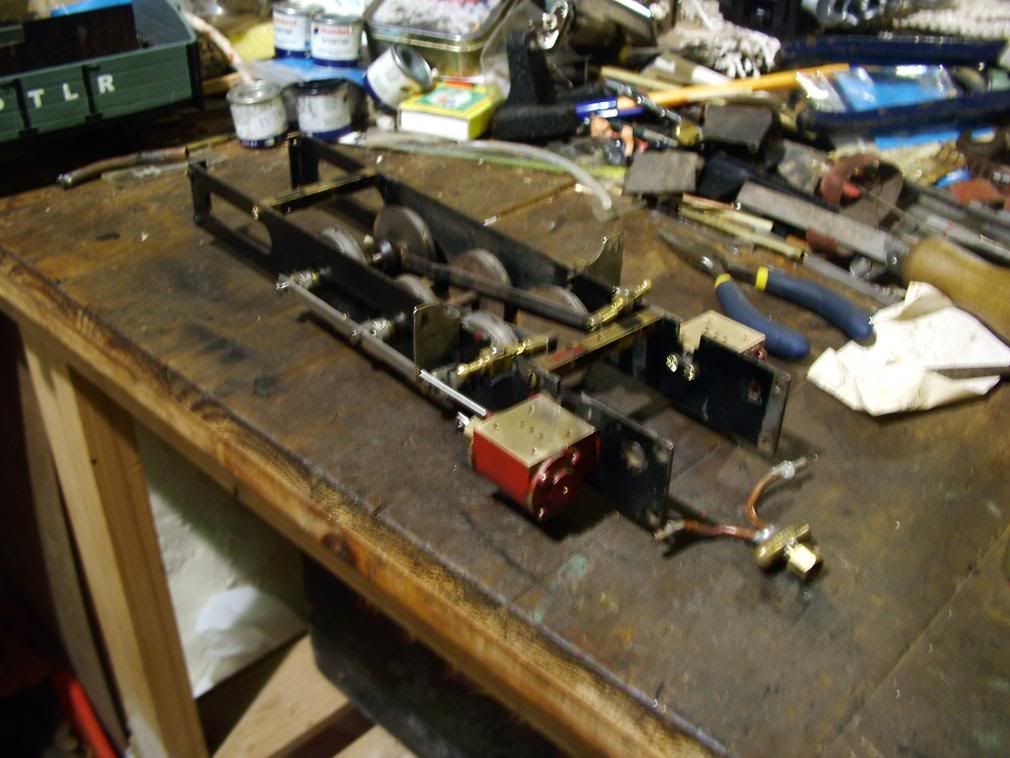
Then rather late at night, I painted the boiler and meths burner, ready for reassembly some point today. While I was doing that, PTLRsam started working on re-assembling the cylinders and eccentrics.
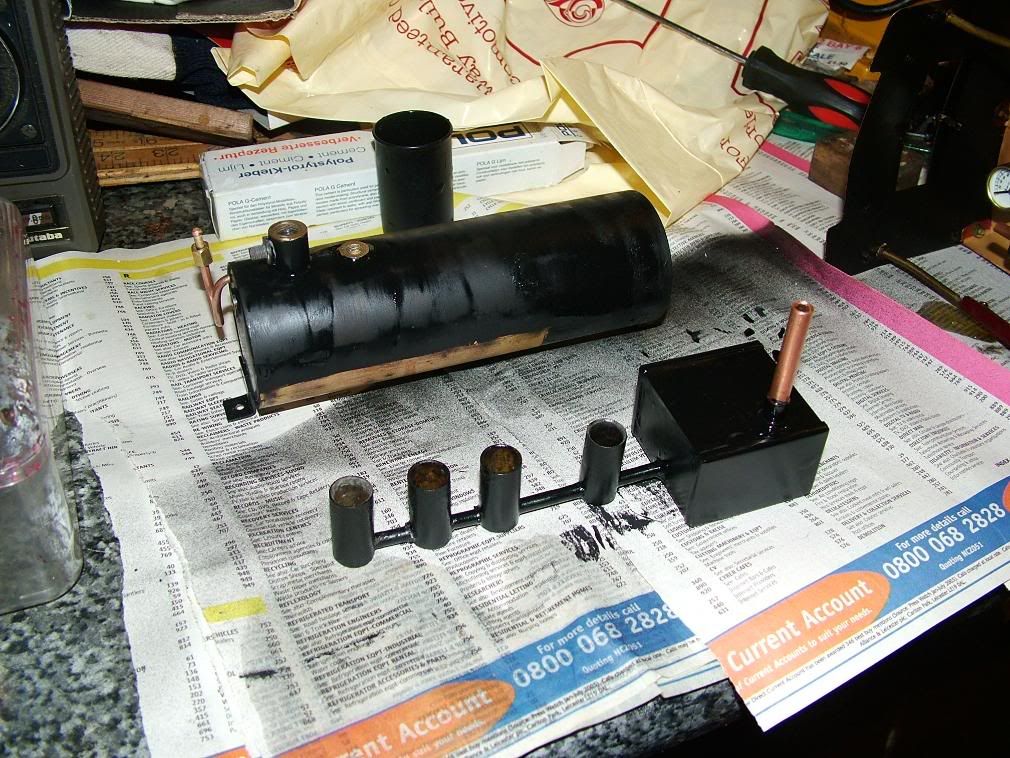
Also late at night, we realised we are missing a couple of rather important pieces which could delay the project! The safety valve is missing, as is the flame guard!
We will see what happens. Well, thats it for yesterdays progress. Time to get up to the PTLR and check on todays progress!
If you want to to see even more photos then goto my photobucket...
http://s294.photobucket.com/albums/mm92/bungle80a/
Well, yesterday same quite a lot of progress thanks to PTLRsam! All engineering work is being carried out by him while I do cosmetic jobs and act as photographer!
The work startd by cleaning up and siver soldering the meths burner as it was previously soft soldered and the pipe with the wicks was disconnected. The original filler pipe was removed and a bush put in for a new one!
The next job was to put a bush in the boiler to accept a water filler valve, In piccies below show the moment of truth with the boiler being drilled (arrrghhhh! He's putting a Fur Cough big hole in my boiler!) and the boiler once drilled!
It was also decided by Mr Engineer to alter the pipe for the pressure gauge as the gauge screwed into a fixed nut and should I come to change the gauge at some point, it could end up pointing in any direction. So the end was cut off, a nipple produced and silver soldered in and a union nut fitted to the pipe. Production of the union nut is shown here...
The bush was produced for the feed valve and silver soldered in. Below also shows it once done. (The actual feed valve is being produced at the PTLR workshop as I write this)
MY cosmetic works for the day are shown in the picccies below. I've painted footplate and cab inside, along with tank tops and sanding pot lids.
Then rather late at night, I painted the boiler and meths burner, ready for reassembly some point today. While I was doing that, PTLRsam started working on re-assembling the cylinders and eccentrics.
Also late at night, we realised we are missing a couple of rather important pieces which could delay the project! The safety valve is missing, as is the flame guard!
We will see what happens. Well, thats it for yesterdays progress. Time to get up to the PTLR and check on todays progress!
If you want to to see even more photos then goto my photobucket...
http://s294.photobucket.com/albums/mm92/bungle80a/
Bungle80a
"Who has stolen the 3 link coupling off the end of my train?!?!
.....[a few minutes pass hunting down replacements].....
"So, which comedian has uncoupled my entire train?!?!"
"Who has stolen the 3 link coupling off the end of my train?!?!
.....[a few minutes pass hunting down replacements].....
"So, which comedian has uncoupled my entire train?!?!"
Aye and who bought the engine with the safety valve and the cow catcher  .
.
http://www.freewebs.com/pinetreelightrailway/index.
Cecil your engines on Fire!
Its a Mamod it does that.
Cecil your engines on Fire!
Its a Mamod it does that.
-
SillyBilly
- Retired Director

- Posts: 3536
- Joined: Sat Aug 18, 2007 11:00 pm
Who is online
Users browsing this forum: No registered users and 9 guests