- IMG_0532.JPG (79.02 KiB) Viewed 5915 times
Rik


Hopefully, the railcar won't be getting too far off the ground and so prangs (as I think the good old handle-bar moustache chaps used to call them) are going to be fewer and farther between than in the RC aircraft world.
Thanks for that tip, Philip. Another setting to investigate.philipy wrote: ↑Sat May 02, 2020 1:54 pm Rik,
Looking at the picture of the white seats, you seem to have a pincushion/pillowing effect on some of them. Not sure if its just the internal structure showing through or if it's an actual physical effect? However, the way to get rid of it is to increase the number of top layers in the slicer. I used to use 3 or 4 top layers and had a big problem, particularly with low infill %, but a professional 3d printing guy told me that he tends to go up to as much as 10 layers - the more layers the less flexible and less prone to deforming.
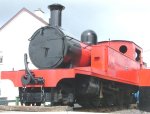
I thought I'd go for the line's passenger stock livery, maroon. I was tempted to keep her in CDR livery of crimson and cream, though.....
She really is!
Very tempting! I might give it a try...Andrew wrote: ↑Tue May 05, 2020 2:18 pm
I was looking at some photos of Irish railcars lately, including the ones that ended up on the IoM - are you sure you couldn't be tempted into "updating" your passenger livery for this new-fangled form of motive power with a nice cream stripe??!
https://www.flickr.com/photos/25337191@N04/4057858396
Looking forward to seeing the finished thing snaking its way round your garden...
Andrew
Users browsing this forum: No registered users and 5 guests