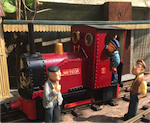
Happy New Year and thank you for all the kind comments but I have to suggest that my modelling is not altogether high fidelity, but more about "willing suspension of disbelief". I tend to be selective with what I model as "ultra-scale" as most can be much lower-fidelity.
The workshop was designed as a photographic stage, and so most of the background clutter and equipment is suggested by rough wooden shapes. As cameras have got better I am gradually improving the wooden ones to more scale models. Eg the lathe is still blocks of wood, but the drill press is slightly more detailed now. The photographs also help by maintaining maximum depth of field resulting in timed exposures, not a problem as nothing is moving. But shallow depth of field gives away a photograph of a model.
Below is an example of "willing suspension of disbelief". I find it easier to believe if free-lance models have plausible backstory that is suggested visually. The RLR in heritage times needed modern rolling stock and rather like the WHR looked abroad to import second hand equipment. The first modelled is No 63. I hope this is seen as a SAR-type metal-bodied wagon.
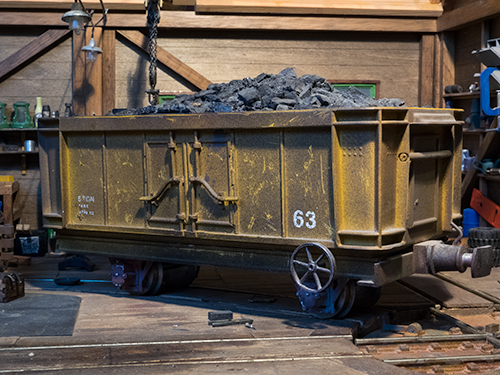
- No 63.png (384.3 KiB) Viewed 5785 times
Once you know that it is a "Really Useful Box Company" plastic box stuck onto a basic plastic chasssis, with some added plasticard detailling; then it is harder to see the supposed 1:1 wagon.
Honestly not the high standards scale modellers are churning out all the time. However Peter Denny of Buckingham Branch Line (and a clockwork garden railway) fame used to claim that if everything the eye's sees is to the same standard it will tend to believe the model scene as real. I think it even more so with the camera lens if used judiously.
The modelling may no the the best but if you are willing to "disbelieve" and see into my world then that is a complement too
Andy S. at the Rylston Light Railway