Page 1 of 5
The B.E.R - The Rebuild Begins!
Posted: Sat May 03, 2014 4:42 pm
by angr607
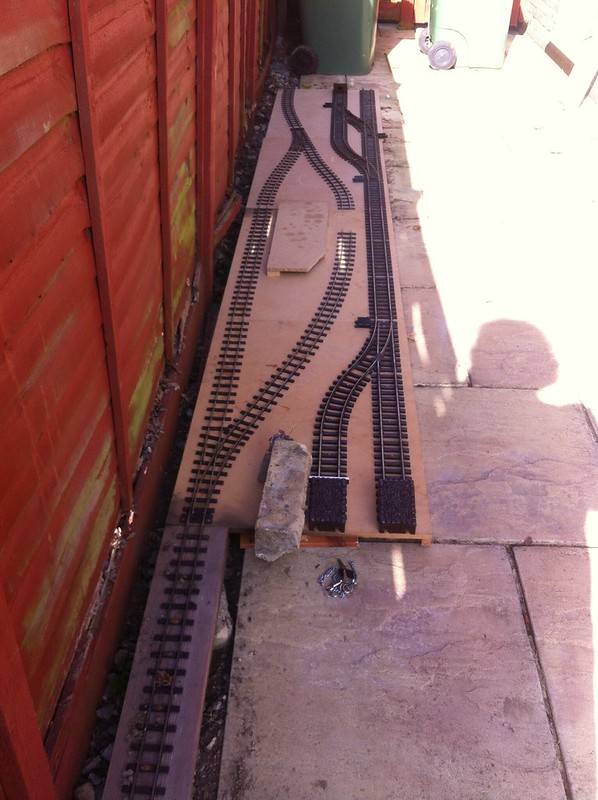
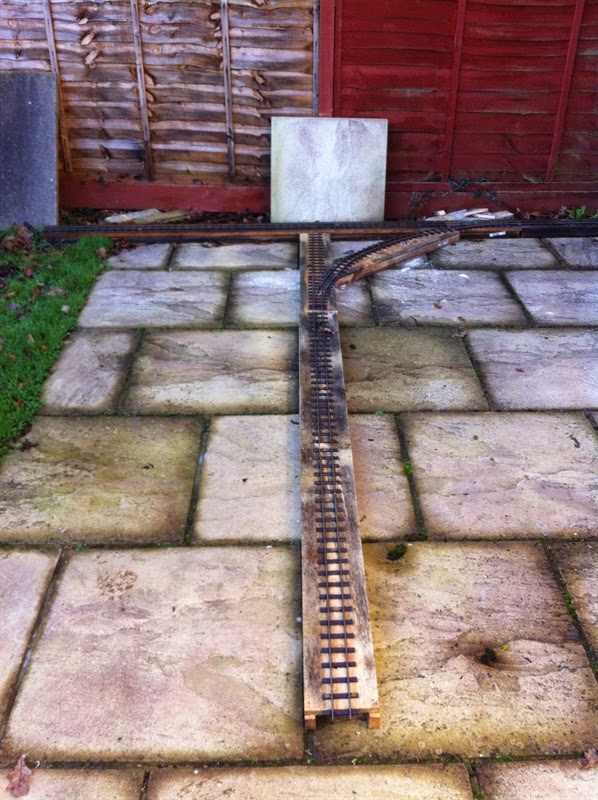
After much planning and to an extent some persueding of the landlords including a visit to another local railway, I've been able to start work on a new SM32 line to run alongside one of the fences that run either side of the garden. The running line length is 9 2/3 Yards long and is a simple line of track from behind the site of the engine shed to the other end of the line. Originally, I was planning to have the engine shed rail connected to the rest of the railway but the landlords/parents aren't overly happy about that. However, I've left enough space for an additional board to be added to give the rail connections needed into the engine shed.
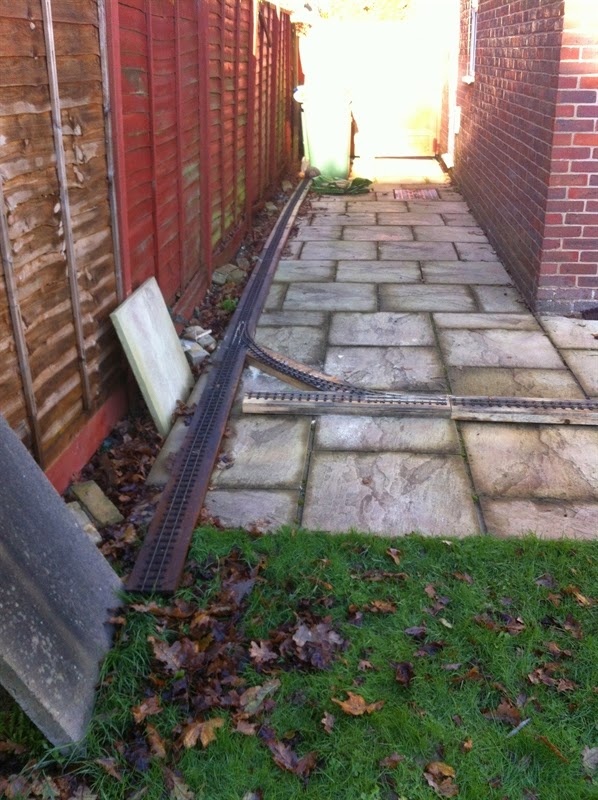
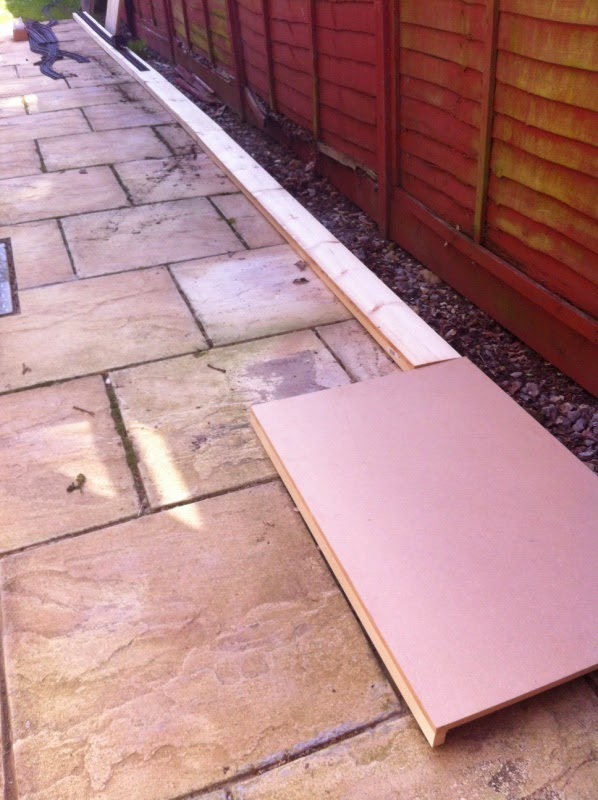 The completed full length trackbed with the first 4 yards of track laid
 The completed full length trackbed with the first 4 yards of track laid
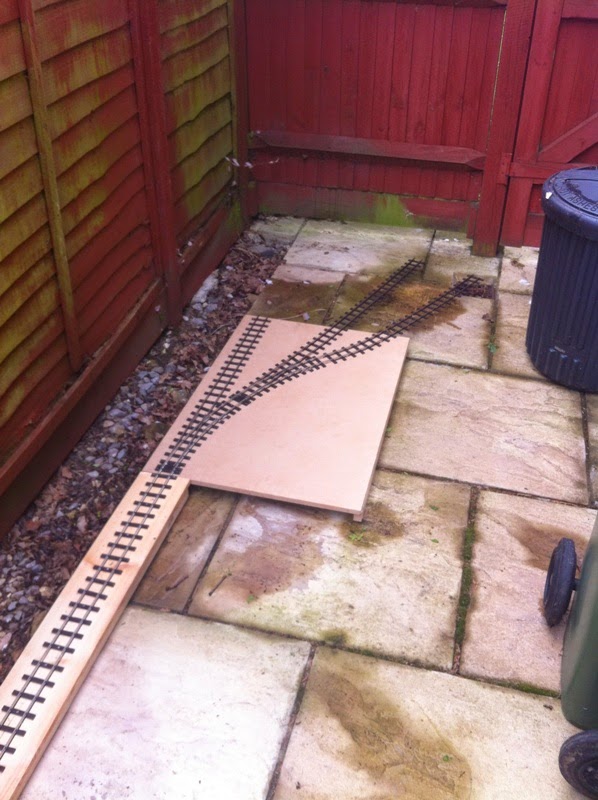
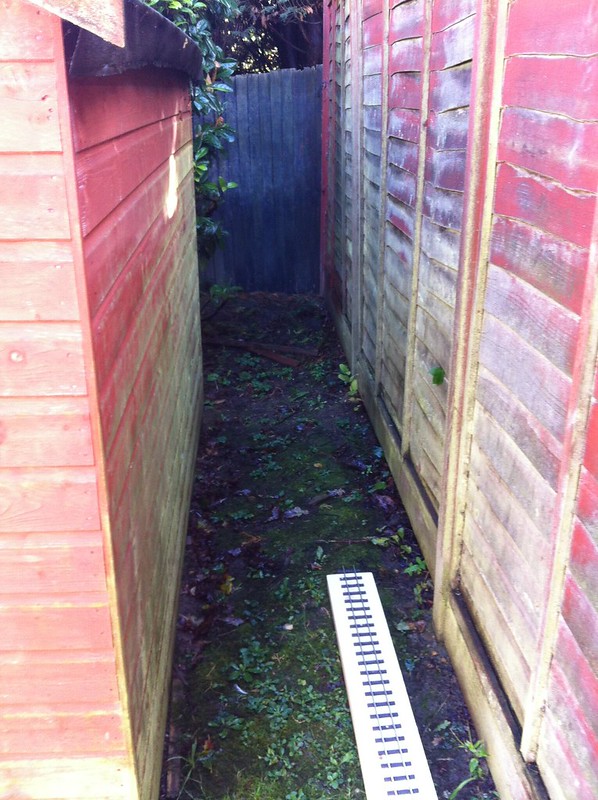
 The completed short length trackbed with the first 4 yards of track laid
One of the requirements for the line was that it could be shorted so that the bins wouldn't need moving which has been achieved. It is hoped that in the future, the line will be able to be put on legs with the running line running though the engine sheds to behind the bin area.
Cheers,
Jon
Posted: Sat May 03, 2014 4:50 pm
by kandnwlr
Good luck with the building

Like the website

Posted: Wed May 07, 2014 7:35 pm
by angr607
kandnwlr:100259 wrote:Good luck with the building :D Like the website :lol:
Cheers! The plan is that it will eventually be raised up by about 1 and a half feet but until then, its running on the ground.
With the arrival of the track order to complete the line, track laying has progressed rapidly upto the point where I've run out of trackbed to complete the line. Fortunately a trip to the local shop tomorrow is planned to allow the final length to be completed.

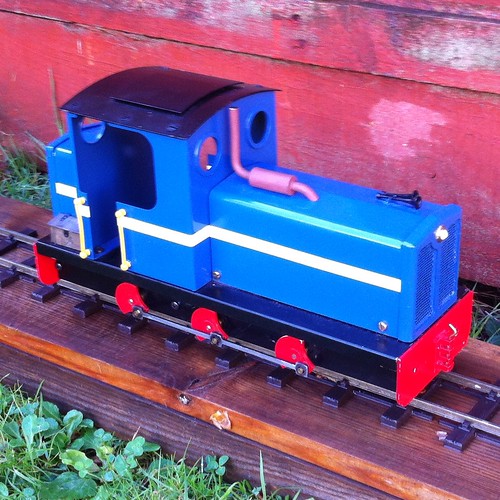
To celibrate the first signs of a life long dream coming to life (a premanent outdoor railway), I decided to celibrate by buying a new steam engine. Naturely being skint after a car MoT, it couldn't cost much. So I went for a rehashed Mamod SL1 now produced by MSS from Dream Steam.

After doing some research into these engines, some alarming facts started to come out (such as poor steaming with the solid fuel burner and being slightly uncontrollable) but with those facts/research, came a lot of solutions. From a meths burner (which I brought with the engine) to improve the steaming dramatically to uprated safety valves and cylinders.
For my engine, I want to keep it as standard as possible (mainly to keep the whistle!) but I do plan a few practical changes such as a Regulator, displacement lubricator, 16mm Couplings/bufferbeams, uprated safety valve and a Meths burner along with a couple of cosmetic changes like a Tender, tank caps and a brass chimney cap. So far pushing the engine up and down a length of track hasn't shown any issues with the cylinders and wheels which this class of engine is known to have but I'll have to see how it performs when I test run the engine hopefully tomorrow.
Cheers,
Jon
Posted: Wed May 07, 2014 8:20 pm
by kandnwlr
Excellent news. Can´t wait to see the next stages
Posted: Thu May 08, 2014 4:59 pm
by Chris Cairns
You are going to get fit chasing after a runaway MSS on an out & back layout. Make sure you attach a reasonable load behind it initially.
First thing I would recommend is to flush out the boiler prior to starting the running in process. These locos usually suffer from quite large priming (water being carried out of the boiler) whilst running in leading to too low boiler levels quite quickly. The manufacturing leaves a lot of residue from the solder paste heated through a furnace process which will just make the priming worse. I use a 50% water/50% vinegar mix and fill the boiler up to about 2/3rds of the normal content. With the safety valve (and possibly the steam dome) removed I bring this mix up to the boil using a paper towel or rag over the holes to stop it bubbling out of the boiler. Let it cool down then repeat this heating process. Cover those holes (or replace the fittings) and give the loco a lot of agitation (shaking). Remove the fittings or uncover those holes and shake the boiler contents out. Refill the boiler with clean water, agitate then shake out the contents into a container (e.g. soup plate) so you can monitor the removal of the deposits. My MSS kit build loco required the boiler to be refilled 12 times with clean water before there were no more deposits being flushed out.
Chris Cairns.
Posted: Fri May 09, 2014 6:44 pm
by angr607
Chris Cairns:100385 wrote:You are going to get fit chasing after a runaway MSS on an out & back layout. Make sure you attach a reasonable load behind it initially.
First thing I would recommend is to flush out the boiler prior to starting the running in process. These locos usually suffer from quite large priming (water being carried out of the boiler) whilst running in leading to too low boiler levels quite quickly. The manufacturing leaves a lot of residue from the solder paste heated through a furnace process which will just make the priming worse. I use a 50% water/50% vinegar mix and fill the boiler up to about 2/3rds of the normal content. With the safety valve (and possibly the steam dome) removed I bring this mix up to the boil using a paper towel or rag over the holes to stop it bubbling out of the boiler. Let it cool down then repeat this heating process. Cover those holes (or replace the fittings) and give the loco a lot of agitation (shaking). Remove the fittings or uncover those holes and shake the boiler contents out. Refill the boiler with clean water, agitate then shake out the contents into a container (e.g. soup plate) so you can monitor the removal of the deposits. My MSS kit build loco required the boiler to be refilled 12 times with clean water before there were no more deposits being flushed out.
Chris Cairns.
Hi Chris,
I've already flushed the boiler out about 4 times so maybe more flushing is needed to sort out the priming problem the engine has at the moment. Definately a job for over the weekend. That said, I'm only operating the engine at low pressures at the moment on its own so running away doesn't seem to be a issue. I'm not planning to try some serious running in at higher pressures until I get access to run on a continuous run next month. At least now I'm getting used to it and its running, its getting better slowly but surely.
Returning to the railway for now at least until the next post about the work on the MSS engine. Today after buying more wood, I've managed to complete the station area on the line. This was the final section still needing work before trains could run. The remaining jobs include Ground frames, signals, construction of a small engine shed and the laying of the relavent track work however this isn't a piority. Hopefully the first trains will be able to run over the completed line when the weather improves i.e. not raining.
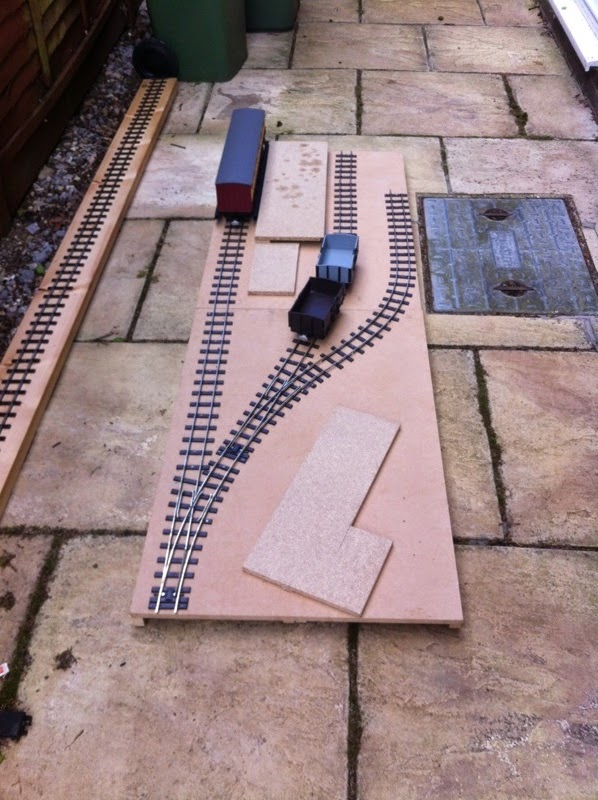 The completed station:- The left hand platform will be for passenger coaches, Right hand for wagons and the small L shaped piece of wood will be where the engine shed will go eventually.
Cheers,
Jon
Posted: Mon May 19, 2014 6:28 pm
by angr607
Just to bring this upto date, time for some shots of the completed line in use over the last couple of weeks. With the bulk of the hard work now done and enough stock from accucraft to work trains, the main job is sorting out No.3 (aka the MSS engine) then working on some more specialist stock such as a Ffestiniog Rake and a DHR Rake with appropiate engines to pull them.
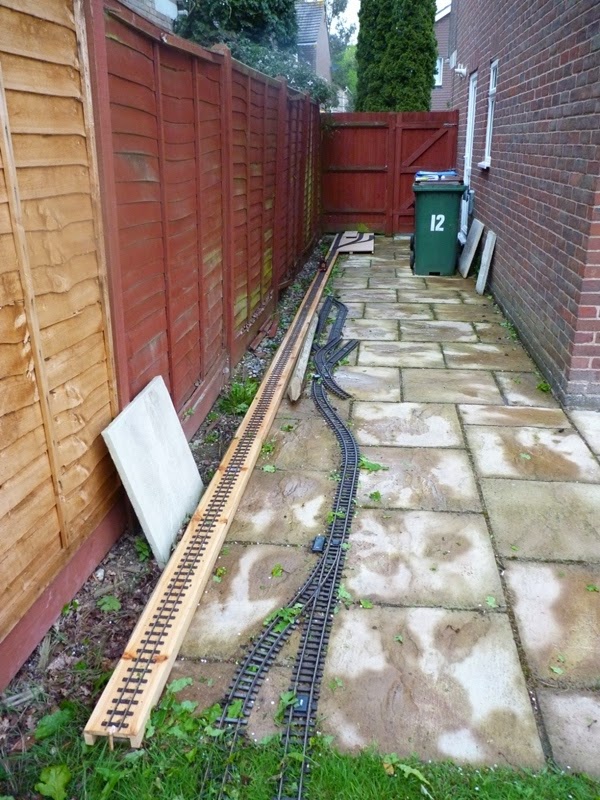 The whole line with No.3 on one of its many test runs
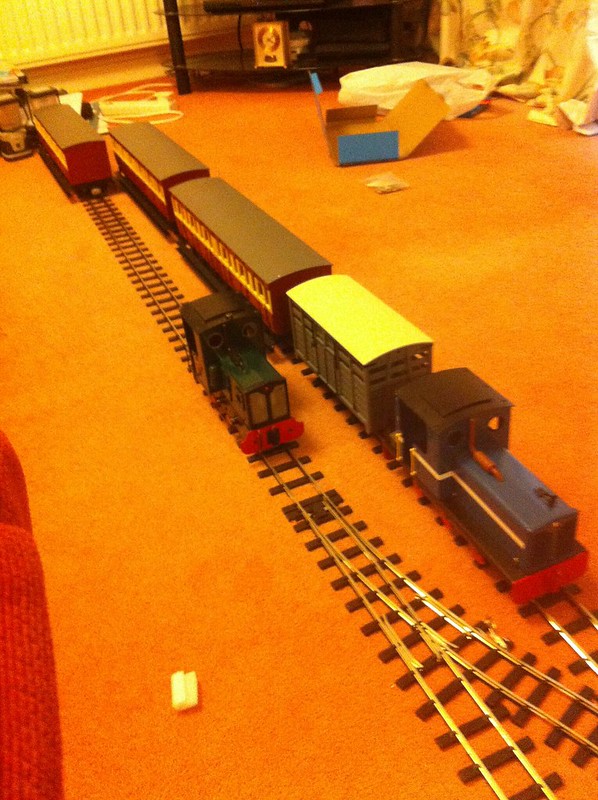
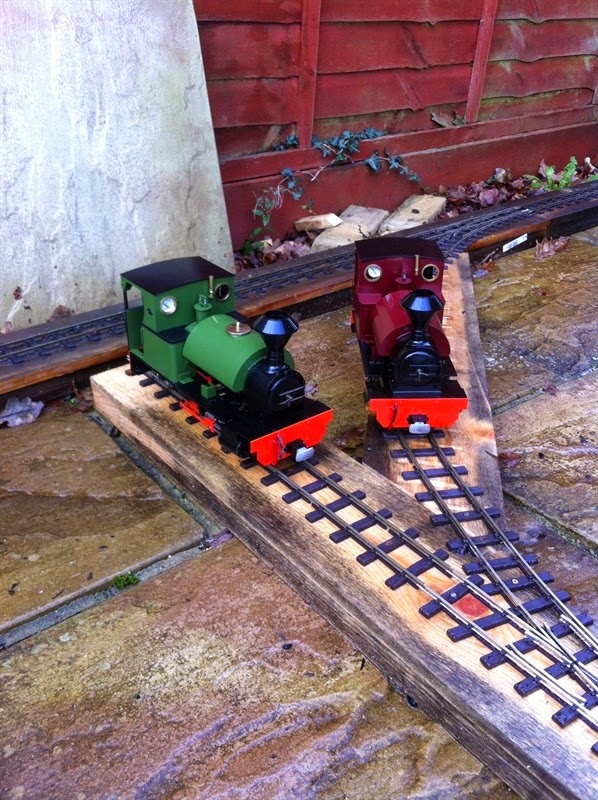
 Both working/semi working engines in the station together
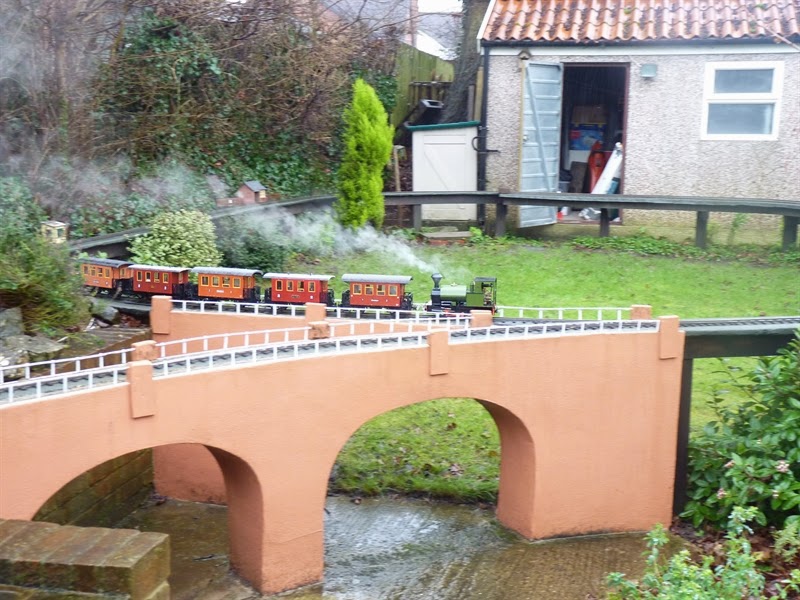
 No.1 with the passenger set on its first complete run on the line
Cheers,
Jon
Posted: Mon May 19, 2014 9:20 pm
by Andrew
That's coming along nicely - and crying out for an extension across the lawn!
All the best,
Andrew.
Posted: Wed Aug 13, 2014 3:01 pm
by clay45
grate line i hope it gets longer
Posted: Wed Aug 13, 2014 6:06 pm
by Gremlin
good start, I'm sure you could get some more lengths down the side of the lawn. O brown stained wood it would be quite unobtrusive. Love the Leader, one of my fave engines
Extension time!
Posted: Thu Oct 16, 2014 11:58 pm
by angr607
Well after some time, and finally getting agreement on the matter, the line has been extended in two key areas. The main station area and the running line.
 The new main station area
The station area has been doubled in length with the station now becoming a runround loop. The original station set up will instead be moved to the other end where a 2 coach platform with twin road engine shed will be sited in the area between the fence and the garden shed. I've also put a extended 2 yard headshunt running behind the bins to give more space to store stock/light up engines out the way. By moving the engine shed, I've been able to put down a short section of G45 track for engines of that gauge/for testing new stock from Accucraft (my prefered make for rolling stock) before regauging.
 The future other terminus/engine sheds site
On a motive power front, my IPE Jessie has had another new gearbox fitted. Hopefully it will last longer than the last one did. Its also been joined by another IPE engine, a Jessica. Both are manual controlled and regaugable. The current plan is for them both to be used on days when I just want to run a train or for shunt release at the to be built station where there won't be a runround loop.
 No.4 Jessica
 Jessica and Jessie undertest to see what each engine can handle over the Peco pointwork
Leader remains the only operational steam engine for now while parts are gathered for the MSS engine before sending that off for a now long overdue rebuild.
Rolling stock wise, I've settled on using the Accucraft IoM Pairs Coaches for passenger trains and the Accucraft W&L Railway Wagons for goods stock. Current plans are for potenially one more Pairs coach, a Composite to go with the 2 all thirds and a composite brake, a Sheep wagon and another brake van to make running trains up and down a lot simpler to avoid the need to move the brake van from one end of the train to the other.
All in all, progressing nicely and with the weather now starting to get worse, it may be time for some more planning/saving up to purchase the extra brakevan and maybe another steamer to give Leader a break from time to time.
Cheers,
Jon
Posted: Fri Oct 17, 2014 10:23 pm
by daveyrd11
It looks like an interesting project, my line is also end to end along one side of the garden, I quite like end to end, it feels more real than a loop!
I keep it interesting by playing shunting games and moving freight around the garden!
I also have a Mamod, a 30 year old SL1, its got lots of dream steam goodies added to it and I added radio control using a deltang micro receiver under the cab roof. It transforms it, I can run it up and down the garden with confidence and even shunt with it!
Keep us posted with how your line develops
Posted: Sat Jan 24, 2015 9:22 pm
by angr607
Cheers for the nice comments!
Unfortunately since the last post, the MSS engine has been sold as it just wasn't living up to expectations and with a paycut (new car etc etc) on the horizon, I got shot of it. That said, after a post on this very forum, I've been able to acquire a second Accucraft Leader to run on my Railway. It works well however after about 5 steamings, I've had to drain it due to a leak around the water gauge (now known to be a cracked gauge glass which is on the list for replacement).

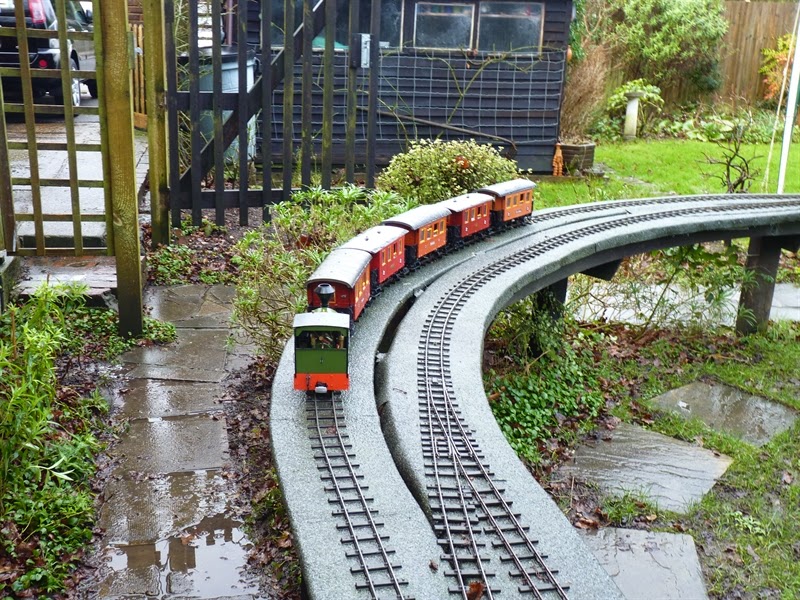
Since the last update, there has been a change of layout. Mainly because I grew fed up of having to walkup and down the garden with Leader sometimes failing to get half way up the line due to either a lack of pressure or madly varying gradients. With the new layout, its still not perfect but its better than before.
The route now runs in a L shape running down the fence from the Bins to the end of the Patio where it takes a left turn (38 Inch radius laid using flexitrack which was a first for me) before running along to a new pair of sidings at the new end of the line. The original station was laid up due to the amount of rot developing on the MDF boards (not one of my better ideas) however, its been placed in store until some better weather to allow the track to be salvaged for reuse either on a different track section or on the current railway on new boards (which is most likely the easier option).

However, with the arrival of a second Bowaters engine, having them both working trains of Welshpool and Llanfair Railway rolling stock does seem a bit weird (even though Sister engine Excelsior and Bowaters 0-6-2Ts Superior and Chevalier have all successfully operated on that line in Preservation) so I am thinking about designing some Sittingbourne and Kemsley Railway Rolling stock to run with them although what exactly is undecided.....
Cheers,
Jon
Posted: Sat Jan 24, 2015 9:36 pm
by kandnwlr
Liking it!

Posted: Sat Jan 24, 2015 9:43 pm
by Big Jim
Well done. You do seem to be progressing well. I do like the picture of the pair of Leaders together.
Sittingbourne rolling stock would make a nice change from all the W&L, FR, WHR, L&B stuff knocking about. I don't think anyone does any kits.
Good Luck
Posted: Sat Jan 24, 2015 10:00 pm
by MDLR
Somebody HAS done kits of Sittingbourne wagons, but I can't remember who!
Posted: Sun Jan 25, 2015 11:30 am
by laurence703
They are no longer in production... I know.. I've searched in vain!
So I had some built by a friend

Posted: Sun Jan 25, 2015 2:57 pm
by Big Jim
I stand corrected Brian.
Now you say that, there was someone doing something as a scratch aid type thing (3d printing possibly) quite recently. I can't remember if it was 7mm ng or 16mm. I think a batch of them appeared on ebay.
They may have been done as a personal project for some one who sold a few to help the costs.
My humble apologies if I am barking up completely the wrong tree (or any tree for that matter) Woof Woof!
Posted: Sun Jan 25, 2015 3:27 pm
by angr607
Thanks for all the comments. Laurence, were you the one with the article in Garden Rail? As its that article that got me thinking about it in the first place

I've spent today drawing them up using my normal CAD software (which is normally used for much smaller models in 4mm:ft) and come up this. I've ordered a test sample so hopefully it won't be too long before I have something to show for it.


Couplings will be Accucraft Choppers (so they match with my Leaders) and bogies by IP. If it all works, then I'll be a happy chappie.
Cheers,
Jon
Posted: Sun Jan 25, 2015 4:21 pm
by laurence703
Hi Jon,
Yes that was me... I have the drawings for the pulp wagons and a friend built the chassis for me... They're a simple design that there aren't really that many of about in our scale...
Let me know if you want the drawings and how you get on!