Building scale

A place for discussing garden railway scenery, such as buildings, trees, etc....
SapperAnt
Fireman
Fireman
Posts: 464
Joined: Wed Nov 23, 2011 11:20 pm

Building scale

Post by SapperAnt » Wed Jan 22, 2014 7:25 pm

Hi Guys, Gals and those who identify as neither

What scale do people build their trackside structures at?

Looking at the interwebs and Garden Rail most structures seem tiny.... I've been drawing up some local buildings (based on brick counting) to 16mm scale/ 1:19 they're vast. Even the little LYR station grotty hut is mahoosive. And really bring home how small narrow gauge actually is.

So do most people tend to reduce the scale of their buildings so as not to tower over their trains (to reduce space or it is because in our heads buildings don't tower over trains...even our tiny ones).

Secondly - help! What do people use for bricks or to represent brick walls?

Ant

:?

User avatar
andymctractor
Trainee Driver
Trainee Driver
Posts: 705
Joined: Fri Feb 01, 2013 12:03 am
Location: Suffolk, UK
Contact:

Post by andymctractor » Wed Jan 22, 2014 8:49 pm

Many of my buildings and structures are from kits and these often tend to be much closer to 1:24 than 1:19. Often these kits are sold to both 16 millers and G scalers but also, this might be done to reduce a buildings footprint and is only really noticeable if you place buildings of the different scales together. It may be more acceptable to put 1:24 stuff in the background and the close up stuff a bit closer to 1:19.
I noticed how small many of my structures are when I constructed a terrace of 4 stone cottages using jigstones to 1:19. This is a massive building and takes 2 to lift it. I daren't use it or it will show how out of scale the others are.
Eventually I might sell it at Peterborough at the member to members
stand but I don't fancy putting it in my car.
Regards
Andy McMahon

If it moves, salute it.  If it doesn't move, paint it. (RN sailors basic skills course 1968)

User avatar
TommyDodd
Fireman
Fireman
Posts: 497
Joined: Wed Dec 16, 2009 3:46 pm
Location: West Lindsey

Re: Building scale

Post by TommyDodd » Thu Jan 23, 2014 7:40 pm

SapperAnt:95812 wrote:I've been drawing up some local buildings (based on brick counting) to 16mm scale/ 1:19 they're vast. Even the little LYR station grotty hut is mahoosive. And really bring home how small narrow gauge actually is.
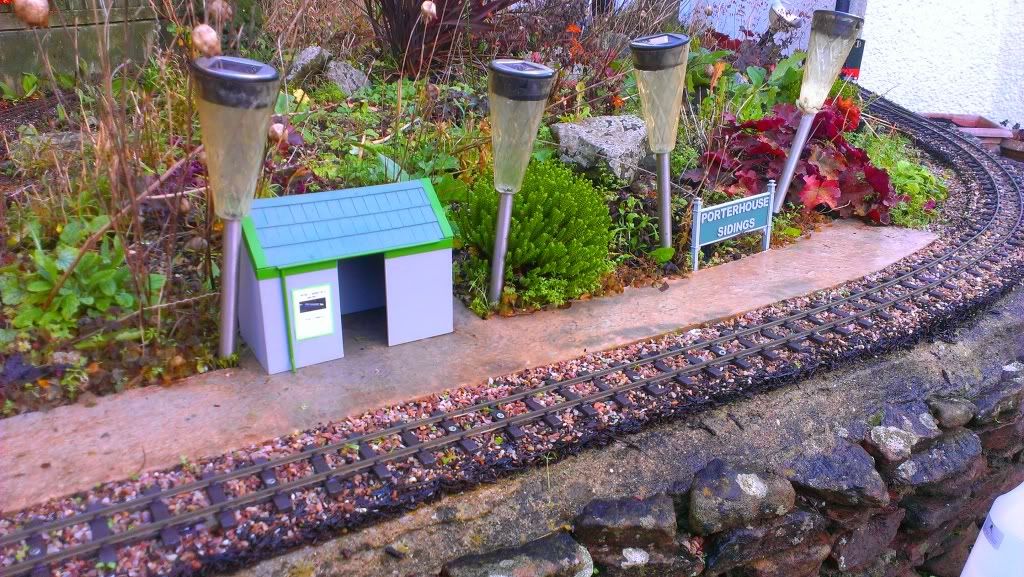
You know what? I think that's probably a good thing. Many of us are drawn to narrow gauge by the appeal of the smaller, human-scale kit- friendlier and less intimidating (as Peachbottom puts it). A train alone in the garden can sometimes lose that appeal because it's out of context, with nothing visible for comparison so it loses that sense of smallness. On the mantlepiece or on plain line through the rockery a VoR 2-6-2T is a large and impressive piece of kit. It's only when it's stabled opposite an ATW 158, NR 37 or looking slightly lost among the full-size buildings at Aberystwyth that you're reminded how small it really is in "big railway" terms. Anything that cuts our trains down to size and serves as a visual clue to their overall proportion is a good thing. Buildings large or small have a role to play in this, since doors and windows are people-sized and fairly standard (with exceptions). I would say that for best effect, close to the track a smaller building of the right scale is more useful than a same-size model of a larger building in a different scale. Further away from the track there's a lot more room for manoeuvre- even "forced perspective" if you're very lucky and rather clever.
It's not just buildings either: Any familar object of known size can serve to provide an eyeball-reference for scale. Figures and human-scale objects like bicycles, suitcases, street furniture and the like, as could familiar railway equipment like standard gauge stock (on transporters, or off their wheels in retirement as sheds, shelters or whatever) or equipment like signals.*

*Yeah, signals. For me they can make or break scale effect. There were comparatively few narrow gauge railways, certainly not enough to justify manufacturers producing special signals for them, so the few lines that had them tended to buy off-the shelf kit straight from manufacturers' catalogues intended for SG lines. This means that signals appear very large in the narrow gauge world, the proportions look wrong with the arms too big (especially on short posts to be visible to drivers nearer to the ground) and the trains too small, but that's prototypical. If you freelance a signal so it "looks right" with the trains it's almost certainly wrong- but if it "looks wrong" it's more likely to be right- no wonder lots of modellers don't bother with them ;-)
Well, now we know the buffer-stops work! (Heard at 2013 "Longest Day" solstice steamup)

Colinjamesporter
Cleaner
Cleaner
Posts: 98
Joined: Sat Apr 06, 2013 9:39 am
Location: Frampton cotterell, Bristol
Contact:

Post by Colinjamesporter » Thu Jan 23, 2014 8:08 pm

Ive only built one building so far for the garden railway which is based on the building from Snapper Halt. It was built to 1:19 scale.
Image
Best wishes
Colin

User avatar
Woodfields Light Railway
Trainee Fireman
Trainee Fireman
Posts: 175
Joined: Tue Nov 26, 2013 8:03 pm
Location: Earth

Post by Woodfields Light Railway » Thu Jan 23, 2014 8:10 pm

WhT is 1:19? Is it 16mm?
"So, when is this newfangled railway coming?"
"When we have enough money..."
"Where is this money coming from?"
"Havent thought that far..."

LnBmad
Trainee Driver
Trainee Driver
Posts: 884
Joined: Fri May 31, 2013 10:17 pm
Location: North Devon

Post by LnBmad » Thu Jan 23, 2014 8:22 pm

1:19 is 16mm:1foot
If it can be made full scale it can be made 16mm

My line: http://gardenrails.myfreeforum.org/about7200.html

User avatar
Woodfields Light Railway
Trainee Fireman
Trainee Fireman
Posts: 175
Joined: Tue Nov 26, 2013 8:03 pm
Location: Earth

Post by Woodfields Light Railway » Thu Jan 23, 2014 8:26 pm

*brain explodes*................ Oh..... Got it!!!
"So, when is this newfangled railway coming?"
"When we have enough money..."
"Where is this money coming from?"
"Havent thought that far..."

bazzer42
Driver
Driver
Posts: 1215
Joined: Sun Nov 25, 2012 1:37 pm
Location: Forest of Dean

Post by bazzer42 » Sun Jan 26, 2014 12:56 pm

Having been a little bit lgb in the past I am in the process of replacing buildings with true 16mm scale sizing. My modeltown figures need the headroom to get in. It will be interesting to see how the buildings appear. I have just measured up a combination of Lydney junction and Oakle Street stations on the old Severn and Wye and it scales out at 32 inches. If it looks too big I'll lose it in the flower bed at the rear of my terminus.

User avatar
philipy
Moderator
Moderator
Posts: 5098
Joined: Sun Jan 30, 2011 3:00 pm
Location: South Northants

Post by philipy » Sun Jan 26, 2014 1:52 pm

bazzer42:96068 wrote:.... I have just measured up a combination of Lydney junction and Oakle Street stations on the old Severn and Wye and it scales out at 32 inches..
Doesn't surprise me. Quite by chance I've just spent this morning drawing up an old village post office and village stores, to act as part of  the rear scenic break behind my station building.
The post office building is 'Listed' and dates from 1678 so you'd expect it to be small but even so, in 16mm it measures at 720mm long ( 28.5" in old money)!
Philip

User avatar
MDLR
Driver
Driver
Posts: 4027
Joined: Thu Jan 15, 2009 10:38 pm
Location: Near Ripley, Derbyshire, UK
Contact:

Post by MDLR » Sun Jan 26, 2014 4:37 pm

bazzer42:96068 wrote:Having been a little bit LGB in the past I am in the process of replacing buildings with true 16mm scale sizing.
It's a good job you're saying this here and we all know what you mean: there's a story that a garden railwayer went to Uni and saw a poster for an LGB Club. "Oh, goody!" he thought, and went along to the first meeting with his latest big red box, only to discover that LGB meant something entirely different......................

Lesbian, Gay & Bisexual, if you didn't know..........

:oops:  :oops:  :oops:
Last edited by MDLR on Sun Jan 26, 2014 8:49 pm, edited 1 time in total.
Brian L Dominic
Managing Director
Flagg Fluorspar Co
www.mdlr.co.uk/ff.html

bazzer42
Driver
Driver
Posts: 1215
Joined: Sun Nov 25, 2012 1:37 pm
Location: Forest of Dean

Post by bazzer42 » Sun Jan 26, 2014 8:00 pm

Thanks Brian, a quick search on lgb always brings up the rainbow flag.  I think I'm committed to 16mm buildings having spent the weekend casting these babies in resin.  After my first over loading of fillite it has worked quite well.

Image

ps masters made using 4.8mm square plastruct to fit snugly with 5mm foamboard. The upper windows can be cut off to form plain doors, too lazy to make two masters.....

User avatar
MDLR
Driver
Driver
Posts: 4027
Joined: Thu Jan 15, 2009 10:38 pm
Location: Near Ripley, Derbyshire, UK
Contact:

Post by MDLR » Sun Jan 26, 2014 8:51 pm

I used to use car filler for that job, and glass reinforced filler for roof panels.........
Brian L Dominic
Managing Director
Flagg Fluorspar Co
www.mdlr.co.uk/ff.html

User avatar
philipy
Moderator
Moderator
Posts: 5098
Joined: Sun Jan 30, 2011 3:00 pm
Location: South Northants

Post by philipy » Mon Jan 27, 2014 7:35 am

bazzer42:96090 wrote: ps masters made using 4.8mm square plastruct to fit snugly with 5mm foamboard. The upper windows can be cut off to form plain doors, too lazy to make two masters.....
Bazzer,
They look superb, what did you use for the actual mould itself?
Philip

bazzer42
Driver
Driver
Posts: 1215
Joined: Sun Nov 25, 2012 1:37 pm
Location: Forest of Dean

Post by bazzer42 » Mon Jan 27, 2014 1:31 pm

Hi Philip,
RTV silicone to make the moulds. Made the masters from plasticard and plastruct and then stuck them to a sheet of plasticard for the base of a mould. Used cheap pound shop aluminium trays for the moulds. This is my first attempt at casting and quite pleased how well it has turned out. There are some tiny air bubbles but small enough to wonder whether filling is worth it. I need to make a mould tonight so will post a couple of pics as I go. Toilet windows are on the agenda.....

User avatar
Andrew
Moderator
Moderator
Posts: 3276
Joined: Tue Jul 03, 2012 1:33 pm
Location: Bristol, UK
Contact:

Post by Andrew » Mon Jan 27, 2014 4:13 pm

bazzer42:96131 wrote: I need to make a mould tonight so will post a couple of pics as I go.  
Ooh, yes please! Learning to cast in resin's been on my "to do" list for a year or two but have never quite got my head round the process enough to order the stuff. Some buildings are on the cards sooner rather than later, my enthusiasm's been stoked up by your lovely goods shed model - some resin doors and windows would be just the thing...

Andrew.

User avatar
philipy
Moderator
Moderator
Posts: 5098
Joined: Sun Jan 30, 2011 3:00 pm
Location: South Northants

Post by philipy » Mon Jan 27, 2014 5:44 pm

Thanks for that. I look forward to the pictures.
I did try some making some silicone moulds once, about 35 years ago, without much success and have been reluctant to try again, but I think I must bite the bullet. :)
Philip

bazzer42
Driver
Driver
Posts: 1215
Joined: Sun Nov 25, 2012 1:37 pm
Location: Forest of Dean

Post by bazzer42 » Mon Jan 27, 2014 8:05 pm

Whether I've been lucky, I don't know but the moulds have worked quite well.  The latest pink moulds are Tomps fast setting and should be demouldable in 2 hours.  The blue takes longer to set so may give more time for air bubbles to rise but I may have been lucky to date.
it's all a bit pound shop. A ps plastic jug to mix the silicone and catalyst in using a ps knife (4 for a pound!) and the mould is ps aluminium tray cut down and stuck together with ps contact adhesive.  The scales were an invaluable buy and can be reset every time you add resins, fillers or silicones.  Once you have cast an item you can gauge your mix by weight.
the window in one of the pictures took 8g each of hardener and resin and a teaspoon of fillite to give colour, and add padding.  Too much fillite causes a failure to set properly....as I have found out.
Image
original made from plastruct stuck to plasticard


Image

bazzer42
Driver
Driver
Posts: 1215
Joined: Sun Nov 25, 2012 1:37 pm
Location: Forest of Dean

Post by bazzer42 » Mon Jan 27, 2014 8:14 pm

Mould now stuck to baking tray

Image

the silicone and catalyst. When mixed I pour from about 2 feet above the tray to reduce air bubbles.

Image
release agent and two moulds. A tiny squirt of this certainly prevents sticking, although I can't say for sure as I've yet to forget (give it time)

Image
and finally the next window is setting the mould.

User avatar
philipy
Moderator
Moderator
Posts: 5098
Joined: Sun Jan 30, 2011 3:00 pm
Location: South Northants

Post by philipy » Mon Jan 27, 2014 8:47 pm

Fantastic, thanks.
What size are the crossbars on the window? They look very fragile, how thin do you think you can go?
Philip

bazzer42
Driver
Driver
Posts: 1215
Joined: Sun Nov 25, 2012 1:37 pm
Location: Forest of Dean

Post by bazzer42 » Mon Jan 27, 2014 8:59 pm

philipy:96174 wrote:Fantastic, thanks.
What size are the crossbars on the window? They look very fragile, how thin do you think you can go?
sorry to hi jack the thread. The cross members are 2mm and the resin will flow unaided... standardised on 4.8mm main frame, 3.2mm inner frame and 2mm crossbars, door panels are edged with 1.5mm quadrant.

Post Reply

Who is online

Users browsing this forum: No registered users and 4 guests