Page 1 of 1
New Slate Wagon for the WVLR
Posted: Sun Dec 01, 2013 3:48 pm
by WVLR
My first attempt at building a slate wagon, I already have 4 Binnie ones
but I need at least 3 more to complete my anti gravity train,
the power unit for which has been sitting on the TO_DO shelf for the last 2 years.
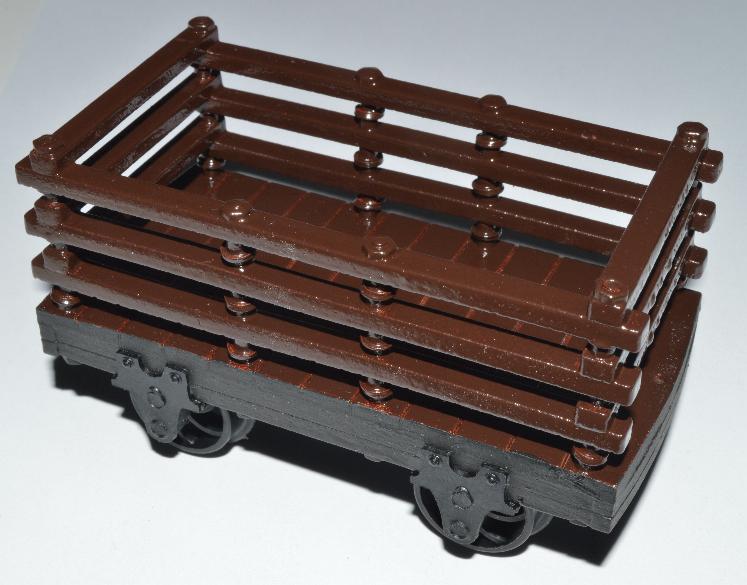
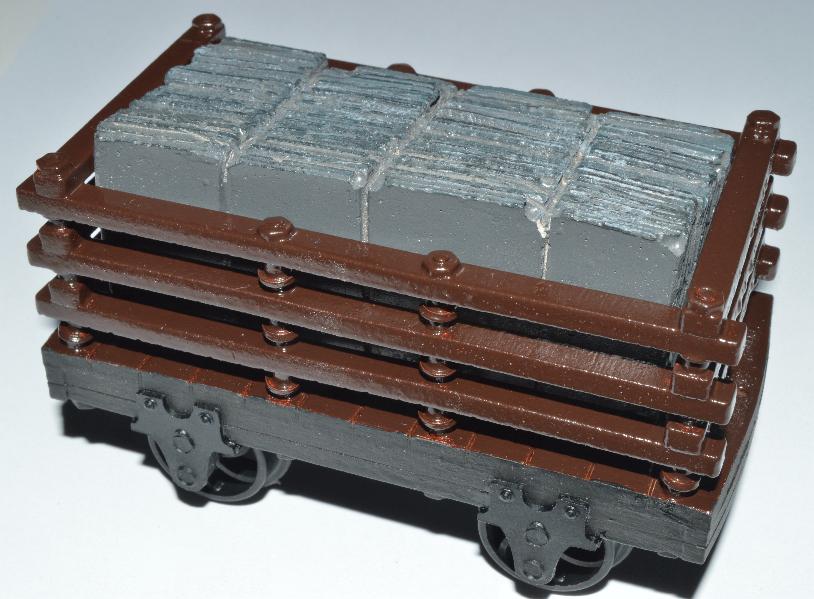
The usual method of construction using 3mm laser cut ply with Binnie
wheels, axles and axle boxes, the photos show work so far with a bit of
detailing and finishing off still to do.
As I'm not entirely happy with it the BIG FOOT IN THE SKY my well intervene
What do you all think

Posted: Sun Dec 01, 2013 3:52 pm
by Lner fan Sam
Looks top notch, good job

Posted: Sun Dec 01, 2013 4:36 pm
by Peter L
I think it looks excellent
Posted: Sun Dec 01, 2013 4:40 pm
by tom_tom_go
Do not be so critical of your work. Sometimes I make something and think it looks rubbish but then I walk away and come back to it and realise it's fine.
I will have it off you before you flatten it!
Posted: Sun Dec 01, 2013 5:51 pm
by Peter Butler
Looks well enough to me.
I like to use a matt varnish which takes away the light reflection and disguises any slight imperfections.
Posted: Sun Dec 01, 2013 8:53 pm
by laalratty
Wagon itself looks fine, so definitely don't go smashing it!
Skate wagon
Posted: Sun Dec 01, 2013 9:00 pm
by Vapouriser
No dont smash it. Send it to me!! Love the uprights especially. Well done
Posted: Sun Dec 01, 2013 9:09 pm
by williamfj
There is nothing in the photo that suggests that slate wagon deserves to be smashed, in fact it looks very good.
Posted: Sun Dec 01, 2013 9:37 pm
by jim@NAL
looks good I like it
Posted: Sun Dec 01, 2013 10:07 pm
by WVLR
Many thanks everyone for all your comment's, I also put the same photos on facebook
and got equally positive comments from there as well.
So the wagon has a reprieve,
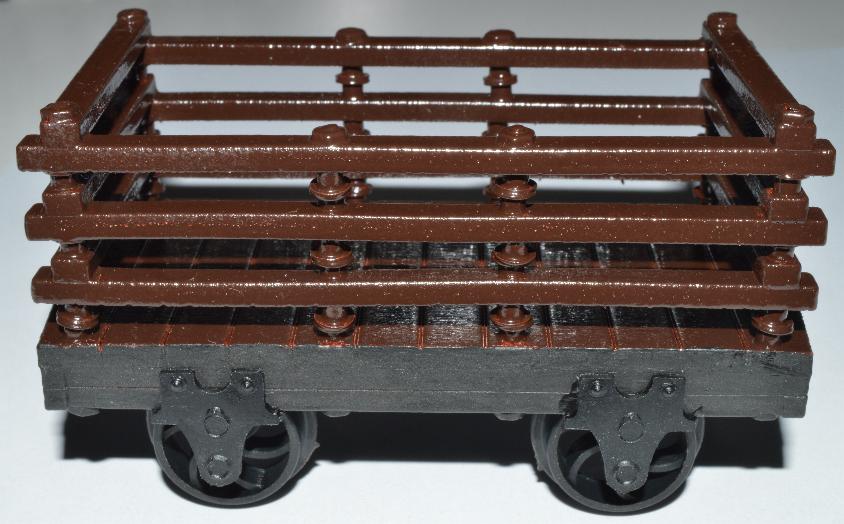
Love the uprights especially.
This was one of the things that I didn't think was quite right. I used pairs of eyelets back to back as they seemed to be fairly close to the shape of the cast iron pillers.
I like to use a matt varnish which takes away the light reflection and disguises any slight imperfections.
I think you've hit the nail on the head here, I used gloss paint and I think it just looks wrong. A bit of dry brushing with a matt paint is called for.
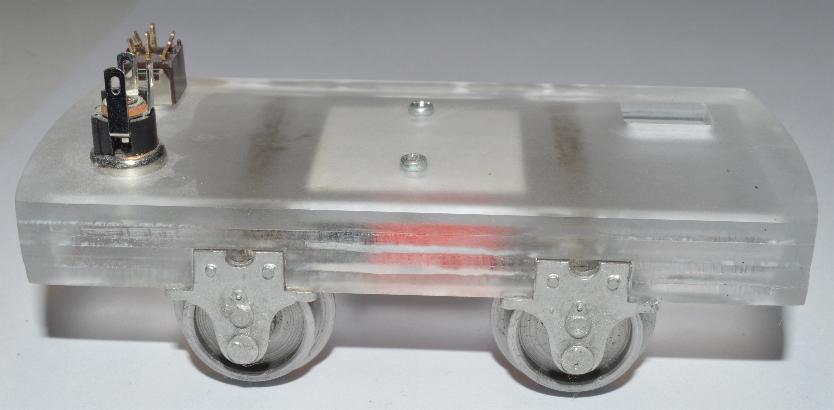
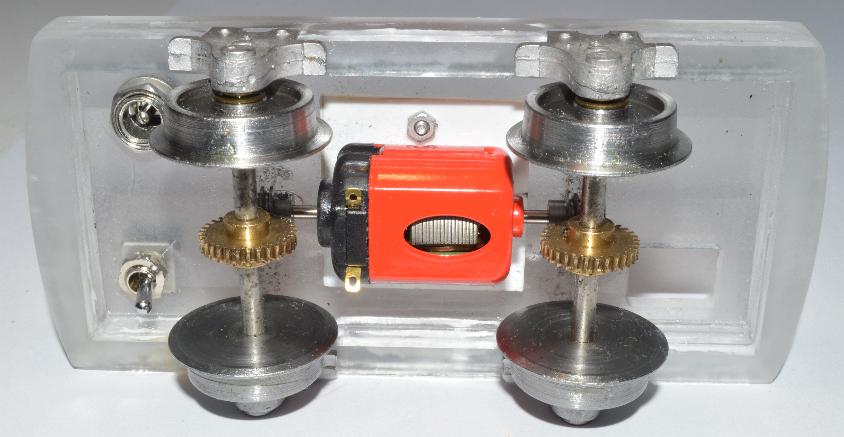
The next stage of the project is the power unit, which is probably something for another thread
but here's the work so far.
Posted: Sun Dec 01, 2013 10:16 pm
by Peter Butler
I need to know everything there is to know about your chassis.
It looks just brilliant.... compact, neat, twin axle drive, perfect!
Please explain in FULL detail about all the items used.
Posted: Sun Dec 01, 2013 10:46 pm
by Enginehouse
Interesting thread on a very nice build project. The slate wagon is truly excellent. Nice clean loco chassis layout. The double ended motor is interesting. These are not readily available at the size yours appears to be. What is the supplier and the voltage range of this piece of kit please?
Looking forward to the next piece on this build.
Posted: Sun Dec 01, 2013 11:43 pm
by WVLR
I need to know everything there is to know about your chassis.
Wow, I'm on the spot here

I think I'll start this in a new topic under projects, but for the time being:-
The motor is a 12 volt slot car motor from the local model shop, but there
are similar ones on Ebay. The gears are Cambrian 30:1 with IP engineering 20mm wheels, axles and axle boxes.
The chassis is very slightly bigger than the one for the slate wagon shown above
and is made from 3 layers of 1/8" acrylic (actually a car number plate blank).
This was machined on a CNC router.
The observant will notice that as well as the ON/OFF switch there is
a charging socket for an on board 6 volt battery.
The rectangular hole in the base to the right of the photo is to take the
connectors for the radio control receiver with the electronics and batteries being
on top of the chassis and hidden under a dummy slate load.
This project has been lying around for far too long, I originally hoped
it would be ready for an open day at a local line in July last year, but
that never happened so I think as I've nearly sorted out the motor
controller for Tom, it's next on the list
Posted: Sun Dec 01, 2013 11:52 pm
by Peter Butler
Many thanks for the reply, I am truly impressed and envious!
When the full build is posted I will be watching closely.... I wonder how fast it will run on 6v and what sort of pulling power it will have? I guess it is early days for you and possibly these things have yet to be tried.
I have recently spent time in Maplins to try to find a suitable rechargeable battery system and discovered what a complete minefield it is. It would be wonderful to have first hand information of a whole system which actually works.
No pressure!!!!!
Posted: Thu Dec 05, 2013 12:13 pm
by WVLR
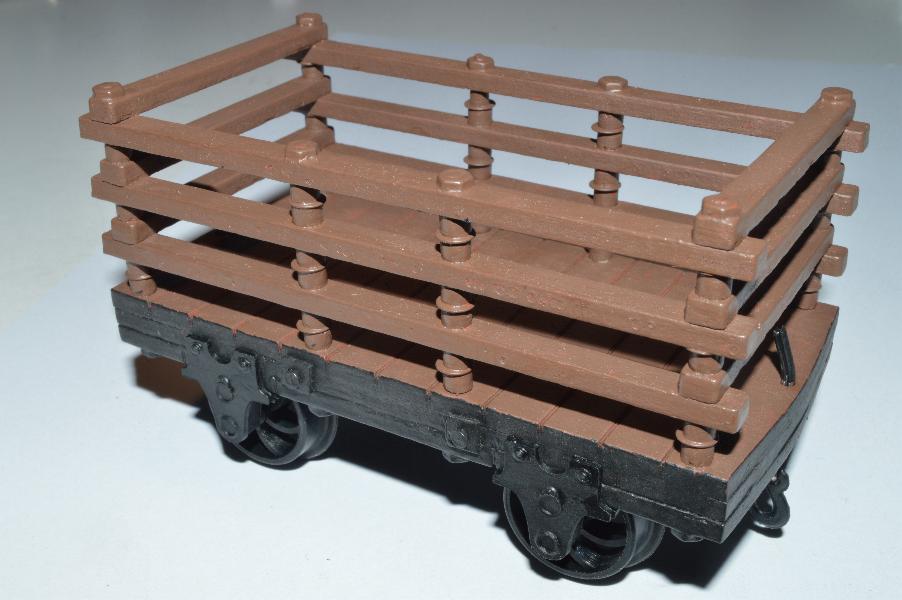
The next slate wagon is complete, same method of construction
as the first one but with the uprights laser cut from 3mm ply with
2mm washers to give the detail.
Going with Peter Butler's suggestion I have used matt brown for the
main body.
Posted: Thu Dec 05, 2013 1:56 pm
by LnBmad
Cracking work as always mike! You thought about making these as kits?
Posted: Thu Dec 05, 2013 1:58 pm
by REIGNAC.
Great work! Can't wait for the new topic!
Posted: Thu Dec 05, 2013 3:14 pm
by Peter Butler
WVLR:93076 wrote:
Going with Peter Butler's suggestion I have used matt brown for the main body.
I can't claim credit for the idea of using a matt finish but it is one I use myself and recommend it as there is a noticeable improvement.
I hope you agree.
Posted: Thu Dec 05, 2013 3:21 pm
by WVLR
I hope you agree.
I certainly do, it's the same paint as I used on my Binnie slate wagons,
they look OK but I think this one being wood rather than plastic looks better.
Posted: Thu Dec 05, 2013 7:59 pm
by Andrew
Very nice, love the "bobbins" between the planks and the bolts on top.
I'd be tempted to rub away at the paint with some sandpaper to let the real wood show through, gives a nice worn look, but then I like a bit of weathering. I've simulated that in places on my Binnie ones, but of course I had to paint on ther "wood"...
Cheers,
Andrew.