Page 1 of 2
Rowland's Modules - was Joined up Thinking
Posted: Sat Jan 12, 2013 8:13 pm
by Hope Mountain Railway
Well, the project is under way. John Wenlock completed the first standard sized baseboard on Friday and I completed the second today. One thing that has come out, is that 900mm high is a little low, and 950mm to baseboard top a better bet. Will communicate this to all who are building modules. Has anyone out there got ready access to a laser cutter, or perhaps a plasma cutting machine? I want to have templates made in plastic or 1/8th steel for marking out the curved boards. With 8 angled boards equalling a full circle, there is a lot of opportunity for error if angles are slightly askew. Best Wishes, Gareth
Posted: Sat Jan 12, 2013 8:40 pm
by Sir Clothem Cap
here is some already built it will be adjusted to the end standards. the video is short due to lack of batterey power in camera

Rowland's Modules
Posted: Sat Jan 12, 2013 10:09 pm
by Hope Mountain Railway
Thanks for that Bryan. What dims did you work too? What height from the floor. Could you send some pics? Thanks, Gareth
Posted: Sun Jan 13, 2013 10:01 am
by Sir Clothem Cap
This is a long modular railway that was built a while back by others and was based on mamod track but has been rebuilt with some hand made track to the same proportions. it is intended to modify the ends to make it a rowlands standard and alter the run round loops to allow larger stock to pass.
I'm unsure of height but will measure next time I get a chance. It has been stored a while but was revisited because of your idea.
Posted: Mon Jan 14, 2013 2:45 pm
by Chris Cairns
Finally got the video to work after tweaking some settings in Chrome.
Not wanting to 'bungle' this Topic but that was a rather large gas burner flare up on your Mamod Mark II locomotive Bryan. Have you marked the wheel on the gas valve? I find that helps keeping a close eye of what gas setting to set.
Chris Cairns.
Rowlands Modules stand at Peterborough
Posted: Fri Apr 26, 2013 3:06 pm
by Hope Mountain Railway
Hello all,
I will be hosting a stand promoting the Modular layout/interface idea at the Peterborough Show, if anyone fancies coming up for a chat.
See you there, Gareth
Rowlands Modules - Stds on the Website
Posted: Mon Feb 03, 2014 8:53 pm
by Hope Mountain Railway
Hello All, just an update to say that the Stds are on the Association Website now. Hope that progress is being made? Mine slow, but gathering pace. See you all at the Show?
Posted: Sat Feb 08, 2014 7:26 pm
by MDLR
The MDLR's 2-module layout has made significant progress today (like joined-up baseboards with legs and railway bits dropped on it) see
http://www.mdlr.co.uk/mod.html
Rowlands Modules - Metric
Posted: Sat Feb 08, 2014 9:40 pm
by Hope Mountain Railway
Brian, .... can you please change your post to remind those interested that the standard lengths are multiples or divisions of 1200mm, not 4' as you mentioned in the piece from your link - thanks.
Posted: Sun Feb 09, 2014 12:14 am
by MDLR
Dunnit...................
Aldi - Bargains
Posted: Sun Feb 09, 2014 6:53 pm
by Hope Mountain Railway
For those of you sorting timber out for their Modules, there are some huge boxes of a variety of woodscrew in Aldi at the moment. A lot cheaper than B&Q etc. Also packs of small angle bracket which would be useful for strengthening.
Posted: Mon Feb 10, 2014 12:53 pm
by rebelego
MDLR:96598 wrote:The MDLR's 2-module layout has made significant progress ...
Nice! I like the use of kitchen cabinet legs.

Posted: Mon Feb 10, 2014 10:16 pm
by MDLR
rebelego:96643 wrote:Nice! I like the use of kitchen cabinet legs.
There's a requirement in the spec for adjustable legs, so we can all be at the same level, and this seemed to be a readily-available solution. I haven't actually adjusted mine yet (apart from one which was sitting over a hollow in the garage floor - another advantage) but will have a twiddle to get somewhere within range before I pack for Peterborough.
Posted: Tue Feb 11, 2014 6:56 am
by philipy
Many years ago, I was part of a group of OO modellers who built a modular layout, using very similar principles to these current Assoc ones.
For my leg adjustment I used something called "Handwheel bolts" which were sold by Maplins in those days but are now available on line. I drilled a 10mm hole up the bottom of the legs and fitted a captive T-nut and simply screwed the bolt in.
My concern with the kitchen cabinet legs would be robustness. There is a lot of plastic and they aren't really designed to be constantly adjusted.
One other thing, we found from bitter experience how out of true the floors of big halls can be over the length of a the layout. Even with a couple of inches of adjustment, we often had to put packing underneath, so a stock of 1/2" ply offcuts frequently came in handy! ( Also for carpeted floors, it stops the feet sinking into carpets.)
Posted: Tue Feb 11, 2014 12:46 pm
by MDLR
philipy:96677 wrote:For my leg adjustment I used something called "Handwheel bolts" which were sold by Maplins in those days but are now available on line. I drilled a 10mm hole up the bottom of the legs and fitted a captive T-nut and simply screwed the bolt in.
I might've gone down that route, but didn't have the technology to drill the holes!
philipy:96677 wrote:My concern with the kitchen cabinet legs would be robustness. There is a lot of plastic and they aren't really designed to be constantly adjusted.
One other thing, we found from bitter experience how out of true the floors of big halls can be over the length of a the layout.
I'm not intending that the modules will be going out more than about 3 times a year, so I'm not over-worried about this - besides, they are easy and cheap to replace! I've got problems with a dip in the concrete garage floor, which has needed some adjustment on one leg only to get a stable structure!
Posted: Tue Feb 11, 2014 12:58 pm
by philipy
MDLR:96685 wrote:philipy:96677 wrote:For my leg adjustment I used something called "Handwheel bolts" which were sold by Maplins in those days but are now available on line. I drilled a 10mm hole up the bottom of the legs and fitted a captive T-nut and simply screwed the bolt in.
I might've gone down that route, but didn't have the technology to drill the holes!
It's called a Black & Decker with a 10mm drill bit!
Posted: Tue Feb 11, 2014 2:40 pm
by MDLR
I would've preferred to do it with a pillar drill, but mine wouldn't have coped!
Posted: Tue Feb 11, 2014 4:05 pm
by MDLR
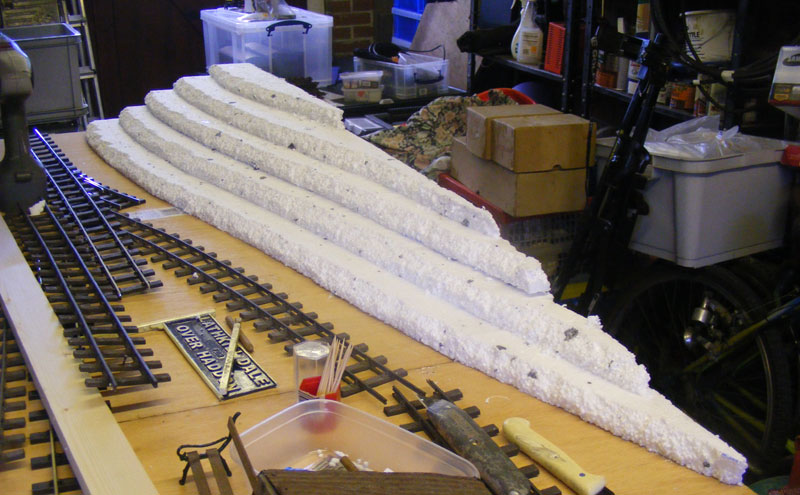
Today, I feel like singing................ "The hills are alive.........." because we've got one!
Go to
http://www.mdlr.co.uk/mod.html for the words and pictures:
It looks like this now!
Posted: Wed Feb 12, 2014 9:02 pm
by MDLR
I've been getting plastered in Lathkill Dale this evening............................
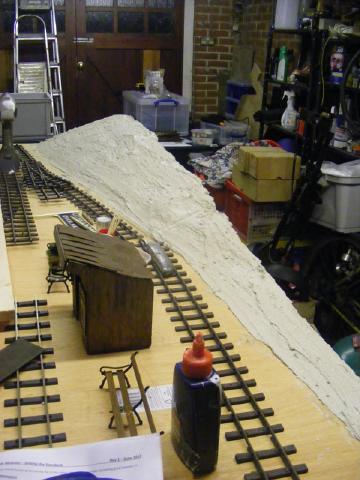
All the words are at:
www.mdlr.co.uk/mod.html
Posted: Wed Feb 26, 2014 2:22 pm
by MDLR
The scenic work on Lathkill Dale (for Over Haddon) is coming on nicely - see
http://www.mdlr.co.uk/mod.html........................