That Car I Keep Alluding To

This is the place to talk about news, TV, music and other hobbies
User avatar
Old Man Aaron
Trainee Driver
Trainee Driver
Posts: 808
Joined: Wed Oct 19, 2016 11:08 am
Location: Sunshine Coast QLD, Australia

Re: That Car I Keep Alluding To

Post by Old Man Aaron » Sat Feb 24, 2024 9:03 am

Ah, the "old man" shtick is because I've been called "old man" and curmudgeon" all my life. I just know what I want. :lol:

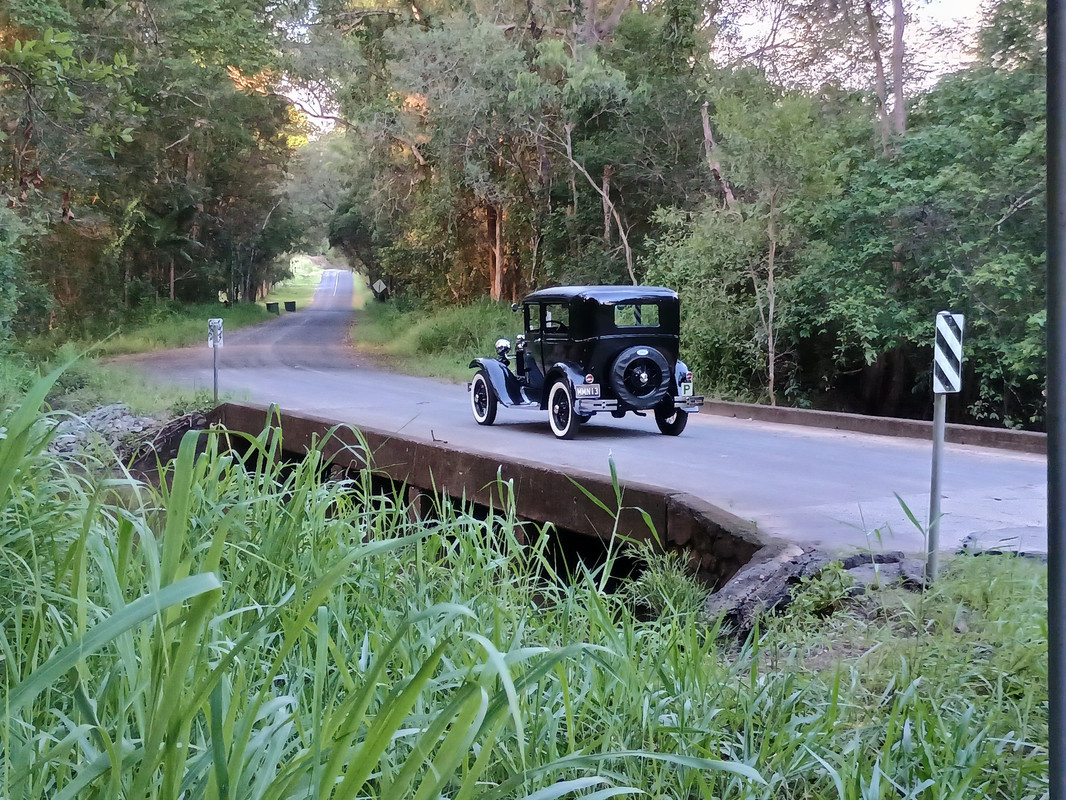
The idea is to end up with a brand new car. Fix it once, fix it right. Show the world that old things are more than up to the job, and defy mind-numbing stereotypes such as "candle headlights", "unreliable", "imaginary brakes" etc. when they're done properly.


09/11/22
Once again grateful for Dad's help, heading into work early two days this week, to make a painful task quick and easy for us both.
He doesn't drink, but I owe him one. His colleagues were surprised to see what sort of wheels he brought in, after asking the boss' permission.
Weird to think those tubes last saw the light of day on the other side of the world.


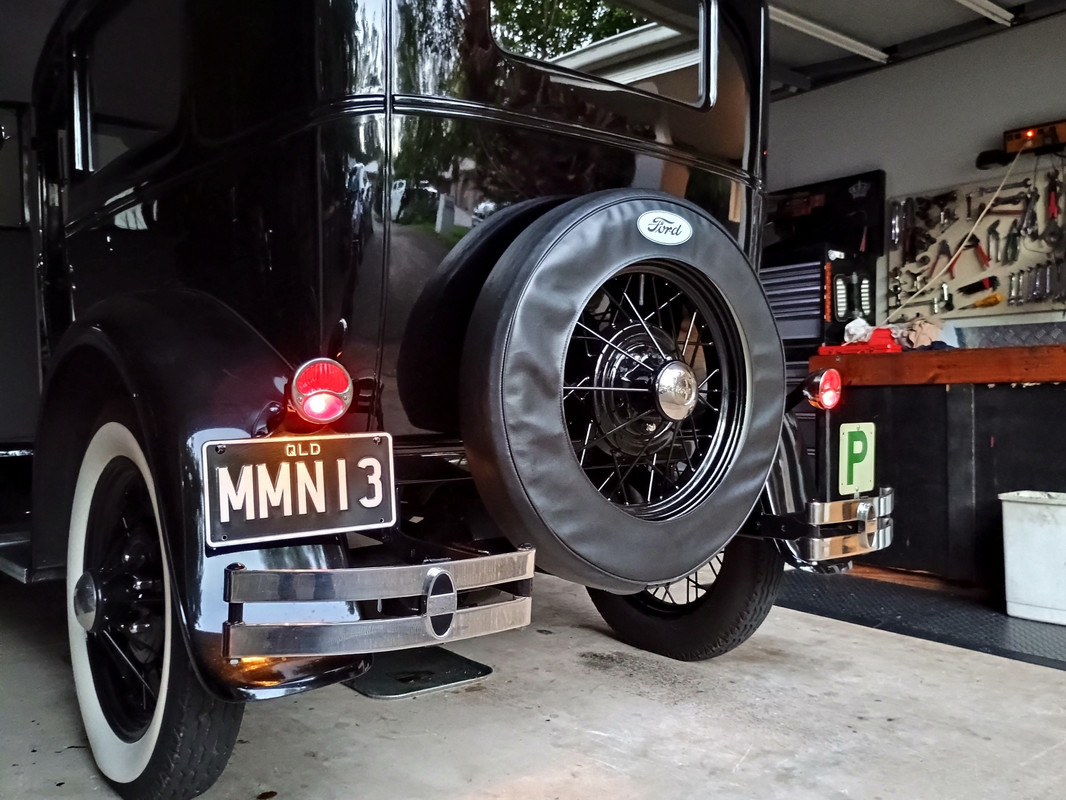
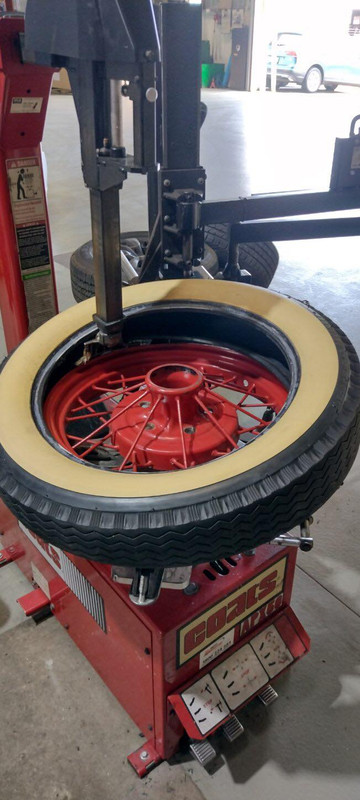
These 1988 bias tyres still have plenty of tread left on them, but they're (just) starting to dry rot. Many people run on far worse, so they were sold.
If this was your average Sunday ice-cream-getter, I'd have kept them. But for a daily, a set of new radials will provide the best value per mile.
Image


13/11/22
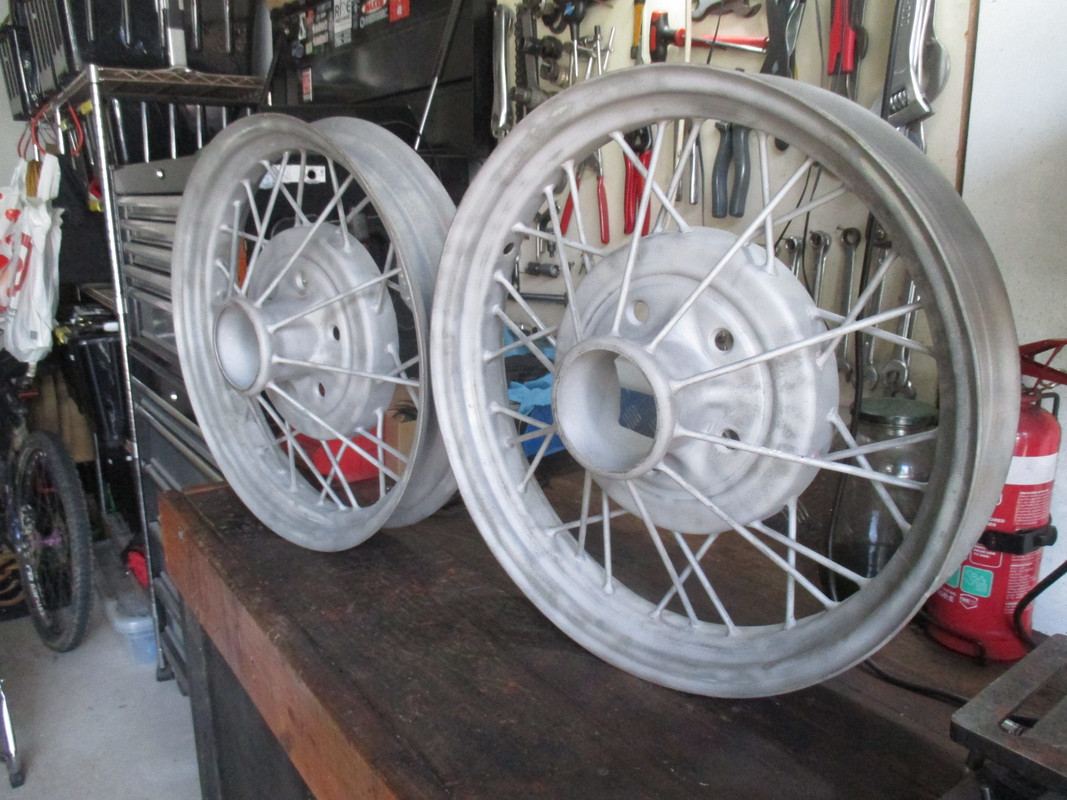
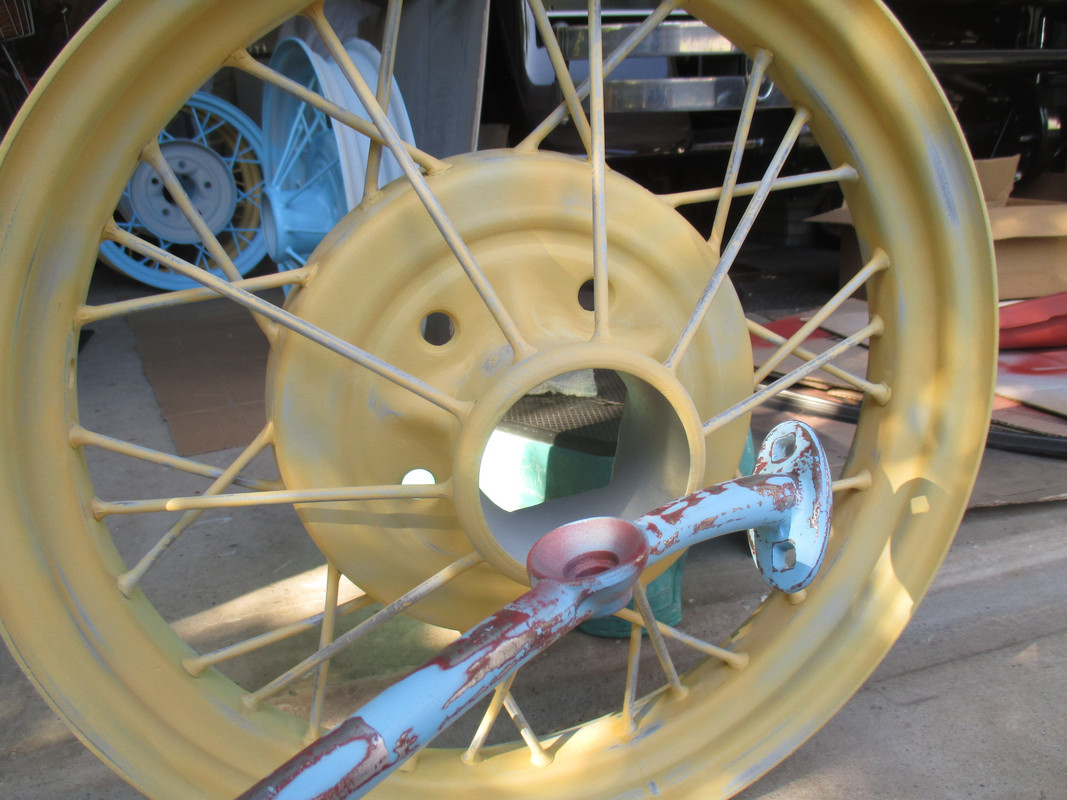
To cut a long, boring, painful and expensive story short: I gave up on the sandblasting cabinet at the railway museum, and had the wheels blasted by a local powdercoating shop.
No cracks or loose spokes on these two, just straightened a few slightly bent spokes with a hammer and drift. They were then thoroughly cleaned with meths and rags, then sprayed with epoxy primer. Won't be sorry to see all the wheels finished. I'm no stranger to tedious work, but these wire wheels are up there among the worse..

One wheel has two tiny cracks starting from the stud holes. You could TIG weld it, but the metal itself is fatigued, they'll just crack elsewhere.
The only solution is monitoring, and replacement as soon as a better wheel can be found. Also need to find a replacement spare wheel.
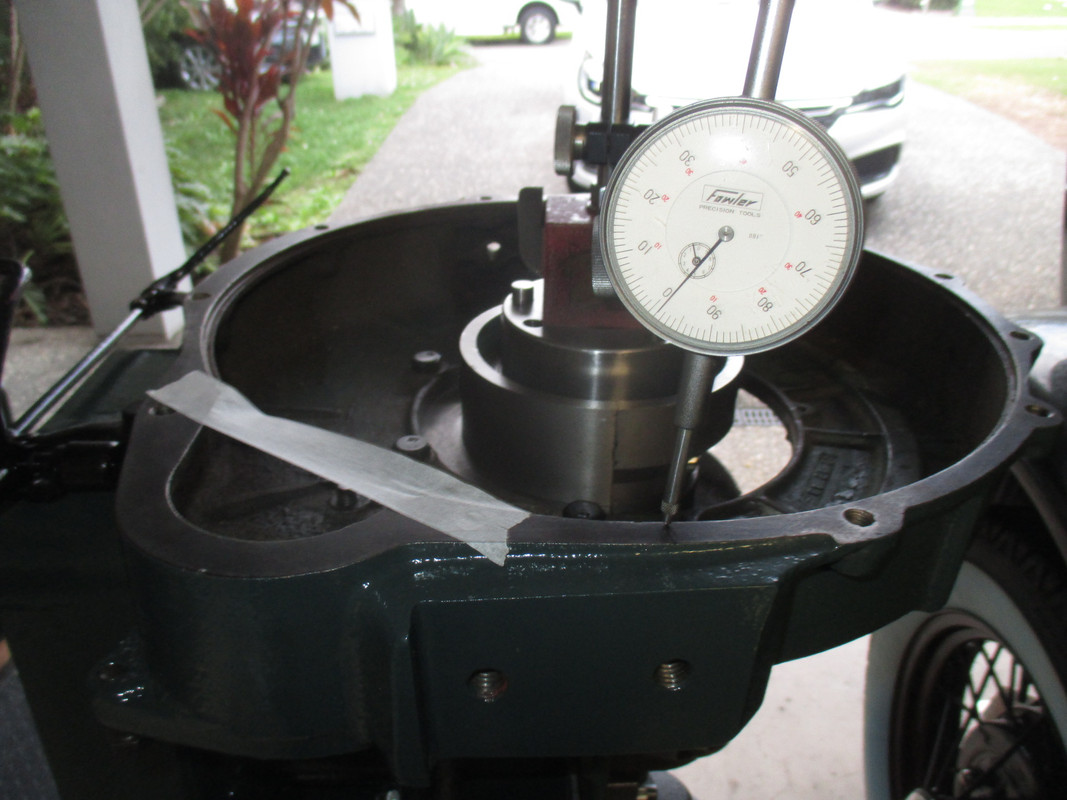
Max. wobble for road use is ⅛". The spare has a ¼" wobble in it - I'd say it hit a kerb very hard early in it's life.
Image


22/11/22
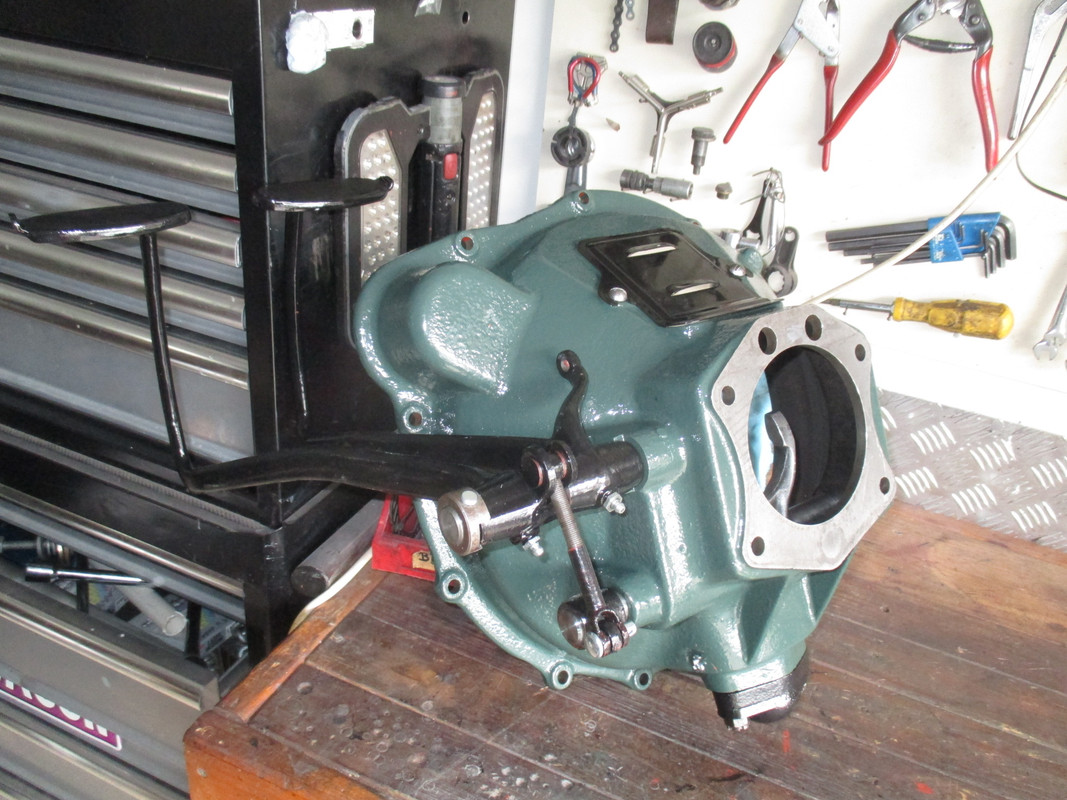
Steering column pulled. New horn wire, chrome redone, (proper stuff with the copper layer) worn out control notches built back up with weld, then cleaned up with the grinder and re-cut with files.
Dulux overhaul besides. Needs mechanical rebuild but no money at the time. I later pulled it out again, bought new parts and had my local "A" friend rebuild it for me.
Image


25/11/22
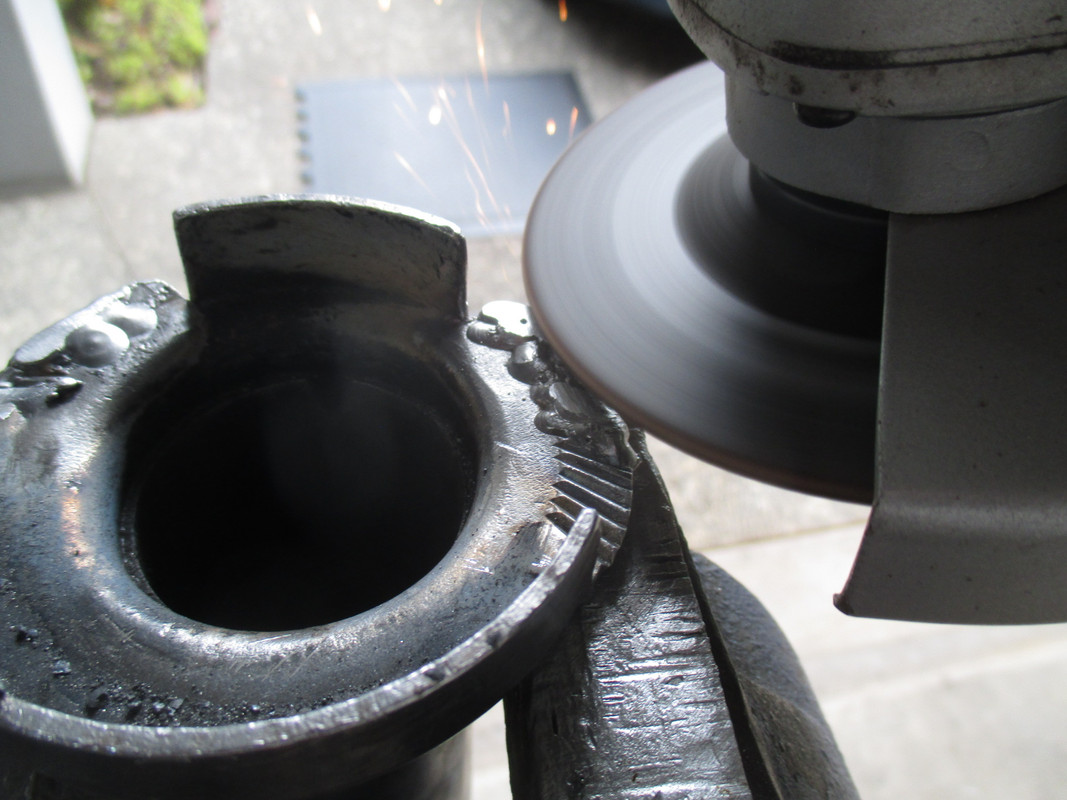
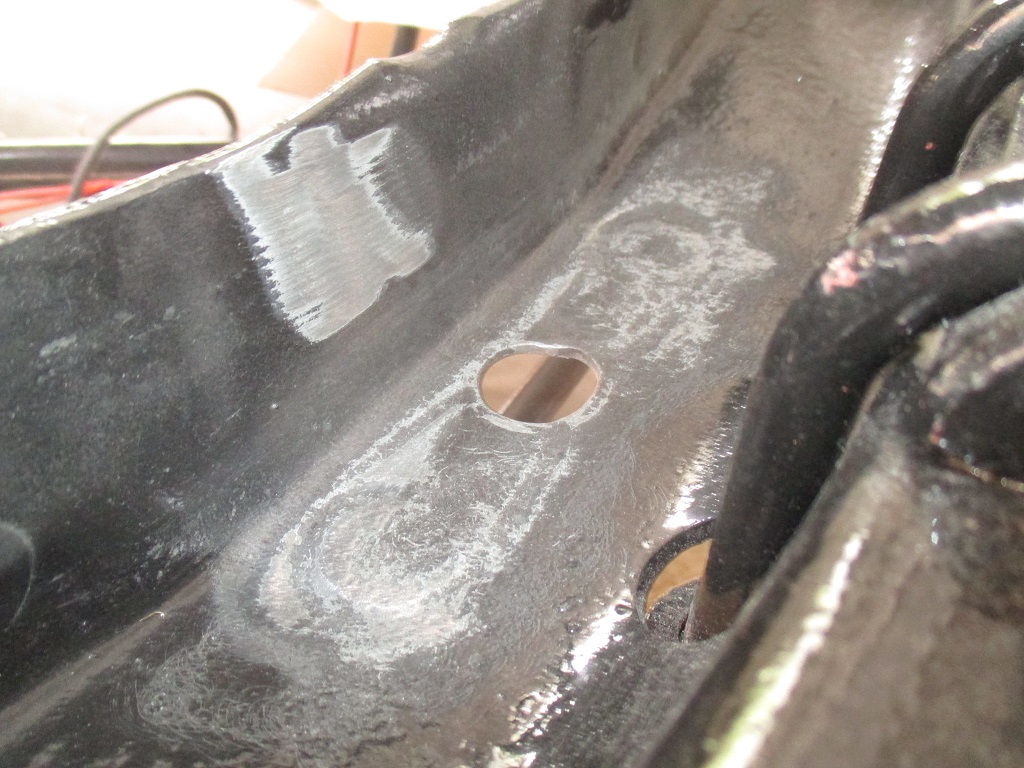
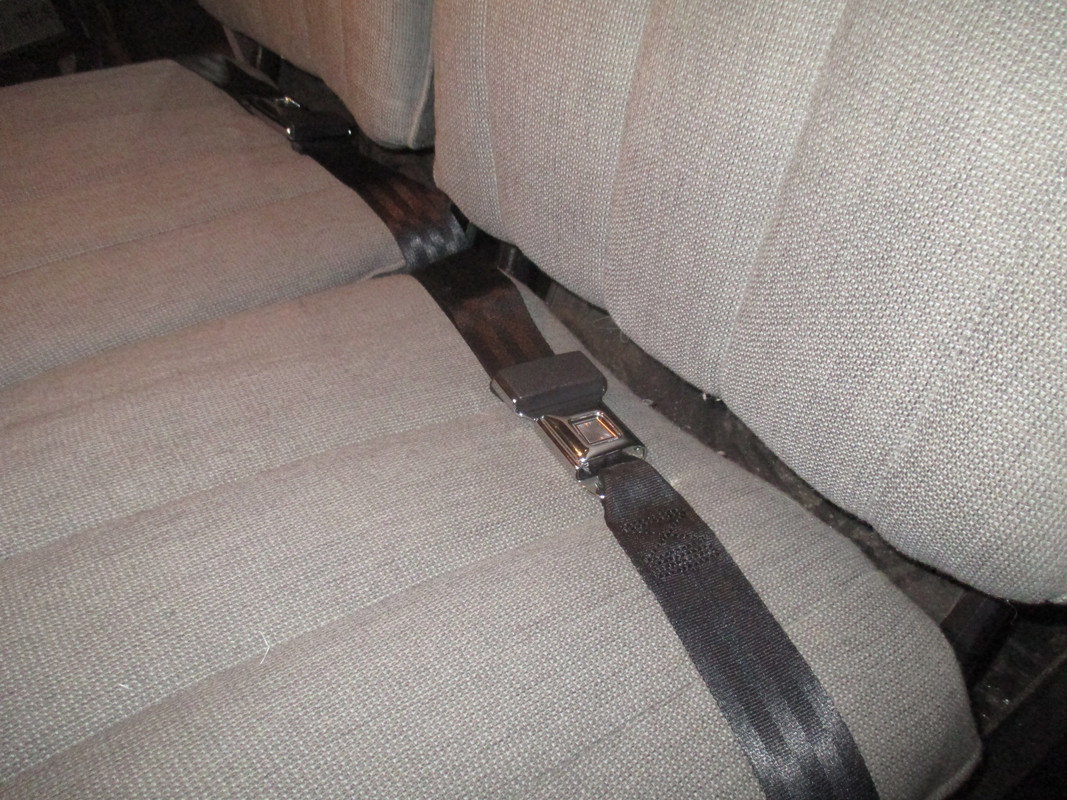
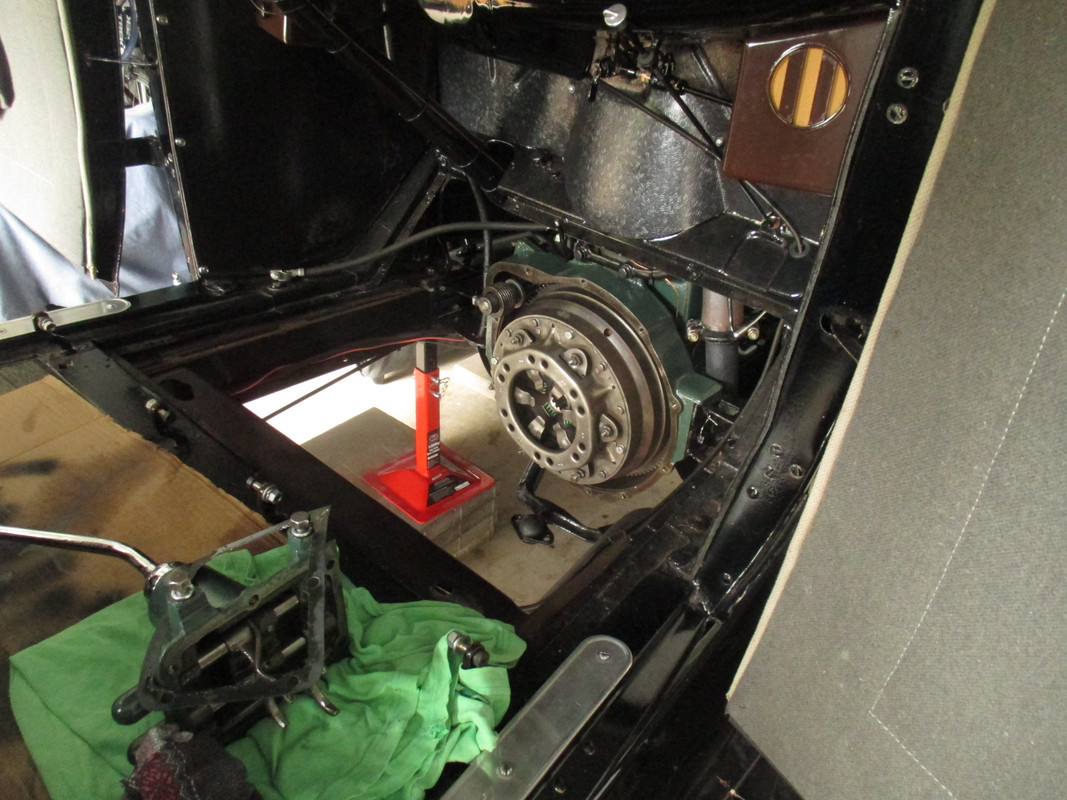
The clutch pedal trunnion was worn to the usual degree, (sitting on the vice at upper right) along with the egg-shaped hole in the pedal. I don't have (don't want to spend more money on) the correct drill to weld up the pedal and fit a stock replacement part, so I roughly rounded out the pedal hole with a stone in the dremel, and finished with a Poor-Man's Reamer to fit a new oversized trunnion. The latter was made on the lathe, using the original clutch slider shaft from the bell-housing.
Image


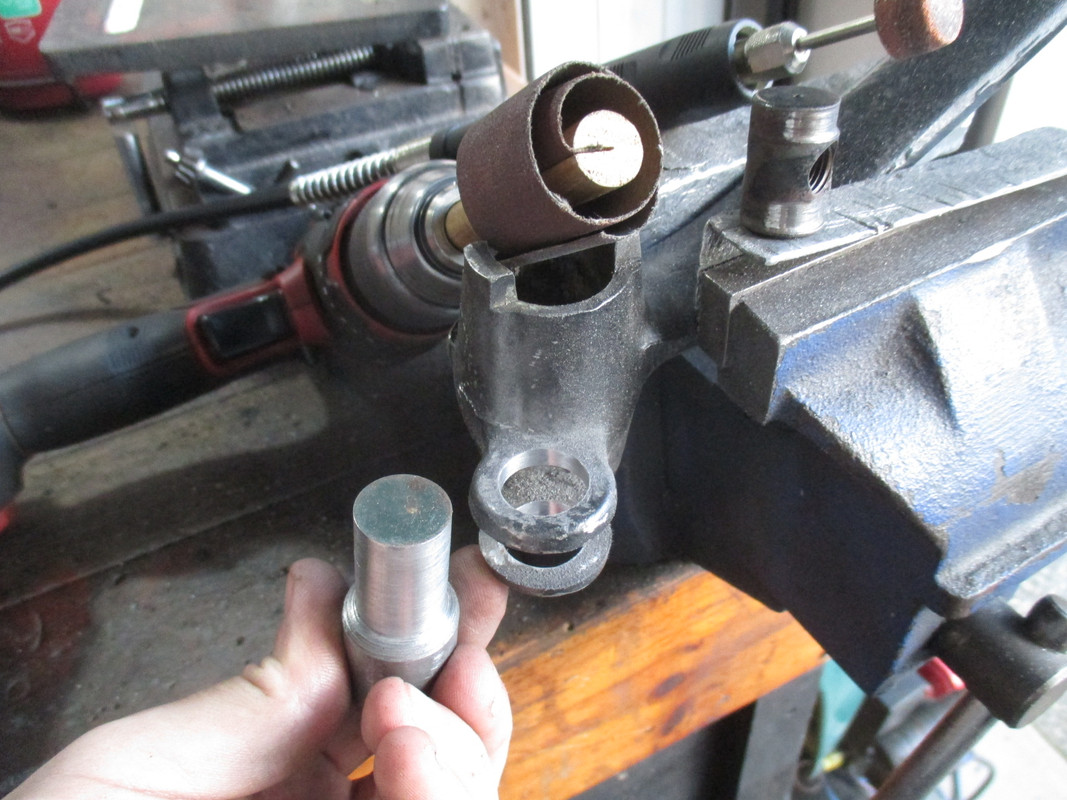
Bellhousing overhauled. New shafts, bushings and grease nipples added to pedals.
Image


03/12/22
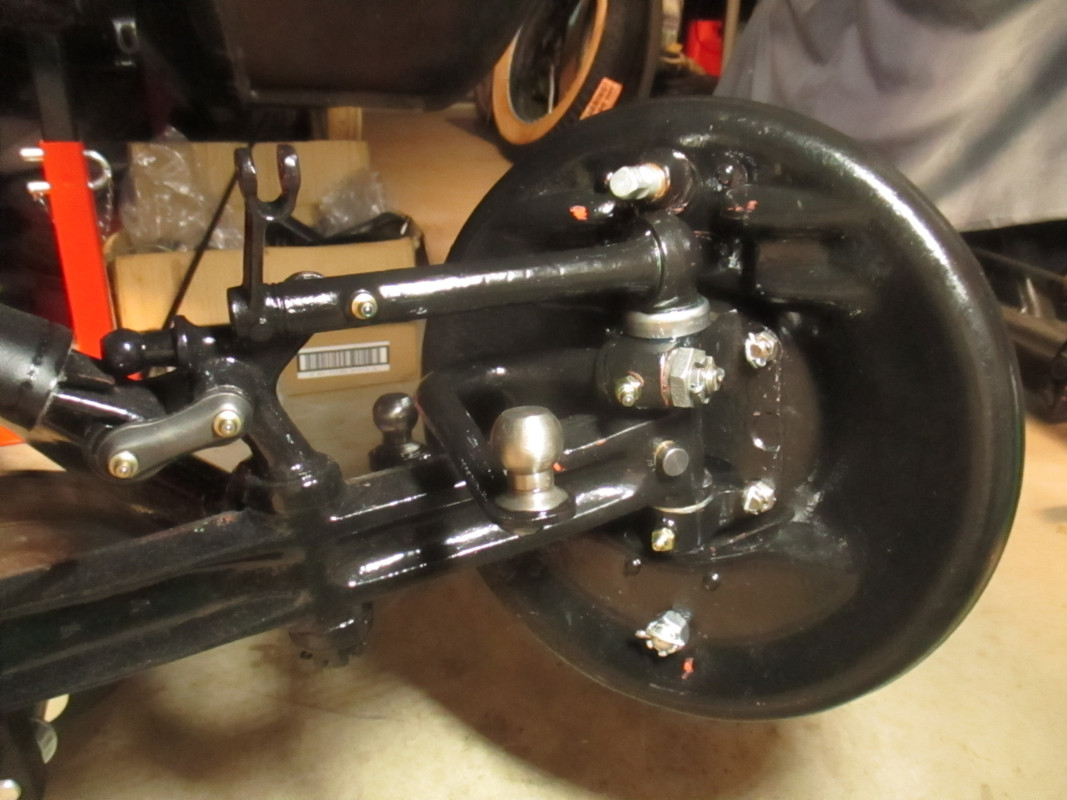
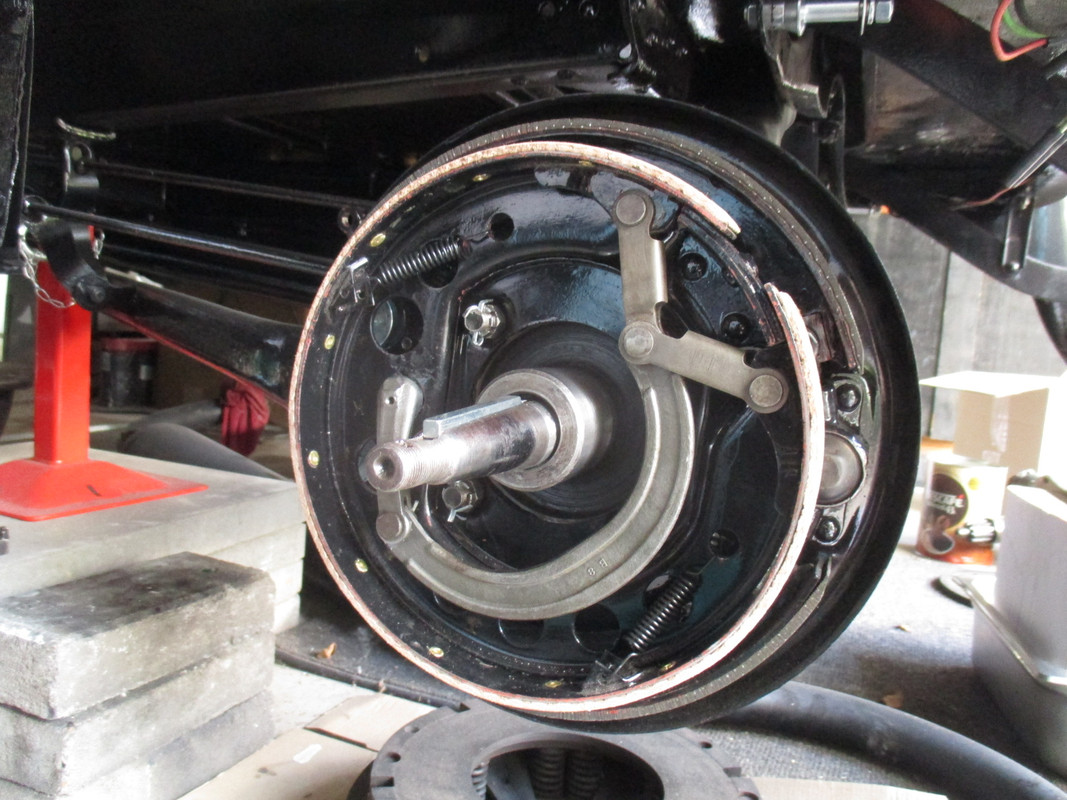
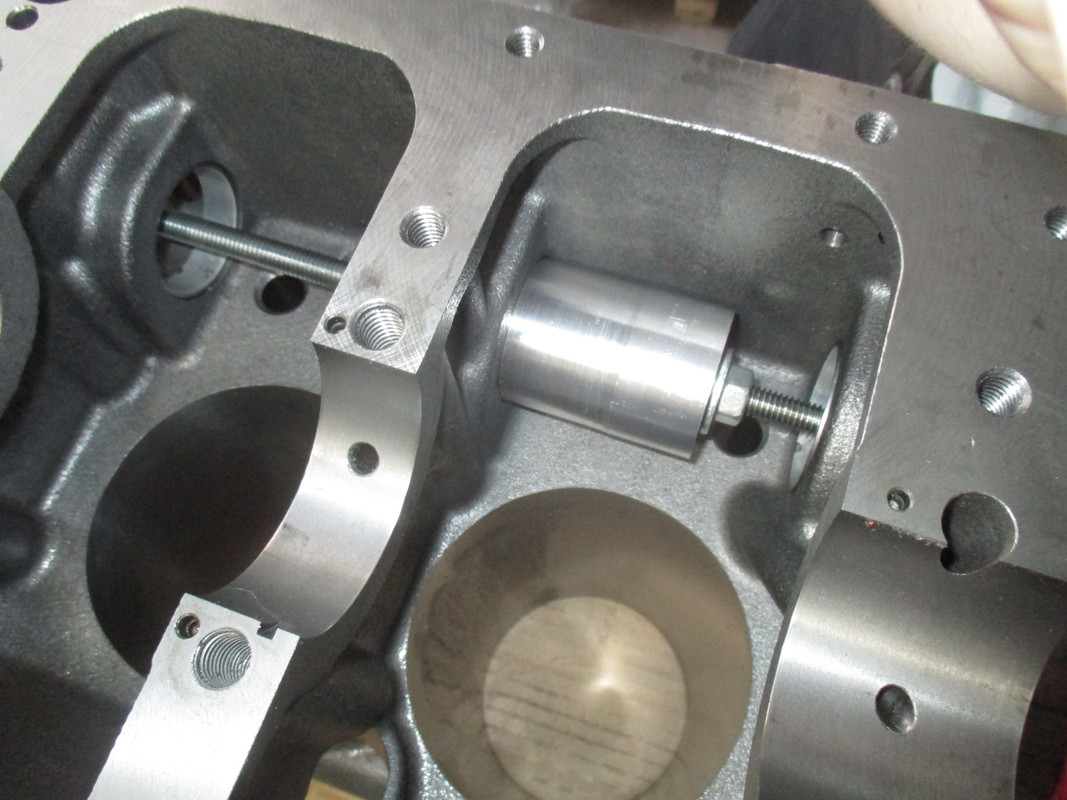
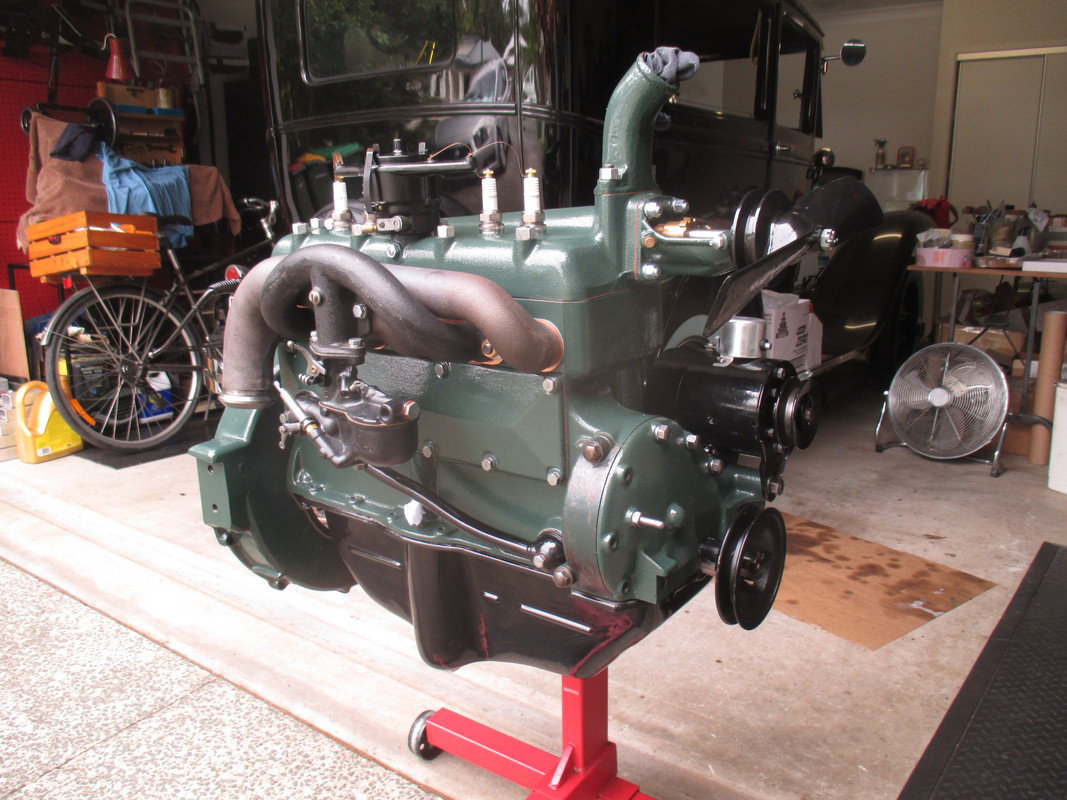
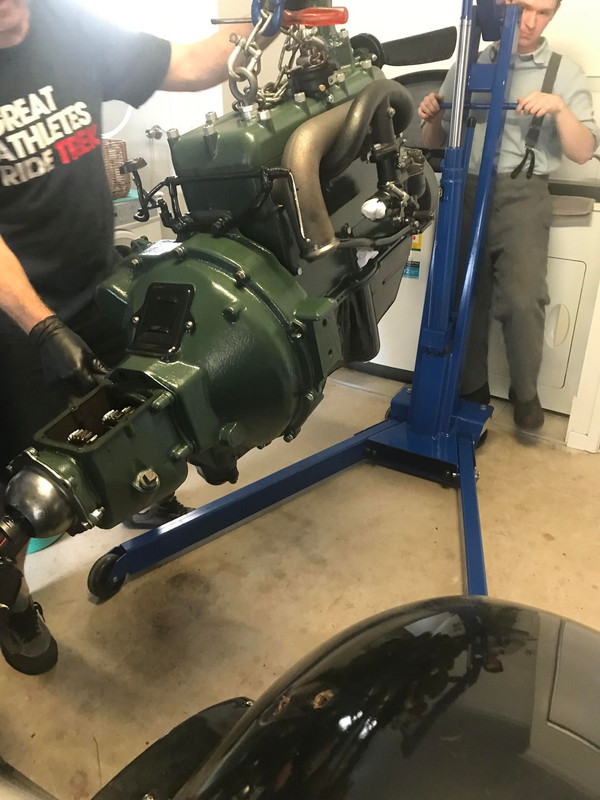
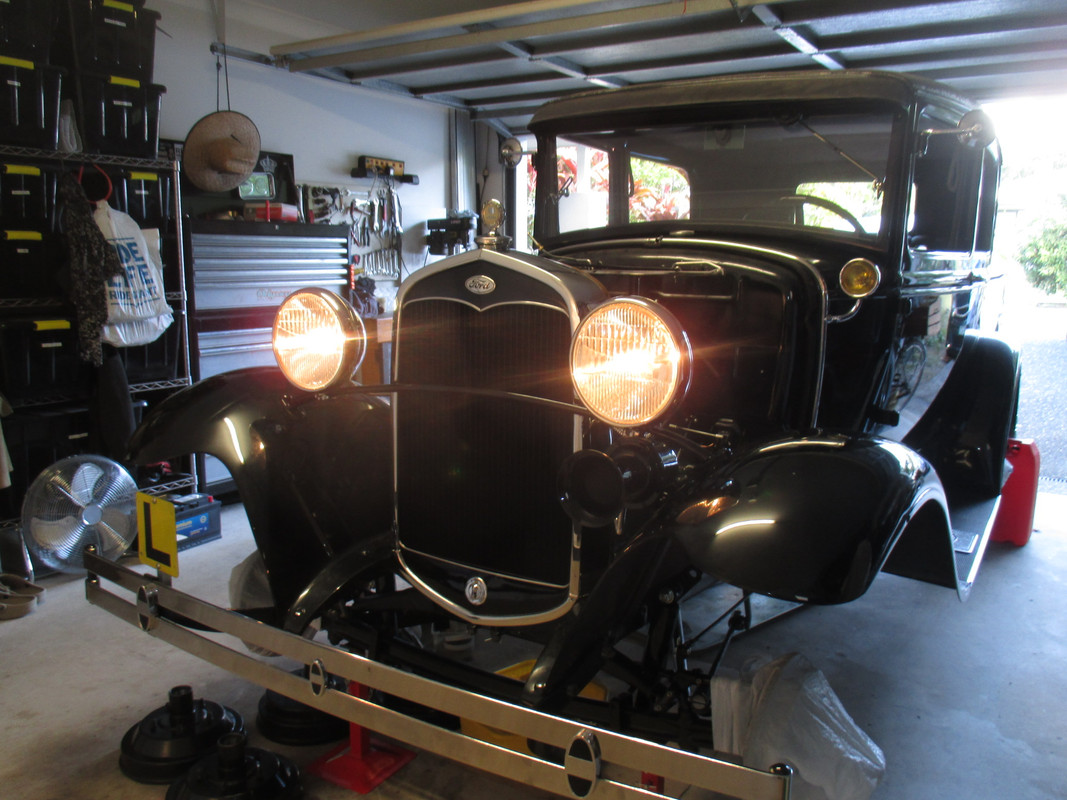
On this 95th anniversary of the Model A's unveiling to the world, my humble Tudor reaches a little milestone of it's own. The front axle is complete, (minus fitting refurbed tie rod and drag link) ready for it's new iron drums and Timken bearings.

To summarise 4 months of work: New spring & shackles, along with tube-type shock absorbers fitted, roller tracks welded and re-ground, brake rods welded and re-drilled, all new pins, rollers, bushes, shafts, new kingpins, (properly shimmed to this axle) brake adjusters, front brake shoe floaters fitted for improved braking, all grease nipples standardised with modern fittings, (they were a mix of proprietary Ford, and modern grease nipples - screw you Henry Ford) and new steering ball joints, along with the above mentioned drums and bearings.

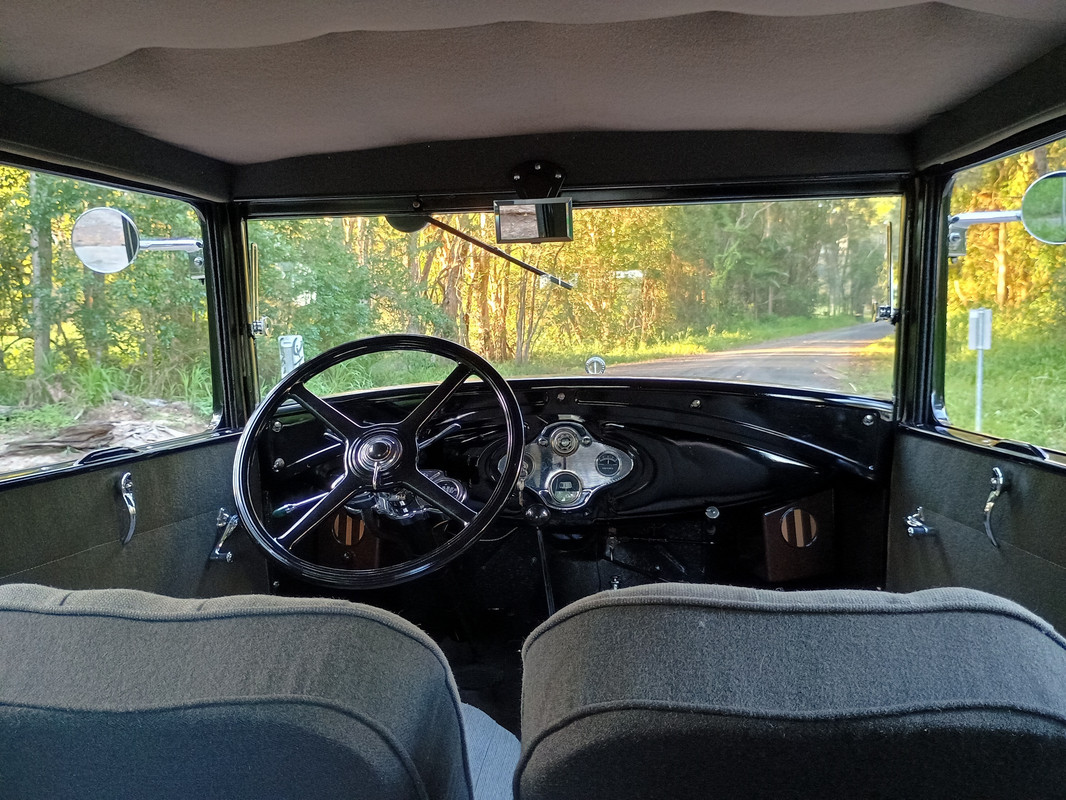
In other words, it's had everything. This thing should drive like it's new.
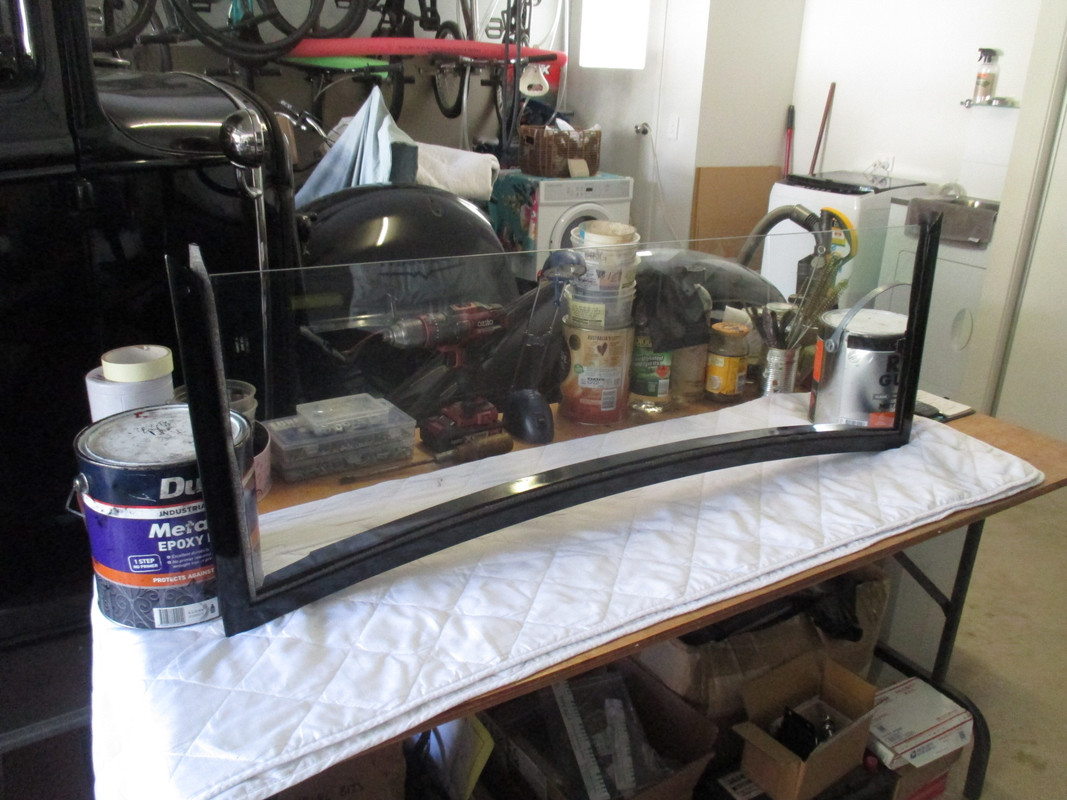
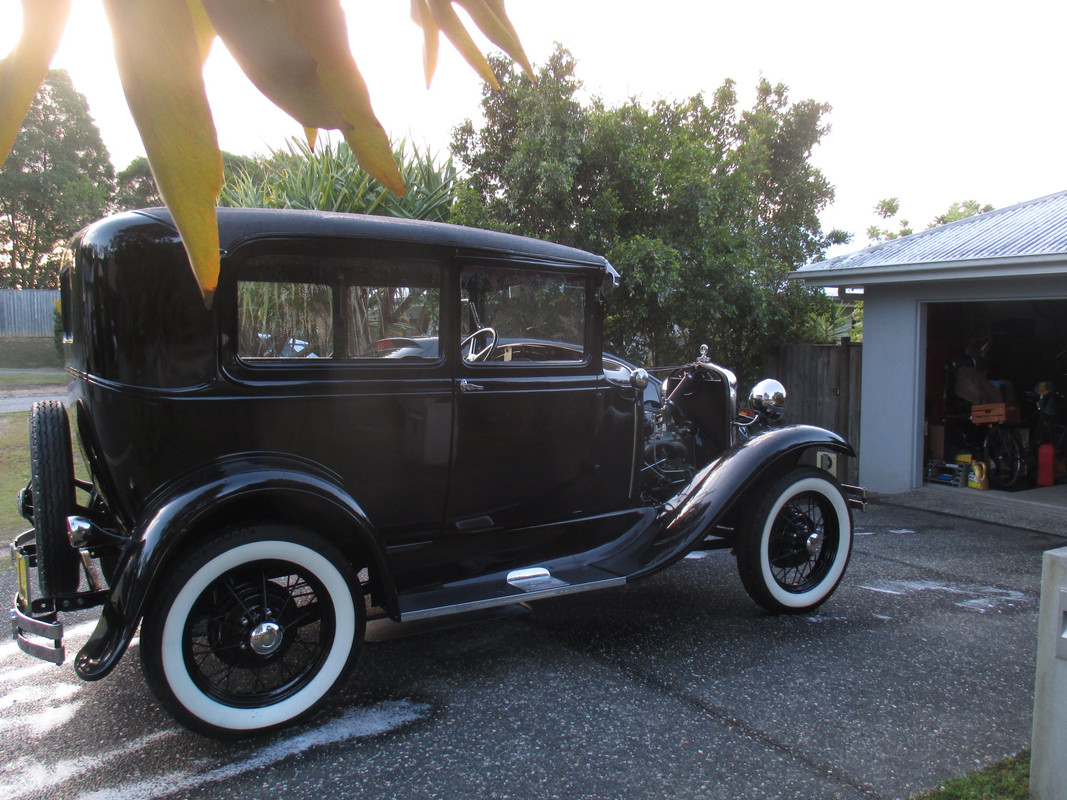
Image


10/12/22
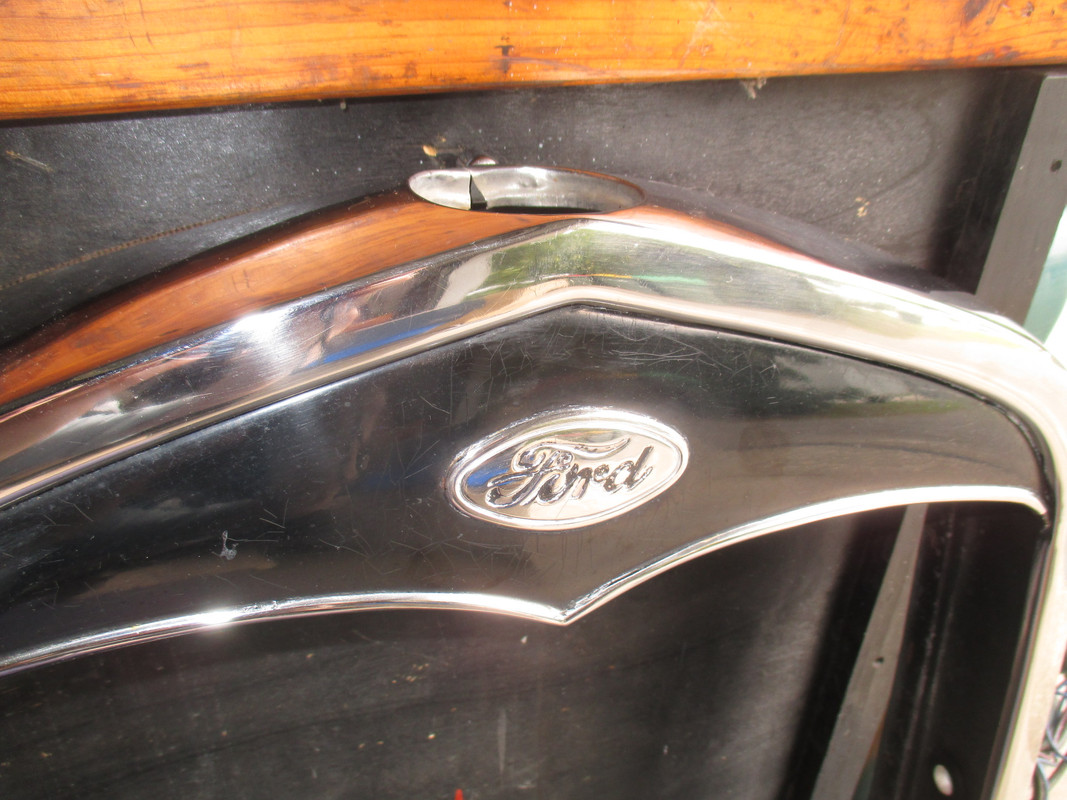
The radiator shroud looks a bit sad. I was able to strip the paint without further scratching to the stainless, by laying the shroud face-up on the bench, covering the paintwork with old rags, and soaking them in dirty thinners.
All the little kinks and bends in it were straightened out to be best of my ability. Not perfect, but a lot better than it was.
Test-refitting to the old radiator showed where the shroud had been touching the radiator neck, and crudely opened out, resulting in the cracked top ring. Some more careful bending improved the split, which thankfully is hidden quite well by the radiator cap.

With all that out of the way, the process of sanding out 90 years of scratches began..
Image


19/12/22
Returned from the Model A Club xmas party yesterday.
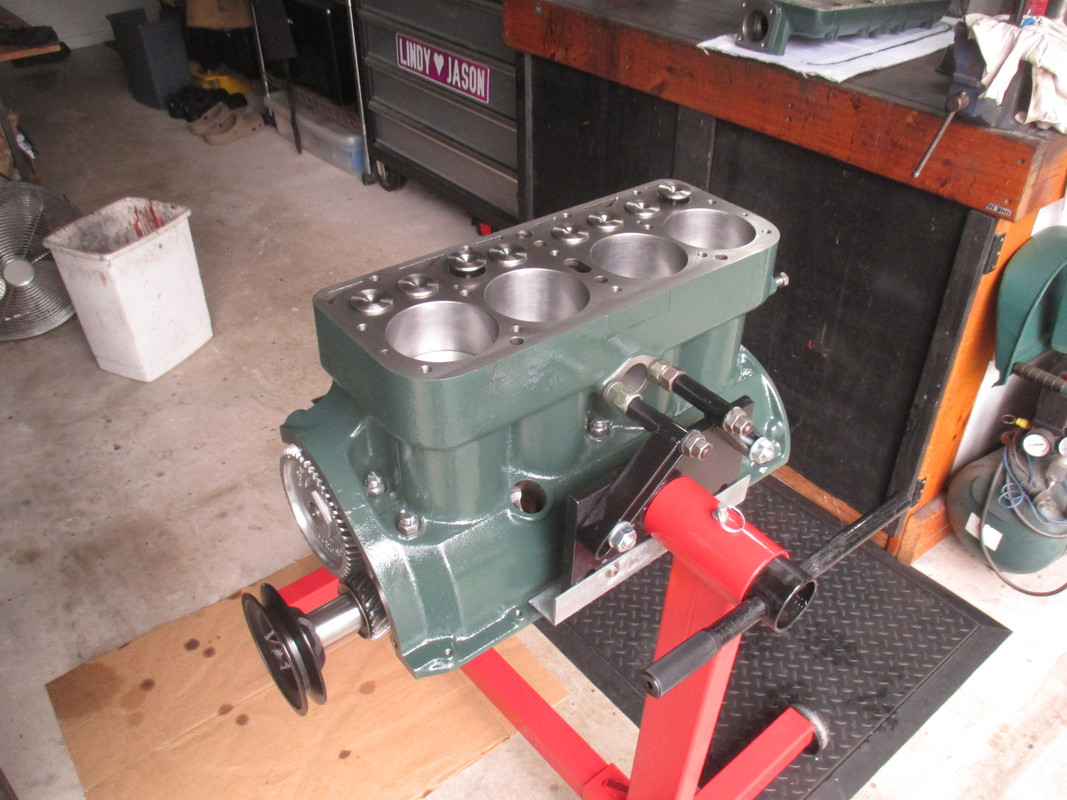
The ruined engine quickly found a happy new owner, and I sold enough leftover parts to almost recover the cost of the sandblasting and re-plating.

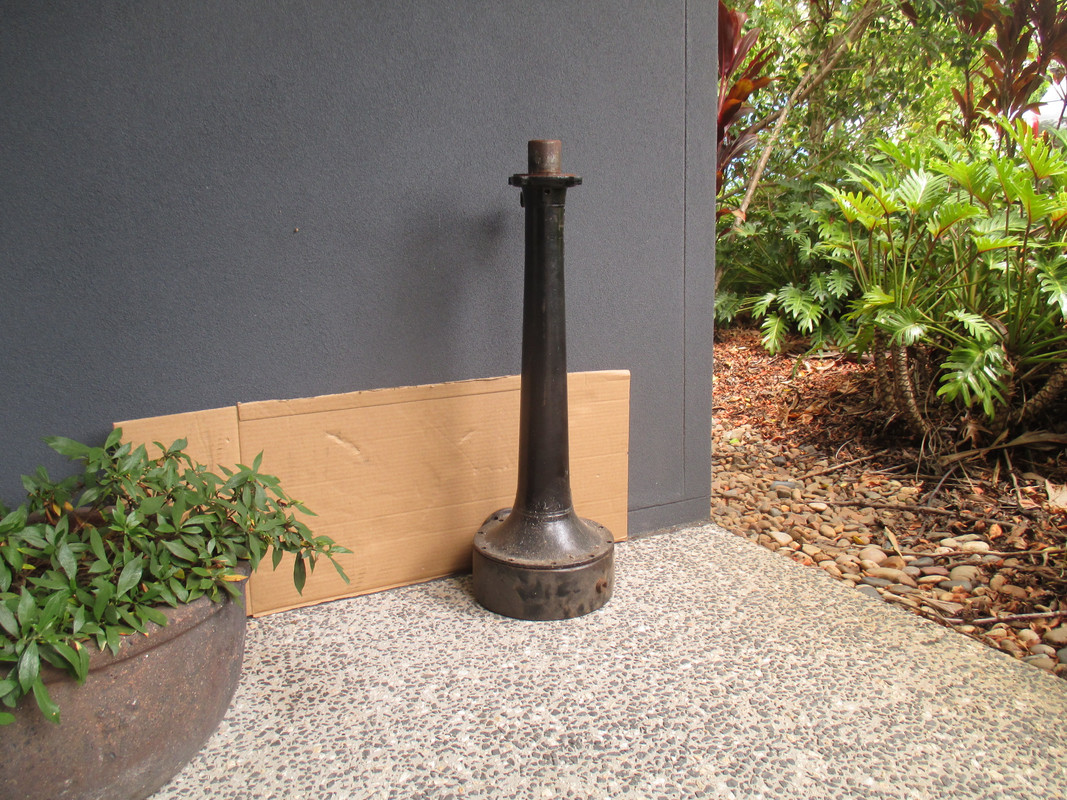
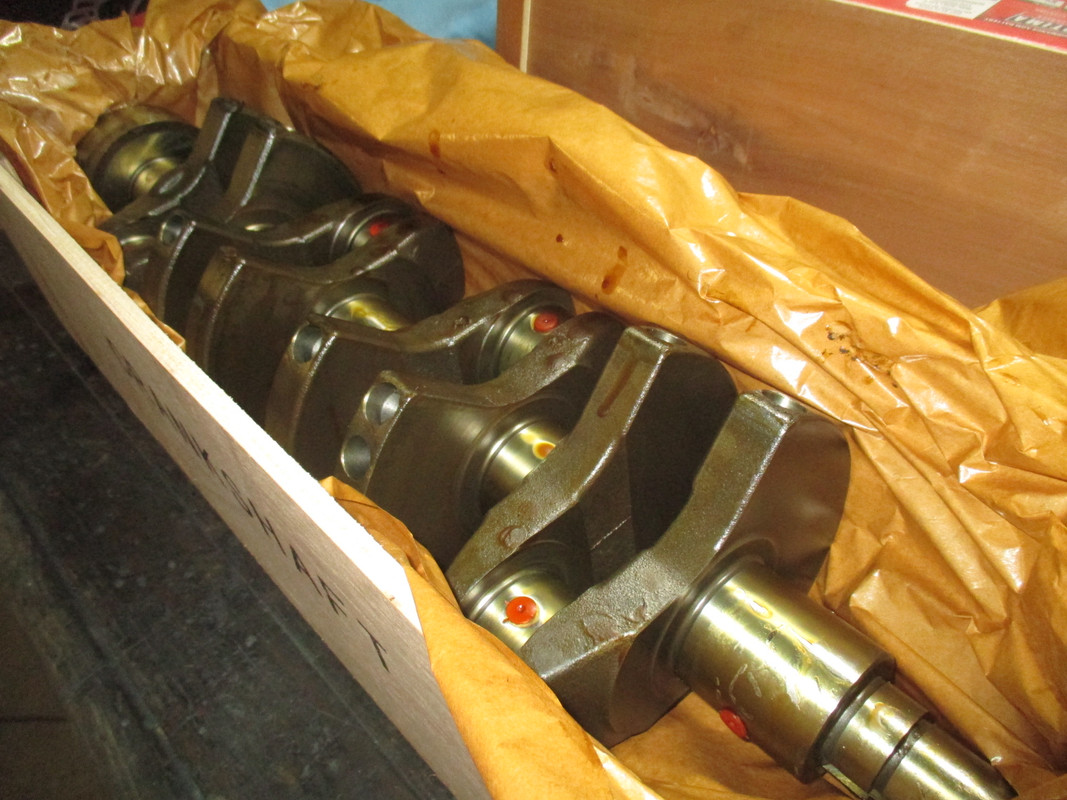
That spare rear axle I mentioned earlier, came with three axle housings and two "banjo" differential housings.

After picking the best housings for future use, I realised the surplus housings would make an ideal 16mm scale industrial chimney.
Picture the cardboard as a corrugated sugar mill structure. ;) The parts being hollow would suit a smoke generator, too.
Image
Last edited by Old Man Aaron on Sat Feb 24, 2024 11:48 pm, edited 1 time in total.
Regards,
Aaron - Scum Class Works

User avatar
Old Man Aaron
Trainee Driver
Trainee Driver
Posts: 808
Joined: Wed Oct 19, 2016 11:08 am
Location: Sunshine Coast QLD, Australia

Re: That Car I Keep Alluding To

Post by Old Man Aaron » Sat Feb 24, 2024 10:46 am

30/12/22
Took the easy way out of filling the pitting and dings in my wheels last week, hitting them with two heavy coats of spray putty. This smoothed out most of the pitting with zero further work, but the deeper pits and dents needed sanding flush.
Today I sanded out 4/5 wheels, each took an hour.. Man, every job on these wheels takes forever.
Did I mention I'm putting whitewalls back on it? :lol: :roll: :banghead:

The incorrect 1928 headlight bar was swapped out for a 1930-31 bar, which is what you see here. I got some 2-pack spray cans colour matched black for these and a few other parts - eg. horn. Had to buy a respirator for this paint, that 2-pack hardener is nasty stuff.
Image


22/01/23
Rear brakes complete with handbrakes, new drums can go on for good. Wheels are painted, tyres and hubcaps fitted.
Car went back on it's wheels the next day.
Image


23/01/23
The new engine has arrived. And by that, I mean brand new. It's called a Burtz engine, after it's designer. A drop-in replacement for the original.
It looks, sounds, and works just like the original Ford block, while addressing it's flaws and vastly extending it's life between overhauls.
  • It has 5 main bearings. (Ford used 3, not enough support for the crankshaft)
  • Those bearings are replaceable shells, (available everywhere and can be replaced in your garage - Ford used a poured molten whitemetal bearing called babbit, which today is an expensive lost art to have done - Similar to white-metalled steam engine bearings.)
  • The crankshaft is much beefier, has counterweights and is balanced to modern engine tolerances. (Original cranks are relatively flimsy and flex a little when under heavy load. They also have no counterweights and relatively primitive balancing, so they vibrate at high RPMs)
  • High-pressure forced lubrication throughout. (Original engines' oil pumps only lifted the oil halfway up the engine, where it ran by gravity to the main bearings only. Everything else was "splash-lubricated" by the big ends of the rods dipping into the oil and spraying it everywhere inside the engine)
Along with many other improvements. You can use the same pistons, camshaft, valves, cylinder head, carburettor, distributor, flywheel/clutch as an original engine. Or whatever upgrade parts you want, weather you're replicating a bone-stock engine as it came from Ford, something with a little more guts to keep up in modern traffic, or a full-blown hot rod.

And the best part: It costs the same as having an original block rebuilt!
Image


The new engine kit is of extremely high quality, well-packed and well-protected from corrosion.
Image


My engine, Burtz Block No.305, will look bone stock on the outside.
After Model A production ended in late 1931, Ford produced the Model B. It was essentially a slightly more powerful and efficient Model A.
The shape (profile) of the camshaft lobes was one reason for this improvement. The new camshaft I've chosen is also a Burtz product, and uses a Model B cam profile, which has been tweaked slightly again, for a further improvement.

I will also be using a Burtz 6.5:1 high-compression cylinder head, for a large boost in power and mileage over the original 4.2:1 head.
Like the block, it's indistinguishable from an original by looking at it.
Image


28/01/23
The door latches were badly worn out. You had to slam the driver's door very hard to make it latch, which caused other damage for me to fix.
The worn away latches and strikers were welded back up, re-drilled, given new pivots, new springs and new rubber bumpers.
The doors themselves take a good bit of fettling with shims between the car's frame and body, to get everything aligned properly.
But they now shut like they're new, good as any modern car.
Image


29/01/23
Inside the doors were treated similarly to the body. Both driver's side window winders were worn out (they always are) and were replaced.
Previous owner thought that slopping grease everywhere inside the door, then forcing the winder handles and breaking them repeatedly, was the solution..
Original passenger side were restorable. Windows themselves took a fair bit of attention to once again slide smoothly in their felt tracks.
Who'dve thought that if you fix it right, it just works?
Image


09/02/23
To save the builder some money, the job of deburring the block and cleaning out every trace of casting sand and machining swarf, is left to the builder.
A pressure washer, (you will get very wet) compressed air, brake cleaner and WD40 to stop the iron flash rusting will be your friends here.
Oh, and a lot of patience. Or masochism, whatever works for ya. :lol:
Image
Regards,
Aaron - Scum Class Works

User avatar
Old Man Aaron
Trainee Driver
Trainee Driver
Posts: 808
Joined: Wed Oct 19, 2016 11:08 am
Location: Sunshine Coast QLD, Australia

Re: That Car I Keep Alluding To

Post by Old Man Aaron » Sun Feb 25, 2024 1:00 am

01/02/23
Because of the camshaft I chose, two of the camshaft bearings in the engine block had to be pulled out and drilled for an oil hole, then pressed back into place. To do this, you need to machine an aluminium mandrel. That lump of aluminium was later used for the chimney of my boneyard Koppel loco.
Image


25/02/23
Indicators hidden in the tail and cowl lights.
No bandaid LEDs to spoil the appearance. No 12V conversion. Just rebuilt all lights, dedicated grounds added to everything for long-term reliability.
Image


18/03/23
Fake bakelite speakers made from MDF and styrene. A "what-if?" period accessory to fit "The New Ford".
They have USB computer speakers inside them. Just plug into your phone's audio headphone jack and you're sorted.
In practice, they're not loud enough above 25MPH. I'll eventually get round to doing something about it..
Image


Windscreen rebuilt with new glass and seals. A silicone-lathered debacle of idiocy that I won't go into. :cussing:
Image


27/03/23
The bumper clamps were an inexcusable mess of mismatched broken plastic and sloppily painted blue infills.
Once stripped, I just polished them up and infilled with black. Can't be stuffed getting colour-matched Ford Blue for these, they wouldn't match the car anyway.
Image


01/04/23
Starter overhauled. Bendix is damaged, will get a US-made replacement..
Image


Stock fuel shutoff leaked. They're a tapered valve and always leak. Fitted a inlet filter and ball valve to be done with it.
Black paint helps hide things.
Old valve functions only as a pipe-elbow now. After almost 1000 miles at the time of writing (25/02/23) the new valve has yet to leak a drop.
Image


09/04/23
38 hours of wet sanding, and a few more of buffing and painting, along with fresh lacing and grommets, saw the radiator shroud refreshed.
Thankful that's over, but I'm really happy with it.
Image


04/05/23
The headlights were your standard fare for vintage car headlights - borderline useless. Wrong reflectors, (even mismatched between the two)
bad bulbs and sockets, poor grounding, and the mounts were seized up so you couldn't even aim them.
Here, the difference after sanding and buffing is evident.
Image
Regards,
Aaron - Scum Class Works

User avatar
Old Man Aaron
Trainee Driver
Trainee Driver
Posts: 808
Joined: Wed Oct 19, 2016 11:08 am
Location: Sunshine Coast QLD, Australia

Re: That Car I Keep Alluding To

Post by Old Man Aaron » Sun Feb 25, 2024 1:24 am

08/06/23
The engine progresses in spite of poor lighting.
It's like a Roundhouse kit - Pre-machined and more-or-less ready to bolt together, or, you can fettle and fiddle with it for a better result.
Image


04/07/23
After some problems, block No.305 is slowly getting there. A dim light is finally starting to appear at the end of the tunnel.
Image


06/07/23
Shim brass from the modelling scrap box came in handy once again, getting the flywheel housing (quite literally) dialled-in to correct alignment.
Image


15/07/23
Engine is about complete. Still waiting on the oil pump and filter bracket, those can be fitted with the engine in the car.
Just as well, I've run out of work to do, and refitting the engine opens up a wealth of small jobs to keep things moving.
The carburettor and distributor were rebuilt by another "A" friend. They still needed extensive fettling, but that's carbs and dizzies for ya..
Image


15/07/23
The aftermarket front engine mount spring wore halfway through the front cross-member over the years. Besides fitting a repro factory leaf spring, the cross-member was welded back up.
Image


27/07/23
A roadside toolkit was cheaply cobbled together over a morning at the big annual swap meet, held by the local car club.
A 1:18 scale F-100 for the garden modelling was also picked up for cheap. :thumbup:
Image
Regards,
Aaron - Scum Class Works

User avatar
Old Man Aaron
Trainee Driver
Trainee Driver
Posts: 808
Joined: Wed Oct 19, 2016 11:08 am
Location: Sunshine Coast QLD, Australia

Re: That Car I Keep Alluding To

Post by Old Man Aaron » Sun Feb 25, 2024 2:00 am

12/08/23
Borrowing the crane from Dad's work again, the complete engine/gearbox assembly goes in. With little garage room to spare.
Image


23/08/23
"Retrobelt" seatbelts were installed through the body crossmember, which is reinforced from below with a length of steel angle.
They'll keep you inside the car, at least. A fire extinguisher was fitted to the floor behind the driver's seat.
Image


05/09/23
The new engine runs.This is the first engine I've worked on seriously, and it's turned out exactly as I'd hoped. New radiator will keep it cool.


14/09/23
Now we're getting somewhere.
Image


22/09/23
Oil leaks are (mostly) sorted, and wheels are back on.
After 2000+ hours of work and entirely too much money, "Minnie" moved under it's own power for the first time in 17 months.


25/09/23
​Now to wash 17 months of grime off. Paint looks good at a distance, but to pass the 2ft test it needs some serious clay-barring and polishing - then there's all the touchups!
Image
Regards,
Aaron - Scum Class Works

User avatar
LNR
Driver
Driver
Posts: 1542
Joined: Sat Feb 27, 2016 5:26 am
Location: Australia

Re: That Car I Keep Alluding To

Post by LNR » Sun Feb 25, 2024 3:59 am

A thorough job just like you do on your locos Aaron, and you can use the horn without the prince of darkness showing up! I have a little Healey with a Lucas electrical system so know all about the prince.
Interestingly, I mentioned your purchase to my club friend and when I said a Tudor with wires and white walls he thought he knew of the car. Pete keeps a close eye on cars for sale in the States and coming into Australia.
Grant.

User avatar
LNR
Driver
Driver
Posts: 1542
Joined: Sat Feb 27, 2016 5:26 am
Location: Australia

Re: That Car I Keep Alluding To

Post by LNR » Sun Feb 25, 2024 4:07 am

A PS to the above,
Pete also said he hoped the front engine mount spring hadn't worn too far through the front cross member. But I see you've been there, done that.
Grant.

User avatar
ge_rik
Administrator
Administrator
Posts: 6580
Joined: Sun Oct 25, 2009 10:20 pm
Location: Cheshire
Contact:

Re: That Car I Keep Alluding To

Post by ge_rik » Sun Feb 25, 2024 9:21 am

That engine sounds a whole lot sweeter. A testament to all the hard work you put in.
Marvellous!

Rik
------------------------
Peckforton Light Railway - Blog Facebook Youtube

User avatar
-steves-
Administrator
Administrator
Posts: 2444
Joined: Thu Jul 28, 2011 1:50 pm
Location: Cambridge & Peterborough

Re: That Car I Keep Alluding To

Post by -steves- » Sun Feb 25, 2024 9:33 am

I have to ask, but why us there an L plate on it?

Very sweet resto job, not envious at all :mrgreen:
The buck stops here .......

Ditton Meadow Light Railway (DMLR)
Member of Peterborough and District Association
http://peterborough.16mm.org.uk/

User avatar
Peter Butler
Driver
Driver
Posts: 5245
Joined: Sun Sep 09, 2012 10:33 pm
Location: West Wales

Re: That Car I Keep Alluding To

Post by Peter Butler » Sun Feb 25, 2024 11:05 am

A truly incredible story of ambition and dedication. You can't begin to imagine how impressed I am with what you have achieved. I have read every word of your journey and, despite not understanding car mechanics, have thoroughly enjoyed every moment.
I'm envious of the F-100 Pick-up model truck too.
The best things in life are free.... so why am I doing this?

User avatar
Lonsdaler
Driver
Driver
Posts: 1229
Joined: Tue May 20, 2014 9:50 am
Location: North Yorkshire

Re: That Car I Keep Alluding To

Post by Lonsdaler » Mon Feb 26, 2024 8:06 pm

Absolutely incredible effort there, Aaron, and the first drive video was worth the wait. Your Mom (I presume) is right - it's pretty cool! Well done.
Phil

Sporadic Garden Railer who's inconsistencies know no bounds

My Line - https://gardenrails.org/forum/viewtopic ... 41&t=11077

User avatar
Old Man Aaron
Trainee Driver
Trainee Driver
Posts: 808
Joined: Wed Oct 19, 2016 11:08 am
Location: Sunshine Coast QLD, Australia

Re: That Car I Keep Alluding To

Post by Old Man Aaron » Tue Feb 27, 2024 12:36 pm

-steves- wrote: Sun Feb 25, 2024 9:33 am I have to ask, but why us there an L plate on it?

Very sweet resto job, not envious at all :mrgreen:
Well, I did say this is my first car. ;)

Vehicles close to 16mm scale are hard to find for reasonable money. I also have two '31 Model As in 1:18 (a ute and a Tudor, the latter of course will be painted to match it's 12" scale counterpart) and three '14 Model Ts, one of which is 1:16 scale.


I couldn't take credit for the whole thing if I wanted to, I've been lucky to receive a hell of a lot of help from many people. Job ain't over yet...
I won't go into all the boring fettling and troubleshooting, but I will say it accounted for another few hundred hours. :oops:
Somewhere along the line, the car was placed on full registration.


01/11/23
There's something I didn't mention when we installed the engine and gearbox - the gearbox itself, while it currently performs without issue, is very worn. It's also a "crash" gearbox. Meaning no synchronisers (that we take for granted today) in the gearbox.
Ford started fitting synchros in '32.

Now, there are three things I struggle with, no matter how much I work on them: Human contact, tying knots, and driving.

Me driving a car like this, double-clutching and rev-matching with every downshift, in an already overpopulated tourist trap set to double in the next decade, makes "begging for trouble" an understatement. This is why Mum talked me into getting a synchronised gearbox for the Model A.
These are made to order in California, and temporarily fitting the stock gearbox saved 3 months of delay - it just means Dad and I had to pull the rear axle to swap the gearbox over a weekend.
Image


03/11/23
The neat thing about the Mitchell synchro gearbox, is that it's a drop-in replacement. They take an original gearbox, restore only the case and tower, replacing the worn-out original guts with new gears made in-house, besides new seals and bearings.
They even offer three different gear ratio options - as-original, or 2nd @ 15% higher, or reverse, 2nd and 1st @ 15% higher.
Image


29/11/23
A new top is to be fitted. The old trim strips were pried away. On a Tudor, the roof frame, floor and various interior tacking spots are timber.
Image


8/12/23
Monday. Driving test day. Into the Xmas traffic swarm we go..
Apparently, due to the fact this car's indicator lights are red (not amber) this makes the car ineligible as a test vehicle. This is not mentioned in the test vehicle requirements on TMR's website, nor was it an issue in getting the bloody thing roadworthy certified - older cars are exempt from the amber indicator law.

Rebooked the test for 2 days later. To the car parts shops!
Checking both places in town for some kind of amber trailer lights I could adapt to run on 6V, slap onto the rear bumpers, then tear 'em off when I'm done, yielded no results.

Then, an idea. The tail lights on my vintage caravan have amber covers. I can use those covers to counterfeit some indicators.

Wires were soldered directly to a pair of spare brake light bulbs. "Sockets" are just cut-down aluminium tube from pool fencing. The backing and base panels are 3mm PVC foamboard, painted with el-cheapo craft acrylic. Aluminium tape gives a reflective surface. Everything is glued together with rubber cement, and mounted with double-sided tape. Temporary wires were run neatly where they could be seen on the rear bumper irons, then as-the-crow-flies underneath the car - a proper zip-tie special.
Image


Failed that test, no surprises there. Between frequent rain and a top that isn't waterproof, general poor circumstance, part failures, being sent the wrong roofing vinyl, other people screwing around, et. al, I've hardly been able to drive these past two months at all.
With xmas in the way, it'll be another few weeks of twiddling my thumbs after this roof is finished..


11/12/23
The front end of the LH side gutter is rusted through - this of course had been filled with bathroom silicone.
Image


12/12/23
Railway modelling comes in handy once again. A piece of shim brass was formed and tinned, along with tinning the gutter. Some heat and a little extra solder got it fixed. Not the nicest thing in the world, but I'm happy with my first go at this sort of thing.
With a coat of paint, even I don't notice it.
Image


28/12/23
The new roof vinyl was stretched over the car, left in the sun for a few hours so it could be stretched again, then tacked in place. A lot of time was taken (and excess mastic sealant squeezed out) to ensure the new top would be waterproof in daily use.
The trims and gutters will also get the sealant - never take chances with water.
Image


29/12/23
The RH gutter wasn't rusted out, but had been mangled so badly it would never sit right. I suspect the past restorer removed that side first, then did a better job on the other.

A new gutter had to be made, as the parts dealers were shut for xmas break. Some "J" section aluminium from the Evil Green Shed - as Dazza rightly puts it - was cut down to closely match the height of the original steel gutter.
It was then annealed and bent around a wooden former to fit the car.
Image


Never done anything like this, but I'm really pleased with how the gutter came out. I've just nailed it on with plenty of sealant. Not factory, but this isn't a fine point car. It's a driver, where "period-plausible" is my personal rule.
Image


03/01/2024
With the trims all fitted and sealant cured, they could be masked off for painting.
Image


08/01/24
One of the first jobs I did on this car was stripping and painting beneath the rear arches.
One of the final jobs was the front arches.
The process of paint touchup then began. That took three days. :roll:
Image


The car came here in 2019 through a bloke by the name of Keith Sutton. The guy I bought it from, bought it from Keith.
I've recently been in contact with Keith to see if he had any information about the car's past life in the Northern Hemisphere.
As it turns out, it came from a town North of Milwaukee. I have enough information to contact any local Model A clubs, see if I can dig up anything further..
Regards,
Aaron - Scum Class Works

User avatar
drewzero1
Administrator
Administrator
Posts: 486
Joined: Fri Apr 21, 2023 4:35 pm
Location: WI, US

Re: That Car I Keep Alluding To

Post by drewzero1 » Tue Feb 27, 2024 2:14 pm

Wow, that's my area... it's entirely likely that I've seen this car in person! About 15-20 years ago I was a regular at the Iola car show and the Pierce Park one in Appleton, both within 1-2 hours northwest of Milwaukee. Always wished then that I had a classic car, now I know how much work it is to get them anywhere near showable (because mine sure aren't!) :lol:

User avatar
dudeface
Fireman
Fireman
Posts: 295
Joined: Tue Nov 14, 2023 3:35 am
Location: Dodge Co. WI
Contact:

Re: That Car I Keep Alluding To

Post by dudeface » Wed Feb 28, 2024 11:53 pm

drewzero1 wrote: Tue Feb 27, 2024 2:14 pm Wow, that's my area... it's entirely likely that I've seen this car in person! About 15-20 years ago I was a regular at the Iola car show and the Pierce Park one in Appleton, both within 1-2 hours northwest of Milwaukee. Always wished then that I had a classic car, now I know how much work it is to get them anywhere near showable (because mine sure aren't!) :lol:
My grandpa has been driving his blue '53 Skylark to Iola for years, so you might have seen that at some point too...
https://m.youtube.com/@Dudeface167
Miles-- Trains are fun. With the exception of track power. Argh!

User avatar
drewzero1
Administrator
Administrator
Posts: 486
Joined: Fri Apr 21, 2023 4:35 pm
Location: WI, US

Re: That Car I Keep Alluding To

Post by drewzero1 » Thu Feb 29, 2024 1:23 am

dudeface wrote: Wed Feb 28, 2024 11:53 pm
My grandpa has been driving his blue '53 Skylark to Iola for years, so you might have seen that at some point too...
Probably! I love those old Buicks. My parents had a '95 Park Avenue and I loved the styling callbacks to the majestic beasts Buick was putting out in the 50s. (Swoopy curves, toothy grille... just missing the massive chrome bumpers and Ventiports.)

User avatar
Old Man Aaron
Trainee Driver
Trainee Driver
Posts: 808
Joined: Wed Oct 19, 2016 11:08 am
Location: Sunshine Coast QLD, Australia

Re: That Car I Keep Alluding To

Post by Old Man Aaron » Thu Feb 29, 2024 5:20 am

Small bloody world! :lol: The address I have is just an hour South of Appleton, according to google maps.
Had to look up what ventiports were, what a neat idea. :thumbup:

Finally passed my learner's test three weeks ago. Those awful temporary rear indicators were banished and dismantled the following day. :anhammer
With (at the time of writing) almost 800 miles on the clock, the fettling/run-in stage is coming to an end.

I keep forgetting to get those post-restoration glamour shots, so here they are. At this point, the cat was let out of the bag among friends and family - I've kept this car a secret for two years, three if you count the time spent searching for it.

I promise both headlights are the same brightness in person. :roll: They light up the road like any other car - who says you need 12V or LEDs?
Image

Image

Image

Image

Image

Image


So after three years, what now?

Find some work and keep putting things back together, for a start.

I've a new project in mind. Very early days, barely into the "is this even feasible?" stage.
A blank, cabin-shaped space at the back of my grandparents' property. In beautiful countryside. Awful lot of space for a garden..
IMG_20240211_171043456 - Copy.jpg
IMG_20240211_171043456 - Copy.jpg (1.29 MiB) Viewed 390 times
Regards,
Aaron - Scum Class Works

User avatar
LNR
Driver
Driver
Posts: 1542
Joined: Sat Feb 27, 2016 5:26 am
Location: Australia

Re: That Car I Keep Alluding To

Post by LNR » Thu Feb 29, 2024 8:15 am

Picture Perfect, and still left hand drive. Drive with pride Aaron.
Grant.

User avatar
-steves-
Administrator
Administrator
Posts: 2444
Joined: Thu Jul 28, 2011 1:50 pm
Location: Cambridge & Peterborough

Re: That Car I Keep Alluding To

Post by -steves- » Thu Feb 29, 2024 9:46 am

Well done, a cracking job :salute: :thumbup:
The buck stops here .......

Ditton Meadow Light Railway (DMLR)
Member of Peterborough and District Association
http://peterborough.16mm.org.uk/

Trevor Thompson
Trainee Driver
Trainee Driver
Posts: 978
Joined: Fri Oct 05, 2018 6:30 pm
Location: South West Wales

Re: That Car I Keep Alluding To

Post by Trevor Thompson » Sat Mar 02, 2024 3:22 pm

Magnificent!

I'm really impressed.

Well done.

Trevor

User avatar
BertieB
Fireman
Fireman
Posts: 369
Joined: Mon Nov 13, 2017 12:13 am
Location: London
Contact:

Re: That Car I Keep Alluding To

Post by BertieB » Sun Mar 03, 2024 10:14 am

Wonderful! Congratulations.

Post Reply

Who is online

Users browsing this forum: No registered users and 3 guests