An international forum for garden railway modellers in all scales and gauges. It is free to join and is funded through voluntary contributions by its members. Many thanks to all those who keep it going. https://gardenrails.org/forum/
Meanwhile, Joe at south west steam had been working away on the wheels and motion, which meant the rolling chassis could be assembled for the first time:
I had painted the wheels seperatley, which was exciting as these were the first parts in the final colour.
You can see the couplings I chose in these pictures. I also added eyebolts to the bufferbeams, partly to allow safety chains to be used if any railways I visit require it, but mostly to provide some secure tie-down points I can use when transporting the finished engine.
Re: Jynn: a 7 1/4" gauge wren
Posted: Sat Jul 04, 2020 9:01 pm
by Nomis
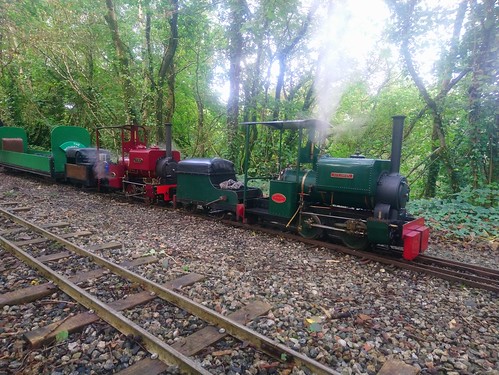
Not suprisingly the newly assembled chassis was extremely stiff, so we undertook some running-in on the kensey valley railway (the home track of south west steam).
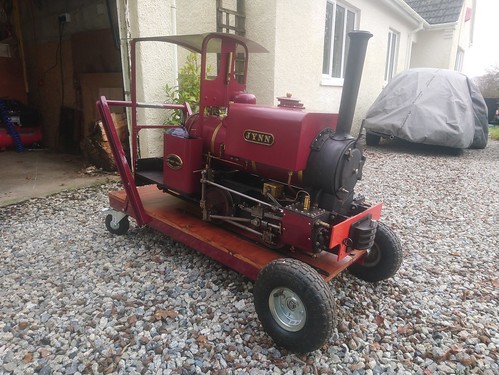
Here is the loco out in the daylight for the first time:
The bearings were so stiff that extra weight needed to be added to stop the wheels from just skidding along the rails - some very heavy steel wheels were found and balanced on top of the chassis.
Dad's 2/3 scale Lister was used as motive power. Note the difference in size between a scale model and a loco built to maximum dimensions: 20180519_104754 by simon mace, on Flickr
A few (real) miles had the main bearings and coupling rods moving a lot more easily. However, there was an interference issue with the connecting rods, so these were temporarily removed.
Re: Jynn: a 7 1/4" gauge wren
Posted: Sat Jul 04, 2020 9:04 pm
by Nomis
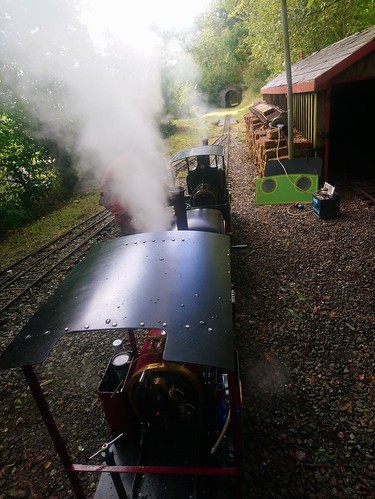
A few weeks later, and the connecting rod issue is fixed, so the wren chassis is towed around again to break in the piston rings.
A job done most effectively by my friend Lee and his loco "Tazmin":
The dome cover was a bit of an issue, as this large part was missing from the original pile of bits. Fortunatley Joe managed to find a suitable one intended for a different engine (of the same boiler diameter).
It had to be machined to allow the safety valves to vent. It is a thick iron casting, so adds some extra adhesive weight.
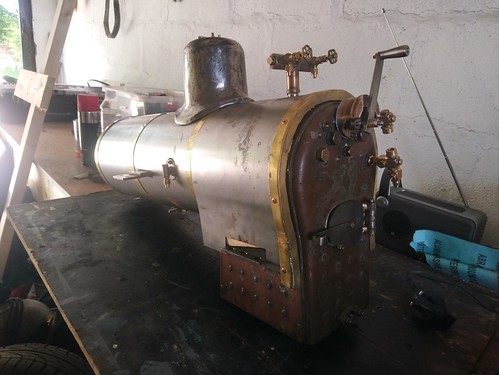
As you can see, the boiler is all copper (so will hopefully have a long working life), and has a nice deep firebox and large firedoor, which make it a very easy boiler to manage.
The regulator handle is machined from stainless steel, and is a little overscale (at my request).
The fittings into the boiler itself are all bronze, with commercial valves etc. so I can maintain / replace them when needed.
Another change from the original design drawings is the steam turret. The drawings call for a crosshead driven water pump, and a single injector that takes steam from a valve on the side of the dome (an awkward reach).
As my loco will run mostly in short bursts around the garden, the pump would not be that useful (would be better on a long club track), so instead I requested a pair of injectors. The steam turret carries four valves; the blower (centre), the two injector feeds (left and right), and the whistle valve (mounted horizontally at the right hand end). All withing easy reach when driving, and fitted with beautiful scale handwheels.
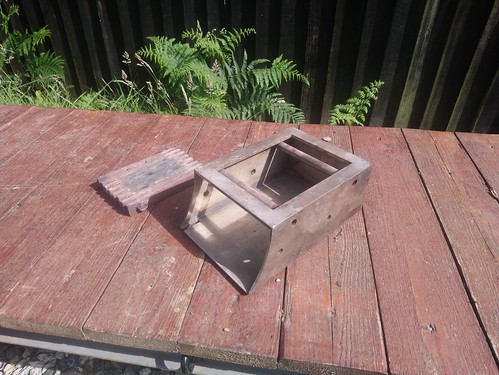
Again, all stainless steel, designed and welded by Joe. The ashpan is all laser cut, so is a very precise assembly.
The ashpan is held up by two long pins that pass through the horizontal tubes. The grate then rests on the tubes, sitting inside the rectangular cutout.
It's a shame that these parts are all hidden!
Re: Jynn: a 7 1/4" gauge wren
Posted: Sun Jul 05, 2020 9:14 pm
by tom_tom_go
The steam turret on the boiler is nicely machined (I want to remake mine one day) and a pair of injectors over a hand or axle pump backup should be fine providing you have good quality injectors that are reliable (I use Chiverton type as recommended by my club).
Re: Jynn: a 7 1/4" gauge wren
Posted: Mon Jul 06, 2020 12:01 pm
by Nomis
The injectors are a pair of "number 4s" from polly model engineering.
Pretty reliable, although I have had some issues with the feedwater warming up (hopefully fixed now).
Re: Jynn: a 7 1/4" gauge wren
Posted: Mon Jul 06, 2020 12:07 pm
by Nomis
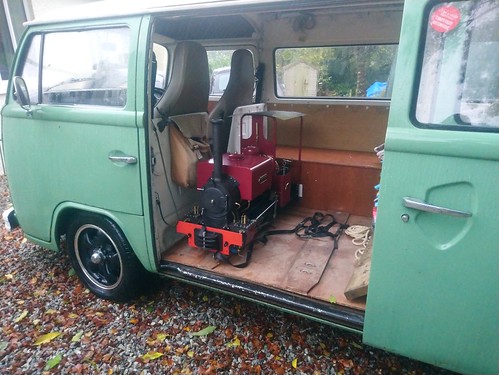
Here is the boiler cleading & dome cover all painted up and curing in my van (makes a nice hot greenhouse when the sun gets on the windows):
There have been some (minor) teething issues, but nothing I wouldn't expect from a new engine:
- getting the suspension & valve timing to work together. With hackworth gear the distance from the weigh shaft to the rear axle has quite a bit of effect on the valve events, so getting the "ride height" correct is important. The wren has leaf springs all round with short push rods to connect to the axle boxes. Shortening these rods lowers the chassis on the wheels.
- there was a tigh spot in the motion that turned out to be connecting rod bearings being slightly too tight tolerances. Fortunatley these are marine style split bearings, so easy to introduce a little "slop" until things loosen up.
- the blower was pretty weak at first. On wrens the piping for this runs from the cab, under the left hand side of the saddle tank and into the smokebox; about 4' of pretty small bore copper pipe making a pretty ideal condenser. Mostly just hot water coming out at the business end. Fixed by wrapping the whole pipe with string to insulate (held in place by soaking in thin superglue)
- some injector trouble resulting from the water in the saddle tank getting hot. I have added a couple of layers of gasket material where the tank brackets meet the boiler and smokebox. This blocks the worst of the conducted heat, and increases the air gap underneath the tank itself.
- I am still trying to get the delivery rate from the mechanical lubricator right, it is adjusted by moving the drive rod between different holes on the ratchet arm. Hopefully I am getting close now....
Re: Jynn: a 7 1/4" gauge wren
Posted: Mon Jul 13, 2020 6:18 pm
by Nomis
I took a few close-up pictures of various parts of the engine to show some of the fine detail.
I have no idea how Joe managed to machine some of the more complex shapes in the motion work.
You can see the wrapped blower pipe running up to the smokebox here:
This is the lubricator drive, set here for maximum delivery (which meant a very oily exhaust, and getting covered in sooty black oil spots after driving!).
You can also just see the balance pipe between the two "legs" of the saddle tank. This has a T piece with a large ball valve that makes it quick & easy to drain the tank (either at the end of a run, or the dump hot water & replace with cold).
A driver's view of the cab. Everything is nice and easy to reach. I cut an opening in the cab roof to give a better sightline of the gauge glass, and Joe mounted the pressure gauge as low as possible for the same reason.
Apart from these things it is all laid out as per the prototype. The small brass handles either side of the boiler are the water controls for the two injectors, and the lever on the floor (left of the firedoor) actuates the draincocks.
Nomis wrote: ↑Mon Jul 13, 2020 6:07 pm
- getting the suspension & valve timing to work together. With hackworth gear the distance from the weigh shaft to the rear axle has quite a bit of effect on the valve events, so getting the "ride height" correct is important.
My Sweet Pea also uses Hackworth gear which required the suspension and valve timing to be adjusted when I first got it to get it spot on (it now runs in forward and reverse with no issues and does not need a push to get going even when pulling passengers, only tested with 8 people so far).
Nomis wrote: ↑Mon Jul 13, 2020 6:07 pm
- the blower was pretty weak at first. On wrens the piping for this runs from the cab, under the left hand side of the saddle tank and into the smokebox; about 4' of pretty small bore copper pipe making a pretty ideal condenser. Mostly just hot water coming out at the business end. Fixed by wrapping the whole pipe with string to insulate (held in place by soaking in thin superglue)
The blower pipe arrangement on your Wren is similar to that on my Sweet Pea, however, I have not experienced any condensate issues. Trying to think what would cause this on your loco?
Nomis wrote: ↑Mon Jul 13, 2020 6:07 pm
- some injector trouble resulting from the water in the saddle tank getting hot. I have added a couple of layers of gasket material where the tank brackets meet the boiler and smokebox. This blocks the worst of the conducted heat, and increases the air gap underneath the tank itself.
I drilled a small breather hole through the plug of my saddle tank on my loco as the fit was very snug.
Nomis wrote: ↑Mon Jul 13, 2020 6:07 pm
- I am still trying to get the delivery rate from the mechanical lubricator right, it is adjusted by moving the drive rod between different holes on the ratchet arm. Hopefully I am getting close now....
I also had to adjust the arm on my mech lubricator when I first ran my loco as it showered me in oil. Too much oil is better than too little though!
 20180410_185648 by simon mace, on Flickr
 FB_IMG_1528570542490 by simon mace, on Flickr
 FB_IMG_1528570549790 by simon mace, on Flickr