If I had the money, energy and patience,
and Accy did another run of the Shay, against my judgement I'd still consider one. I'd have to immediately replace the burner and do the roller-bearing eccentric mod, though..
Mitch stack wrote: ↑Sun Jun 07, 2020 7:23 am
What colour is your bundy?
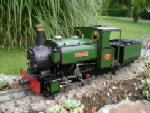
The Bundy's currently a bog-standard job - Brunswick green with red frames and Millaquin spark arrestor. After
"Victoria", it'll receive the same treatment as
"Baron", here, along with a name (don't have one yet) and a diamond chimney.
04/06/19
To this day, I still don't know just how Accucraft finishes their locos, but it's the toughest coating the works here have yet encountered; I'll give them that. I figured it was powder-coat or something. But it was still chipped, glossy, and I wanted satin - the plan being to scotch-brite the original gloss finish, de-grease the chassis in enamel thinners, then etch prime and engine enamel.
Returning to the thinners bath a few hours later, I was dismayed to find I now had several more days of work to do, scrubbing the half-lifted remains of the original finish, out of every nook and cranny. Areas such as behind the wheels and eccentrics were left alone and painted over, as for whatever reason, they weren't as badly affected by the thinners..
The rocker arm locking screws were replaced with some spare Roundhouse cheese-heads; As the original grub screws tended to seize, resulting in their sockets being stripped out trying to loosen them. I also added a third lubrication pipe. Now the eccentrics and both axles can be oiled without having to upturn the loco. With a little effort, the "little ends" of the eccentric rods can also be oiled with a fine-tipped nozzle passed under the side tanks. I apologise for the horrific sight I've made of the pipes; A recently-bought set of tube-bending springs should see my copper-mangling consigned to the past..

- IMG_5611.JPG (238.55 KiB) Viewed 7546 times
10/07/19
After masking the moving and mating parts, the boiler and chassis were done with black etch primer, lightly scuffed with scotchbrite, followed by satin black engine enamel. The smoke/fire boxes were hit with potbelly black. We use the same stuff (albeit brushed) on smoke/fire boxes at Woodford.

- IMG_5776.JPG (208.72 KiB) Viewed 7546 times
Prior to painting the chassis, some styrene scraps were epoxied together, filling the unsightly gap between footplate and boiler.

- IMG_5777.JPG (183.09 KiB) Viewed 7546 times
A dummy firebox and ashpan were knocked up from brass - A little rough but it'll do. I then had to flip the trailing wheelset frame upside down, and machine a longer pivot pin for it. The paint was removed from treads and flanges with cotton buds dipped in thinners.

- IMG_5775.JPG (201.75 KiB) Viewed 7546 times
The original ceramic smokebox insulation disintegrated when it was removed, and was replaced with new material.

- IMG_5773.JPG (180.38 KiB) Viewed 7546 times
The cab finally received a rear "arch", with provision to mount a rear headlight. The grab rail was another long-overdue mod.

- IMG_5780.JPG (221.99 KiB) Viewed 7546 times
Because I'd added the waist-high rear wall to the cab, it couldn't be removed for refilling the gas tank. So up until now, I was lifting away the cab roof, retaining it with very thin smears of Blu-Tac. This wasn't very reliable, so some rare-earth magnets have been epoxied into the cab. The original screw holes were slightly enlarged, and slotted on one side to help the roof align more easily.

- IMG_5781.JPG (258.87 KiB) Viewed 7546 times
As for the roof itself, M2x5mm countersunk screws were silver-soldered into the roof's original mounting holes & slots, then cleaned up with the dremel. The screws will function as locators to the holes in the previous photo.

- IMG_5782.JPG (166.1 KiB) Viewed 7546 times
On top, the screw heads were sanded flush with the dremel. As I lack the equipment needed to simply roll a new roof from steel, with upturned side edges as rain gutters, the home-made steel rain strips I fitted years back were re-used, this time soft-soldered on. A bit of bog deals with the screws' sockets.

- IMG_5783.JPG (235.65 KiB) Viewed 7546 times
07/08/19
After six years, the running crews now have steps and grabs to access the tank fillers.

- IMG_5932.JPG (193.99 KiB) Viewed 7546 times
Xmas is coming up, but I prefer hanging primed loco parts on machine tools, to decorations on trees.

- IMG_5936.JPG (227.12 KiB) Viewed 7546 times
New gas pipe silver-soldered, to adapt the Accy tank to the RH burner. Gotta love that cadmium-bearing solder.

- IMG_5966.JPG (190.69 KiB) Viewed 7546 times
I didn't photograph the process of re-assembly, painting or weathering; Because as this was my first time weathering a live steamer, it meant a lot of experimentation and such, that would be difficult and tedious to follow in writing. This was also my first time weathering with enamel paints - I usually use Tamiya acrylics for weathering, but we all know that won't fly around heat, oil and water. For
this loco, I'd started with Humbrol tinlets, but soon learned all about their now-abysmal quality, and promptly binned them in favor of Tamiya's enamel equivalent.
A Baldwin-style "knob" handle for the sand dome was machined and fitted. My old home-made headlight generator was replaced with a proper whitemetal Stones job from Roundhouse. A scanned copy of an original Stones service manual was invaluable in adding the missing conduits and pipework to the generator. The worksplates were fitted with JB Weld, and the nameplates with black silicone. A rear headlight was turned from aluminium, and both were fitted with 3V grain-of-wheat bulbs and glass lenses, sold as replacements for wrist-watches.
28/11/19
Washes, drybrushing, powders and some miniature spray-gunning seemed to produce the result I wanted - a hard-worked loco, but owned by one of those rare mills that actually takes some pride in their fleet. The effect is a bit less subtle than the camera made it look; could've picked a better time and place for lighting, too.
With no permanent line on which to test, some lengths of flex track were plonked on the lawn.
"Baron" performed extremely well, if a little tight, due to the new o-rings. When I get the chance, I'll have to take the loco down to the club track at Zillmere for a proper test.

- IMG_6441.JPG (273.2 KiB) Viewed 7546 times
A proper roll-on/off carrier was made to fit a new box. Mini bungee straps hold the loco in place, with clean soft rags to protect the paintwork. I think this is the way to go, for me, as the oil stays around the bottom of the cylinders and away from the weathered finish. It also means far less handling of the loco, reducing the chance of damage, and frequency of touch-ups.

- IMG_6774.JPG (203.18 KiB) Viewed 7546 times
The box is a steel "ammo" style toolbox. The lettering isn't perfect, but this box made good practice fodder for signwriting more critical things, for example, that pub in the background.

- IMG_6769.JPG (177.81 KiB) Viewed 7546 times
The lighting was also re-wired, with a charge socket, fuse, and center-off switch. The plugs will allow me to remove the cab if and when needed in future.

- IMG_6776.JPG (183.8 KiB) Viewed 7546 times
The Baldwin, as I now prefer to call it, still needs a few bits of "loco clutter" befitting a canefields machine - and a driver, now here waiting for paint.
Barring a proper test run when I have the chance,
"Baron" should be about done. A "couple of weeks" burner replacement, that snowballed into a nearly bare-frames rebuild over thirteen months.

- IMG_6445.JPG (189.13 KiB) Viewed 7546 times
My Fowler
"Victoria" is next for weathering, and now that I've some clue as to what I'm doing, I can document that job, with a view to encouraging others to have a go at weathering.
*ADDENDUM* - 24/08/2020
The test run at Zillmere revealed an issue that went unnoticed in the previous brief test run:
The burner frequently self-extinguished. The problem was that in having a standard Roundhouse jet fitted, too much butane was being supplied to the burner. This resulted in more combustion gases than could be exhausted from the smokebox, resulting in back-pressure against the burner, which soon extinguished it. The solution was to supply less butane, by fitting a smaller jet.
A No.3 size from Chuffed2Bits was fitted and has solved the issue.
For context, the bore of a Roundhouse jet is 0.24mm. The Chuffed2Bits No.3 jet is 0.18mm.