Page 3 of 3
Posted: Sat May 07, 2016 4:09 am
by ge_rik
Cracking good work David. You've got loads more patience (and dexterity) than me fitting all those individual panes - but the finish looks well worth the effort. Great tip about using Glue n Glaze btw. It's time I replaced some of the glazing in my coaches - must get some.
Rik
Posted: Sat May 07, 2016 3:55 pm
by River Lin
Hi ge_rik, Andrew and others.
I got my bottle of Glue-n-Glaze from The signal Box in Anstey Leics.
If you google it, his online business is mainly DVDs but he has a shop selling much n- and 00 gauge stock but also some 16mm. mainly Accucraft i think, and much modeling material and kits. He is an association member and so if you can buy from him i am sure he would appreciate it.
The shop is well worth a visit i feel but parking is a problem in the narrow streets round about. I am lucky as i live only 15 minutes walk away.
No. 74 buses from Leicester every 15 minutes.
David.
Posted: Sat May 07, 2016 7:12 pm
by Soar Valley Light
Hi David,
I thought I lived close but you've beaten me hands down. I live 15 minutes drive away!
Please keep the update pictures coming, I'm really looking forward to seeing the finished article.
Andrew
Posted: Mon May 09, 2016 5:50 pm
by River Lin
Hi all.
Update over the weekend.
Nearly there.
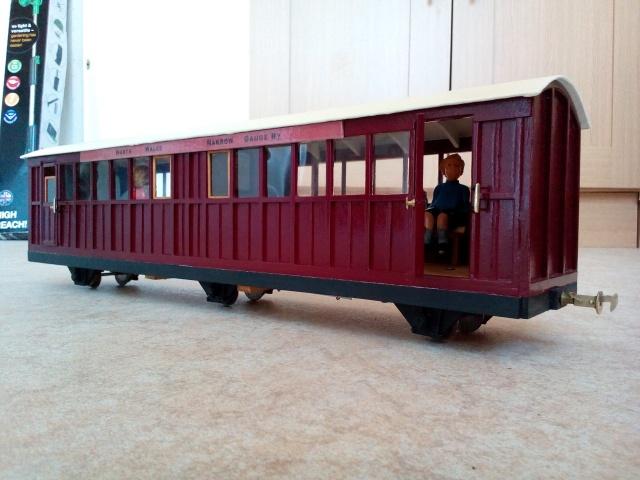

The poster is a reproduction of the only NWNG poster I could find, in the book ' MORE ABOUT THE WELSH HIGHLAND RAILWAY. The poster is dated 1896 and advertises tickets from Dinas to ( Snowdon) station.
"Conveyances to Beddgelert meet all trains at Snowdon Station and passengers should secure Cheap Return Coach tickets at that station. fare 1/3d.
David
Posted: Mon May 09, 2016 10:10 pm
by Soar Valley Light
It just keeps on getting better David! The internal detail is superb, those bench seats are remarkable.... well done.
Posted: Tue May 10, 2016 11:16 am
by Peter Butler
Hi David, sincere apologies for not commenting on your carriage build but I have been awestruck throughout its construction method and your patience and determination to get it right. It is a remarkable piece of work which you can be proud of... I wouldn't have attempted this myself as I prefer to work in Plasticard and that might be a task too far for a vehicle that size. Congratulations.
Posted: Tue May 10, 2016 4:26 pm
by River Lin
Thank you both for those kind words. It has taken a long time though. Looking back I seem to have started it early last summer.
One problem I have come across is that with the roof not being glued on, the body is quite flexible being made primarily of 3mm square timber and glazing matertial above the waistline and only supported at the ends and the central partition. I have to be careful how I pick it up and not squeeze it. The best way is one handed in the middle or two handed at the very ends.
It has been an enjoyable project and I can't wait to try the coach on a garden line next Sunday, with my other homebuilt NWNG/WHR stock, as I don't have one of my own. Hopefully the weather will pick up again.
Pictures will follow.
David.
Posted: Tue May 10, 2016 8:13 pm
by Andrew
River Lin:117948 wrote:
It has been an enjoyable project and I can't wait to try the coach on a garden line next Sunday, with my other homebuilt NWNG/WHR stock, as I don't have one of my own. Hopefully the weather will pick up again.
Pictures will follow.
Yes please! I'm sure they'll be a sight to behold, it's a lovely carriage.
Enjoy your maiden run!
Andrew.
PS Next time you're at The Signal Box do let the owner know that his old "Russell" is still going strong and being very much enjoyed! I bought it from him at Peterborough about 5 years ago...
Posted: Wed May 11, 2016 10:37 pm
by River Lin
Will do Andrew.
David.
Posted: Thu May 12, 2016 6:14 am
by IrishPeter
What a lovely wee beastie that carriage has turned into!
Peter in AZ
Posted: Mon May 16, 2016 9:19 pm
by River Lin
Hi all.
There's good news and not so good news!!!
Firstly the carriage looked lovely in the afternoon sunshine on the Disney Bridge Railway.

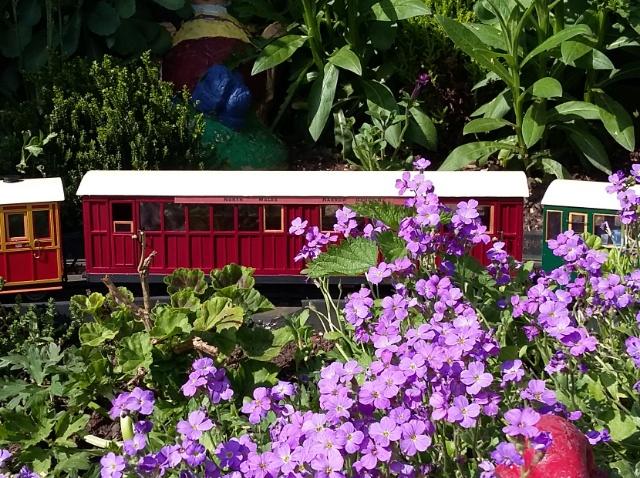
But.
She misbehaved a couple of times on this particular curve (not a tight curve) and decided that instead of being towed she would rather walk and put her wheels into the two foot.
On an inspection underneath, not very ladylike but it had to be done, I found the following -

It seems that for some reason the end bogie turned too far and allowed the wire strut to become detached and caused the carriage to jump the track. I suppose teething troubles occur and need to be sorted.
So I have made a start on the folloiwing-
Fit longer wire struts.
Use thicker and stiffer wire for the struts.
Fit stops to limit the turning of the bogies beyond a certain point.
Remove some of the play and 'loseness' of the bogies.
Any other thoughts please share. Overall though, I am pleased with the carriage.
David.
Posted: Tue May 17, 2016 7:18 am
by IrishPeter
From my experience with Cleminson underframes, I would make the changes incrementally starting with the longer, thicker guide rods. I would not limit the slop on the sub-frames until you have proved to yourself that the longer rods on their own are not enough.
My big fear with six-wheelers would be that two changes at the same time may fix one problem and create two more! The stage by stage approach really is much safer with this type of vehicle. I found that a stiffer linkage cured most of my problems with the six-wheeler I built.
Cheers,
Peter in AZ
Posted: Tue May 17, 2016 4:01 pm
by River Lin
Hi Peter.
What you say makes good sense. I have already made thicker and longer guide rods so will stick with that for now until I can try the carriage again next Sunday.
David.