Page 3 of 4
Posted: Fri Jan 31, 2014 10:06 pm
by Soar Valley Light
These really are superb. Seeing what you have done has encouraged me that I might have the skills to have a go myself in due course at heavy kit bashing or even scratchbuilding.
Thanks for sharing it with us. I look forward to seeing the finished products.
Posted: Fri Jan 31, 2014 10:18 pm
by MDLR
Soar Valley Light:96350 wrote:These really are superb. Seeing what you have done has encouraged me that I might have the skills to have a go myself in due course at heavy kit bashing or even scratch building
I personally think the kits are fairly light!!
Posted: Sat Feb 01, 2014 9:07 pm
by Soar Valley Light
Good one Brian!

You have to bear in mind though that I'm fundamentally a platelayer. All the bashing we do tends to be heavy, we don't have a hammer under six ponds!

Posted: Sun Feb 02, 2014 11:58 am
by Andrew
Soar Valley Light:96385 wrote:...I'm fundamentally a platelayer...
Really?In that shirt and tie?! That's pretty posh platelaying...
Lovely carriages St Michael, they'll look great out in the garden...
Andrew.
Posted: Sun Feb 02, 2014 2:06 pm
by pskipper
Your coaches are brilliant

Posted: Sun Feb 02, 2014 7:48 pm
by Soar Valley Light
Andrew:96399 wrote:Soar Valley Light:96385 wrote:...I'm fundamentally a platelayer... :D
Really?In that shirt and tie?! That's pretty posh platelaying...
Andrew.
Ah, professionally I'm a platelayer but at heart I'm a Signalman!
Posted: Sat Feb 08, 2014 8:45 am
by St.Michael
Hi all.
A quick update of the progress:
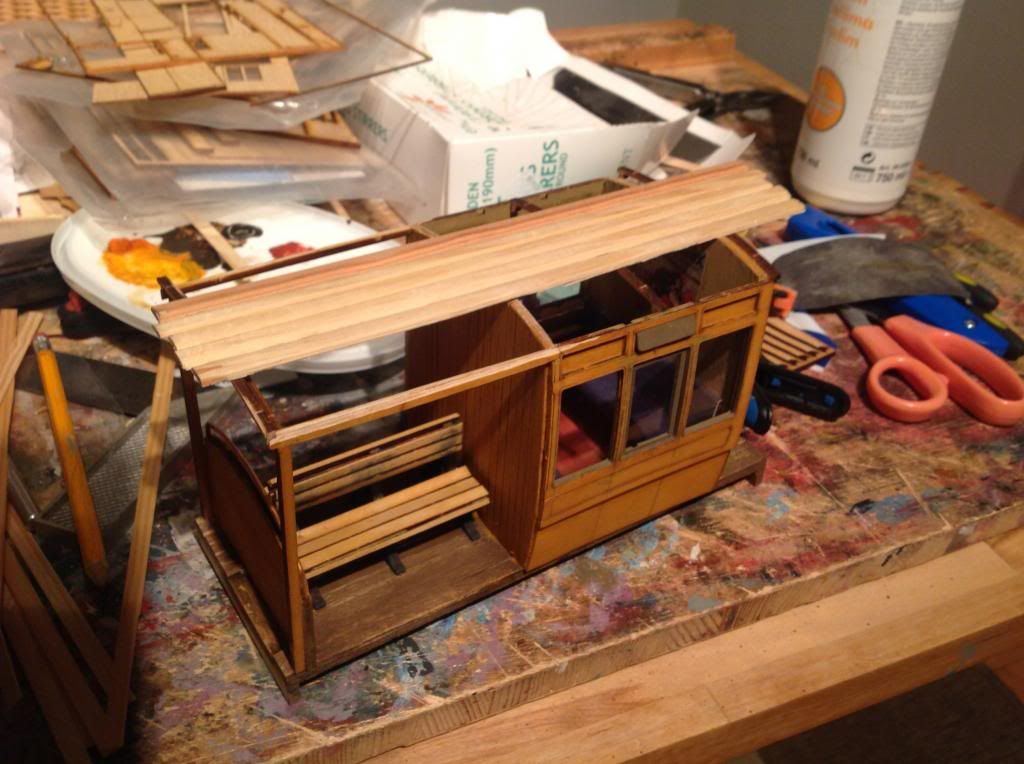
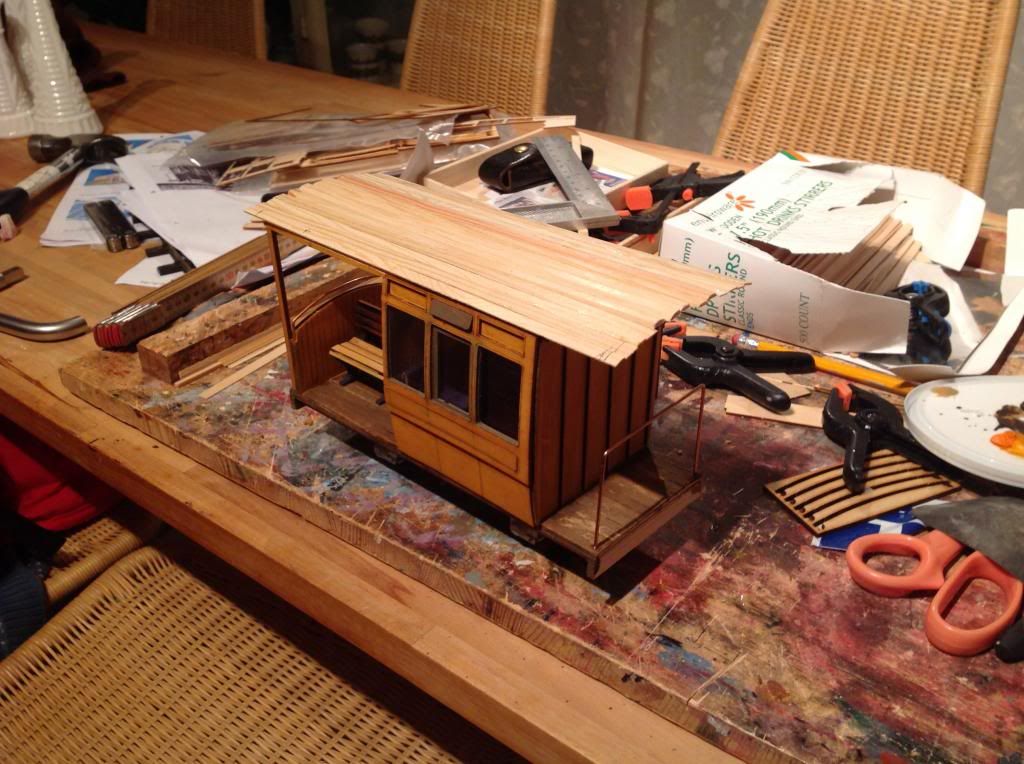

I´ll be back with more info...
Posted: Sat Feb 08, 2014 11:24 am
by Peter Butler
This project has grown on me..... I like the rustic, antique finish of the woodwork, the quirky seating and balcony arrangement, and your vision to see the possibilities from the basic kits in the first place.
Brilliant!
Posted: Sat Feb 08, 2014 12:31 pm
by philipy
I agree with Peter, I love that 'antique varnish' effect.
Posted: Sat Feb 08, 2014 8:43 pm
by laalratty
Must say I wasn't sure initially, but it is looking very nice now that it is coming towards completion
Posted: Sat Feb 08, 2014 9:03 pm
by St.Michael
Thank you for all credit. I almost get a bit embarrassed

:oops:
Anyway, here are some thoughts about this project: I think these kind of coaches were ment to be pulled by horses, in city tramways..(correct me if I´m wrong) And I believe they where used in South America...
I actually tried to by one on Ebay a couple of years ago, but it became to expensive, I lost the auction.. And so, a half year ago, I was struck by the idea how to build them (Anyone who would like to copy the Idea: feel free to do so)
About the warm colour: It is a mix of two artist oilcolours, Yellow ochre and Orange yellow, higly dilluted with white spirit. And after painting -directly wiped off with a cloth.
Posted: Sat Feb 15, 2014 9:38 am
by St.Michael
Now the two coaches have reached the same ready-level. I have been working with the magnet connection of the roofs. I have used one of my favourit materials: Meccano, wich gives magnetic contact and at the same time gives strength to the entire roof construction. Because of the open half of the coach, I wasn´t able to hide the connection points, but I am going to paint most of it in some discreet colour. Does anyone know if I can paint the actual magnetic surfaces, or better not?
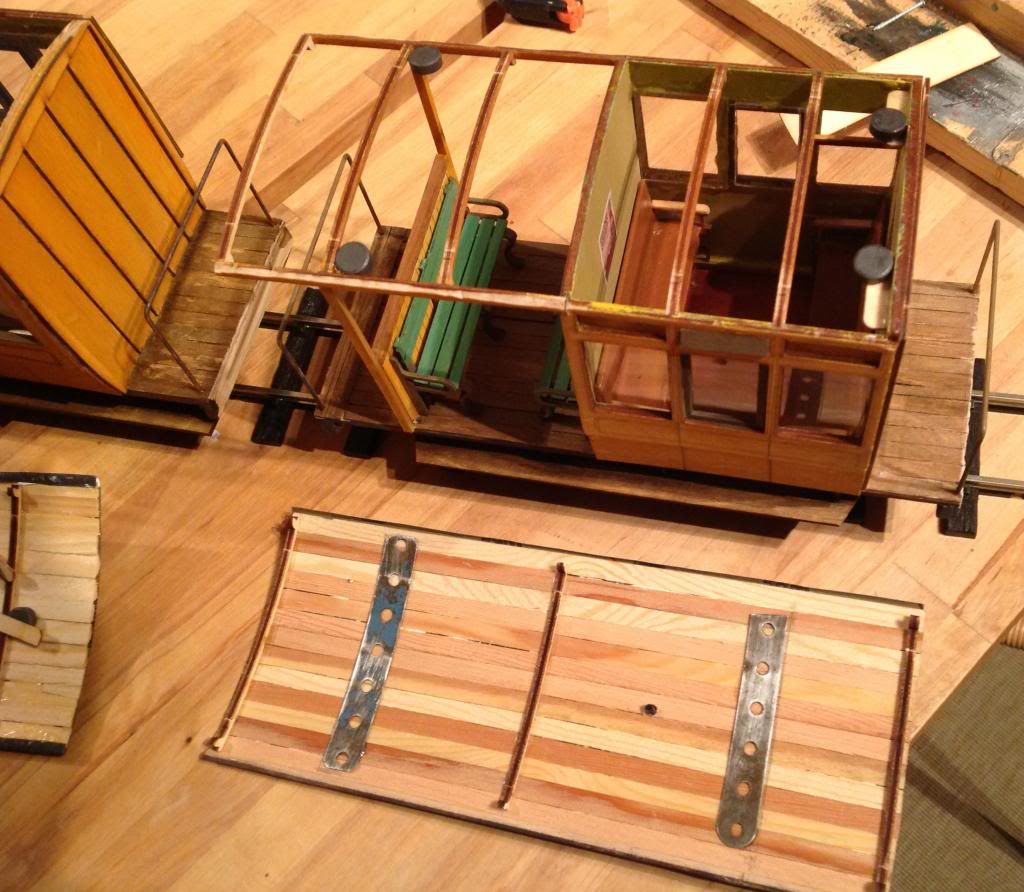
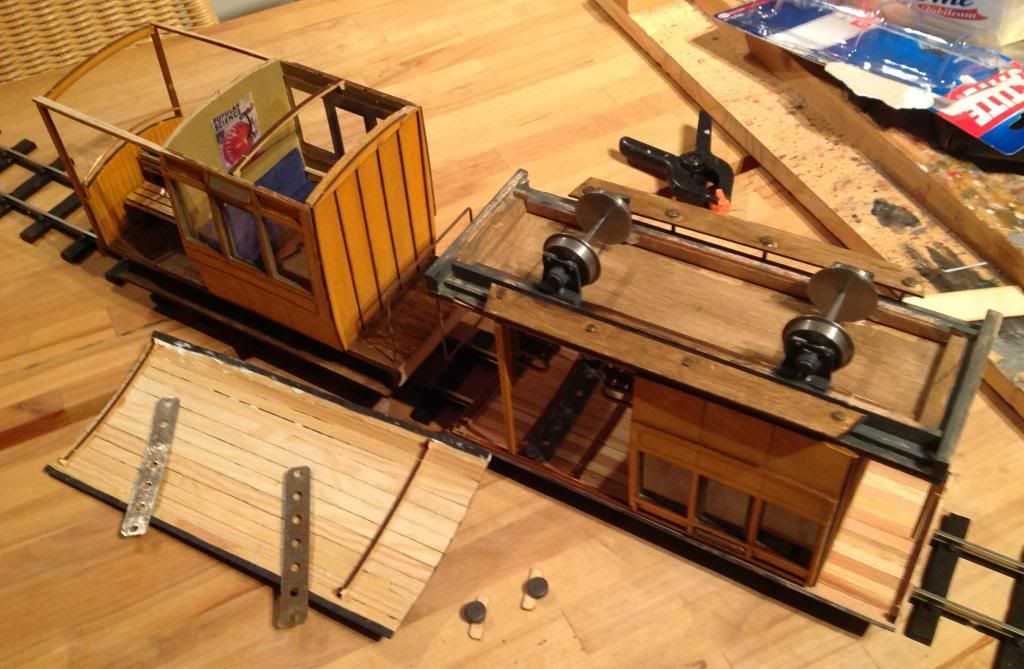
It seems like there is a god grip in the magnets. On the second coach I used a bit bigger magnets, and they gave an even better result. I am going to use this method on loose roofs on some other of my coaches

Posted: Sat Feb 15, 2014 9:51 am
by Dannypenguin
Those are looking very nice!
Posted: Sat Feb 15, 2014 10:07 am
by Peter Butler
Clever idea using Meccano and magnets..... I see no reason why painting the magnetic surface should cause a problem, after all, the Meccano is painted and still attracts! Possible 'slippage' might occur so perhaps some sort of locating stops attached to the corners under the roof might help?
Posted: Sun Feb 16, 2014 9:17 pm
by St.Michael
Well...Think I´m almost ready, so far. You can always arrest me for all the little things that should have been there: security chains on the balconys and a lot of textile (curtains) hanging on the open part of the coaches, and a lot more.. The door handles are beeing glued on right now and dont´ appear on the photos below. Regarding the curtains they might appear in the future, but for now I´m satisfied with full visibility to the benches.
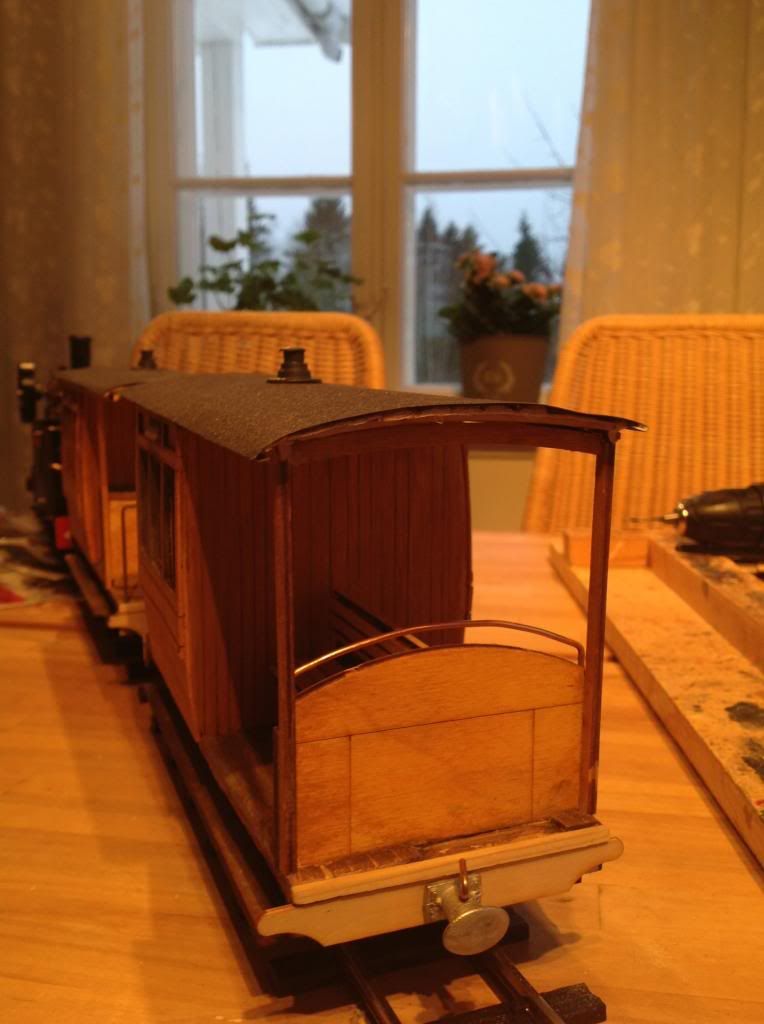
The buffer beams caused me some thinking, and adjusting. First the where a bit low, so I glued another small ledge on the top of them. The rounded tips on the beams end didn´t work out for me, so I cut them down to the actual width of the coach.
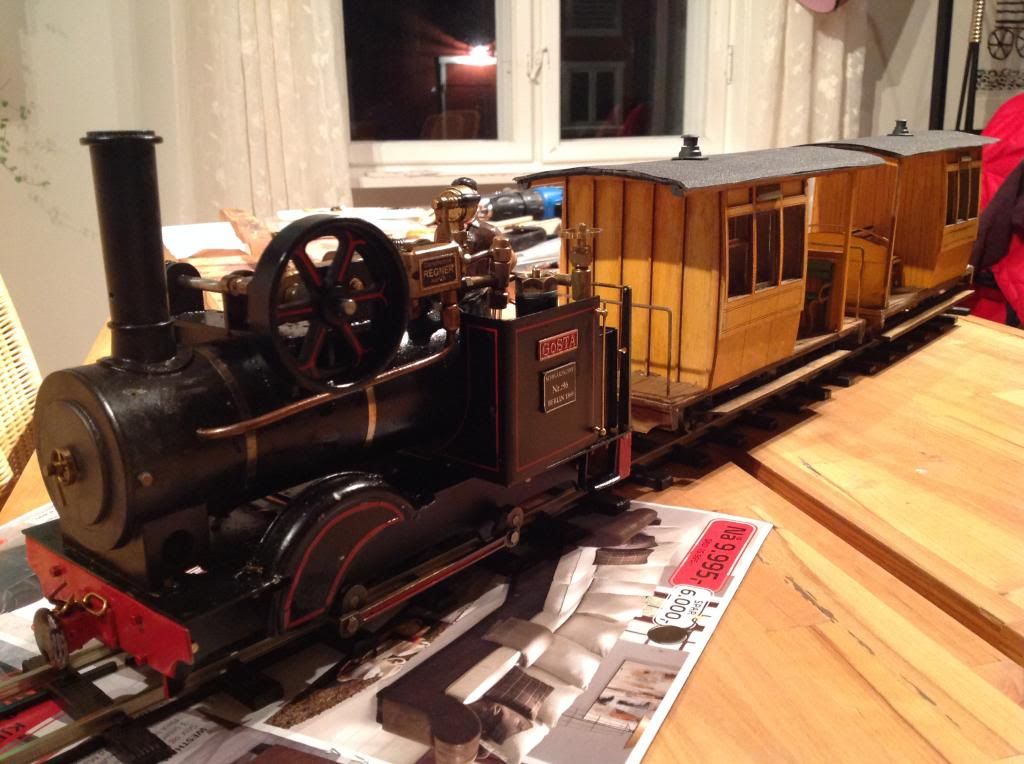
Here are the coaches behind "Gösta" (Regner Vincent) to which they where built
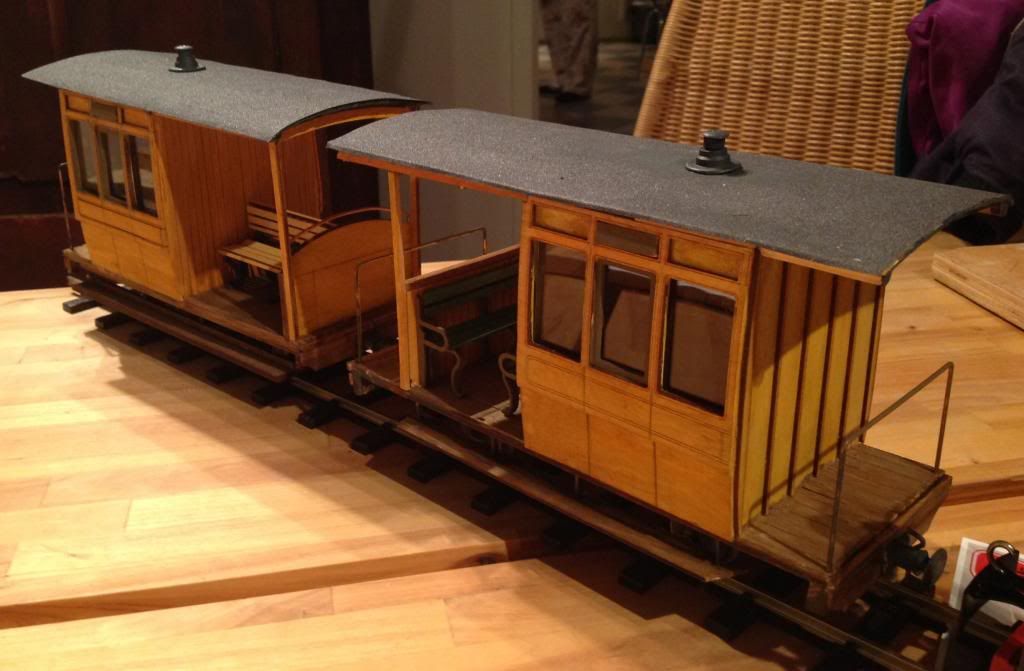
As I mentioned earlier, I still have enough parts to build a small goods wagon of some kind

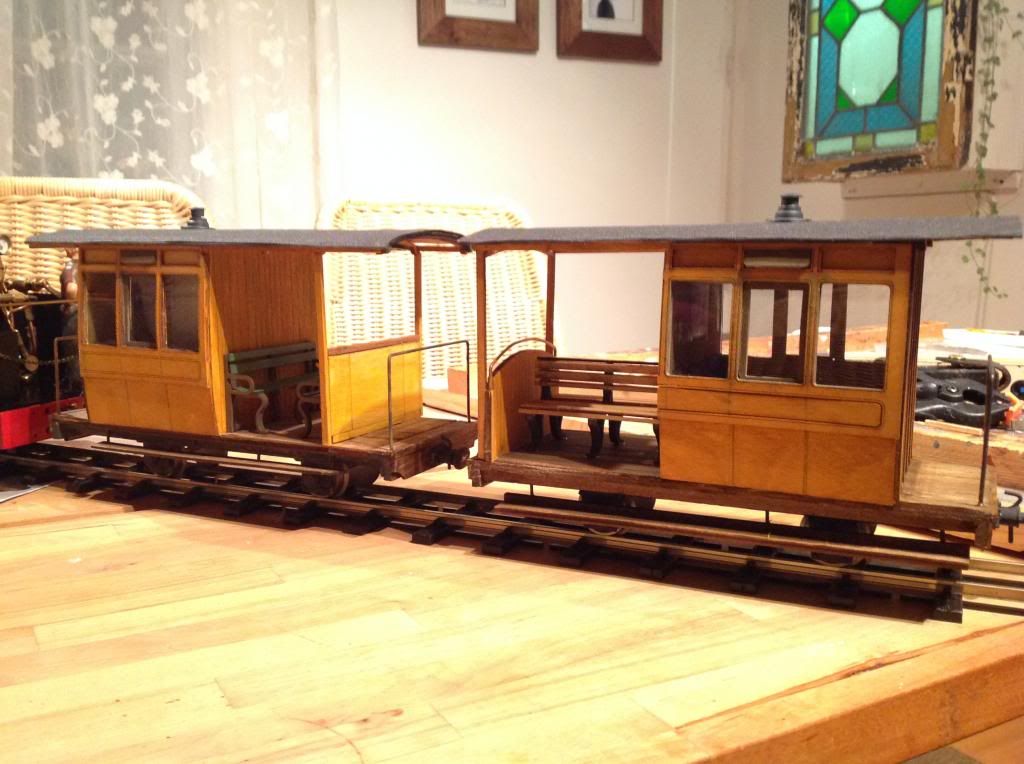
Possible 'slippage' might occur so perhaps some sort of locating stops attached to the corners under the roof might help?
Peter: The roof struts that i built the planking roof on are situated on places so they "lock" the roof and prevents it from slipping
Michael
Posted: Sun Feb 16, 2014 9:27 pm
by Peter Butler
A good job well done! You should be pleased with the end result having stock different to anything others have.
I noticed after sending the post that the roof struts were in a position to keep the roof in place. Well thought out!!!
Next project please........
Posted: Sun Feb 16, 2014 9:28 pm
by Gremlin
They've finished up looking really nice and so at home with the engine. A little goods van would look the part, somewhere to put the luggage. Well done.
Posted: Sun Feb 16, 2014 10:13 pm
by MDLR
They are truly delightful - enter them for the virtual MOTY at the National Garden Railway Show!
Posted: Mon Feb 17, 2014 8:38 am
by Dr. Bond of the DVLR
Marvelous things, I like them alot! How heavy are they?
Posted: Mon Feb 17, 2014 6:41 pm
by Dannypenguin
I'll order two?
Joking aside, great models


