Steve,
The quality and speed of your work are incredible. Very well done. Very Impressive.
Peckett Body Build - First Attempt - NOW FINISHED Pictures page 6
-
IanC

- Trainee Driver

- Posts: 799
- Joined: Mon Feb 15, 2016 9:15 am
- Location: Nr. Warrington, Cheshire
-
-steves-
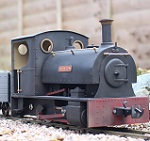
- Administrator

- Posts: 2473
- Joined: Thu Jul 28, 2011 1:50 pm
- Location: Cambridge & Peterborough
Re: Peckett Body Build - First Attempt
Thank you very much indeed for the very kind wordsBertieB wrote: Thu Feb 14, 2019 2:57 pm Wow. I’ve had enough problems attempting some of this stuff in plastic, let alone bleedin’ metalwork. Terrific.
(First kit I attempted was the easy-to-build, GRS plasticard version of a Peckett like this and even that just about drove me insane)

The basic shape and sizes are the same as the GRS 3D printed kit, so I guess the overall loco would look very similar when finished.

The buck stops here .......
Ditton Meadow Light Railway (DMLR)
Member of Peterborough and District Association
http://peterborough.16mm.org.uk/
Ditton Meadow Light Railway (DMLR)
Member of Peterborough and District Association
http://peterborough.16mm.org.uk/
-
-steves-
- Administrator
- Posts: 2473
- Joined: Thu Jul 28, 2011 1:50 pm
- Location: Cambridge & Peterborough
Re: Peckett Body Build - First Attempt
The speed was faster than I expected too, to be honest, it went quite smoothly compared to how I thought it was going to be. Thank you for the very kind words.IanC wrote: Thu Feb 14, 2019 4:23 pm Steve,
The quality and speed of your work are incredible. Very well done. Very Impressive.
The buck stops here .......
Ditton Meadow Light Railway (DMLR)
Member of Peterborough and District Association
http://peterborough.16mm.org.uk/
Ditton Meadow Light Railway (DMLR)
Member of Peterborough and District Association
http://peterborough.16mm.org.uk/
-
-steves-
- Administrator
- Posts: 2473
- Joined: Thu Jul 28, 2011 1:50 pm
- Location: Cambridge & Peterborough
Re: Peckett Body Build - First Attempt
Thanks Graeme, coming from someone who can and has built in metal before, that means a lot. I have a great deal of respect for anyone that can do this sort of thing as I know for sure it's harder than it looks.GTB wrote: Thu Feb 14, 2019 2:26 pmThat has come up very nicely and there is really nothing that suggests it is a first attempt. I know I wouldn't have gotten it to that stage so quickly.-steves- wrote: Wed Feb 13, 2019 11:11 am I am thinking of doing it plain black, with brass a chimney top and brass spectacles. I am very open to ideas on paint at this stage as I have no idea what will look best, do you have any thoughts, if so, please do post up and let me know.
In terms of colour, black would match the diesel in your avatar.......
If you are limited to whatever paint colours you can get in a spray can then weathered satin black like your diesel would look like a hard working, but well maintained loco.
If you use an airbrush then the world is your oyster and you can mix your own colours. I paint my black steam locos in four shades of black, in varying degrees of satin finish. The most recent example being this one.
https://gardenrails.org/viewtopic.php?f=36&t=11815
Regards,
Graeme
Colour I agree, a nice mat black would suit, maybe with red buffer beams and red connecting rods. I do have an airbrush, no idea how good it is as I have never used it. Had it for a few years now, that and a little compressor to run it on. I say I have one, but in fact I have two that came in a kit together, maybe it's about time I dusted it off, took it out the box and actually tried it
I will spend some time looking at your link to see if it gives me any pointers and direction for what I may be about to attempt. I usually use spray cans, so this will be a massive step if I airbrush it as well

The picture below is the avatar picture, my only ever attempt at weathering. Not sure how good or bad it was, but it just never looked like I had hoped it to look, it just looks dirty rather than weathered


The buck stops here .......
Ditton Meadow Light Railway (DMLR)
Member of Peterborough and District Association
http://peterborough.16mm.org.uk/
Ditton Meadow Light Railway (DMLR)
Member of Peterborough and District Association
http://peterborough.16mm.org.uk/
-
FWLR
- Driver

- Posts: 4588
- Joined: Sat Aug 05, 2017 9:45 am
- Location: Preston, Lancashire, UK
Re: Peckett Body Build - First Attempt
Again Steve for a first attempt that's great, although maybe not to much rust on the chassis maybe. But all in all a great job... 
I have seen worse Steve believe me..........
I have seen worse Steve believe me..........
ROD
Life is so easy when I run my trains.


https://gardenrails.org/forum/viewtopic ... 41&t=11364
https://www.youtube.com/@fairywoodlightrailway
Life is so easy when I run my trains.


https://gardenrails.org/forum/viewtopic ... 41&t=11364
https://www.youtube.com/@fairywoodlightrailway
-
ge_rik
- Administrator
- Posts: 7974
- Joined: Sun Oct 25, 2009 10:20 pm
- Location: Cheshire
- Contact:
Re: Peckett Body Build - First Attempt
She looks great in her final form. As others have said, it's certainly not displaying any indications of a first effort. You'll maybe need to plug a few gaps with filler but I suspect even the most experienced modellers would need to do that. Can't wait to see here in workshop grey. I like Graeme's idea of fifty shades of black....
Rik
Rik
-
-steves-
- Administrator
- Posts: 2473
- Joined: Thu Jul 28, 2011 1:50 pm
- Location: Cambridge & Peterborough
Re: Peckett Body Build - First Attempt
As you say, a touch of filler here and there, not sure what to do about the gap between the cab and the saddle tank, maybe run a small brass strip around the edge to fill it, that's what I do for diesels and say it's a rubber expansion strip, lolge_rik wrote: Fri Feb 15, 2019 8:29 am She looks great in her final form. As others have said, it's certainly not displaying any indications of a first effort. You'll maybe need to plug a few gaps with filler but I suspect even the most experienced modellers would need to do that. Can't wait to see here in workshop grey. I like Graeme's idea of fifty shades of black....
Rik
Will have to be very small as it has to miss the rivets, maybe just leave it as it as, once it's black it won't stand out as bad as it does now. Also made a couple of gauges and a shelf for the cab today, pretty happy with those Thanks for the idea Graeme for the shelf It is also now completely wired up, obviously on plugs so I can remove it as need be, but it charges with the switch left and is on with the switch to the right, so that's all good


Last edited by -steves- on Thu Apr 09, 2020 7:14 pm, edited 1 time in total.
The buck stops here .......
Ditton Meadow Light Railway (DMLR)
Member of Peterborough and District Association
http://peterborough.16mm.org.uk/
Ditton Meadow Light Railway (DMLR)
Member of Peterborough and District Association
http://peterborough.16mm.org.uk/
-
-steves-
- Administrator
- Posts: 2473
- Joined: Thu Jul 28, 2011 1:50 pm
- Location: Cambridge & Peterborough
Re: Peckett Body Build - First Attempt
Like I said, weathering is not my thing, never been any good with a paint brush from early days. Give me a bit of wood, plastic or it appears now even metal and I am right at homeFWLR wrote: Fri Feb 15, 2019 7:18 am Again Steve for a first attempt that's great, although maybe not to much rust on the chassis maybe. But all in all a great job...
I have seen worse Steve believe me..........
We shall see how this new one goes, but the multi shades of black is looking like it's worth a try, maybe

The buck stops here .......
Ditton Meadow Light Railway (DMLR)
Member of Peterborough and District Association
http://peterborough.16mm.org.uk/
Ditton Meadow Light Railway (DMLR)
Member of Peterborough and District Association
http://peterborough.16mm.org.uk/
-
FWLR
- Driver
- Posts: 4588
- Joined: Sat Aug 05, 2017 9:45 am
- Location: Preston, Lancashire, UK
Re: Peckett Body Build - First Attempt
Mmmmm, I little tip if I may Steve.
Try some weathering on a scrap bit of brass that's been well cleaned and build up has you go. You will be suppressed how quickly you can see it weather. You can also see how much or little you would need to use on your models.
It's the same with the multi shades of black.....
Try some weathering on a scrap bit of brass that's been well cleaned and build up has you go. You will be suppressed how quickly you can see it weather. You can also see how much or little you would need to use on your models.
It's the same with the multi shades of black.....
ROD
Life is so easy when I run my trains.
https://gardenrails.org/forum/viewtopic ... 41&t=11364
https://www.youtube.com/@fairywoodlightrailway
Life is so easy when I run my trains.
https://gardenrails.org/forum/viewtopic ... 41&t=11364
https://www.youtube.com/@fairywoodlightrailway
-
tom_tom_go
- Driver
- Posts: 4824
- Joined: Wed Feb 23, 2011 3:08 am
- Location: Kent, UK
- Contact:
-
GTB
- Driver
- Posts: 1711
- Joined: Sat Mar 05, 2011 2:46 pm
- Location: Australia
Re: Peckett Body Build - First Attempt
I wouldn't worry too much about completely hiding the gap. The saddle tank on a real one is a separate self-contained part and there is a small gap between it and the cab on the preserved Peckett at Puffing Billy near Melbourne. The gap is also visible on the builders photo.-steves- wrote: Fri Feb 15, 2019 5:18 pm As you say, a touch of filler here and there, not sure what to do about the gap between the cab and the saddle tank
Main thing is to get the gap as even as possible and as narrow as you can manage. I had to manipulate the cab front a bit and slot a couple of screw holes to get a reasonable fit between cab and tank on my Hunslet, which was my first loco bodywork in this scale.
Regards,
Graeme
-
-steves-
- Administrator
- Posts: 2473
- Joined: Thu Jul 28, 2011 1:50 pm
- Location: Cambridge & Peterborough
Re: Peckett Body Build - First Attempt
Thanks Rod, I will give that a go and see what happensFWLR wrote: Sat Feb 16, 2019 9:30 am Mmmmm, I little tip if I may Steve.
Try some weathering on a scrap bit of brass that's been well cleaned and build up has you go. You will be suppressed how quickly you can see it weather. You can also see how much or little you would need to use on your models.
It's the same with the multi shades of black.....
The buck stops here .......
Ditton Meadow Light Railway (DMLR)
Member of Peterborough and District Association
http://peterborough.16mm.org.uk/
Ditton Meadow Light Railway (DMLR)
Member of Peterborough and District Association
http://peterborough.16mm.org.uk/
-
-steves-
- Administrator
- Posts: 2473
- Joined: Thu Jul 28, 2011 1:50 pm
- Location: Cambridge & Peterborough
Re: Peckett Body Build - First Attempt
Unfortunately the gap is not even and I have already tried to minimise it as best I can. I think I will just leave it as is and put it down to a learning experience as I am still extremely pleased with the end result and the feedback I have had on it. The rivets should arrive some time next week for the buffer beams and after that it's the long haul of painting it.GTB wrote: Sat Feb 16, 2019 10:21 amI wouldn't worry too much about completely hiding the gap. The saddle tank on a real one is a separate self-contained part and there is a small gap between it and the cab on the preserved Peckett at Puffing Billy near Melbourne. The gap is also visible on the builders photo.-steves- wrote: Fri Feb 15, 2019 5:18 pm As you say, a touch of filler here and there, not sure what to do about the gap between the cab and the saddle tank
Main thing is to get the gap as even as possible and as narrow as you can manage. I had to manipulate the cab front a bit and slot a couple of screw holes to get a reasonable fit between cab and tank on my Hunslet, which was my first loco bodywork in this scale.
Regards,
Graeme
Can't wait to see it in grey and then black.
The buck stops here .......
Ditton Meadow Light Railway (DMLR)
Member of Peterborough and District Association
http://peterborough.16mm.org.uk/
Ditton Meadow Light Railway (DMLR)
Member of Peterborough and District Association
http://peterborough.16mm.org.uk/
-
philipy
- Moderator
- Posts: 6033
- Joined: Sun Jan 30, 2011 3:00 pm
- Location: South Northants
Re: Peckett Body Build - First Attempt
It's looking fantastic Steve. I wouldn't worry about the gap, it's small to begin with but once everything is painted with primer, a couple of top coats and varnish on top, it will disappear, especially if you do paint it black.
Philip
-
-steves-
- Administrator
- Posts: 2473
- Joined: Thu Jul 28, 2011 1:50 pm
- Location: Cambridge & Peterborough
Re: Peckett Body Build - First Attempt
Thank you.philipy wrote: Sun Feb 17, 2019 8:13 am It's looking fantastic Steve. I wouldn't worry about the gap, it's small to begin with but once everything is painted with primer, a couple of top coats and varnish on top, it will disappear, especially if you do paint it black.
I agree, black should hide a lot of sins,
The buck stops here .......
Ditton Meadow Light Railway (DMLR)
Member of Peterborough and District Association
http://peterborough.16mm.org.uk/
Ditton Meadow Light Railway (DMLR)
Member of Peterborough and District Association
http://peterborough.16mm.org.uk/
-
-steves-
- Administrator
- Posts: 2473
- Joined: Thu Jul 28, 2011 1:50 pm
- Location: Cambridge & Peterborough
Re: Peckett Body Build - First Attempt
Had the rivets turn up today, 1/32 and appropriate drill bit, wow they are small.
Took the idea from Rik's Peckett as I really liked the rivets on the buffer beams. I drill all the rivet holes, added rivets, then cheated and super glued them from the back, cut off the protruding excess on the back with a dremel, then sanded the back of the buffer beams until you couldn't tell they had been there. Very pleased with the result, thanks Rik
The dark marks on the bottom picture is just dust from sanding, nothing that will be seen after paint


Took the idea from Rik's Peckett as I really liked the rivets on the buffer beams. I drill all the rivet holes, added rivets, then cheated and super glued them from the back, cut off the protruding excess on the back with a dremel, then sanded the back of the buffer beams until you couldn't tell they had been there. Very pleased with the result, thanks Rik
The dark marks on the bottom picture is just dust from sanding, nothing that will be seen after paint
Last edited by -steves- on Thu Apr 09, 2020 7:15 pm, edited 1 time in total.
The buck stops here .......
Ditton Meadow Light Railway (DMLR)
Member of Peterborough and District Association
http://peterborough.16mm.org.uk/
Ditton Meadow Light Railway (DMLR)
Member of Peterborough and District Association
http://peterborough.16mm.org.uk/
-
FWLR
- Driver
- Posts: 4588
- Joined: Sat Aug 05, 2017 9:45 am
- Location: Preston, Lancashire, UK
Re: Peckett Body Build - First Attempt
Nice job Steve.
ROD
Life is so easy when I run my trains.
https://gardenrails.org/forum/viewtopic ... 41&t=11364
https://www.youtube.com/@fairywoodlightrailway
Life is so easy when I run my trains.
https://gardenrails.org/forum/viewtopic ... 41&t=11364
https://www.youtube.com/@fairywoodlightrailway
-
Peter Butler

- Driver
- Posts: 5713
- Joined: Sun Sep 09, 2012 10:33 pm
- Location: West Wales
Re: Peckett Body Build - First Attempt
Very neat and time consuming but well worth the effort.... looking great!
The best things in life are free.... so why am I doing this?
-
-steves-
- Administrator
- Posts: 2473
- Joined: Thu Jul 28, 2011 1:50 pm
- Location: Cambridge & Peterborough
Re: Peckett Body Build - First Attempt
Thank you, your kind comments are really appreciated. 
As I said, it's all going to be a tad quite now, got some time out and a lot of prepping and painting to do before anything is worth taking another picture of, though I did add some strengthening brass across the back and sides of the cab as a friend at our local club pointed out that all Pecketts had them, thanks Ian I also, on his advice moved the rear lamp bracket to the centre Though I have forgotten to put the front one on and its already in primer now, balloons!!  Oh well that's one for the epoxy after it's painted now, lol.
As I said, it's all going to be a tad quite now, got some time out and a lot of prepping and painting to do before anything is worth taking another picture of, though I did add some strengthening brass across the back and sides of the cab as a friend at our local club pointed out that all Pecketts had them, thanks Ian
I also, on his advice moved the rear lamp bracket to the centre Though I have forgotten to put the front one on and its already in primer now, balloons!! Oh well that's one for the epoxy after it's painted now, lol.The buck stops here .......
Ditton Meadow Light Railway (DMLR)
Member of Peterborough and District Association
http://peterborough.16mm.org.uk/
Ditton Meadow Light Railway (DMLR)
Member of Peterborough and District Association
http://peterborough.16mm.org.uk/
-
ge_rik
- Administrator
- Posts: 7974
- Joined: Sun Oct 25, 2009 10:20 pm
- Location: Cheshire
- Contact:
Re: Peckett Body Build - First Attempt
Thanks for the credit on the rivets, Steve. As an avowed non rivet-counter, I never thought I'd be responsible for guiding someone else's rivet positioning. It's an honour ( I think). To be honest, I just figured that the rivets would coincide with brackets attached to the main frames. I like to keep things simple. ......
Rik
Rik
Who is online
Users browsing this forum: No registered users and 12 guests