All that detail is going to look fantastic when painted, do you intend weathering the final paint job?
Grant.
Vale of Fairway
-
bazzer42
Peter -not sure Mr Essex would be much help as he seemed a very stiff 69 year old on stage but voice just about still there.
Tom - the driver is modelearth and the standing figure a Rob Bennett mini masterpiece. I had hoped to buy some more of his figures at Exeter but I gather from Simon at Modelearth that Rob sold all his Exeter stock to a German just before the show so he didn't attend. He has also hit retirement stage so may be winding down. Buying from Rob via the internet is interesting.
Grant - yes hope to weather to some degree but not sure how far to go. Would Lord someone allow his locos to get too tatty but there again rusty diesels look nice?!
Piotir - thanks for the kind comments, just trying to make the most of what garden is allowed to be used. The bridges are a bit of a sideline and there are about 200 of my sides and bridges dotted around the country + NZ, USA, Australia, France and Switzerland. Not sure if I am a perfectionist but may be the accountancy training makes me like to see things balanced. I always wanted to be a carpenter so may be by building things it is an outlet for that loss?
Tom - the driver is modelearth and the standing figure a Rob Bennett mini masterpiece. I had hoped to buy some more of his figures at Exeter but I gather from Simon at Modelearth that Rob sold all his Exeter stock to a German just before the show so he didn't attend. He has also hit retirement stage so may be winding down. Buying from Rob via the internet is interesting.
Grant - yes hope to weather to some degree but not sure how far to go. Would Lord someone allow his locos to get too tatty but there again rusty diesels look nice?!
Piotir - thanks for the kind comments, just trying to make the most of what garden is allowed to be used. The bridges are a bit of a sideline and there are about 200 of my sides and bridges dotted around the country + NZ, USA, Australia, France and Switzerland. Not sure if I am a perfectionist but may be the accountancy training makes me like to see things balanced. I always wanted to be a carpenter so may be by building things it is an outlet for that loss?
-
bazzer42
Thanks Rik, a few more rivets on the cab and I think we will be ready for painting. I will go through your website and try and suss out the receiver and controller options.
I think I will try a red buffer coupling as well and see what looks best. Still weighing up the interior, to cream or to green?..
I think I will try a red buffer coupling as well and see what looks best. Still weighing up the interior, to cream or to green?..
-
bazzer42
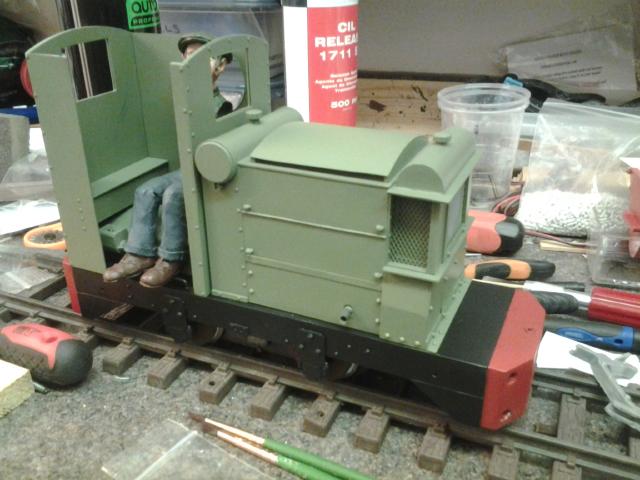
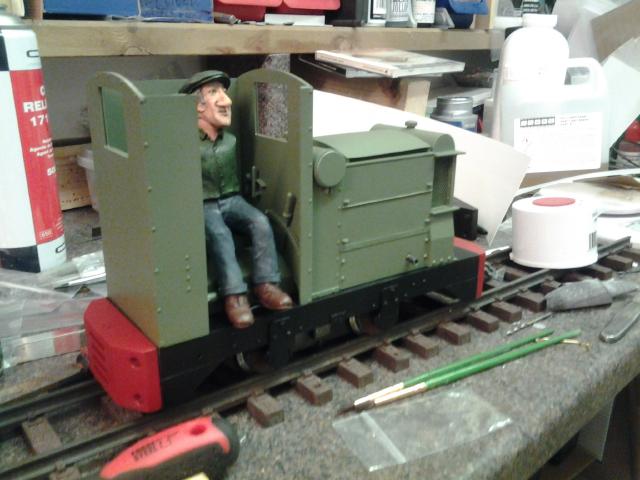
Should have fixed the wife's bike, but I "forgot" and got busy with the aerosols, opted for green interior and red buffers. A bit too clean for my liking and may yet add a plate in front of the bonnet on the chassis. Most pctures show open frames so my excuse will be a plate and a low wooden box for starting handle and chains.
Better have a hoover now before she comes home just to keep my nose clean.....
-
Peter Butler

- Driver

- Posts: 5723
- Joined: Sun Sep 09, 2012 10:33 pm
- Location: West Wales
-
tom_tom_go

- Driver
- Posts: 4824
- Joined: Wed Feb 23, 2011 3:08 am
- Location: Kent, UK
- Contact:
-
philipy
- Moderator

- Posts: 6062
- Joined: Sun Jan 30, 2011 3:00 pm
- Location: South Northants
-
bazzer42
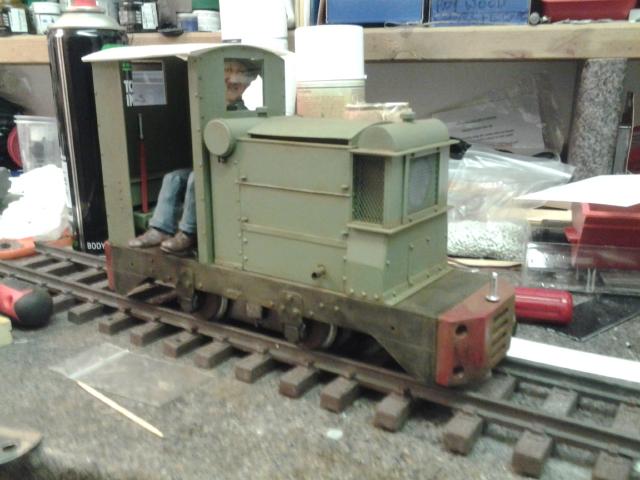
In between laying down some playmobil train stock for young Harvey Broom i have managed to dry brush some humbrol powders onto the chassis and body. Given the levers a touch of red if only to add some colour. I would like to add a florist magnet to hold the bonnet and cab but afeared it be a little too close to the motor. I'm not sure a powerful magnet and an electric motor are a good mix

-
tom_tom_go
- Driver
- Posts: 4824
- Joined: Wed Feb 23, 2011 3:08 am
- Location: Kent, UK
- Contact:
-
bazzer42
-
tom_tom_go
- Driver
- Posts: 4824
- Joined: Wed Feb 23, 2011 3:08 am
- Location: Kent, UK
- Contact:
Different sizes to suit you sir:
http://m.ebay.co.uk/itm/25-50-100pcs-N3 ... Ciid%253A9
The magnets don't even need to touch as the magnetic field around them is strong!
http://m.ebay.co.uk/itm/25-50-100pcs-N3 ... Ciid%253A9
The magnets don't even need to touch as the magnetic field around them is strong!
-
bazzer42
-
LNR

- Driver
- Posts: 1899
- Joined: Sat Feb 27, 2016 5:26 am
- Location: Melbourne, Australia
-
Peter Butler
- Driver
- Posts: 5723
- Joined: Sun Sep 09, 2012 10:33 pm
- Location: West Wales
-
bazzer42

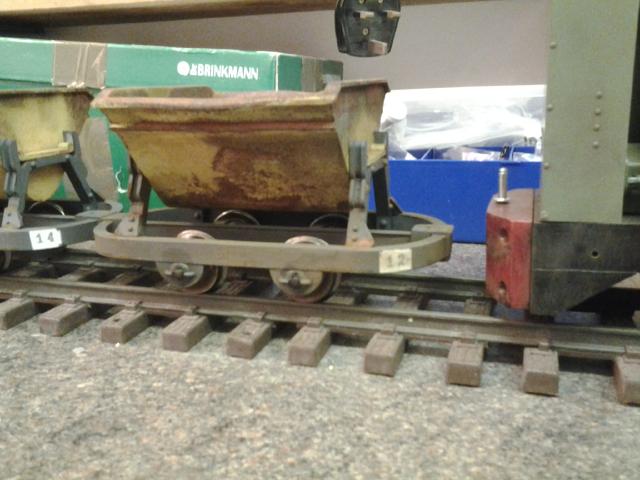

Apologies for the quality backdrop
 but it's a cold night and not much happening so decided on a quick update. These two were planned before Christmas but the need for me to put on weight held them up a little. No 12 still needs an encounter with the Humbrol weathering powders but getting close to being finished. LGB tipper bodies on resin casting chassis, axleboxes and tipper supports. Bachmann wheels add some weight and overall they weigh in at 6 and half oz each.
-
Sylvian Tennant

- Fireman

- Posts: 327
- Joined: Wed Aug 10, 2011 4:48 pm
- Location: Teesside
lovely stuff!
Facebook - https://www.facebook.com/Area51Models/
Instagram - https://www.instagram.com/area51greumach/
Instagram - https://www.instagram.com/area51greumach/
Who is online
Users browsing this forum: No registered users and 48 guests