

So, I got a Cricut Joy which is the basic Cricut m/c and it has limitations. It also uses what they call 'Smart Vinyl' which comes as self adhesive on a backing sheet. I believe that the larger m/cs use a system which requires cutting the shape from vinyl using a backing board, and then using a transfer tape to pick it up and move it on to the required surface - that all seems much too complicated to me!
Rather like 3d printing, you need to create the design then put it into the Cricut Design Space software then transfer that to the actual cutting machine.
There may well be other/quicker/simpler ways of approaching this, but this is what I did:
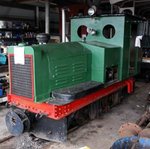
1) I was fortunate that the drawing of the F & B Manning Wardle 0-4-2 in the F & B book includes faint indications of most of the lining, and since I had already scaled the drawing to 16mm scale, all I needed to do was trace over the outlines on a separate layer and save it. If you aren't lucky enough to be in the same position, then you'd have to create a drawing of your lining from scratch.
- Screenshot 2025-12-18 12.59.40.jpg (211.3 KiB) Viewed 14653 times
Obviously the machine can't cut two different coloured vinyls at the same time so having drawn a complete panel, I then copied it several times. Then I deleted the yellow lines on one copy, leaving only the black centre line, and saved that. Then I opened another copy and deleted all but the outer yellow lines and saved that. Repeated that for the inner yellow lines and saved that. Then finally deleted everything but the yellow only centre panel outline.
3) The next thing to do is convert all of the saved drawings to be solid black colour. If not, the Cricut software won't 'see' it.
Initially, for some reason I thought the Cricut Design Space (CDS) would only import svg files, although I now believe it will take all the common graphics formats. However I've done all of mine as svg's. So the black line files need importing into the software, one at a time. I found CDS to not be particularly intuitive, mainly because it is really focused on cutting fancy pre-designed Happy Birthday, Fairies, etc, templates. I keep finding things that are semi hidden, like how to rotate an object, or scale it, or position it. Initially the software kept rearranging things where it wanted to put them, but then by accident I found how to lock it and print it as I had positioned things. If I had found this sooner I think it could have made keeping spacing much simpler! If anyone wants more info on using CDS then please ask.
4) Anyway, having arranged the broad black line drawings, next thing is to send them to the printer itself. This is via a Bluetooth connection from my Windows laptop. The machine first checks to see if it has a long enough piece of vinyl to get the design on and assuming it has, you press GO on the computer and a few seconds later it starts cutting. It is surprisingly quick, then it tells you it is finished and to unload.
5) I was a bit apprehensive about the best way to position a piece of fine, flimsy, self-adhesive vinyl which is alleged to be 'permanent', without it sticking everywhere but where I wanted.
In the end I measured the distances from the edge of the panel and cut small pieces of spare vinyl to act as spacer pieces to offer the actual line up against. The adhesive may be permanent with time but it can be repositioned and/or nudged to adjust it and also to remove the spacers.
6) Having stuck down the centre black line, I then needed to get the fine yellow lines either side. As I mentioned elsewhere the cutting registration is not precise and the thinnest I managed to get to work is a nominal 0.4mm. In practice this wandered from 0mm to about 0.5/0.6mm. 0.4mm is a scale 0.3 inches in 16mil, so probably not too far off prototype. I discovered that the very fine cut vinyl lines are stronger than they look, and starting with the outer border line, after carefully weeding it out from the sheet with the point of a scalpel and grabbing it with a fine tweezers, I could carefully pull the whole line away from the backing.
- weeding.jpg (520.63 KiB) Viewed 14653 times
Then repeat for the inner line.
Finally using spacers. I positioned the inner separate yellow line.
7) At this point, having almost finished, I discovered how to make the software and m/c print what I drew, in the positions that I drew it! If I was to do it again, I would try to cut all of the yellow lines in one go, lift the whole block from the backing sheet as one, position it on the loco and only then weed out what wasn't required. I'm pretty sure it would be quicker and more accurate than doing things one line at a time by eye.
This detail shows the black bits which form the shadows, to be applied to the yellow base letters.
- IMG_0098 invert.jpg (1.81 MiB) Viewed 14653 times
- IMG_0099.jpg (434.14 KiB) Viewed 14653 times
For info, I have done a test and the vinyl seems to be stable under "Army Painter" acrylic varnish - I was a bit worried that the fine lines might curl under the solvent.


 Can you not achieve the same results with low tack masking tape?