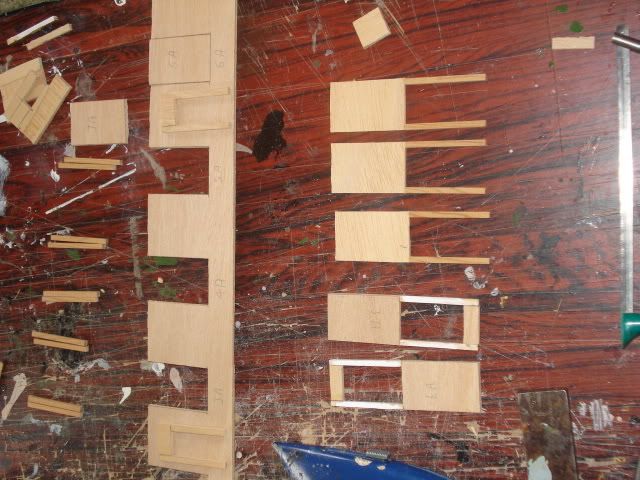
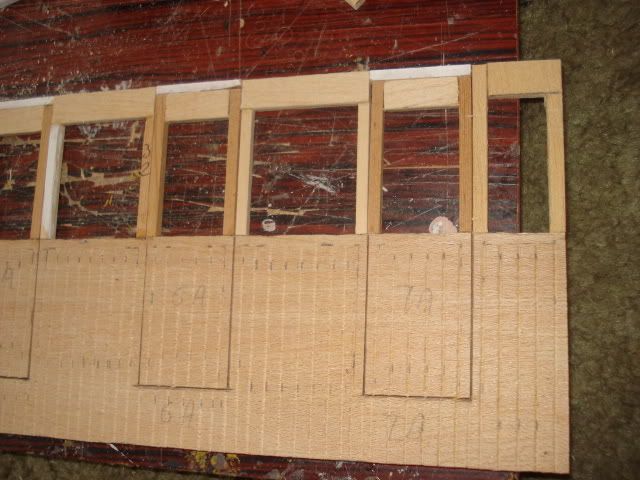
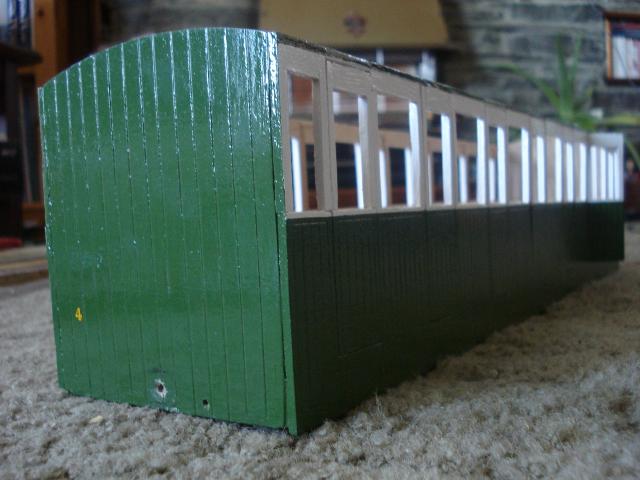
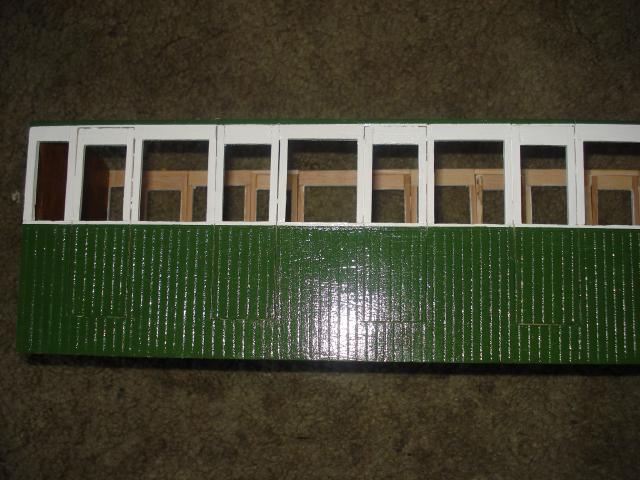
Anyway, cut out the sides today, and then cut the doors out of the sides, all 14 of them. Also started building up the full height of the doors using stripwood recovered from the old body. The construction technique is similar to the buffet car with the sides going up the waist height, and the windows being built up from stripwood. With 14 doors this is not going to be the fastest of builds!
Fixing a 16mm scale train wreck
-
laalratty
nope, it was beat myself with a stick or nothing at all, anyway I reckon I can run faster than you cecil (I've had enough practise...
)
Anyway, cut out the sides today, and then cut the doors out of the sides, all 14 of them. Also started building up the full height of the doors using stripwood recovered from the old body. The construction technique is similar to the buffet car with the sides going up the waist height, and the windows being built up from stripwood. With 14 doors this is not going to be the fastest of builds!
-
ptlrcecil
-
laalratty
Yes, cos otherwise you would of have to have scraped me off jubilee bridge
Anyway, been carrying on with the number 4 rebuild, despite the visit today of uncle Keith. As it was he was satisfied that there was no lasting damage to the ANLR's pride of the line (oh hang on, thats Gwydion)

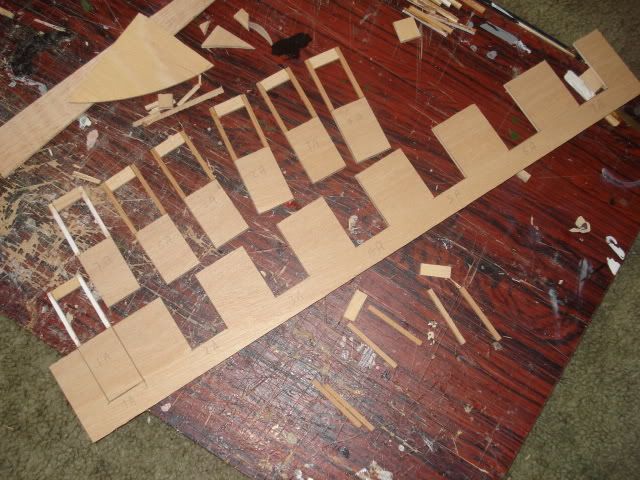
A production line of new doors, 14 are needed in total, but I ran out of stripwood after I had done 12...

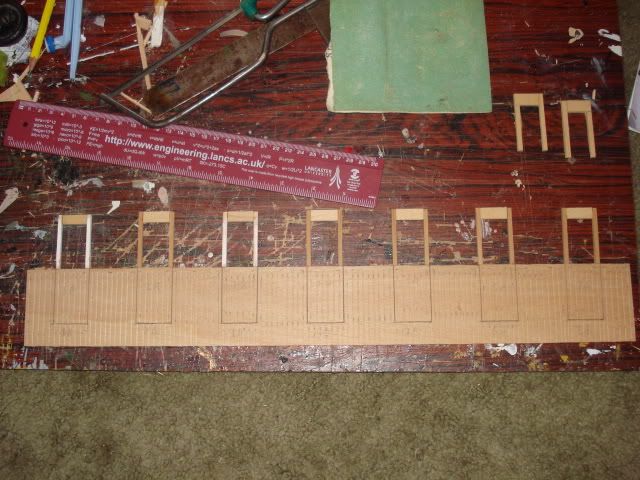
The doors and the side panel. The doors are numbered so that they get glued in the right place, they had been previously been cut out of the side panel

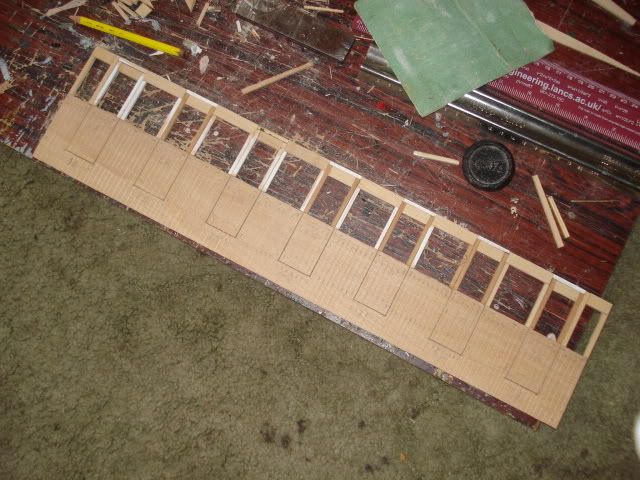
The side panel, with planking scribed, although the doors are not yet glued in place. I'm hoping to start on the framing for the windows tommorow, but that depends on how much stripwood is salvageable from the old body
Anyway, been carrying on with the number 4 rebuild, despite the visit today of uncle Keith. As it was he was satisfied that there was no lasting damage to the ANLR's pride of the line (oh hang on, thats Gwydion)

A production line of new doors, 14 are needed in total, but I ran out of stripwood after I had done 12...

The doors and the side panel. The doors are numbered so that they get glued in the right place, they had been previously been cut out of the side panel

The side panel, with planking scribed, although the doors are not yet glued in place. I'm hoping to start on the framing for the windows tommorow, but that depends on how much stripwood is salvageable from the old body
-
laalratty
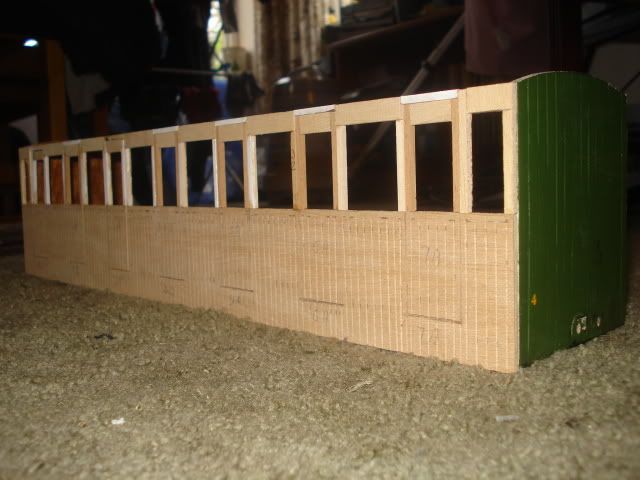
Still carrying on with fixing wrecked Ashbury number 4, and managed to finish the first side today. Also managed to reuse a few bits off the old body, as SB said in one of his garden rail articles "Recycling can be fun"

The first new side. Recycled is wood is white mostly, the remains of paint

Planking detail, once again all hand scribed with a compass, although didn't seem so tedious as it was for the buffet car or the Gladstone car

Last job of the day, fix the new side to the carriage. It now looks a lot more complete, although i'm just about out of 1/8th square stripwood for the other side, which is still rather incomplete. Of course, the model shop is closed tommorow as well...

The first new side. Recycled is wood is white mostly, the remains of paint

Planking detail, once again all hand scribed with a compass, although didn't seem so tedious as it was for the buffet car or the Gladstone car

Last job of the day, fix the new side to the carriage. It now looks a lot more complete, although i'm just about out of 1/8th square stripwood for the other side, which is still rather incomplete. Of course, the model shop is closed tommorow as well...
-
bungle80a
-
laalratty
Yep, i've divised auto parachute facility that deploys when it detects a positive gravity acceleration using a micro explosive system as used on amature rockets
It's all going to be fitted under the floor...
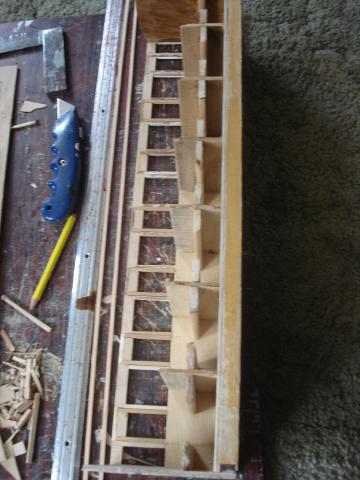
Anyway, apart from that exciting *cough* development i've been working on the interior. As ever, something that should of been simple wasn't as all of the seat backs had to be lowered in height because the new coach bodysides are lower. This meant breaking off and refixing in place all of the seats.

Also, to the left of the body (on its side) can be seen 2 lengths of 1/8th square stripwood, purchased today, allowing me to complete the other bodyside. Hopefully I've now got all of the parts required to finish the coach, I'm hoping for completion in mid June for official unveiling at an NWAG steamup.
Anyway, apart from that exciting *cough* development i've been working on the interior. As ever, something that should of been simple wasn't as all of the seat backs had to be lowered in height because the new coach bodysides are lower. This meant breaking off and refixing in place all of the seats.

Also, to the left of the body (on its side) can be seen 2 lengths of 1/8th square stripwood, purchased today, allowing me to complete the other bodyside. Hopefully I've now got all of the parts required to finish the coach, I'm hoping for completion in mid June for official unveiling at an NWAG steamup.
-
laalratty
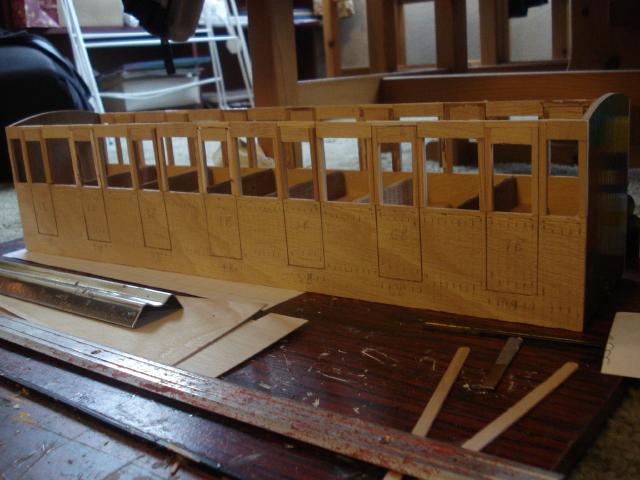
Second side is now one

Now looking rather complete, i'm hoping to have the coach back for mid june, 1 1/2 months after the accident. Next up is making the droplights for the doors (the old body didn't have these), and then painting. The old removeable roof also needs modifications to fit the new body.

Now looking rather complete, i'm hoping to have the coach back for mid june, 1 1/2 months after the accident. Next up is making the droplights for the doors (the old body didn't have these), and then painting. The old removeable roof also needs modifications to fit the new body.
-
bungle80a
-
laalratty
I've now started painting number 4, all of one side and most of the other have been primed, and i've given the primed side 3 coats of the off white used for the upper half of the carriage. I did take a pic but the photo didn't really show up the white paint, as the primer is also white. Hopefully, I'll start on the green of the lower half over the weekend.
-
laalratty
I managed to get the 3 coats of green paint on the first side, somehow squeezed around steamups and student finance applications over the weekend

One of the doors has not been glued in, so that with carefull posistioning the door can be put in the open posistion for photos.

This side is done, the other side still needs painting. Then the interior needs to be stained. I have started the droplights today so that they can be put when the painting and staining is done. As usual some will be left in the open and semi open posistion. The glazing can then be fitted, and then the old roof modified to fit the new body. I'm hoping to temporerally fit the coach with the bogies off the workers coach, as one of number 4's bogies was destroyed in the crash.

One of the doors has not been glued in, so that with carefull posistioning the door can be put in the open posistion for photos.

This side is done, the other side still needs painting. Then the interior needs to be stained. I have started the droplights today so that they can be put when the painting and staining is done. As usual some will be left in the open and semi open posistion. The glazing can then be fitted, and then the old roof modified to fit the new body. I'm hoping to temporerally fit the coach with the bogies off the workers coach, as one of number 4's bogies was destroyed in the crash.
-
laalratty
A week further on, and the exterior painting is just about complete. The interior has also had a coat of wood stain, and the droplights have been fitted, as usual, with a proportion either half or fully open

The completed interior
Today, I fitted the glazing which is a bit of a mash of various plastics that I had available, including some left over from the IMP workers coach and the IP FfR coach. It was fitted with epoxy resin, which I tend to use for glazing now, although I resort to superglue if epoxy fails.

I am hoping to have the carriage on its borrowed bogies soon, followed by re-attaching the couplings, vacuum pipes and door handles and grab rails. The roof still needs modyfying as well. Re-entry into service is hoped for Saturday...

The completed interior
Today, I fitted the glazing which is a bit of a mash of various plastics that I had available, including some left over from the IMP workers coach and the IP FfR coach. It was fitted with epoxy resin, which I tend to use for glazing now, although I resort to superglue if epoxy fails.

I am hoping to have the carriage on its borrowed bogies soon, followed by re-attaching the couplings, vacuum pipes and door handles and grab rails. The roof still needs modyfying as well. Re-entry into service is hoped for Saturday...
-
laalratty
The coach is now back to a runnable condition, i'm pleased to say, indeed except for a few details the rebuild of ANLR carriage number 4 is complete, just over 5 1/2 weeks after the crash that all but wrote off the coach.
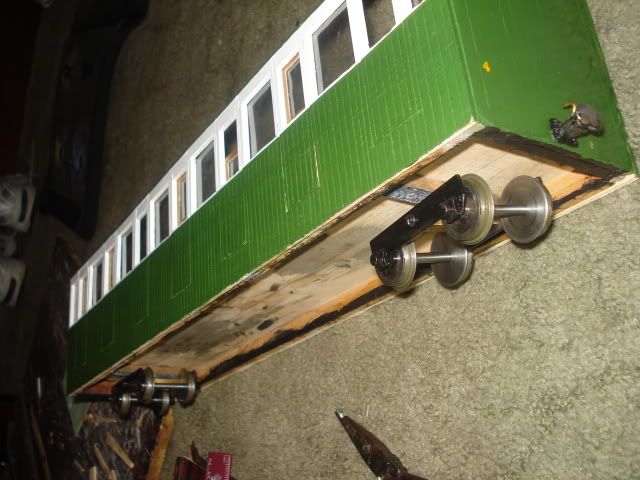
The bogies just after fitting, these will probably be permanantly allocated to this coach and the IMP Gladstone will a get a new set
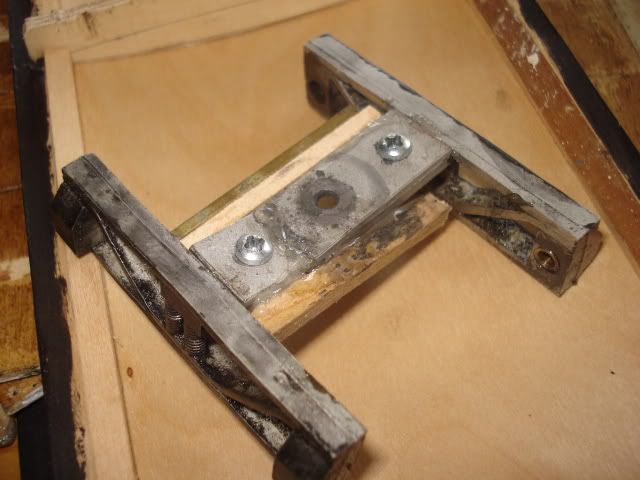
The IP enginering bogie that was broken in the crash. As you can see it was already carrying battle scars, it had previously broke after my mum dropped coach number 5 onto a concrete step
The bogie broke, and was swapped with one on number 4 as number 5 is a quite high mileage vehical that I didn't want out of service. It was repared by fixing a couple of bits of wood and a scrap piece of rail to strengthen the strecher bar that had been glued back together with lashings of epoxy. However this repair failed during the crash, so now the bogie will be totally scrapped.
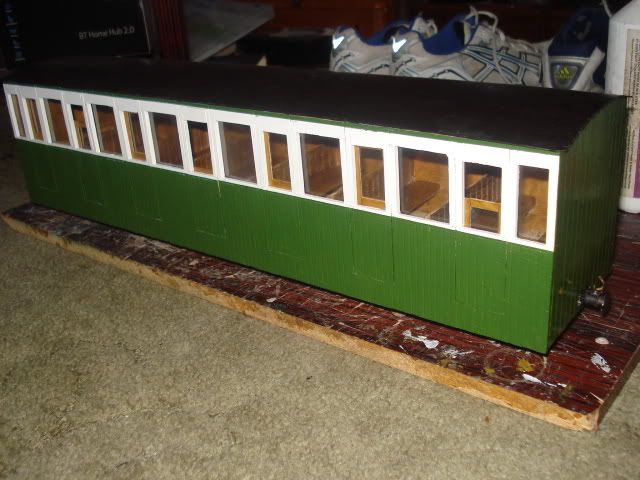
After fitting the bogies, I modified to old removeable roof to fit the new body. It needed a few mods but it just about fits ok now, though i'll give it a wash with roof dirt paint as this is the colour I paint my roofs now. Re-entry into service will be Saturday though

The bogies just after fitting, these will probably be permanantly allocated to this coach and the IMP Gladstone will a get a new set

The IP enginering bogie that was broken in the crash. As you can see it was already carrying battle scars, it had previously broke after my mum dropped coach number 5 onto a concrete step

After fitting the bogies, I modified to old removeable roof to fit the new body. It needed a few mods but it just about fits ok now, though i'll give it a wash with roof dirt paint as this is the colour I paint my roofs now. Re-entry into service will be Saturday though
-
Crackingjob
broken bogie
why not replace the streacher with a block of hard wood (US style),with washers cut out from plastic milk bottle (greasy plastic!!) on top...to be frank who will see it under the coach and why throw away a bogie
Crackingjob
Austerity and Thrift
Crackingjob
Austerity and Thrift
Who is online
Users browsing this forum: No registered users and 6 guests