Learning how to 3D print loco parts
-
tom_tom_go

- Driver

- Posts: 4824
- Joined: Wed Feb 23, 2011 3:08 am
- Location: Kent, UK
- Contact:
Re: Learning how to 3D print loco parts
Do you have a link so we can check it although I suspect it is Norton as with most of these 'security suite' applications they are OTT and grind your computer to a halt.


Re: Learning how to 3D print loco parts
Mark,markoteal wrote: ↑Mon Jun 12, 2017 9:33 pm Great loco James (again) - and yes your weathering does add so much to the locos - I may yet have a go on one of my battery work horses! Millie will always be shiny though!
Its funny - when 3D printers came out I thoughT i'd never have need of one of those - now as I see them being used more and more in the 16mm world, I'm starting to think..................
I was browsing the "Thingiverse" site last night and came across a rather tasty looking Hudson tipper to download....!!
Philip
-
tom_tom_go
- Driver
- Posts: 4824
- Joined: Wed Feb 23, 2011 3:08 am
- Location: Kent, UK
- Contact:
Re: Learning how to 3D print loco parts
That is fine to download, just uninstall Nortonphilipy wrote: ↑Sat Jun 17, 2017 3:05 pm Hi Tom,
Thanks.
http://www.mattercontrol.com/#jumpMatte ... lDownloads
The Windows version.
Re: Learning how to 3D print loco parts
Thanks. I didn't think there was a problem with it, but as well to be sure.
As for Norton it isn't the first time I've thought the same....! I might agree except that it did warn me about a genuine nasty earlier this afternoon.
Philip
-
James from Devon
- Trainee Fireman

- Posts: 210
- Joined: Mon Feb 01, 2016 6:58 pm
- Location: Devon
Re: Learning how to 3D print loco parts
Hi Philipphilipy wrote: ↑Sat Jun 17, 2017 2:35 pmHi James,James from Devon wrote: ↑Sun Jun 11, 2017 6:53 pm slicing ..... I have tried several but get far better results from MatterControl.
I'm actively looking at 3d printing again.
I quite like the look of MatterControl, compared to, say, Makerbot and Replicator G. However, I've just downloaded it ( 3 times!) from the Mattercontrol site and my Norton Antivirus software keeps freaking out and removing it saying it is infected.
Did you have any probs with installing it? I suspect it is Norton being paranoid,, as it often is, but thought I'd check.
Philip
I didn't get a warning from Norton when I downloaded....Not had an probs since either and do a full system scan every week...it may freak out because it's open source software. I have tried Makerbot and I find MC better personally but not Replicator so can't offer comment on that one. I'd love to hear how you get on
Cheers
J
Garden railways don't run on steam or electric rather wine and Jedi master level patience
-
James from Devon
- Trainee Fireman
- Posts: 210
- Joined: Mon Feb 01, 2016 6:58 pm
- Location: Devon
Re: Learning how to 3D print loco parts
Since Phiply and I are on a mission to get to grips with 3D printing...here is a teaser of my next project:
I am using 3D printed parts to create masters for resin mould, (the parts need post printing treatment with wet and dry) - trying a little loco for some fun!
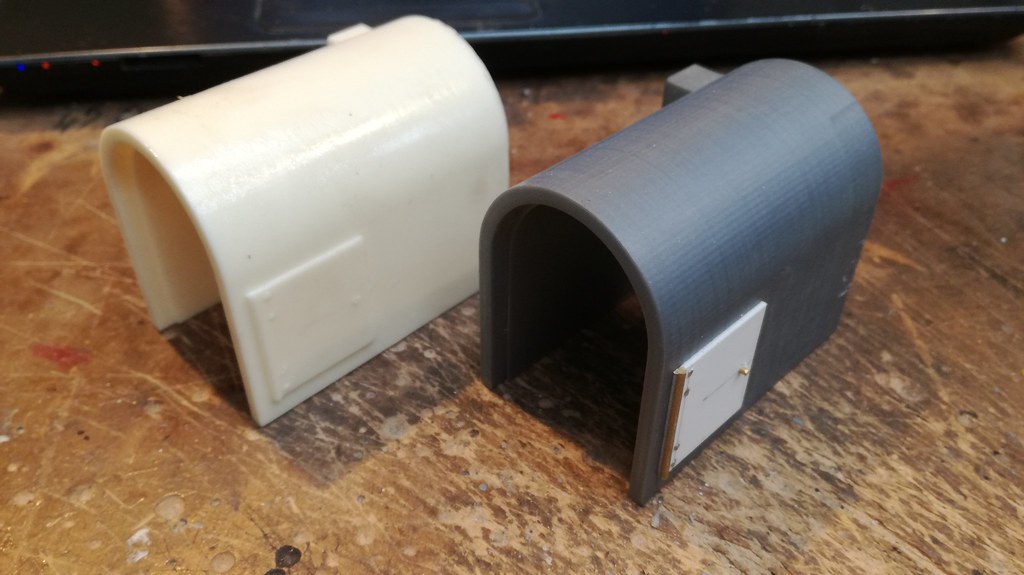
I'll keep updating as I go
Cheers guys

I am using 3D printed parts to create masters for resin mould, (the parts need post printing treatment with wet and dry) - trying a little loco for some fun!
I'll keep updating as I go
Cheers guys
Garden railways don't run on steam or electric rather wine and Jedi master level patience
Re: Learning how to 3D print loco parts
James,
Have you done any experimenting to reduce the surface print pattern and thus reduce the post production work? I'm thinking of, say, reducing print speed and/or increasing extrusion temperature?
It's something that I want to play with, although with what I've been printing so far its more of a blessing than a curse to have some surface texture.
Philip
-
James from Devon
- Trainee Fireman
- Posts: 210
- Joined: Mon Feb 01, 2016 6:58 pm
- Location: Devon
Re: Learning how to 3D print loco parts
Hi Philipphilipy wrote: ↑Sat Jul 01, 2017 7:18 am James,
Have you done any experimenting to reduce the surface print pattern and thus reduce the post production work? I'm thinking of, say, reducing print speed and/or increasing extrusion temperature?
It's something that I want to play with, although with what I've been printing so far its more of a blessing than a curse to have some surface texture.
Yes I have done some work on this, I am presuming that you are using either Matter Control or Qidi to slice?
If you reduce the layer thickness from (default) 0.5 to 0.025 (the qidi goes down to 0.1) that makes a huge difference and also slow the print speed (make small adjustments and test) that also improves the surface. It does, however, take much longer to print. I do see if I can orientate jobs on the printer so that the vertical face is the most important as it is always smoother that a horizontal face. Also, if sanding, wet and dry paper works far better than standard sand paper.
Thanks for your top tip on Sketch Up, I am getting to grips with it - it is far better than 3D builder (which is still fine for simple jobs)
Another thing I notice is that the time remaining on the printer isn't accurate - it is much faster than it says it will be!
Cheers
J
Garden railways don't run on steam or electric rather wine and Jedi master level patience
Re: Learning how to 3D print loco parts
Thanks. A number of interesting points here.
First though, I actually bought the dual head Qidi, partly because it has a slightly bigger print bed and partly to allow for printing supports to overhangs, etc, in the future. So far however I'm only using one head, I haven't even got any dissolvable filament yet.
So, I tried to set it up with MatterControl, but got stuck with what parameters to use for the dual m/c since MC doesn't have native support for Qidi and I had no idea what the various boxes were for. I ended up going with the version of Makerware as supplied on the Qidi SD card and so far I've had no problems with that. I just use the "Replicator Dual" settings to start ( as per Qidi instructions) and then modify any bits that I want to customise. Before getting the Qidi I had previously downloaded and installed the latest Makerware to have a look at, so when the Qidi arrived I just tried to use that and got stuck, because it doesn't include "Replicator Dual" as one of its drop-down m/c options and I had no idea which Replicator model was the equivalent of the Qidi dual. In the end I uninstalled that version of Makerware and installed the older version from the SD card, which does list "Replicator Dual" and as I said, works fine. I may investigate Mattercontrol and/or updated Makerware now that I have some idea how things work, but then again, "if it ain't broke, don't fix it".
The Makerware default settings are 0.2 layer thickness, so that's what I've used for everything so far, together with 60mm/s extrude speed as recommended in the Qidi instructions.
Interesting comment about vertical vs horizontal extrusion. Now that you mention it, the test cubes had much smoother vertical surfaces than my prints, which is why I was thinking about settings to improve it, but hadn't considered the orientation. So far I've done everything flat on the bed, simply because its the obvious way to orientate a 20 x 200 stone slab, rather than building it vertically on a 4 x 200 edge. I'll give it a try and see what happens, although I wonder how it will get on with mortar course recesses?
Not sure about the timing. I have noticed that it doesn't seem to be very accurate, but never really checked the actual timings. I must investigate.
BTW, do you use a Raft when printing, or just do it flat on the bed? It's a huge waste of filament. On my 20 x 200 x 4mm prints I end up with a 30 x 220 x 1.5mm slab of waste! - I guess edge printing would significantly reduce that, which is another good reason to try it.
Philip
Re: Learning how to 3D print loco parts
Interesting. How are you getting that hooped effect without the print collapsing. Presumably you can't print dissolvable supports with a single head?James from Devon wrote: ↑Fri Jun 30, 2017 10:42 pm
I am using 3D printed parts to create masters for resin mould, (the parts need post printing treatment with wet and dry) - trying a little loco for some fun!
Edited to add - The penny just dropped! You print it vertically, end on to the bed??
Philip
-
tom_tom_go
- Driver
- Posts: 4824
- Joined: Wed Feb 23, 2011 3:08 am
- Location: Kent, UK
- Contact:
Re: Learning how to 3D print loco parts
Glad you guys are enjoying your 3D printing adventure.
Would you be interested in printing stuff for us mere mortals? I have a few little things I would like made.
Would you be interested in printing stuff for us mere mortals? I have a few little things I would like made.
-
James from Devon
- Trainee Fireman
- Posts: 210
- Joined: Mon Feb 01, 2016 6:58 pm
- Location: Devon
Re: Learning how to 3D print loco parts
Hi Tom. Its a steep learning curve and yes I'd have a go at printing for you, drop me a pm.tom_tom_go wrote: ↑Tue Jul 04, 2017 2:08 pm Glad you guys are enjoying your 3D printing adventure.
Would you be interested in printing stuff for us mere mortals? I have a few little things I would like made.
Cheers
J
Garden railways don't run on steam or electric rather wine and Jedi master level patience
-
James from Devon
- Trainee Fireman
- Posts: 210
- Joined: Mon Feb 01, 2016 6:58 pm
- Location: Devon
Re: Learning how to 3D print loco parts
Oh I see, I didn't want to start with the dual head but may be a future upgrade. Clearly, the default settings are a little different.philipy wrote: ↑Sun Jul 02, 2017 7:13 am Thanks. A number of interesting points here.
First though, I actually bought the dual head Qidi, partly because it has a slightly bigger print bed and partly to allow for printing supports to overhangs, etc, in the future. So far however I'm only using one head, I haven't even got any dissolvable filament yet.
So, I tried to set it up with MatterControl, but got stuck with what parameters to use for the dual m/c since MC doesn't have native support for Qidi and I had no idea what the various boxes were for. I ended up going with the version of Makerware as supplied on the Qidi SD card and so far I've had no problems with that. I just use the "Replicator Dual" settings to start ( as per Qidi instructions) and then modify any bits that I want to customise. Before getting the Qidi I had previously downloaded and installed the latest Makerware to have a look at, so when the Qidi arrived I just tried to use that and got stuck, because it doesn't include "Replicator Dual" as one of its drop-down m/c options and I had no idea which Replicator model was the equivalent of the Qidi dual. In the end I uninstalled that version of Makerware and installed the older version from the SD card, which does list "Replicator Dual" and as I said, works fine. I may investigate Mattercontrol and/or updated Makerware now that I have some idea how things work, but then again, "if it ain't broke, don't fix it".
The Makerware default settings are 0.2 layer thickness, so that's what I've used for everything so far, together with 60mm/s extrude speed as recommended in the Qidi instructions.
Interesting comment about vertical vs horizontal extrusion. Now that you mention it, the test cubes had much smoother vertical surfaces than my prints, which is why I was thinking about settings to improve it, but hadn't considered the orientation. So far I've done everything flat on the bed, simply because its the obvious way to orientate a 20 x 200 stone slab, rather than building it vertically on a 4 x 200 edge. I'll give it a try and see what happens, although I wonder how it will get on with mortar course recesses?
Not sure about the timing. I have noticed that it doesn't seem to be very accurate, but never really checked the actual timings. I must investigate.
BTW, do you use a Raft when printing, or just do it flat on the bed? It's a huge waste of filament. On my 20 x 200 x 4mm prints I end up with a 30 x 220 x 1.5mm slab of waste! - I guess edge printing would significantly reduce that, which is another good reason to try it.
I think that the printer can handle 1mm overhang ok, if not you may be stuck with printing those flat.
I don't use a raft but I did find longer prints curling up at the edges. The recommended bed heat for PLI was 40 degrees but I found if I up it to 50 degrees, then the part stayed flat.
If you have found software that works for you then yeah, keep using it. I have reverted from matter control to the native Qidi software and getting better results.
Just doing a little job for a sound engineer friend of mine....printing some "Darth Fader" control knobs
if nothing else, the printer is a lot of fun.
Garden railways don't run on steam or electric rather wine and Jedi master level patience
Re: Learning how to 3D print loco parts
Tom,tom_tom_go wrote: ↑Tue Jul 04, 2017 2:08 pm Glad you guys are enjoying your 3D printing adventure.
Would you be interested in printing stuff for us mere mortals? I have a few little things I would like made.
I'd be happy to give it a go, but at this stage of my learning curve no promises on quality or timescale though!
Philip
Re: Learning how to 3D print loco parts
I've had some support filament arrive this morning, so I'll give that a try in due course. I have read that PLA printers can cope with an unsuported outward taper of not more than 62 degrees.James from Devon wrote: ↑Tue Jul 04, 2017 4:46 pm
I think that the printer can handle 1mm overhang ok, if not you may be stuck with printing those flat.
Yes I've had that curling problem, particularly towards the front RH corner of the bed. I've assumed that the bed temperature is not even, but I could be wrong.James from Devon wrote: ↑Tue Jul 04, 2017 4:46 pm I don't use a raft but I did find longer prints curling up at the edges. The recommended bed heat for PLI was 40 degrees but I found if I up it to 50 degrees, then the part stayed flat.
I started with 40 deg as well, as recommended by Qidi, but found a problem with getting it off the raft so I dropped the bed temp to 35 and 30, thinking that at lower temp it wouldn't have time to stick so firmly. It kind of worked but not every time. I'll try raising the temp and see what happens.
Yes, agreed, not sure my wife thinks so, though!James from Devon wrote: ↑Tue Jul 04, 2017 4:46 pm Just doing a little job for a sound engineer friend of mine....printing some "Darth Fader" control knobs
if nothing else, the printer is a lot of fun.
Philip
Who is online
Users browsing this forum: No registered users and 3 guests