Ace Engineering Works MSR Continental Conversion 'Sixer'

A very popular starting point for Live Steam. With their low cost comes a number of problems which can be discussed here
User avatar
ace
Fireman
Fireman
Posts: 294
Joined: Sun Jul 14, 2013 9:03 am

Ace Engineering Works MSR Continental Conversion 'Sixer'

Post by ace » Sat Jan 24, 2015 11:53 pm

Hi Guys,

This project has been nearly 14 months in the making now, it seems right to publish it now whilst it seems topical amongst the forums.

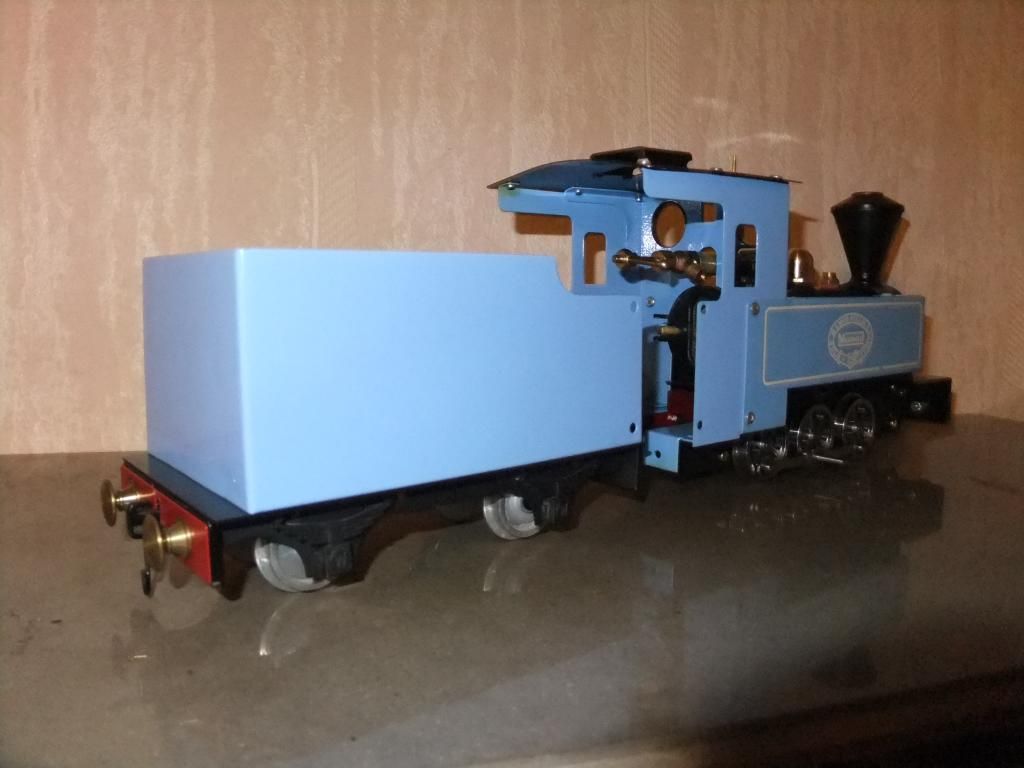
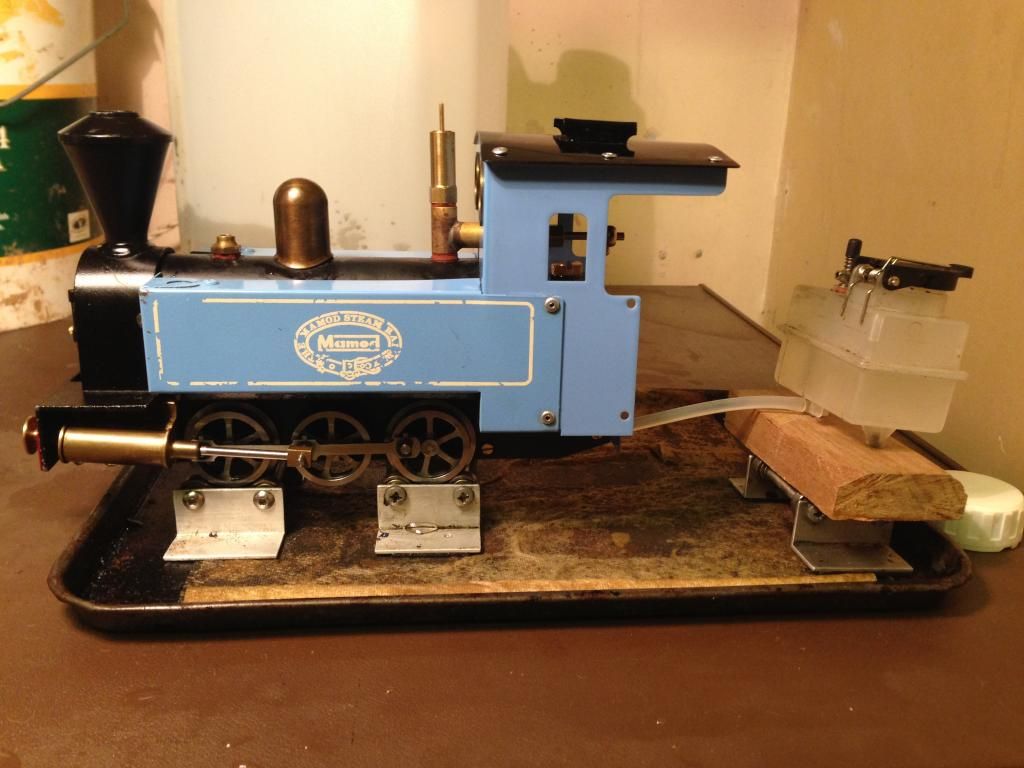
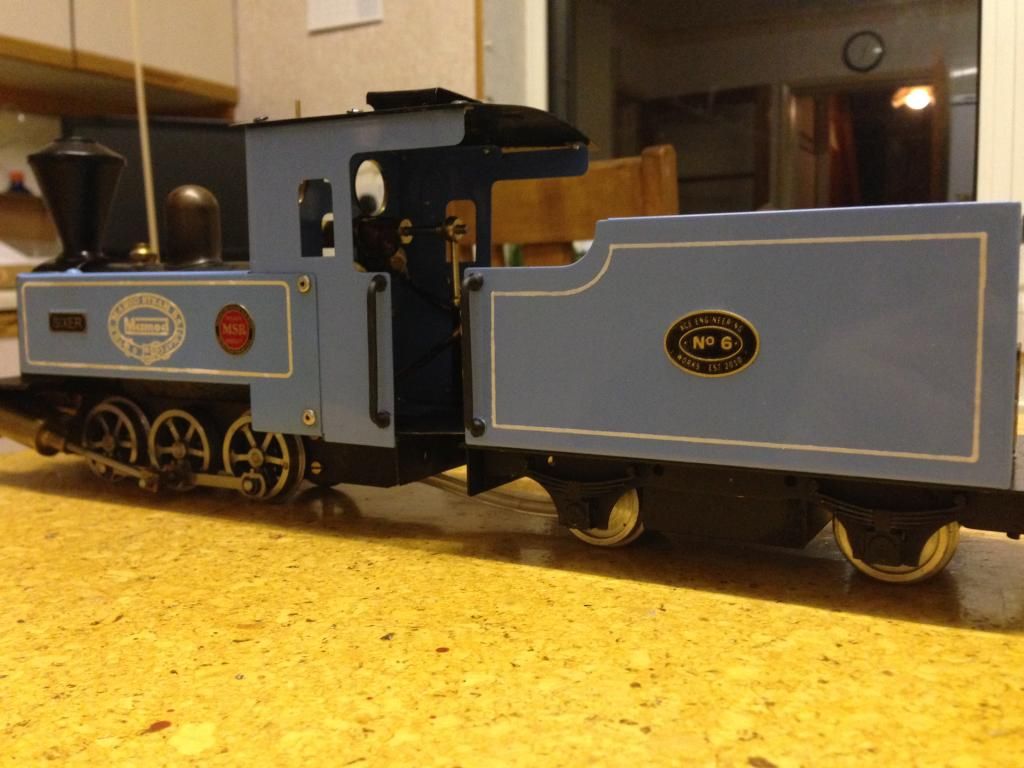
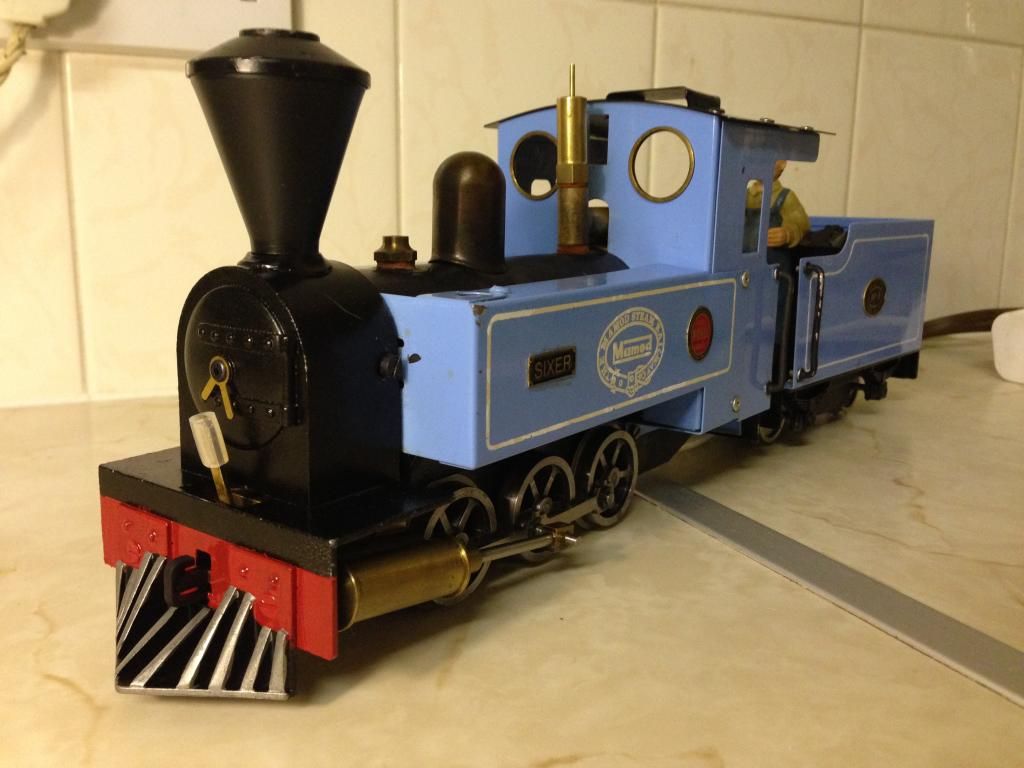
Back in October 2013 when I started my plantation loco 'Baldwin' ( see build thread here: http://modelsteam.myfreeforum.org/about67036.html) , I received quite a few extra parts to complete another MSR rarity. This is the continental 0-6-0 conversion that MSR was going to produce.

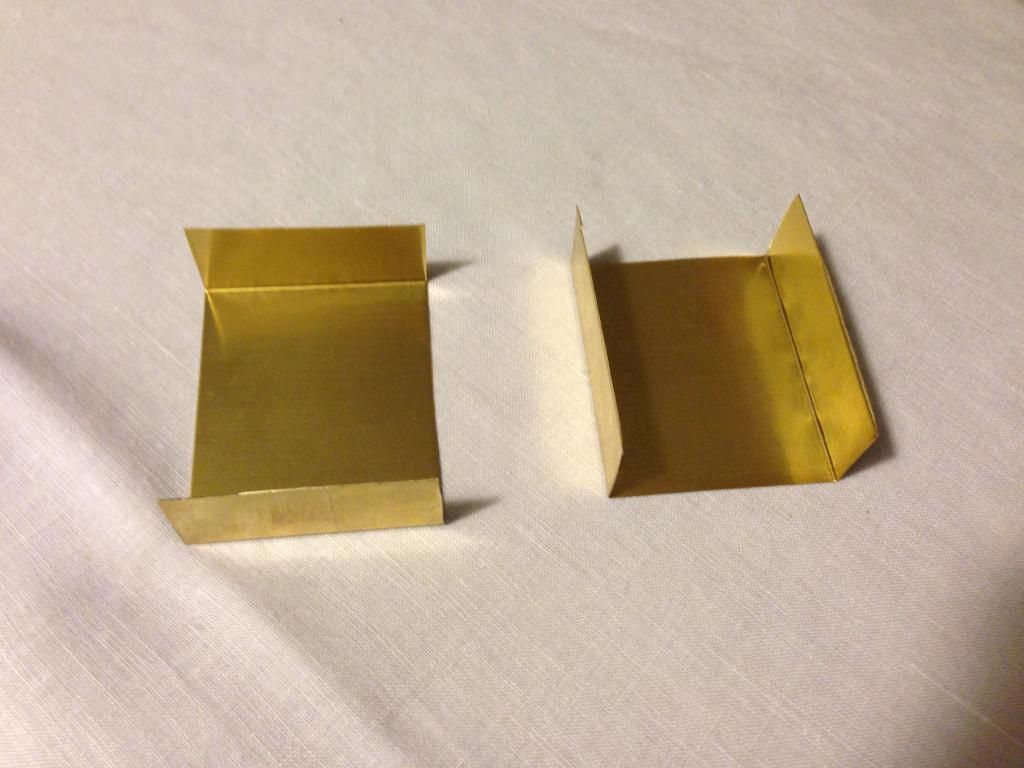
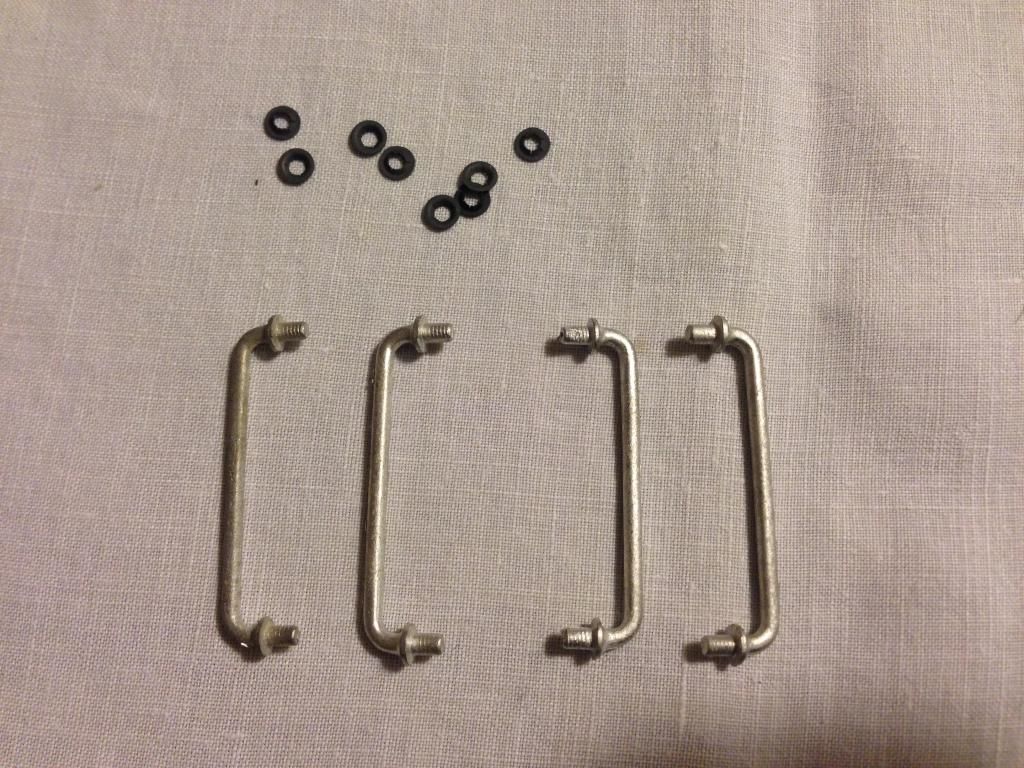
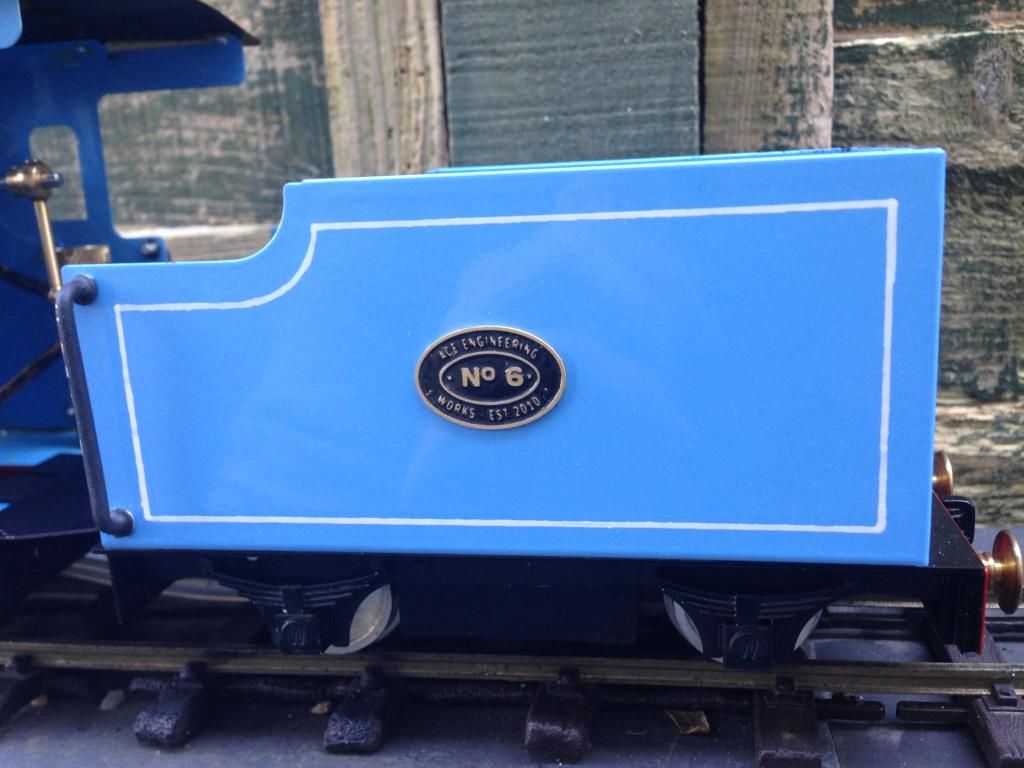
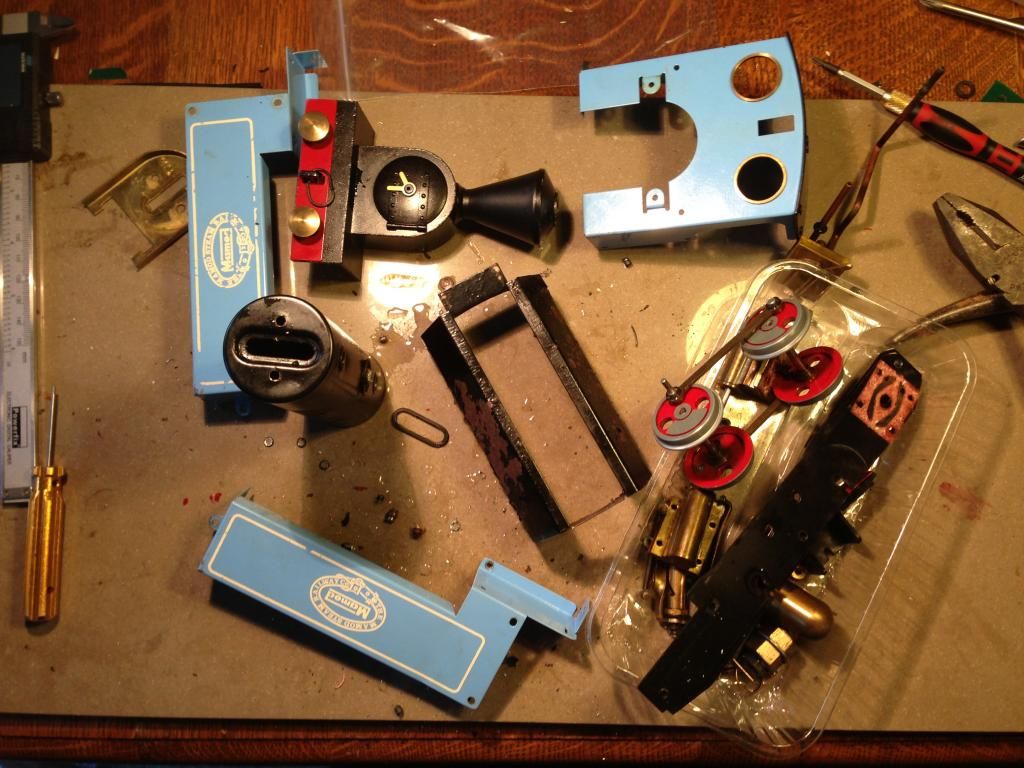
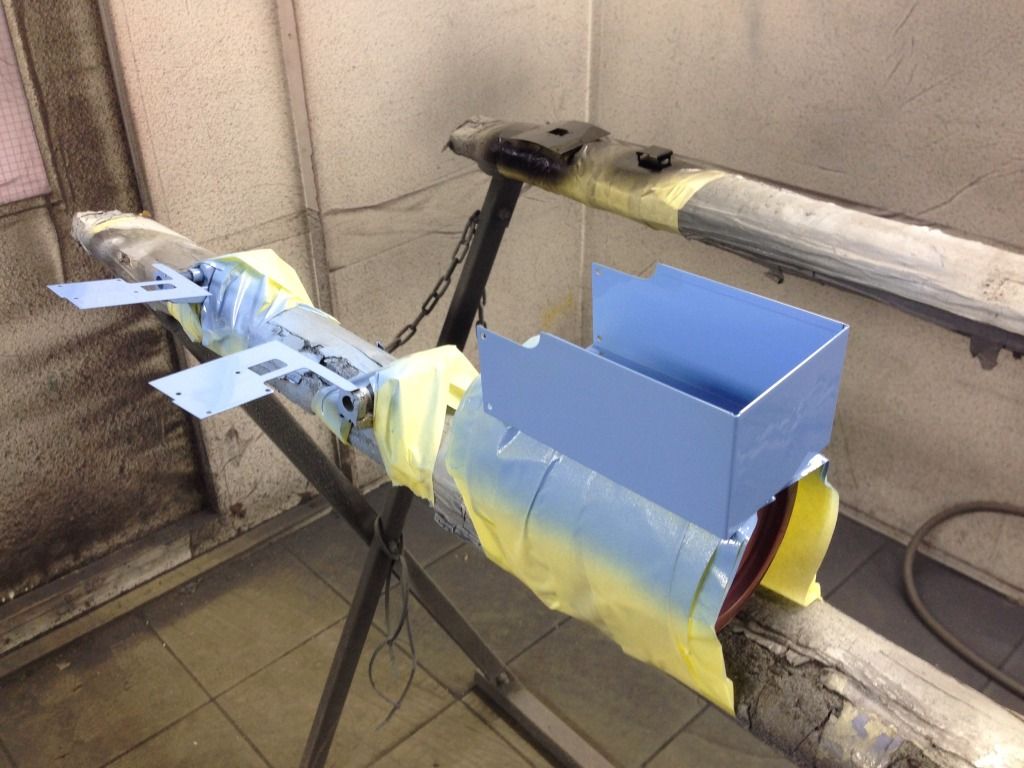
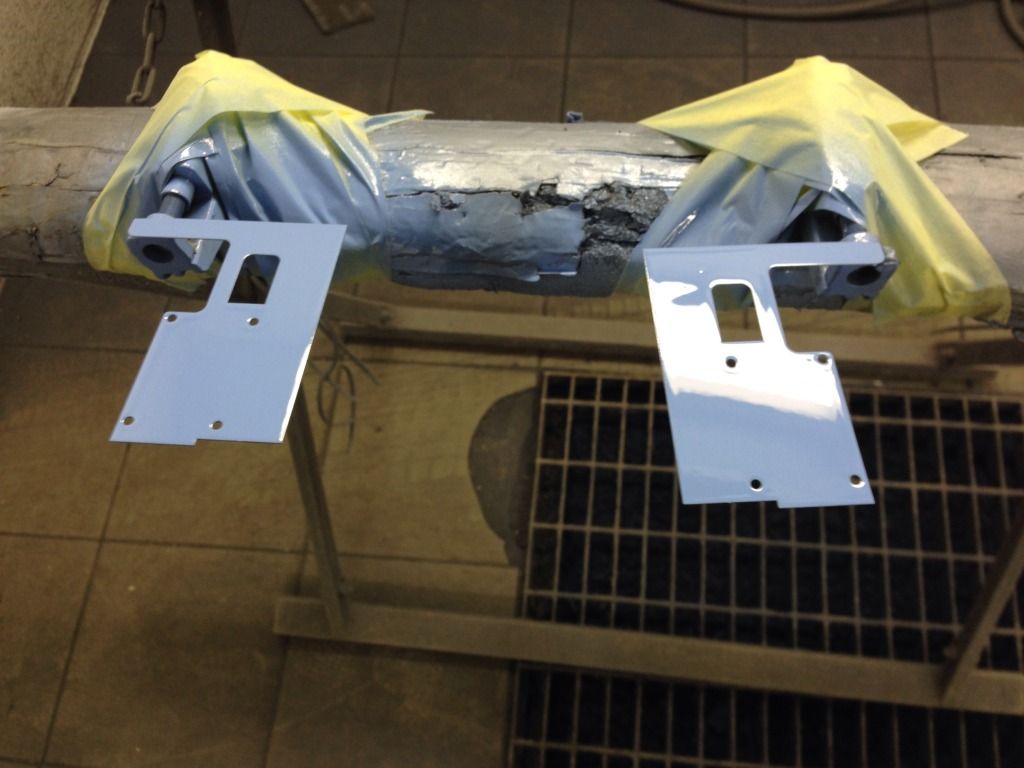
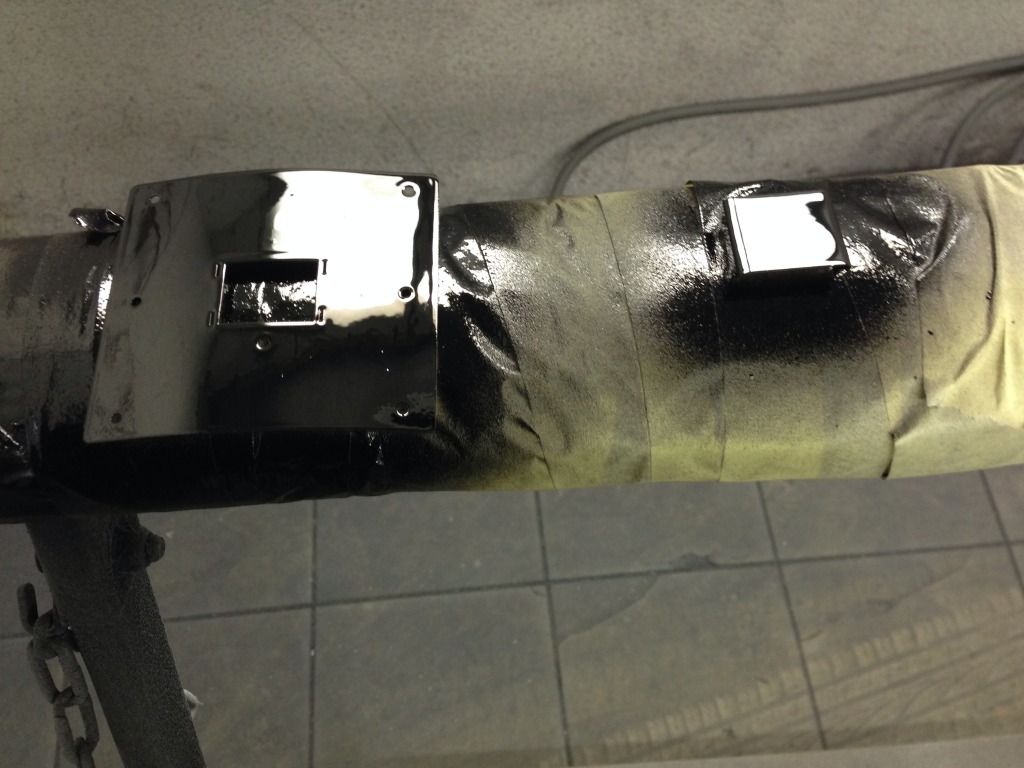
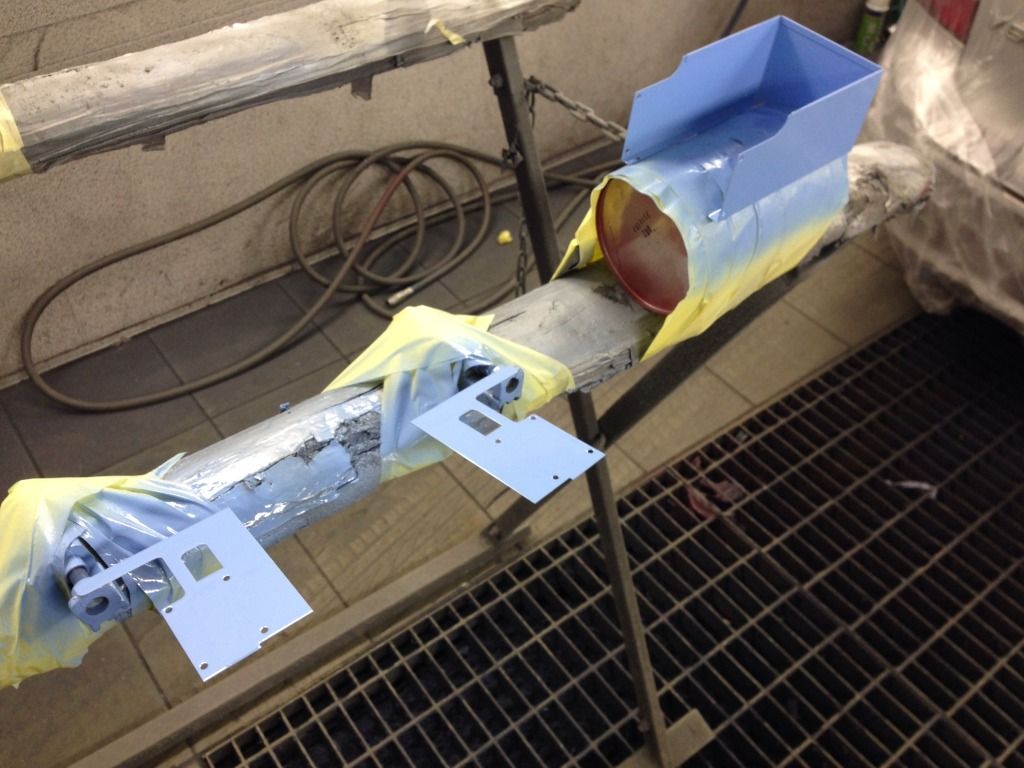
As part of my kit I received the two cab extenders, alternative roof, tender, coupling rods and side frames. Enough to successfully convert a standard Mamod engine into said 'Continental' style engine.

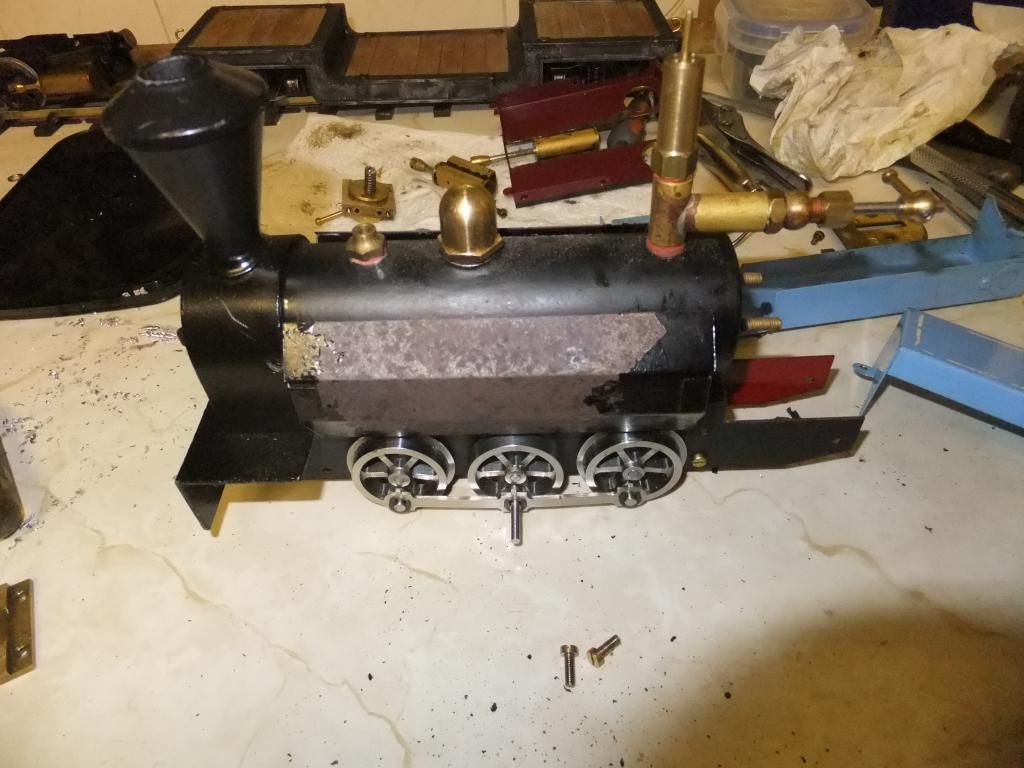
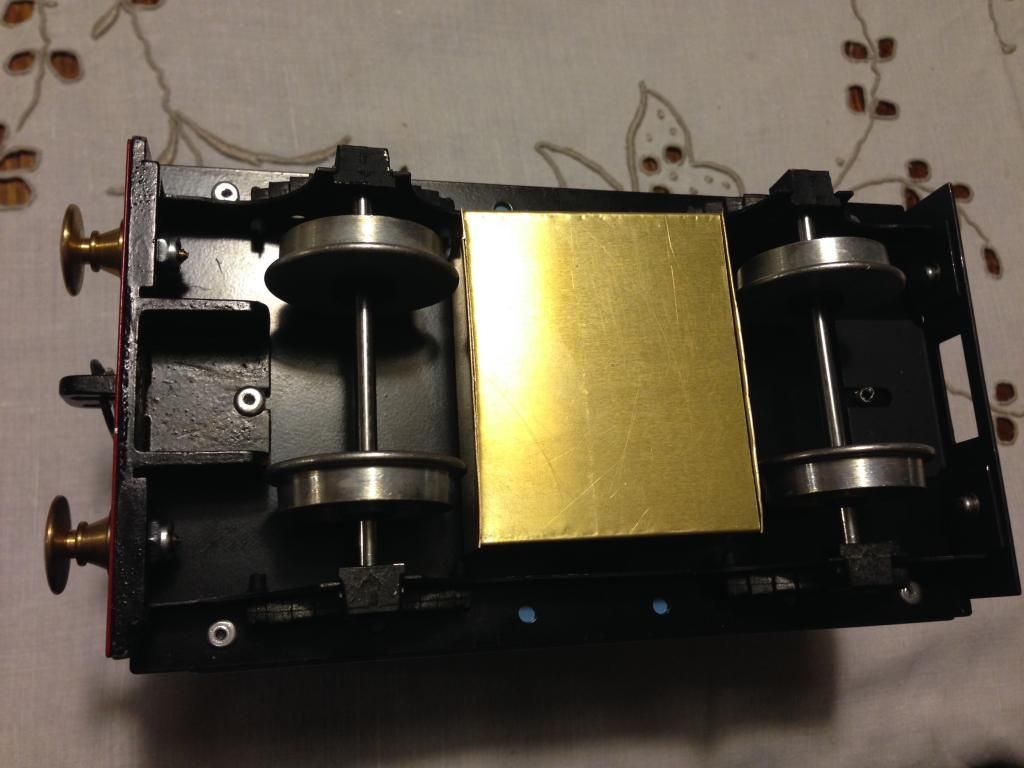
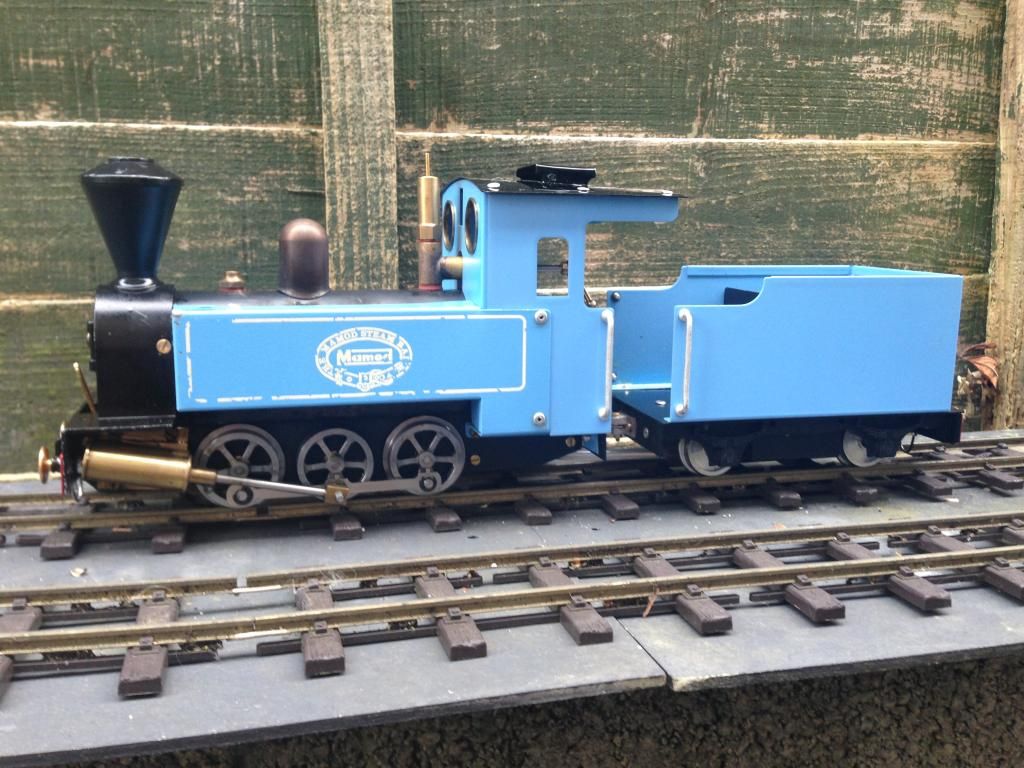
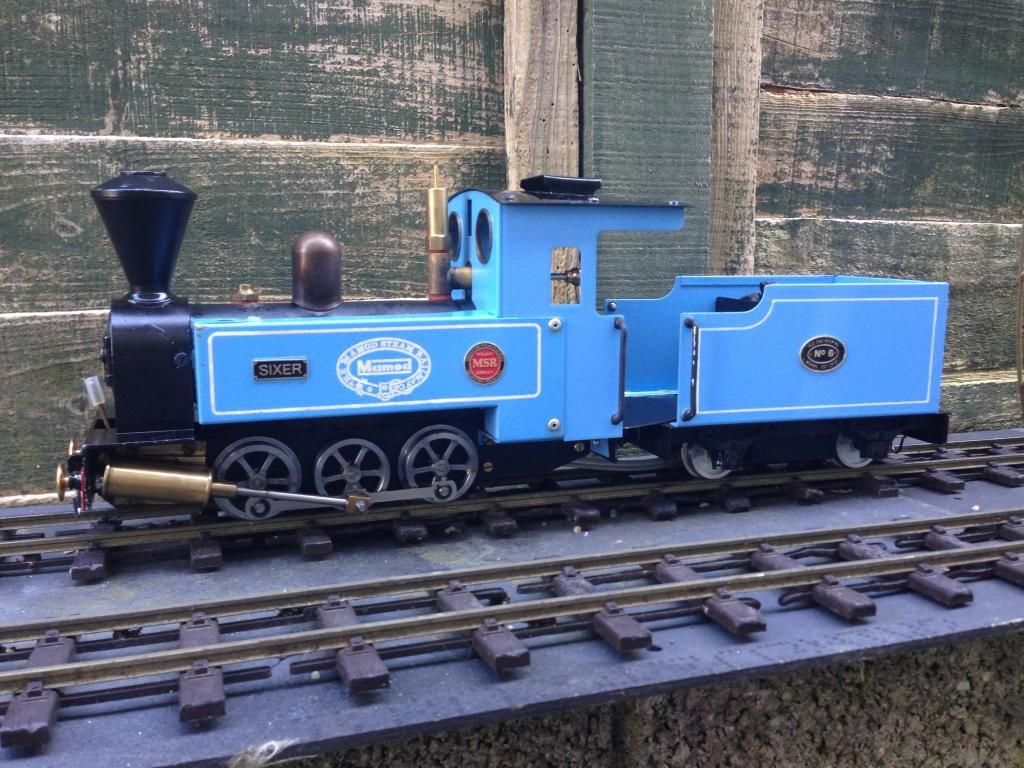
So lets start with the donor, a simple SL2.

Image

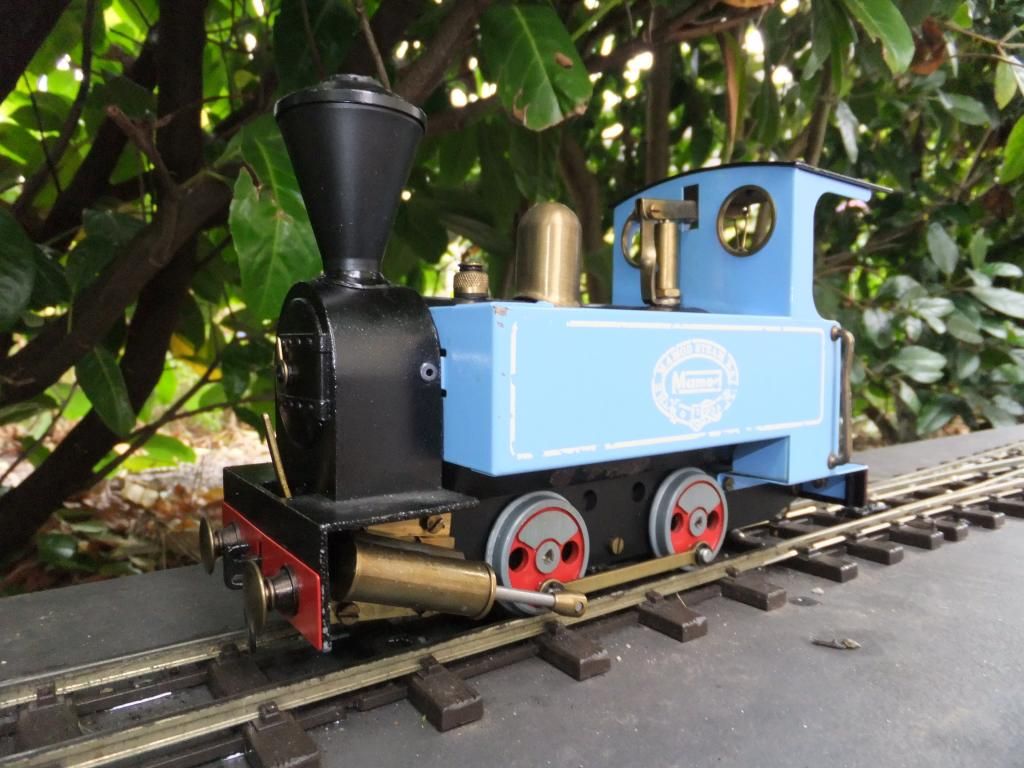
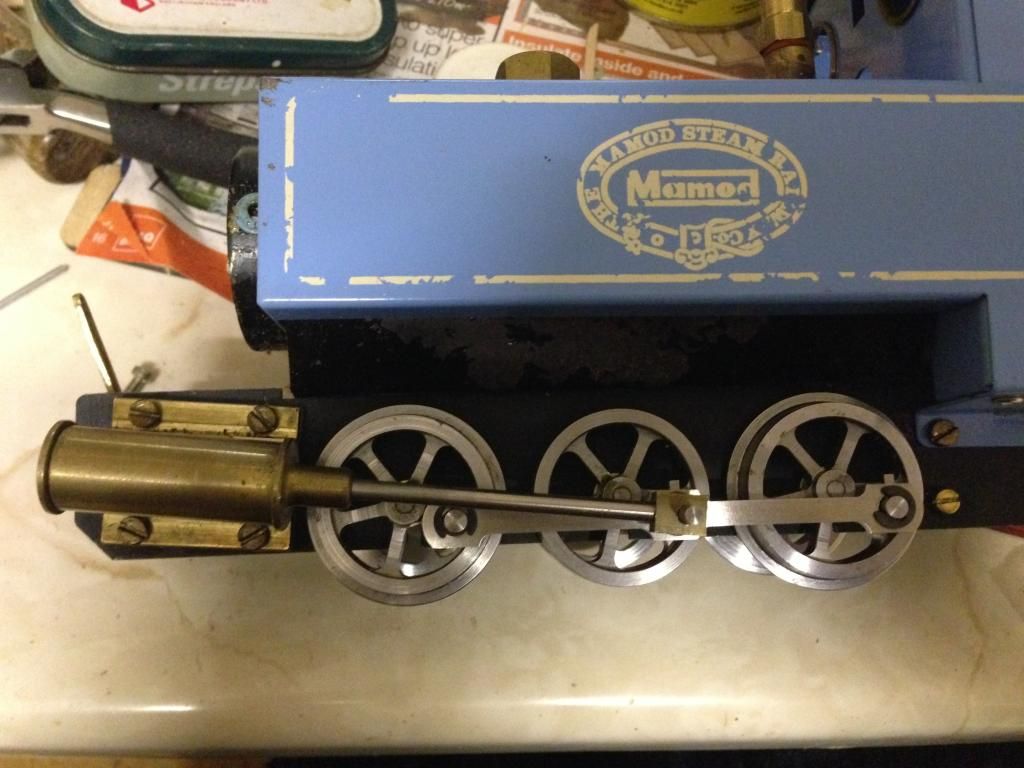
This little engine is (was) an absolute cracker and ran superbly, it was a shame to break it to produce this monster - to be fair it was intended for this purpose, besides I have two others for the preservationists.

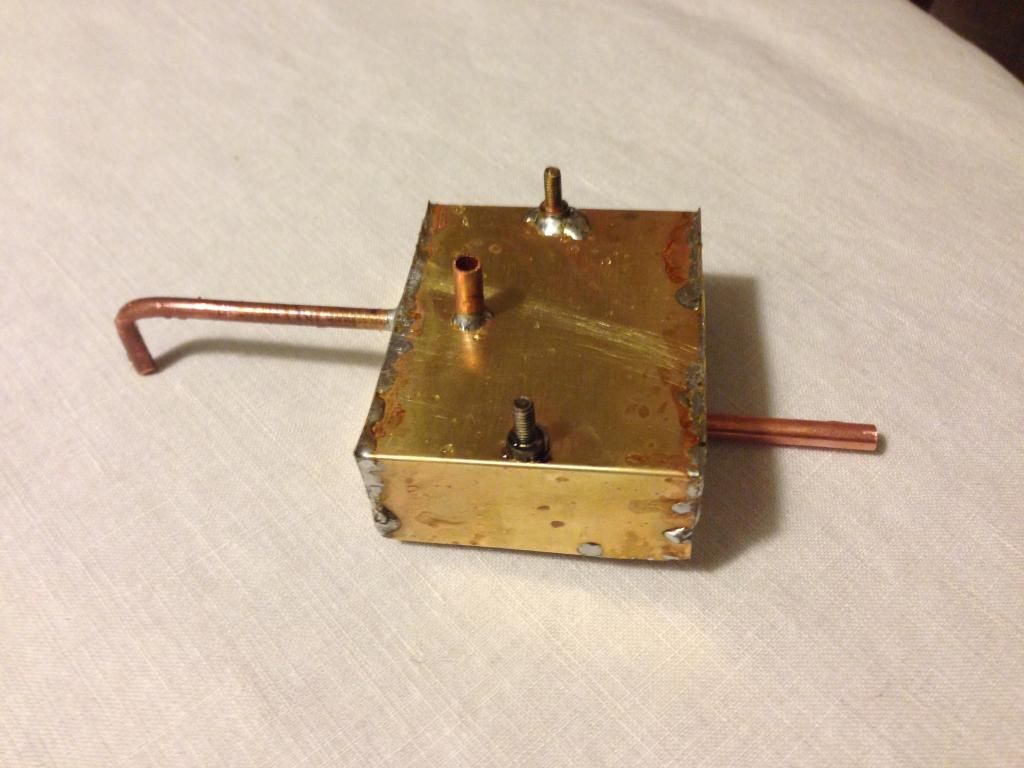
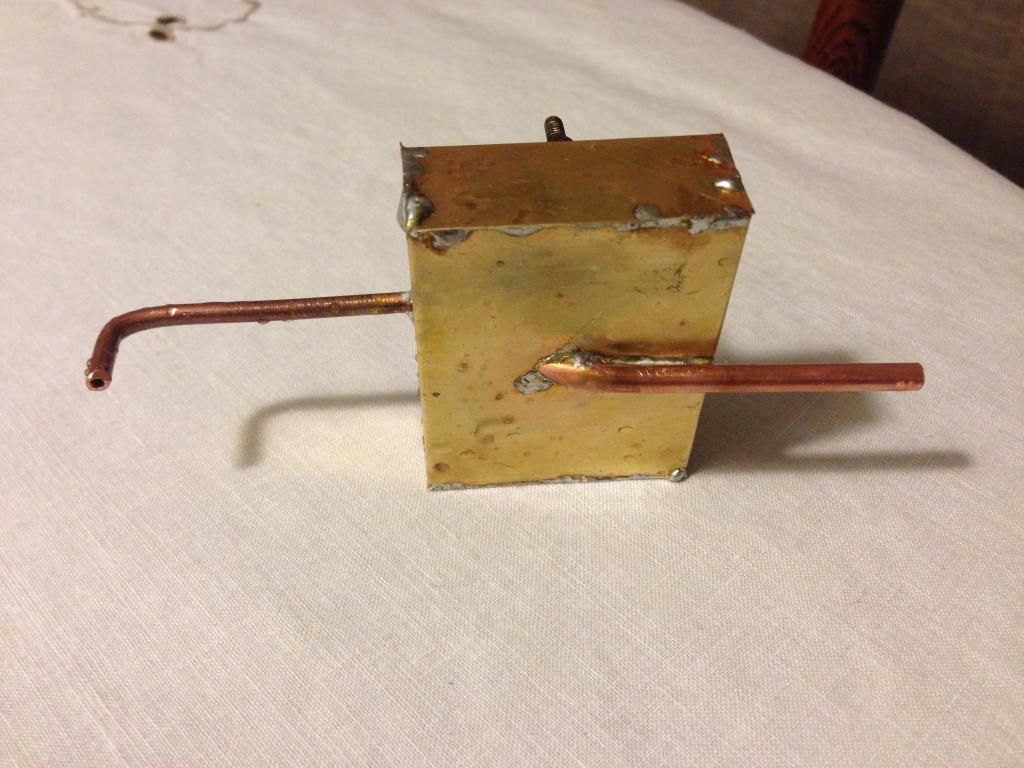
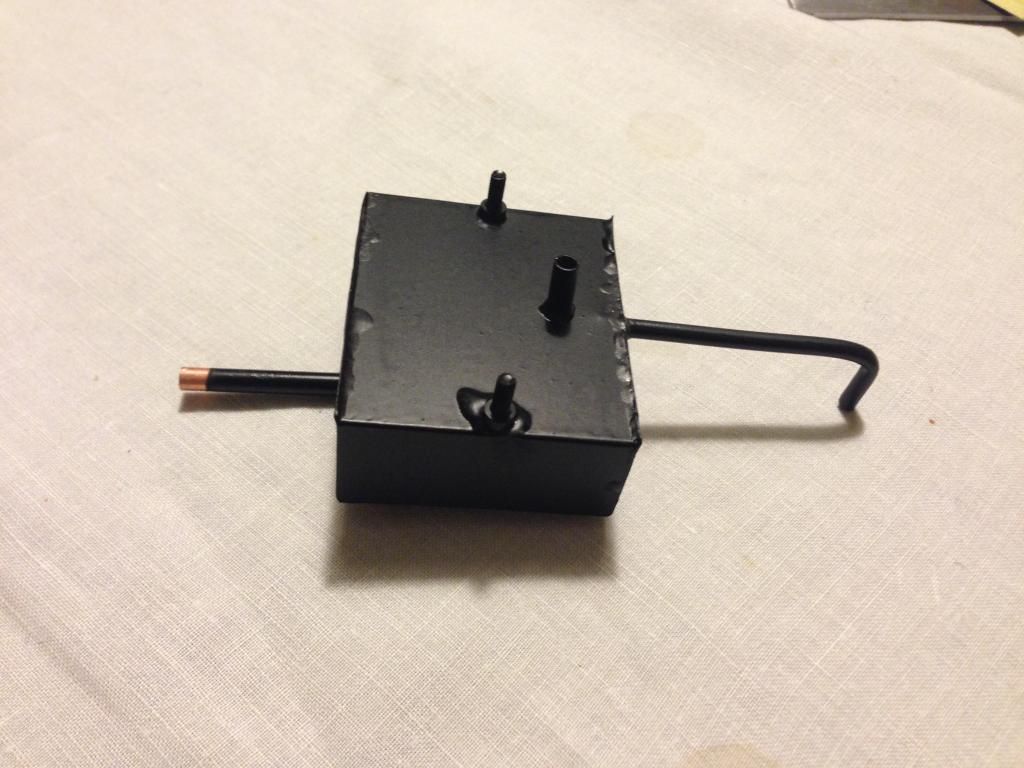
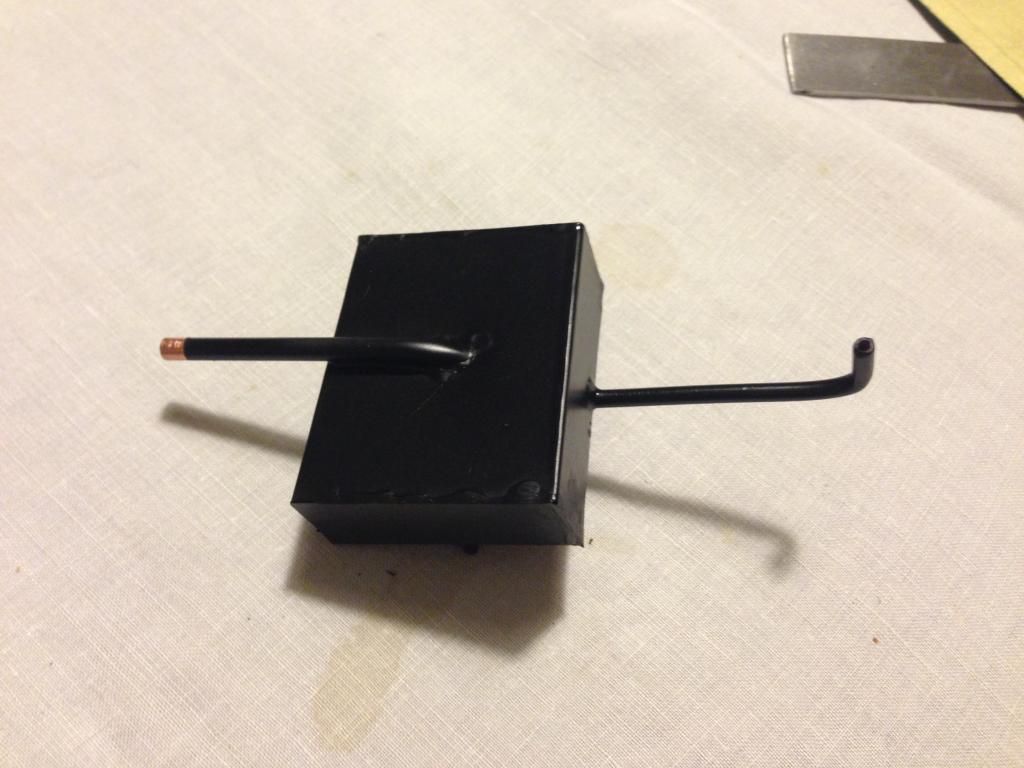
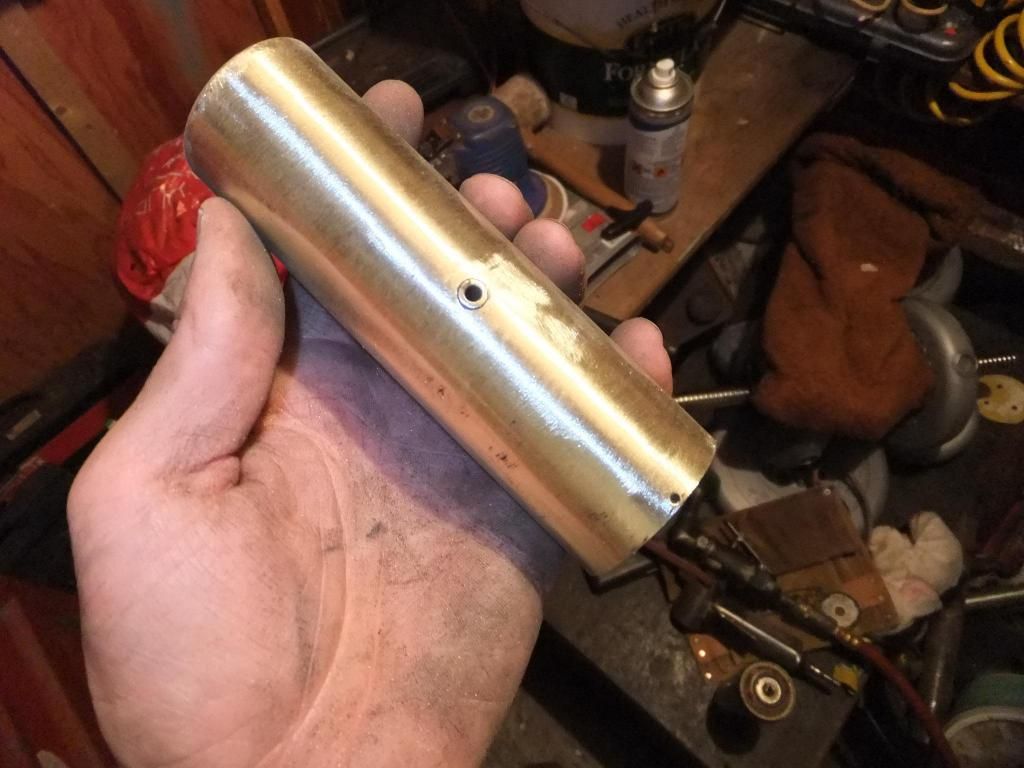
The first thing I did was my usual silver solder of the boiler, for reliability.
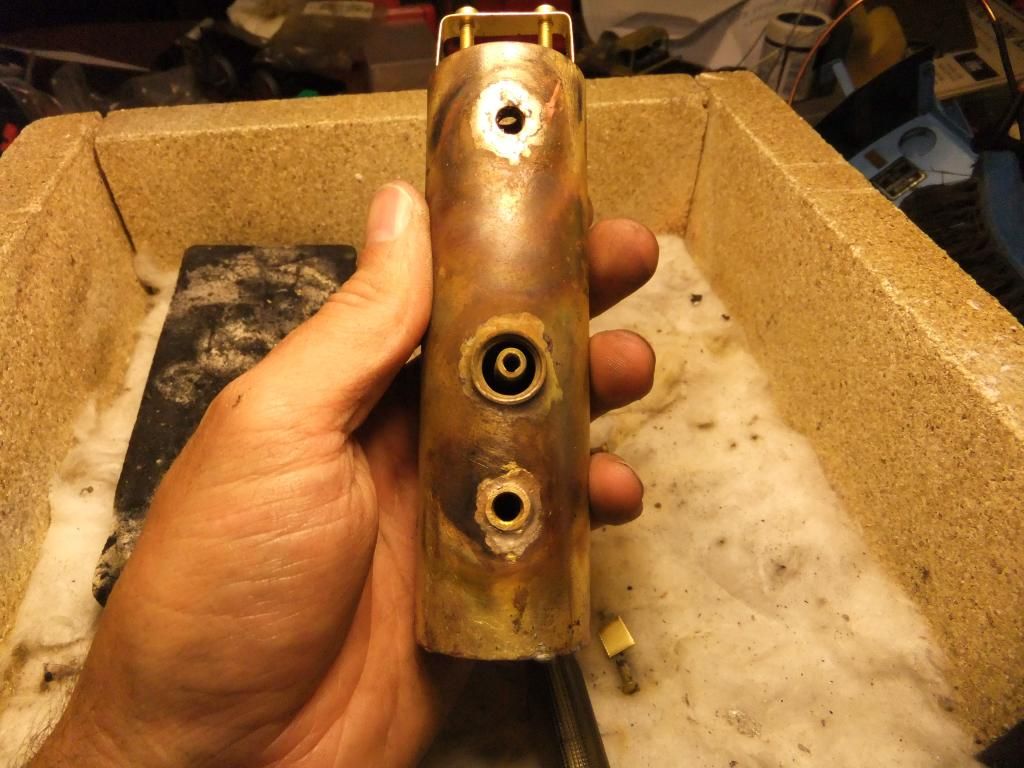
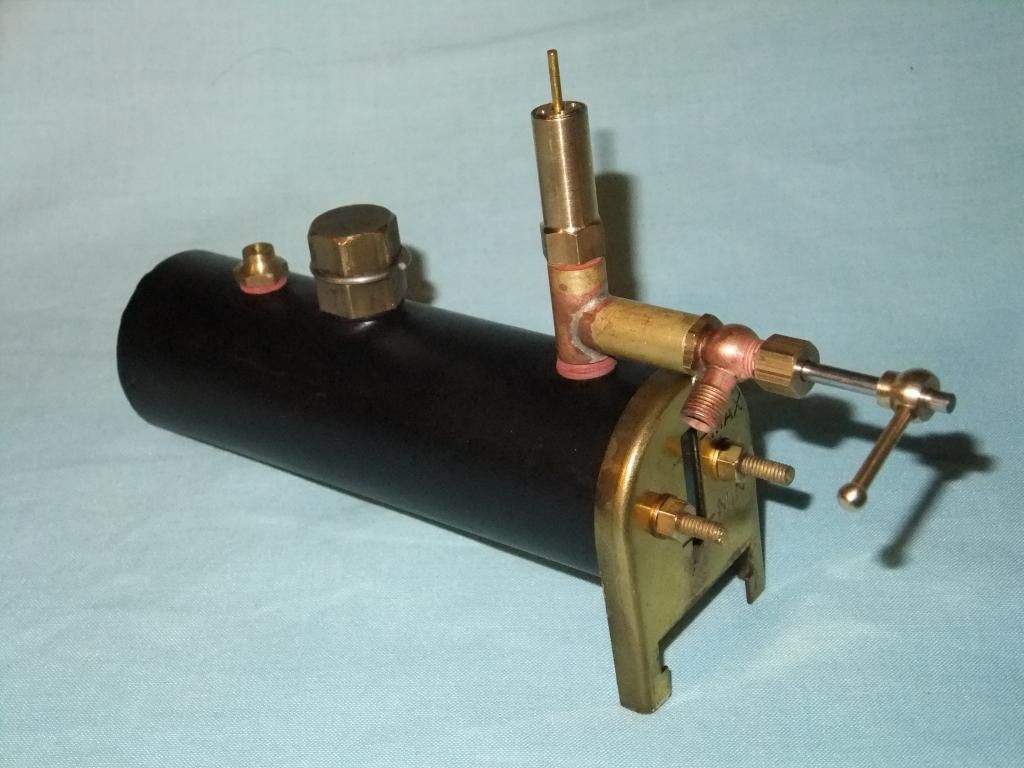
Image

Image

Image

Image

Finished boiler.

Image

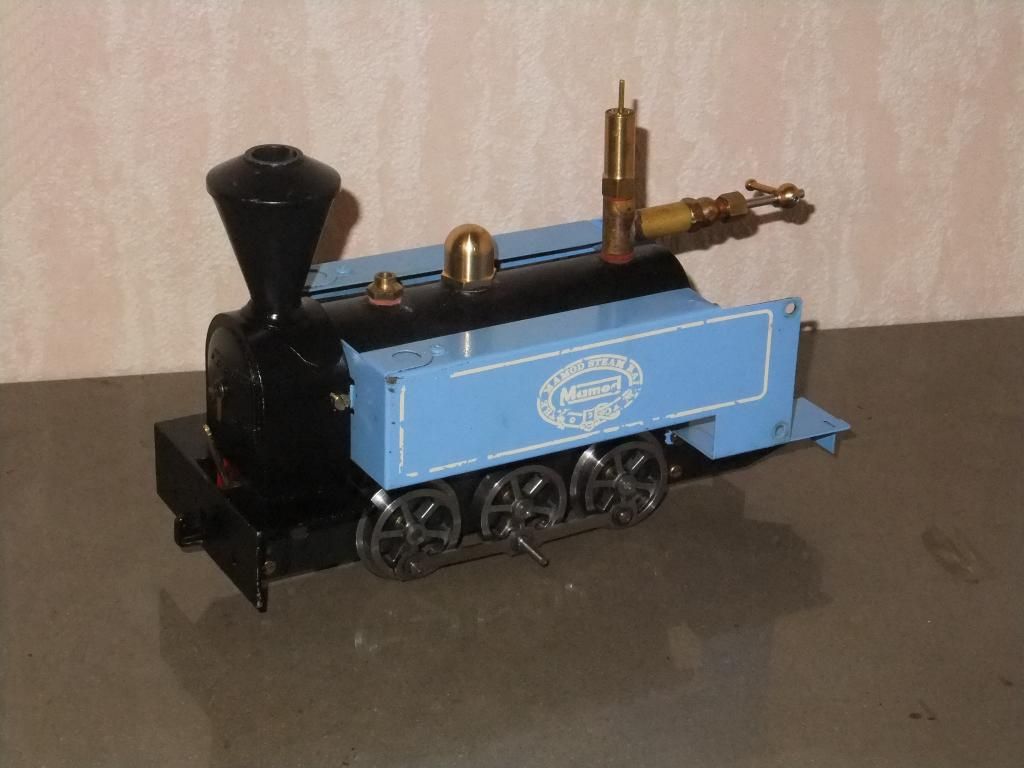
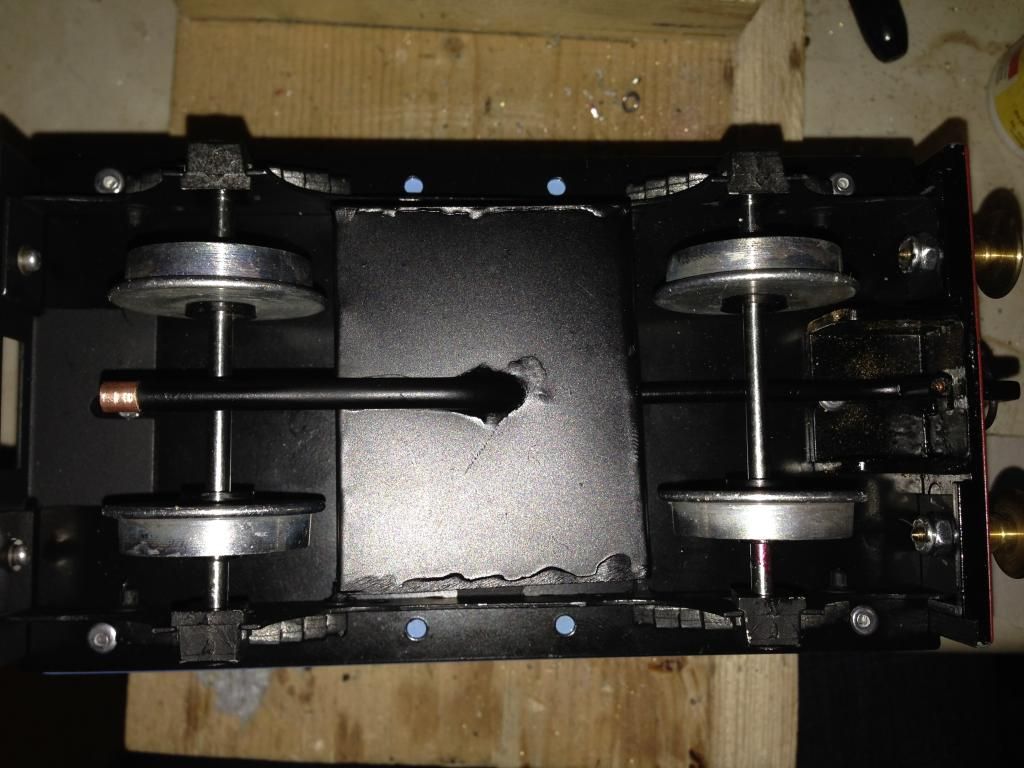
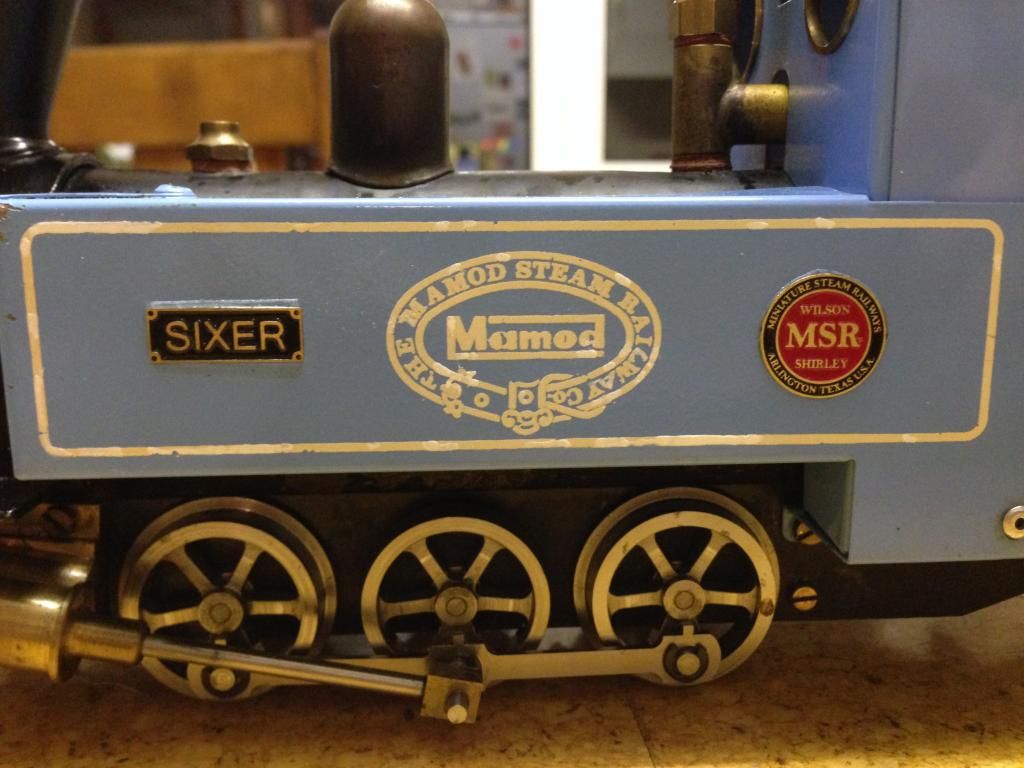
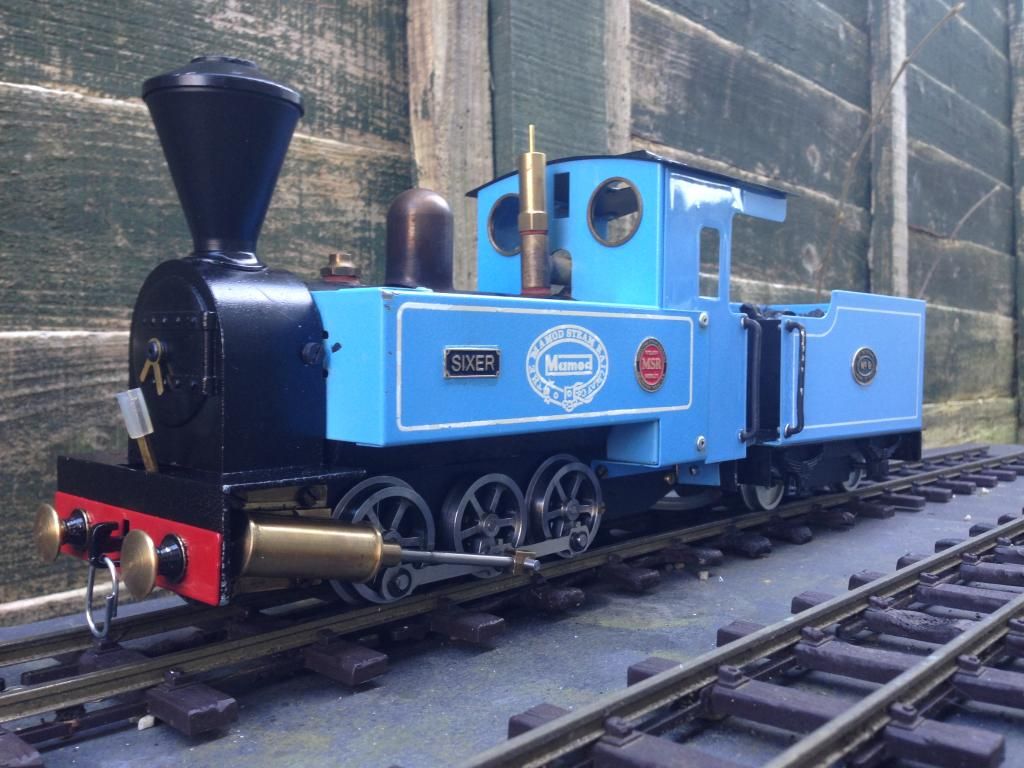
It was from this point that things really went sour for a while as generating the funds in order to fit the custom wheel sets that I wanted took some time. In the mean while I refinished the overlays, roof and tender body in the appropriate colours to suit the SL2 bodywork.

Image

Image

Image

Image

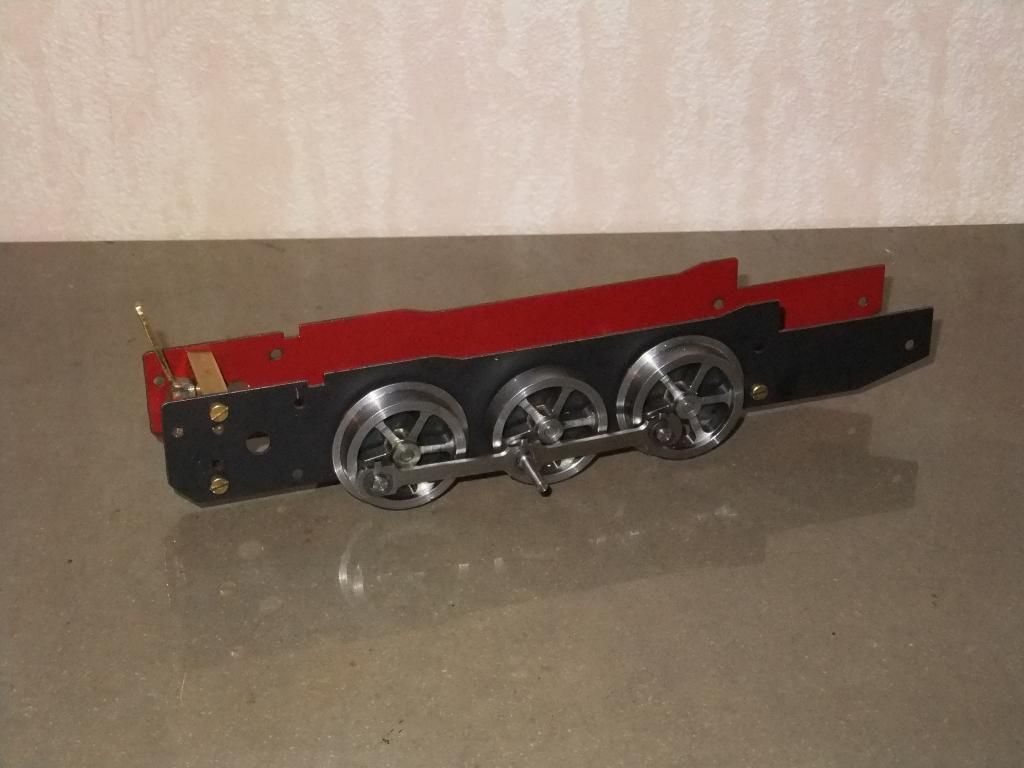
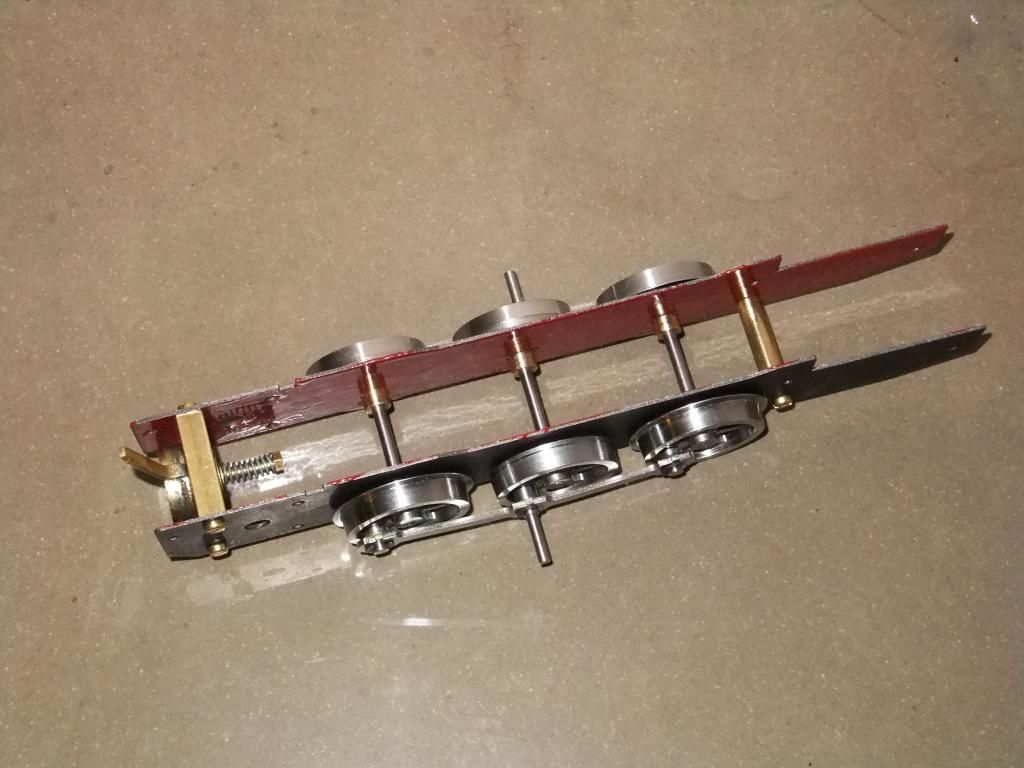
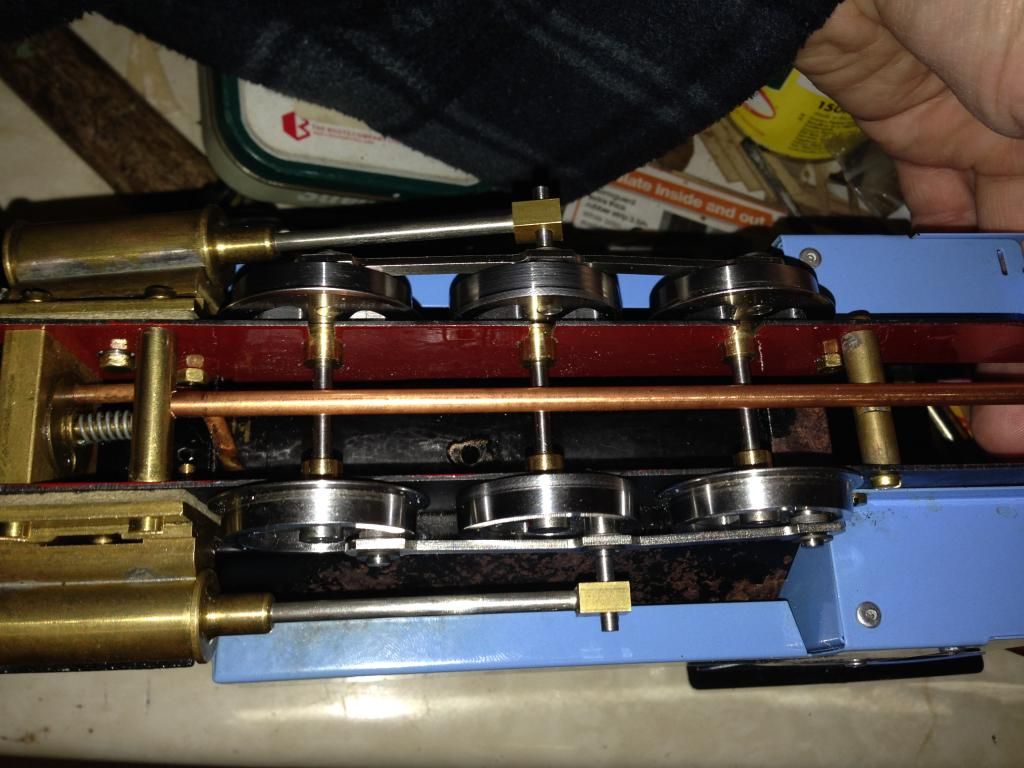
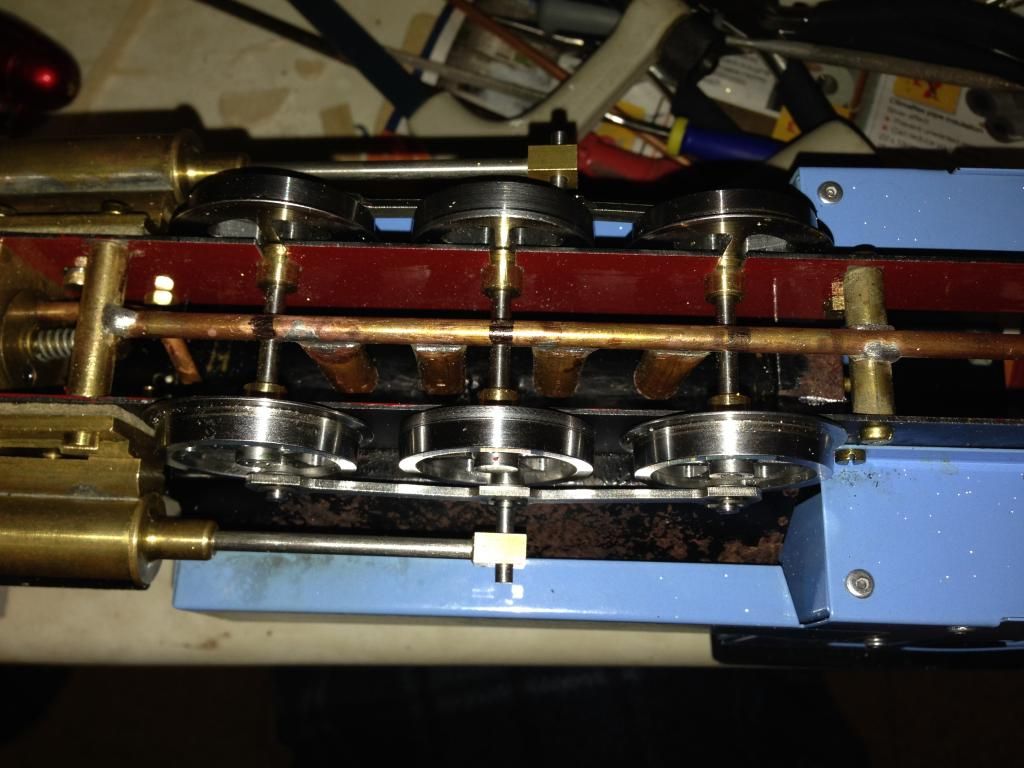
And this is where the project has stood from 2013 until October 2014, when I ordered the custom wheel sets.
YouTube ChannelImage

User avatar
Gralyn
Fireman
Fireman
Posts: 293
Joined: Thu Aug 07, 2014 12:29 pm
Location: Stockport, United Kingdom
Contact:

Post by Gralyn » Sun Jan 25, 2015 11:35 am

Looking forward to the continuation of the story.
Regards Graham.

User avatar
ace
Fireman
Fireman
Posts: 294
Joined: Sun Jul 14, 2013 9:03 am

Post by ace » Tue Jan 27, 2015 8:39 am

Thanks Gralyn, here's a little more. :)

I forgot to mention that I have a pair of MSR cylinders too, in the previous post. It is quite evident from comparing the two side by side that they are a lot larger in diameter, and like the plantation loco they have the wonderful extended gland.

Here is an early shot of the frame mocked up for the picture with some spare wheels I have for another project. These wheels aren't the ones that I will be using for this engine. Here they are sporting the beautiful stainless steel coupling rods.

Interestingly enough, and it's nice to see, the genuine MSR side frames are actually cut from galvanised steel. No more rusty frames!

Image
YouTube ChannelImage

User avatar
ace
Fireman
Fireman
Posts: 294
Joined: Sun Jul 14, 2013 9:03 am

Post by ace » Wed Jan 28, 2015 9:01 pm

Hi everyone,

An update for this project. I have somewhat reached a bit of a quandary with regard to what colour to have the frames. I decided to paint one side red, the other in the usual satin black (with 2k paint), so I could assemble with either colour on the outside to see what I thought, as it happens I thought red was a bit much so I decided on that for the inside (it also creates a little interest when the loco is being serviced).

Here we are painted and fitted up with the Roy Wood spoked steel wheel sets. I asked Roy if he would turn off the flange on the centre wheel (or what would be the front driving wheel on an 0-4-0), I did get some funny look from him when I asked for that! :D

Image

Fitted up with a modified standard type reverser and a frame spacer. I did have to ream the wheel slots out to accept the slightly larger Roy Wood axle bearings, only 0.4mm so I made them an interference fit for now. I will have to keep an eye to see if I have to lock the bearings at a later date.

Clearly visible is the red paint inside, I quite like the look! :)

Image
YouTube ChannelImage

User avatar
ace
Fireman
Fireman
Posts: 294
Joined: Sun Jul 14, 2013 9:03 am

Post by ace » Fri Jan 30, 2015 9:03 am

Had a little trial fit up of the boiler and the side tanks. Everything fits as it should and is going to go together very quickly!

A couple of images.

Boiler, combustion chamber and smoke box resting.

Image

After adjusting the final positions of the pipe work and lubricator, I decided to crack on with the body assembling. Here we see the side tanks arriving in their final positions.

Image

It's starting to look like a loco! Getting very excited about getting it going now. :)
YouTube ChannelImage

User avatar
KNO3
Cleaner
Cleaner
Posts: 80
Joined: Mon Dec 31, 2012 10:30 pm
Location: Vienna

Post by KNO3 » Sat Jan 31, 2015 12:01 am

Very nice, this promises to become a wonderful loco.

User avatar
ace
Fireman
Fireman
Posts: 294
Joined: Sun Jul 14, 2013 9:03 am

Post by ace » Sun Feb 01, 2015 10:10 pm

Thanks KNO3,

With things going swimmingly with this whole project, it would be rude not to add a bit more! Here is the engine mostly assembled with the cab overlays in position.

Image

To be fair, I forgot to image the tender in the building stage. There isn't anything exciting about it. It is a genuine MSR tender that has a 10mm shorter body.

Here is the tender just placed behind the engine.

Image

My two MSR/Mamod based engines, Baldwin & Sixer

Image
YouTube ChannelImage

User avatar
ace
Fireman
Fireman
Posts: 294
Joined: Sun Jul 14, 2013 9:03 am

Post by ace » Sun Feb 08, 2015 6:01 pm

Well now here comes the firing method. It was decided in the spirit of good fun to actually make the burner from scratch, So therefore a alcohol burner was going to be made to effectively carry out the task whilst utilising tender to carry the fuel. I know how problematic alcohol burners can be once totally filled and hot, so the fuel would be safely stowed in the tender away from such direct heat.

This simplified the burner in the loco considerably.

Here we begin. The main burner tube fixed to a frame spacer at the front in between the cylinders and also fixed at the rear frame spacer position.

Image

The main parts ready for assembly.

Image

Soldered together and ready to trim the height of the tubes evenly.

Image

The finished article in place. That was the easier part done! :)

Image

It was decided to add an additional burner tube for the following reasons;

1) The burner tubes were 1.5mm narrower in diameter each compared to the 'normal' alcohol burner.
2) The increase in rotational mass with an additional axle would require more steam to maintain pressure..
3) The capacity of the MSR cylinders is larger so would use more steam per rotation than if it had 'normal' sized cylinders.
4) Why not? I'd rather have too much than not enough! :D

I couldn't resist a quick initial fire up before I built the underslung tender tank.


The result? Well it ran!

Image

So this brings me onto the tender. I did consider a drip feed tank directly in the top of the tender, but being inexperienced with this type of system, I gave it a miss and adopted a more traditional tank designed to be stowed between the tender frames and wheels.

Basic sides.

Image

Offered in place.

Image

Assembled tank.

Image

Image

And refinished

Image

Image

Fitted in place under the tender floor.

Image

Finally the last few parts to go on, the MSR handrails. The normal Mamod handrails are fixed with nuts, MSR are fixed with barbed clips.

Image

Almost done! I like the look. :)

Image
YouTube ChannelImage

Joe
Fireman
Fireman
Posts: 465
Joined: Sat Dec 20, 2014 6:18 pm
Location: West Midlands

Post by Joe » Sun Feb 08, 2015 7:29 pm

Very impressive your obviously very skilled at engineering
Steam is highly under rated

User avatar
ace
Fireman
Fireman
Posts: 294
Joined: Sun Jul 14, 2013 9:03 am

Post by ace » Tue Feb 10, 2015 11:59 pm

Thanks Joe, I wouldn't say I'm skilled at engineering, just have a little understanding of it. :)

Ok so I did a bit of fettling and a little run out on my line, I did get some footage but just need to throw it together into something viewable.

Last few little things made and added. A coal load to hide the filler tube for now.

Image

Added the floor apron.

Image

I decided to line out the tender to match the loco somewhat. My first go at lining and it took me no more than 10 minutes to do, I think the longer it takes to line something, the easier it is to mess it up. Quick swift movements lie an even coat of paint. I need more practice though! Not forgetting to mention the addition of the '6' engineers plates.

Image

This side of the Mamod logo and lining was damaged, so I touched it in to hide the fact it ever had been. Not bad? I also added the name and MSR plates to the sides, the same as Baldwin.

Before

Image

After

Image

The MSR plate.

Image

Nearly done, just need to touch in the rivets and bodywork in the powder blue to finish up.

Image

Image

Image
YouTube ChannelImage

User avatar
ace
Fireman
Fireman
Posts: 294
Joined: Sun Jul 14, 2013 9:03 am

Post by ace » Thu Feb 12, 2015 10:01 pm

Wow, (at the time of typing) 620 views and only three replies on this thread that aren't mine..... A lot of 'not a lot to say' going on....


Well, things are moving on with is loco. Nothing seems planned, just changing things as they evolve.

I was conscious about the lining on the tender, a forum member pointed it out and I had to change it.

Before

Image

After

Image

I was also taken to installing a cowcatcher/pilot to improve the front stance. The general consensus was that it would, so I did. :)

Image

Does anyone want to see a short clip of her running?
YouTube ChannelImage

invicta280
Trainee Driver
Trainee Driver
Posts: 664
Joined: Wed Sep 21, 2011 9:24 pm
Location: kent england

Post by invicta280 » Thu Feb 12, 2015 10:41 pm

Yes please. A skilled piece of engineering. Always like to see imaginative Mamodifications. A nicely proportioned loco. Let's see her in action!

User avatar
ace
Fireman
Fireman
Posts: 294
Joined: Sun Jul 14, 2013 9:03 am

Post by ace » Sat Feb 14, 2015 11:58 pm

Thanks invicta280, I do think she looks better proportioned than an 0-4-0 to be fair!

A short video.

<object width="475" height="297"><param value="http://www.youtube.com/v/watch?v=C4I0vs ... 26fmt%3D22" name="movie" /><param value="window" name="wmode" /><param value="true" name="allowFullScreen" /><embed width="475" height="297" wmode="window" allowfullscreen="true" type="application/x-shockwave-flash" src="http://www.youtube.com/v/watch?v=C4I0vs ... d></object>
YouTube ChannelImage

User avatar
Snailrail
Trainee Fireman
Trainee Fireman
Posts: 156
Joined: Thu Dec 05, 2013 5:49 pm
Location: Essex

Post by Snailrail » Sun Feb 15, 2015 8:18 am

I'm not really into Mamods to be honest and don't know much about them but I have looked at your thread a few times and can appreciate the skilled work that has gone into it. I love the wheels and it certainly looks better than a standard one.


Brian

User avatar
laurence703
Trainee Driver
Trainee Driver
Posts: 804
Joined: Fri Nov 25, 2011 1:49 pm
Location: Lost

Post by laurence703 » Sun Feb 15, 2015 10:49 am

That looks Fantastic! Certainly one of the better 0-6-0 mods I've seen. What does it run like? A wet cat or sluggish?
(by wet cat I mean running like mad)
No one expects the SPANISH ACQUISITION!!!

User avatar
ace
Fireman
Fireman
Posts: 294
Joined: Sun Jul 14, 2013 9:03 am

Post by ace » Sun Feb 15, 2015 5:35 pm

Snailrail:108238 wrote:I'm not really into Mamods to be honest and don't know much about them but I have looked at your thread a few times and can appreciate the skilled work that has gone into it. I love the wheels and it certainly looks better than a standard one.
Thanks Brian, the fact that you have commented on a thread that doesn't really interest you means a lot to me, thank you.
laurence703:108239 wrote:That looks Fantastic! Certainly one of the better 0-6-0 mods I've seen. What does it run like? A wet cat or sluggish?
(by wet cat I mean running like mad)
Thanks Laurence, it doesn't want to go like a stabbed rat if thats what you mean... It drives like a well behaved modified Mamod. It will run slow and will wheel slip everywhere if you open her up.

I have done some filming with a decent load and some calm driving, so you can see for yourself. :)
YouTube ChannelImage

User avatar
ace
Fireman
Fireman
Posts: 294
Joined: Sun Jul 14, 2013 9:03 am

Post by ace » Tue Feb 17, 2015 9:50 pm

A bit of a better video demonstrating with a 'normal' load.

<object width="475" height="381"><param value="http://www.youtube.com/v/iCAIkxu1oaU&sh ... 26fmt%3D18" name="movie" /><param value="window" name="wmode" /><param value="true" name="allowFullScreen" /><embed width="475" height="381" wmode="window" allowfullscreen="true" type="application/x-shockwave-flash" src="http://www.youtube.com/v/iCAIkxu1oaU&sh ... d></object>
Last edited by ace on Tue Feb 17, 2015 11:53 pm, edited 4 times in total.
YouTube ChannelImage

DLRdan
Driver
Driver
Posts: 1083
Joined: Wed Nov 12, 2008 12:05 am
Location: Blyth
Contact:

Post by DLRdan » Tue Feb 17, 2015 9:59 pm

A very nice conversion Ace, cylinders look better driving the centre axle. I think you've posted the same Video twice.
Dan,

James: "Dan, can you use your hearing and tell me if that trains coming ?"
DLR
www.freewebs.com/dlrail

User avatar
ace
Fireman
Fireman
Posts: 294
Joined: Sun Jul 14, 2013 9:03 am

Post by ace » Tue Feb 17, 2015 11:55 pm

DLRdan:108319 wrote:I think you've posted the same Video twice.
Thanks Dan, I did post it twice, oops! I was trying to figure out the xhtml generator as youtube no longer offers this as an option to embed and chose the wrong video! Why can't this forum just use iframe like most other places? :roll:

I have changed the video now. :)
YouTube ChannelImage

Big Jim
Moderator
Moderator
Posts: 2694
Joined: Sat Jul 06, 2013 5:28 pm
Location: Near Llanelli

Post by Big Jim » Wed Feb 18, 2015 12:25 am

Smashing job you have done there Ace.
If at first you don't succeed, use a bigger hammer!

Post Reply

Who is online

Users browsing this forum: No registered users and 3 guests