Whitchurch & Test Valley Railway, phase 1

A place for the discussion of garden railways and any garden style/scale portable and/or indoor layouts
User avatar
AndrewGVT
Cleaner
Cleaner
Posts: 54
Joined: Tue May 21, 2013 7:45 pm
Location: Hampshire
Contact:

Whitchurch & Test Valley Railway, phase 1

Post by AndrewGVT » Tue May 28, 2013 10:53 pm

Hi
Since the Easter holidays me and my mum started work on the garden and now its half term work on the garden railway has begun.
This is a very rough idea of the garden shape:
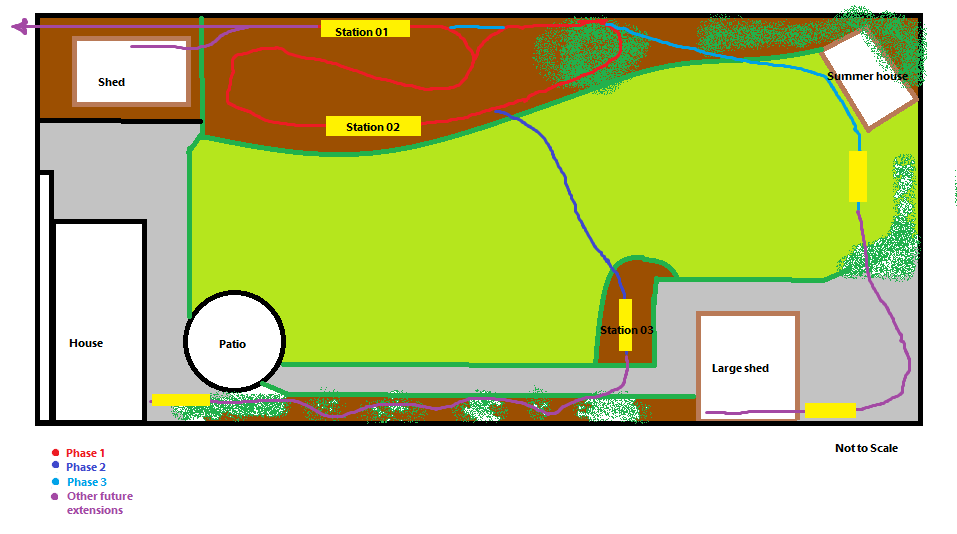
Image

Sorry that its only a paint drawing.
I will upload some station plans later.
The railway is designed to be an end to end from station 1 to station 2 with a bit connecting the so we can sit back and watch the trains.
Since the start of the holidays I have cleared the bed, moved half a ton of soil and stated building the track bed, if the weathers ok tomorrow I should be able to get some pics.
So that's it so far but thing are moving quickly and there should be plenty more to come.
Andrew
=============
Proper engineering techniques; use a hammer, if that fails, get a bigger hammer.

User avatar
MuzTrem
Driver
Driver
Posts: 1122
Joined: Sun Feb 10, 2008 6:51 pm
Location: Buckinghamshire
Contact:

Post by MuzTrem » Wed May 29, 2013 2:16 pm

Looks like you've got room for a pretty good run :) Good luck with the project, I shall follow progress with interest!

User avatar
AndrewGVT
Cleaner
Cleaner
Posts: 54
Joined: Tue May 21, 2013 7:45 pm
Location: Hampshire
Contact:

Post by AndrewGVT » Thu May 30, 2013 12:40 am

Hi
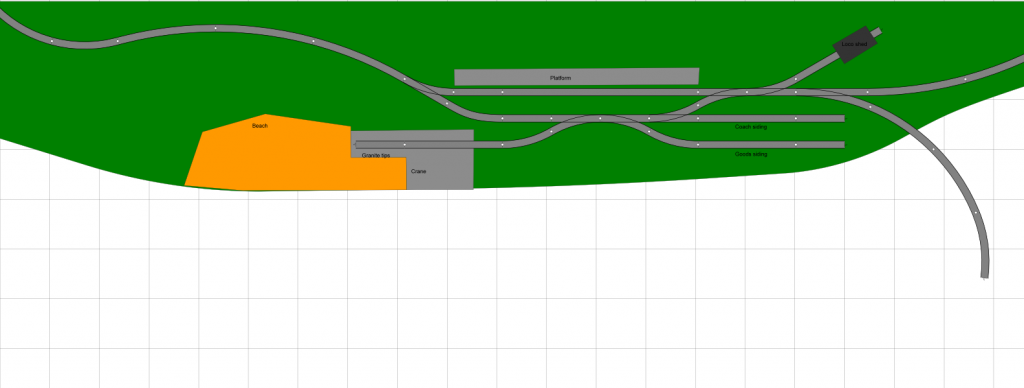
Here is what I am aiming for, a end to end railway witch requires driving (the steepest gradient so far is 1 in 32) with a minimum radius for the main line is R2 but the points in the station are R1.  
So this is the station plan for Station 2 (still need's a name)

Image

I'm not entirely happy with it, it's does not look very realistic but it has what I want, if anyone could suggest a way of improving it that would be very helpful.
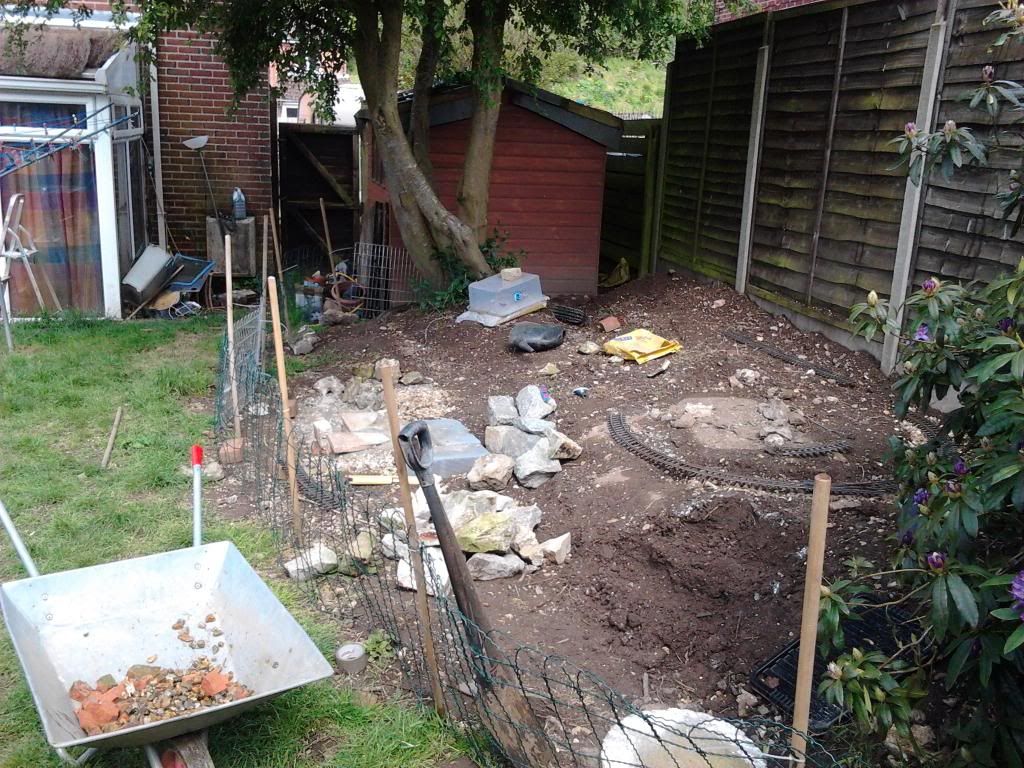
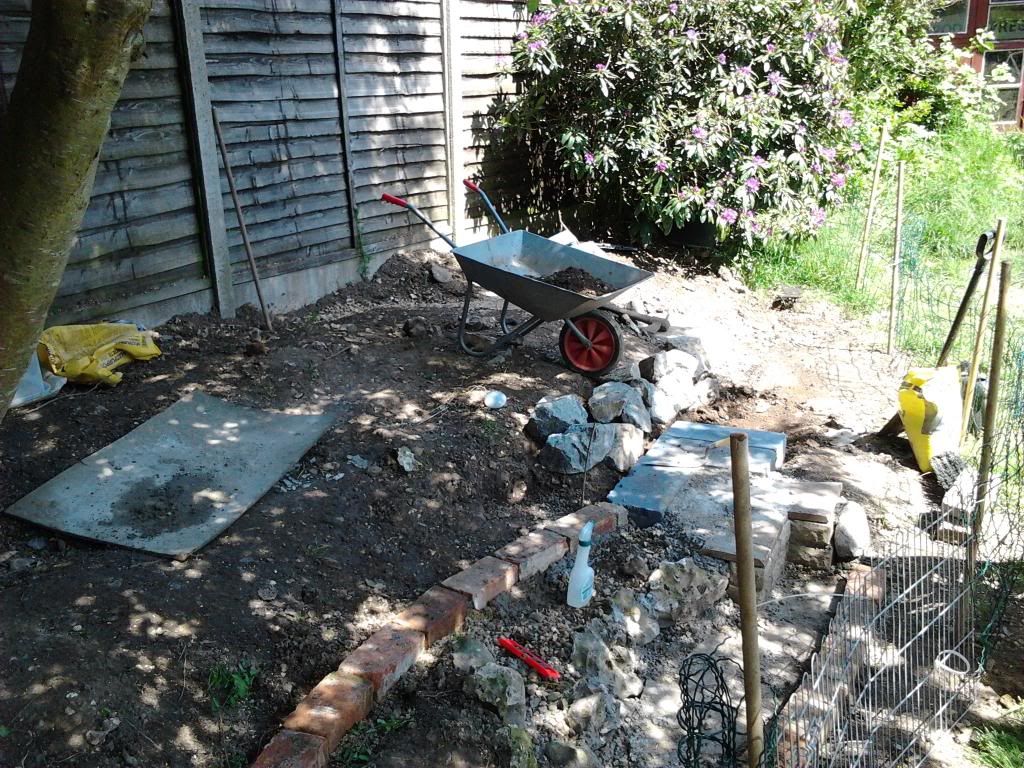
This is the area:
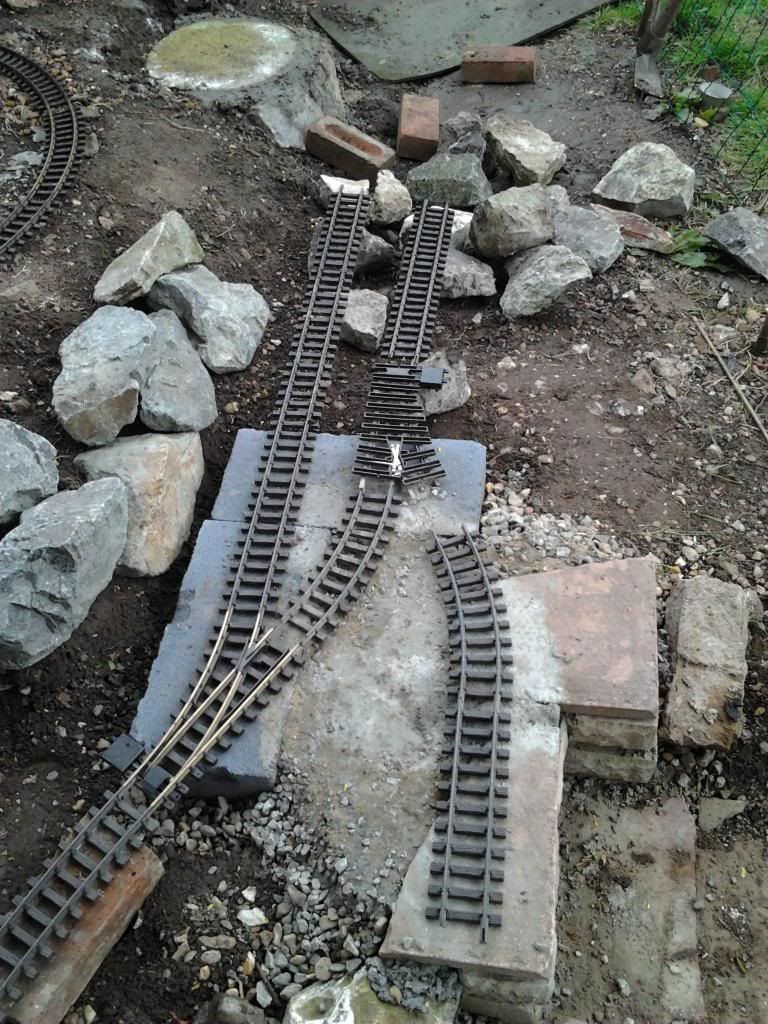
Image

although the track plan has change from the one in the picture.
Image

Image
This will be the dock with the tide out, similar to Mark Found's railway http://www.youtube.com/watch?v=NUPtLwun7Bo (it well worth watching the series if you have not already)
Image
That's all for now.
Andrew
=============
Proper engineering techniques; use a hammer, if that fails, get a bigger hammer.

User avatar
Dannypenguin
Trainee Driver
Trainee Driver
Posts: 632
Joined: Tue Feb 26, 2013 9:57 am
Location: Forest of Dean, UK
Contact:

Post by Dannypenguin » Thu May 30, 2013 8:53 am

I can't see what your worried about, personally I think its looking great. :)

What's the software you've used to create the track plan?
Dan

Visit the PFLR website - http://poultonfarmlightrailway.webs.com/
Dean Forest Railway Society website - http://dfrsociety.org/

jay1976
Fireman
Fireman
Posts: 326
Joined: Mon Apr 29, 2013 4:32 pm

Post by jay1976 » Thu May 30, 2013 9:14 am

would adjust the loop in the station to fit your longest train you plan to run as well.. you looking about at same stage as me as well.. I am in process of moving a few plants about to make room as well as moving a bit of earth..

Big Al
Fireman
Fireman
Posts: 496
Joined: Wed Apr 04, 2012 3:43 pm
Location: Romford,Essex.

Post by Big Al » Thu May 30, 2013 4:44 pm

Allen Hopper - early retirement can't beat it !

User avatar
AndrewGVT
Cleaner
Cleaner
Posts: 54
Joined: Tue May 21, 2013 7:45 pm
Location: Hampshire
Contact:

Post by AndrewGVT » Sat Jun 01, 2013 3:49 pm

Hi
It is indeed anyrail5
We are having some strange weather at the moment, there's a horrible blue thing covering the clouds but I still managed to get some work done ;)

Image

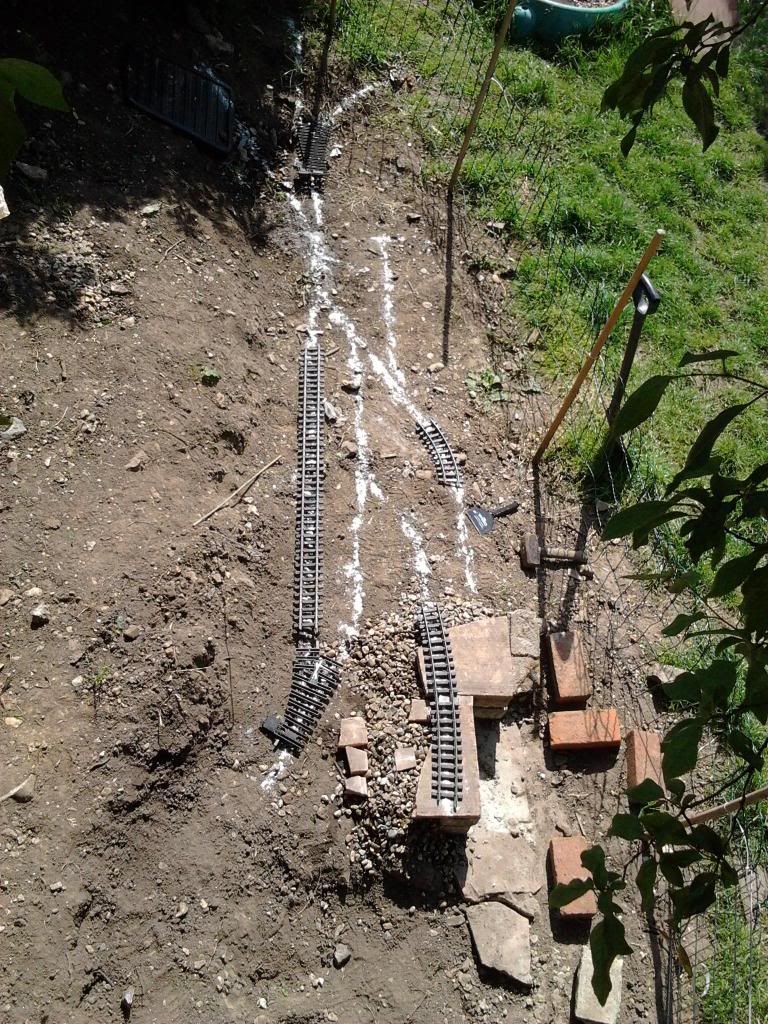
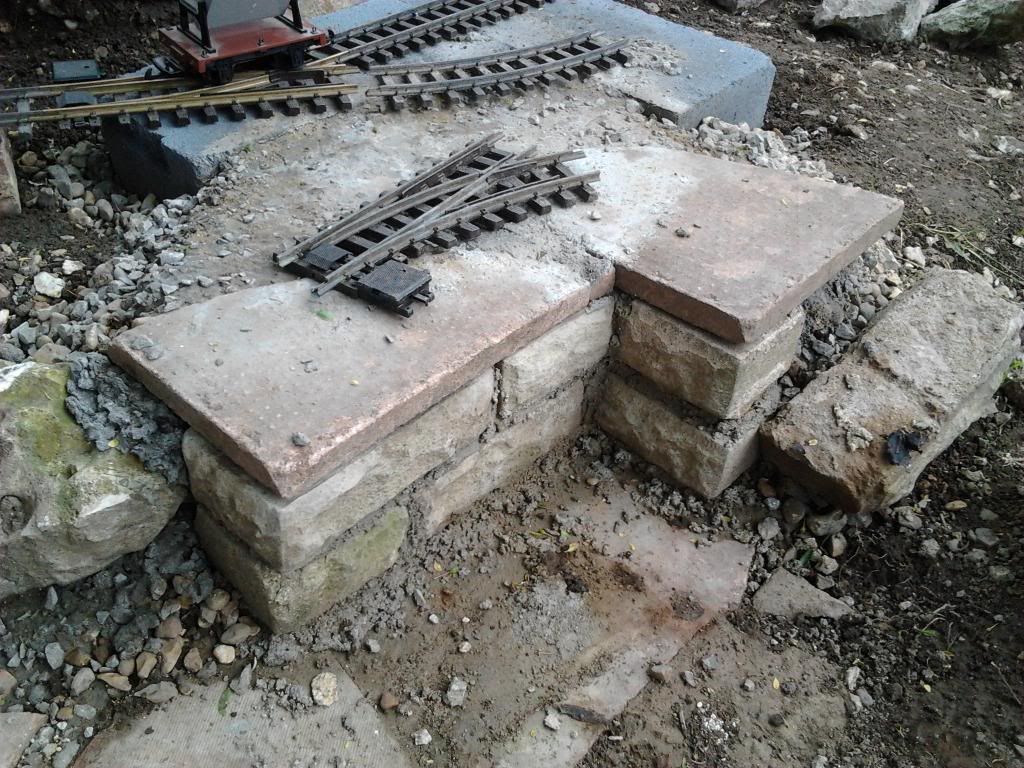
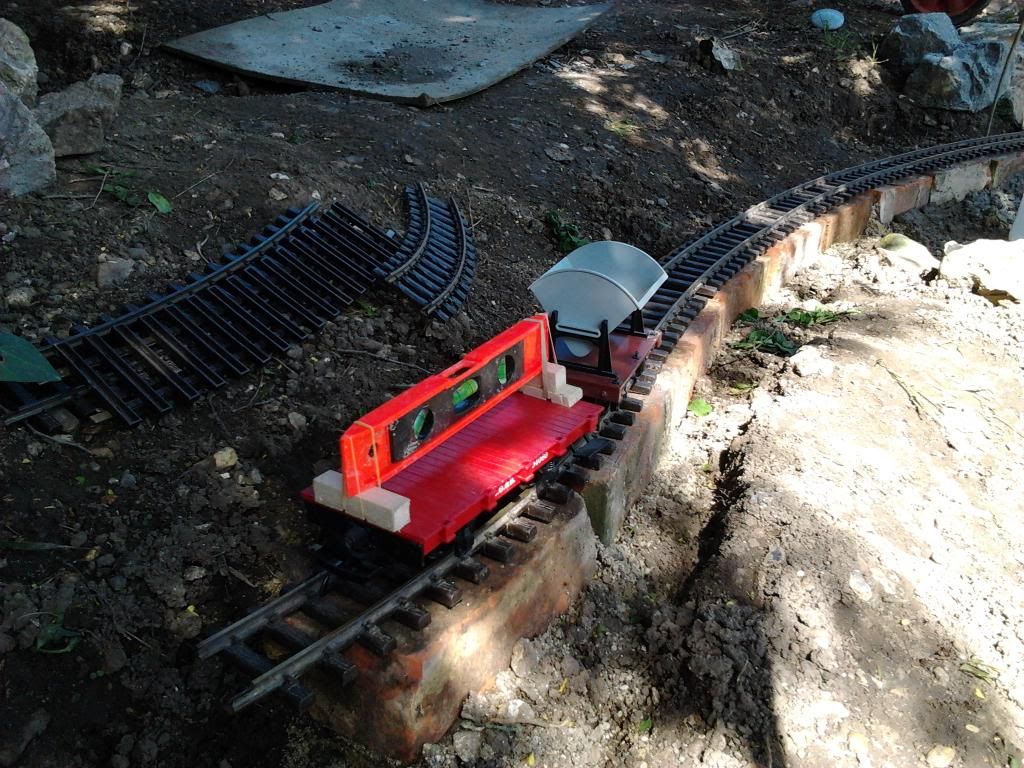
I started the track bed running out the station by laying bricks down on a bed of sand and then making a mortar shoulder to hold them in place.

Image

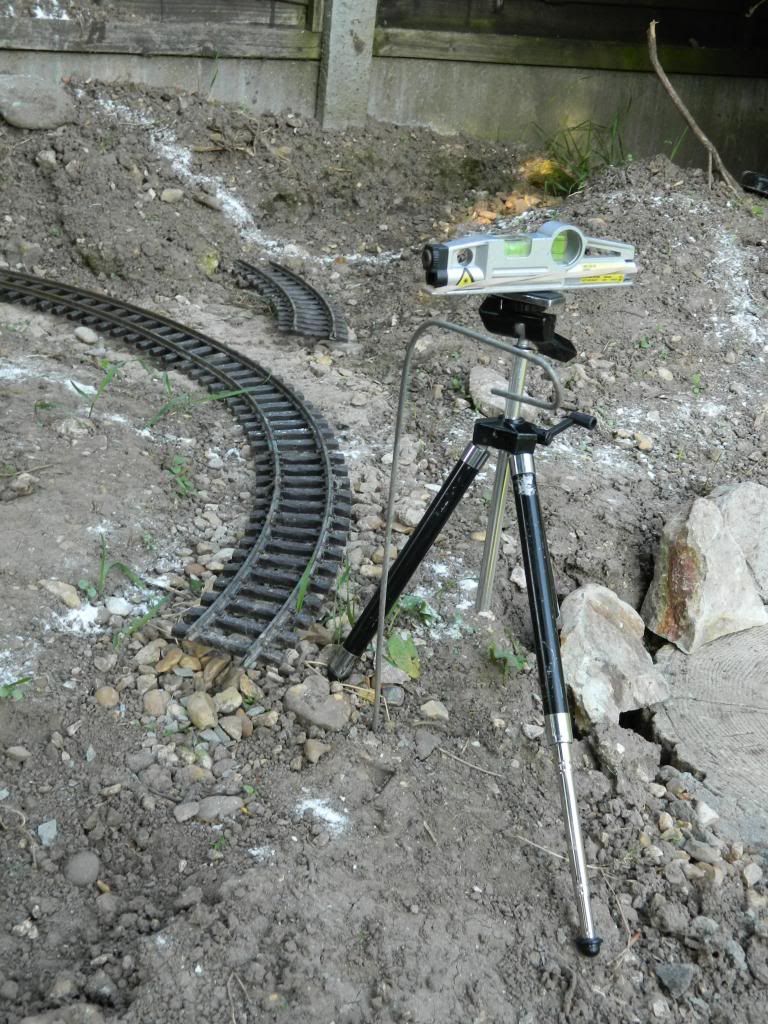
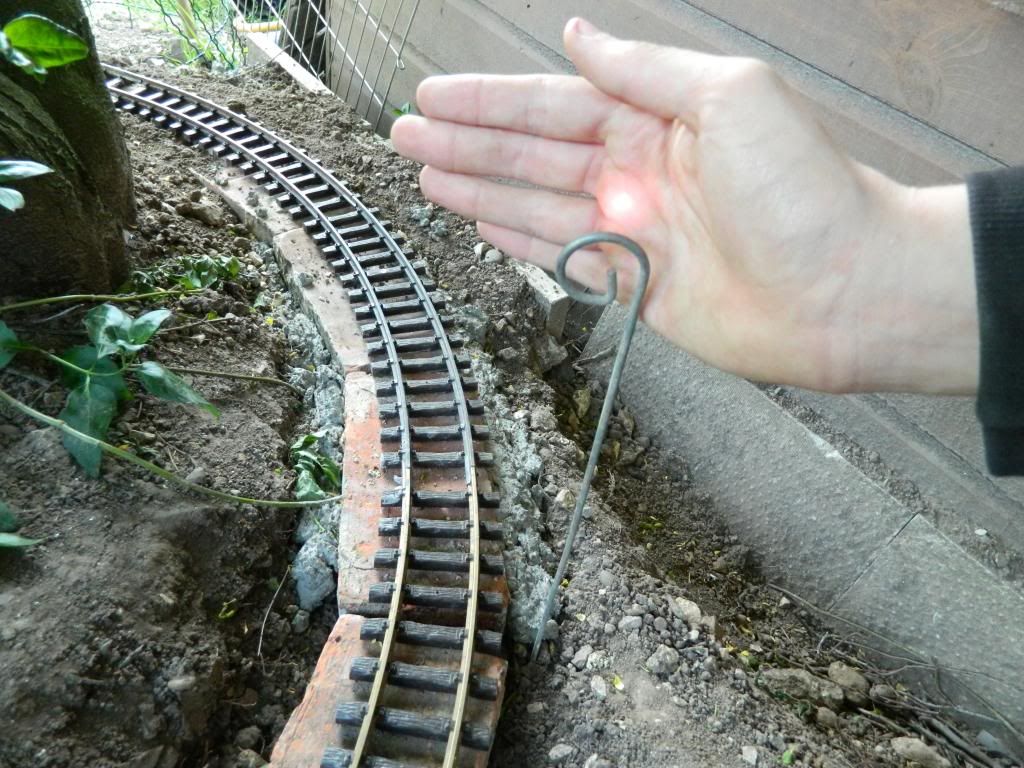
The track at this point is on a 1 in 32 gradient so to get it right I attached a piece of wood to the spirit level with an elastic band so that when it was showing level it would be the correct gradient.

Image

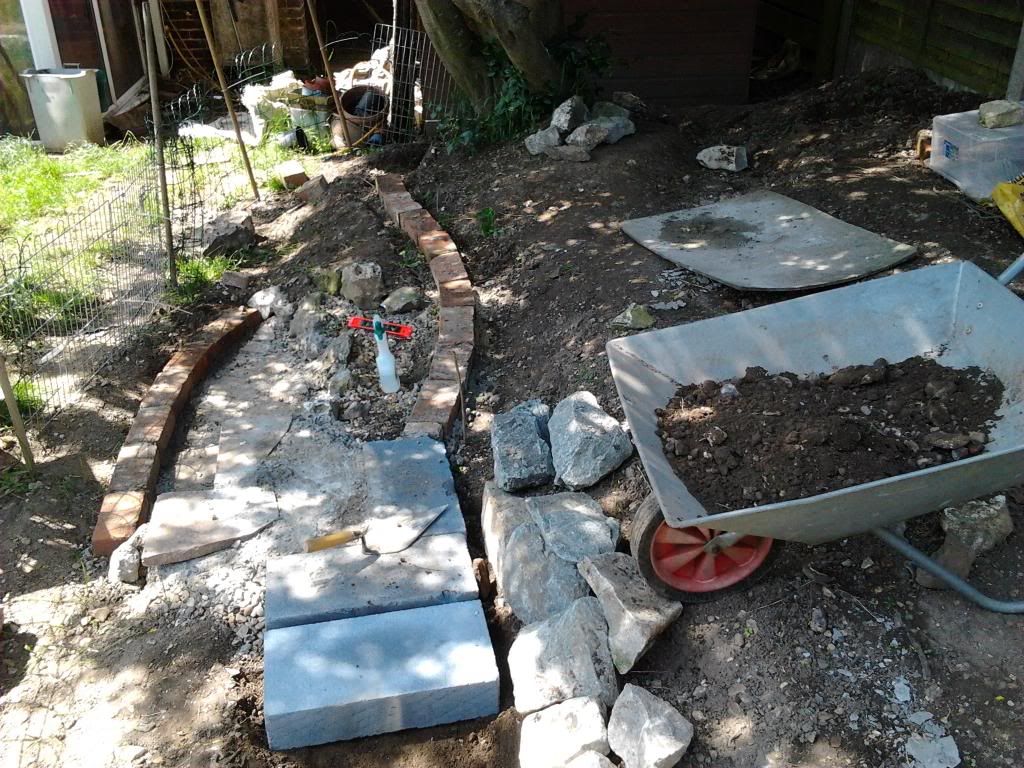
Also I started to level the station area ready to lay aerated concrete blocks down.

Image

That's all for now
Andrew
=============
Proper engineering techniques; use a hammer, if that fails, get a bigger hammer.

User avatar
Dr. Bond of the DVLR
Retired Director
Retired Director
Posts: 4485
Joined: Tue Jun 09, 2009 9:43 pm
Location: Suffolk
Contact:

Post by Dr. Bond of the DVLR » Sat Jun 01, 2013 3:53 pm

I like the "not level" spirit level on a wagon. Marvelous. Looks very promising, wish I could be outside enjoying the weather!
Image
The railway which people forgot
(to build)

User avatar
AndrewGVT
Cleaner
Cleaner
Posts: 54
Joined: Tue May 21, 2013 7:45 pm
Location: Hampshire
Contact:

Post by AndrewGVT » Wed Jun 05, 2013 7:25 am

Hi
Work has slowed down now because I am back to school :(
Any way I got more of the track bed done and concreted it, as well as the station area, in. :D
I will upload some pics later
Andrew
=============
Proper engineering techniques; use a hammer, if that fails, get a bigger hammer.

User avatar
AndrewGVT
Cleaner
Cleaner
Posts: 54
Joined: Tue May 21, 2013 7:45 pm
Location: Hampshire
Contact:

Post by AndrewGVT » Fri Jun 07, 2013 11:02 pm

Hi
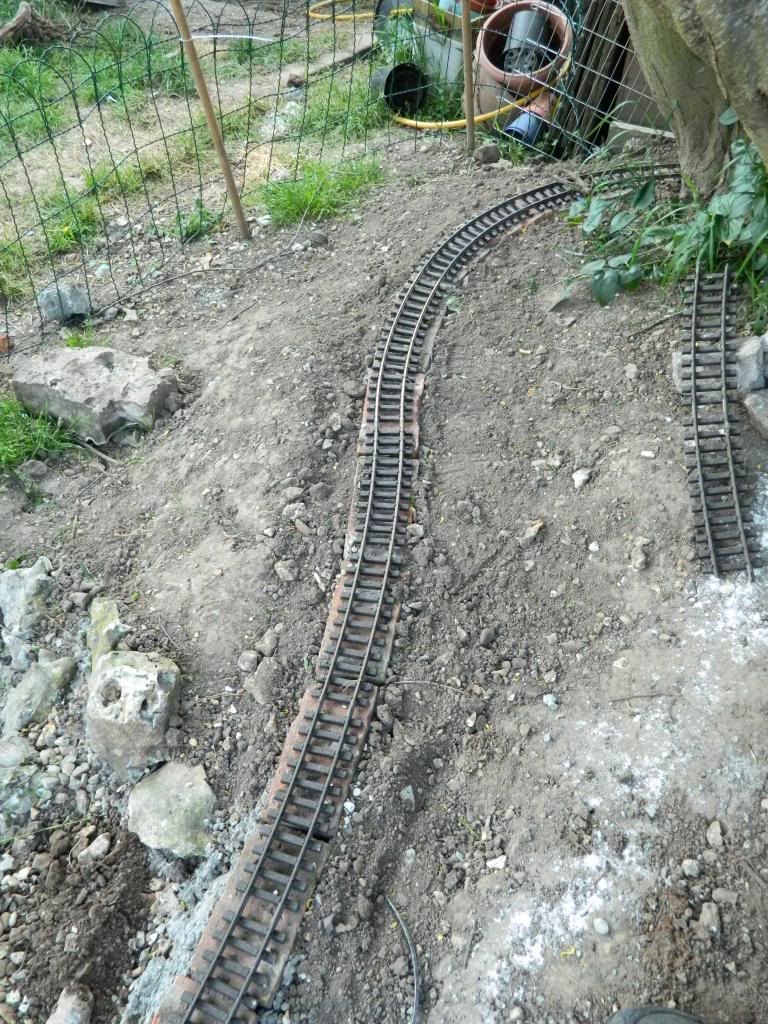
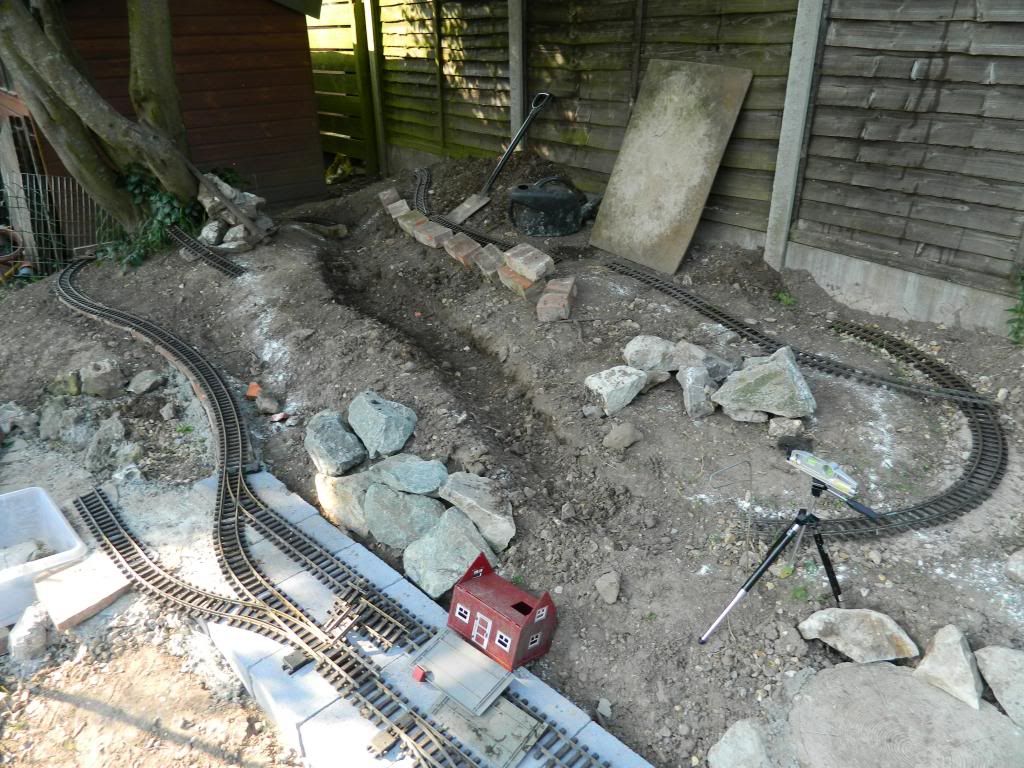
Over the week I have been working hard and have about 2/3 of the track bed laid and half concreted in. Also I tackled "the shed of doom" today and saw the floor for the first time in living memory.
The almost finished track bed:
(sorry I can't rotate it)
Image
I also got some pics of measuring the gradient:

Image

Image

Image
Andrew
=============
Proper engineering techniques; use a hammer, if that fails, get a bigger hammer.

LnBmad
Trainee Driver
Trainee Driver
Posts: 884
Joined: Fri May 31, 2013 10:17 pm
Location: North Devon

Post by LnBmad » Fri Jun 07, 2013 11:24 pm

Great work here bud! Keep it up!
If it can be made full scale it can be made 16mm

My line: http://gardenrails.myfreeforum.org/about7200.html

User avatar
AndrewGVT
Cleaner
Cleaner
Posts: 54
Joined: Tue May 21, 2013 7:45 pm
Location: Hampshire
Contact:

Post by AndrewGVT » Wed Jun 26, 2013 12:35 am

Hi
I will start a new thred in the Railways & Layouts area and post updates there instead as I think its a better place to do that.
Andrew
=============
Proper engineering techniques; use a hammer, if that fails, get a bigger hammer.

User avatar
Dr. Bond of the DVLR
Retired Director
Retired Director
Posts: 4485
Joined: Tue Jun 09, 2009 9:43 pm
Location: Suffolk
Contact:

Post by Dr. Bond of the DVLR » Wed Jun 26, 2013 11:11 am

If you'd prefer I can move this thread over so you don't loose your first pics off the thread
Image
The railway which people forgot
(to build)

User avatar
AndrewGVT
Cleaner
Cleaner
Posts: 54
Joined: Tue May 21, 2013 7:45 pm
Location: Hampshire
Contact:

Post by AndrewGVT » Wed Jun 26, 2013 4:09 pm

That would be great, thanks!
Andrew
=============
Proper engineering techniques; use a hammer, if that fails, get a bigger hammer.

User avatar
laalratty
Retired Director
Retired Director
Posts: 3887
Joined: Wed Jan 16, 2008 5:35 pm
Location: Morecambe

Post by laalratty » Wed Jun 26, 2013 8:47 pm

Moved! :)
"What the hell is that?"
"It's a model icebreaker sir."
"It's a bit big isn't it?"
"It's a full scale model sir....."

User avatar
AndrewGVT
Cleaner
Cleaner
Posts: 54
Joined: Tue May 21, 2013 7:45 pm
Location: Hampshire
Contact:

Post by AndrewGVT » Thu Jun 27, 2013 7:50 pm

Elmtree Line:85273 wrote:What type of trains will you be running?
All my current stock is electric track power (except 2 playmobil locos) which I'm not to happy with and so all new locos will be RC. I would also like to convert some of the current locos, firstly my GVT Sir Theodore.
As for live steam its to expensive for now but maybe when the railways a bit longer ;).
Andrew
=============
Proper engineering techniques; use a hammer, if that fails, get a bigger hammer.

User avatar
Peter Butler
Driver
Driver
Posts: 5236
Joined: Sun Sep 09, 2012 10:33 pm
Location: West Wales

Post by Peter Butler » Thu Jun 27, 2013 8:59 pm

Great to see you doing something productive and sharing your experience with us. I wish you all success with your railway and hope to see it progress.

Peter.

User avatar
AndrewGVT
Cleaner
Cleaner
Posts: 54
Joined: Tue May 21, 2013 7:45 pm
Location: Hampshire
Contact:

Post by AndrewGVT » Fri Jun 28, 2013 6:57 pm

Thanks Peter and thanks laalratty for moving it.
Although there has not been many updates, progress has been made. I will try to get some pics soon.
The track bed has been laid up to the junction at the top and some scenery has been started.
Andrew
=============
Proper engineering techniques; use a hammer, if that fails, get a bigger hammer.

User avatar
AndrewGVT
Cleaner
Cleaner
Posts: 54
Joined: Tue May 21, 2013 7:45 pm
Location: Hampshire
Contact:

Post by AndrewGVT » Thu Aug 01, 2013 12:29 am

Hi all,
I have not posted for a wile, mostly because of pressure from school and the very hot weather. Now I have started on the summer holidays I hope to get more work done when there is some good weather.
Andrew
=============
Proper engineering techniques; use a hammer, if that fails, get a bigger hammer.

jay1976
Fireman
Fireman
Posts: 326
Joined: Mon Apr 29, 2013 4:32 pm

Post by jay1976 » Thu Feb 06, 2014 10:02 pm

did you get any further with this?

Post Reply

Who is online

Users browsing this forum: 90733, ArtyJCB and 5 guests