Page 1 of 5
Posted: Tue Apr 02, 2013 8:38 pm
by Narrow Minded
Try fitting shims on the check rails -
http://gardenrails.myfreeforum.org/ftop ... sc-600.php
- works wonders

Posted: Tue Apr 09, 2013 1:10 am
by Sylvian Tennant
So far the wagons are in a paint-able position.
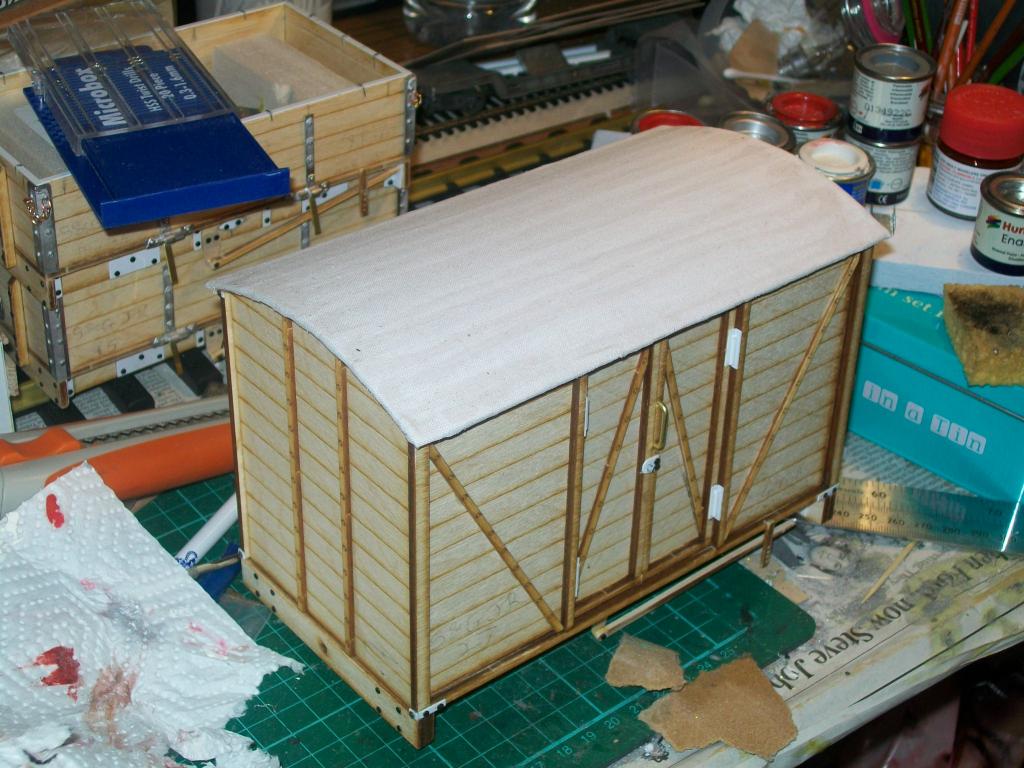
Instead of using the scarily stuff plastic roof, I decided to go the full monty and create a roof using mahogany strips and some fabric linen I had lying around.
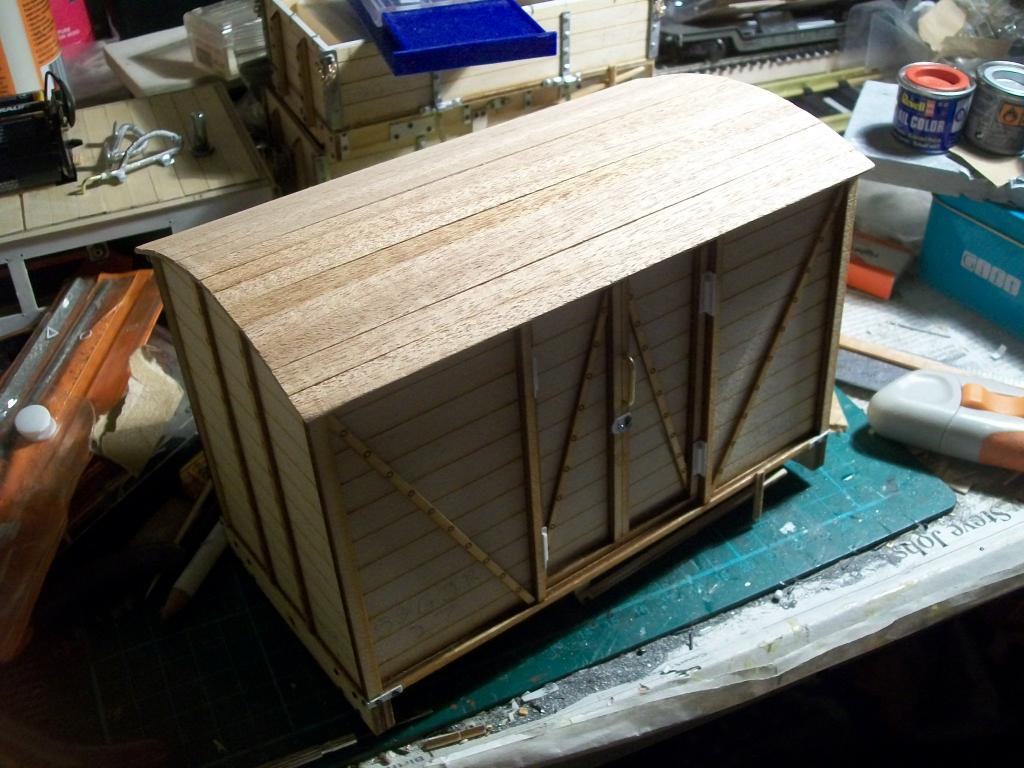
finally some messy first coat... you'll hopefully see an improvement as time goes on.
For more on what I've done check out the blog.
Posted: Tue Apr 09, 2013 8:01 pm
by MDLR
Sylvian Tennant:81996 wrote:Instead of using the scarily stuff plastic roof, I decided to go the full Monty and create a roof using mahogany strips and some fabric linen I had lying around.
That's by FAR the best way - with coaches, you can stain alternate planks pine and Mahogany - they look great!
Posted: Mon Apr 15, 2013 1:16 am
by Sylvian Tennant
Cheers for the tip MDLR, I'll keep that in mid for the future.
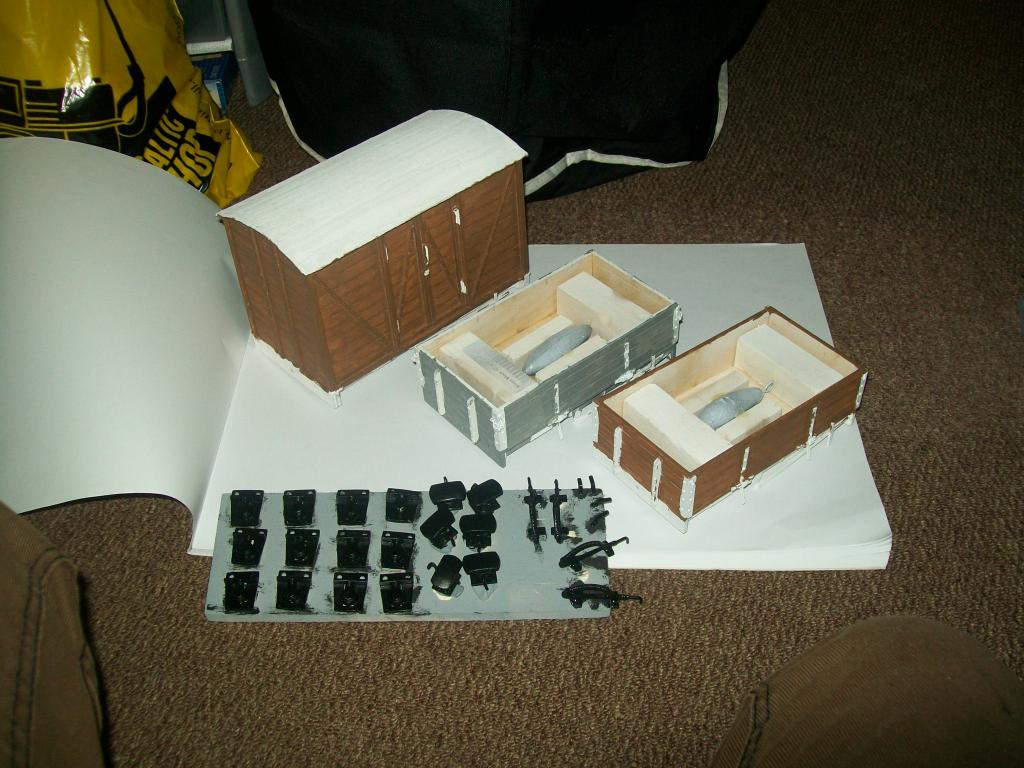
Anyway, unfortunately my camera wasn't working so I've taken some pics with my camera phone of the "almost" finished articles.
 [url=./myff/1543155/548951_565051800 ... .jpg[/img]
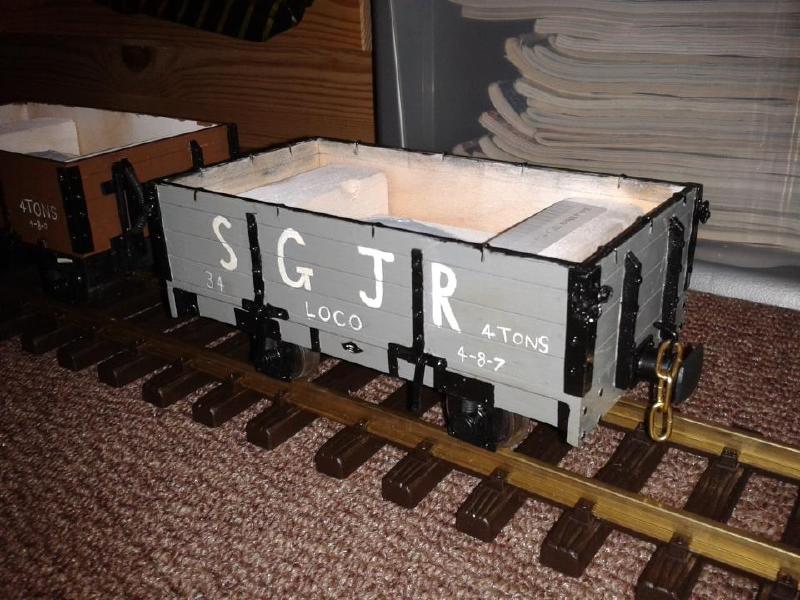
I must be honest and say I feel the writing is a bit of a let down, that and I used Ronseal Satin varnish which I'm not used to. but the overall outcome is okay. But the hand painting is pretty evident especially on the loco coal wagon.[/url]
Posted: Mon Apr 15, 2013 4:25 pm
by Lner fan Sam
I like the writing, gives the wagons their own personality.
Posted: Mon Apr 15, 2013 7:13 pm
by williamfj
Personally I'm impressed with the lettering and the wagons in general, especially the box van.

Posted: Tue Apr 16, 2013 8:53 pm
by Keith S
Yeah, I think they look great too. There's nothing wrong with the hand lettering. I mean if you are making scale models I guess you'd want neater looking writing, but I'm sure it's plausible that a little shoestring railway would have hand lettered wagons on their trains in real life. I think it looks fine.
Posted: Tue Apr 16, 2013 9:19 pm
by Stuvon
I agree, the lettering is spot on, most narrow gauge lines would not have had a lettering specialist to paint the letters, just someone with a steady hand (or not as the case maybe).
The trucks look great, just need to run them behind that new loco now!!
Posted: Fri Apr 19, 2013 5:55 pm
by Sylvian Tennant
Thanks guys, I feel a little less forgiving on it than you chaps.
I've gotten them almost finished, just a dabble of weathering on the van and a tarpaulin hood for the open wagons!
Just out of curiosity. I primed these wagons with some terrible Wilkos stuff... but out of curiosity here. Who primes their wagons before painting? and what with? (if you do)
Posted: Fri Apr 19, 2013 8:05 pm
by Peter Butler
I use a car spray grey primer, either light grey from 'The Range' at about £3.99 a can or a darker grey from Poundland at, you guessed, £1.00 a can! Both are acrylic and do a similar job.
Posted: Fri Apr 19, 2013 8:29 pm
by bazzer42
I prime with holts greybandnthen (foolishly) I've adopted to humbrol greys as stock colours for body and underframes. 67 tank grey for underframe and sea grey body. I like the lettering Mr T, got brace myself to try on my stock. I think we may become the Vale of Fairway Rly allowing me to make a V and F template from thin styrene and spraying as a first effort.
Posted: Fri Apr 19, 2013 10:30 pm
by Sylvian Tennant
Cheers chaps! So I'll continue to prime my wagons. Just I've got a brake van to build next and unlike the other wagons the axles boxes are apart of the chassis plus I want to give it an interior (plus removable roof!)
Anyway, I've managed to get the wagons all painted up, and weathered using some tamiya acrylics and humbrol leather and metal coat... I'll go into a bit more depth later on but please do enjoy the pics.

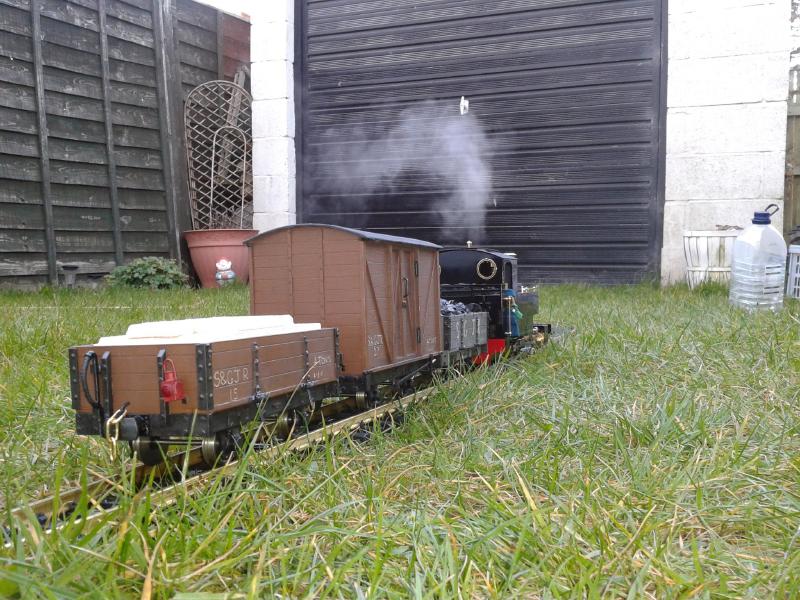

anyway... I've managed to finally run my wagons being Jemima tonight after work. After a slight issue lighting her up all seemed well. Unfortunately, as my back garden is about as level as the North Sea in a blizzard I has a couple of buffer snags and derailments of the coal wagon but apart from that there was not problems at all.
I wish I had used a template but I couldn't find any around plus I wasn't tempted to try and make curved one... but please keep us updated on the rolling stock Bazza

Posted: Sat Apr 20, 2013 5:01 am
by Keith S
The little train looks great. I like it the better for the hand-lettered wagons, to be honest, it looks more real. Sometimes rolling stock can be "too perfect", you know. Yours looks real.
The Lady Anne will need more wagons than that to slow it down though!
Posted: Wed Apr 24, 2013 11:46 am
by Andrew
Looking good! Loving all the extra detail, and the subtle weathering too. I agree about rolling stock sometimes looking too perfect - I like to think that my inability to cut straight or glue square actually helps there. Although I fear I take it too far at times...
Cheers,
Andrew.
Posted: Wed Apr 24, 2013 6:23 pm
by bazzer42
The wagons look great, the lettering looks good. If it is an ip brakevan I found that some of the push out off cuts make great half length running boards. Just need some plastcard supports.
I also agree with the comment that sometimes wagons can look too clinical, I may be guilty as charged.
S&DJR Rolling stock
Posted: Wed May 29, 2013 7:02 am
by Sylvian Tennant
I've been very quiet on the internet lately, so much so that I'm not even updated the weekly blog I promised to do. I'm going to review that situation and make a decision on it s future as a weekly effort was getting a little on top of me. Maybe monthly instead?
Anyway....
I've managed to finish off the rest of my wagons with only the brake van now left to do.

The first wagon to show is the already finished open wagons which I wanted to fit with a tarpaulin. The tarpaulin itself was some tin foil, primed with halfords and painted with revell dark green. The strapping was some cross stitch thread bought from boyes with the knots dabbed with super glue.

The second wagon was painted a lovely shade of humbrol cockpit interior green and given a private owner livery (the name of a very dear but bemused artist friend). and given a load of coal, smaller pieces that the loco coal wagon though...

and the final one painted a Revell yellow colour, and given some crushed party balloon ballast to represent road or railway ballast to be taken from the quarry to a distribution centre.

and this is the lonely Jemima pulling them.

Posted: Wed May 29, 2013 11:05 am
by Peter Butler
Nice and 'rustic' looking......very effective out in the open.
Posted: Wed May 29, 2013 11:11 am
by williamfj
Very impressive, especially the lettering on the Higgins open.
Posted: Wed May 29, 2013 12:17 pm
by Big Al
I like the wagons, Good idea to use foil on the wagon for a tarpaulin I was wondering how to do it.
Posted: Sat Jun 01, 2013 4:48 pm
by Keith S
THose look great- you're getting good at decorating wagons. I should send mine to you for overhaul. Mine are looking rather plain.
![[url=./myff/1543155/548951_565051800 ... .jpg[/img]](%5Burl=./myff/1543155/548951_565051800195860_291351057_n.jpg%5D%5Bimg%5D./myff/1543155/548951_565051800195860_291351057_n.jpg%5B/img%5D)