Changing of a Roundhouse Silver Lady - Steamy Clare

Discussion of Live Steam locomotives should be located here
Post Reply
User avatar
tom_tom_go
Driver
Driver
Posts: 4824
Joined: Wed Feb 23, 2011 3:08 am
Location: Kent, UK
Contact:

Post by tom_tom_go » Thu Apr 07, 2011 6:03 pm

Work has been hinder due to, well work and DIY, however, the whistle is now fitted:

Image

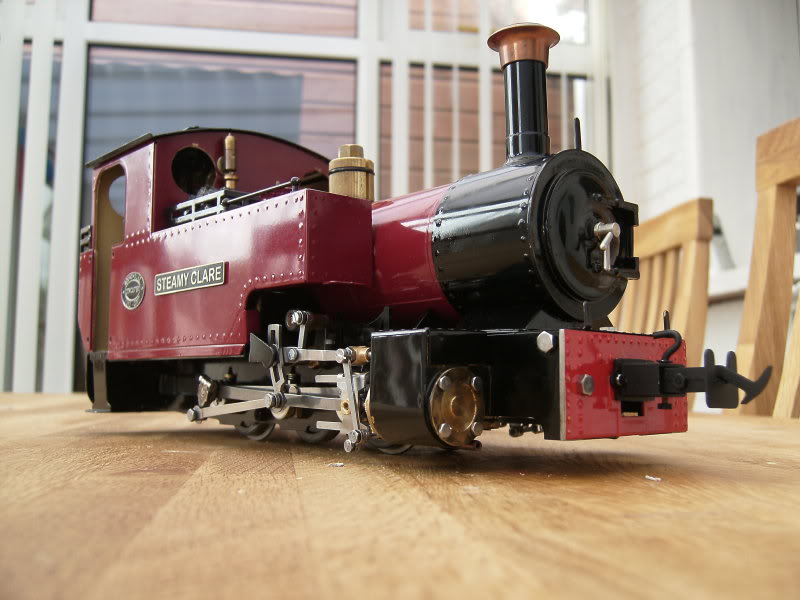
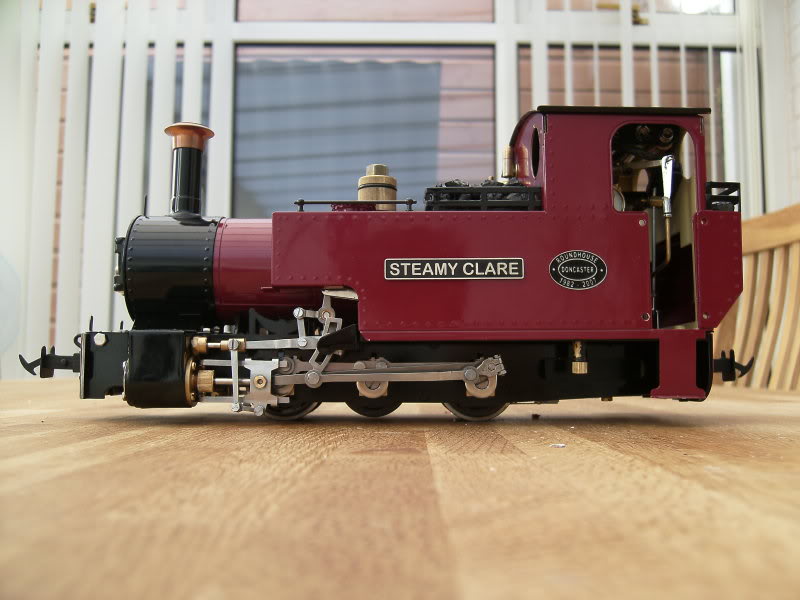
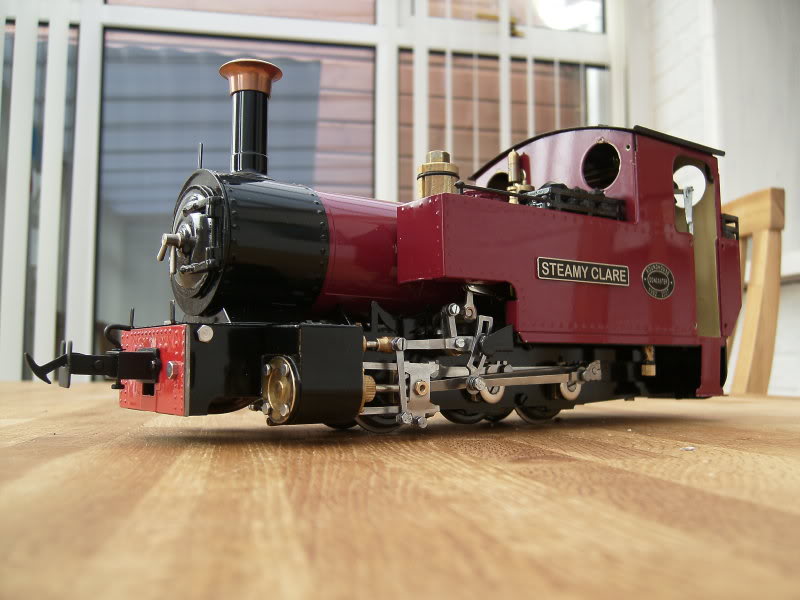
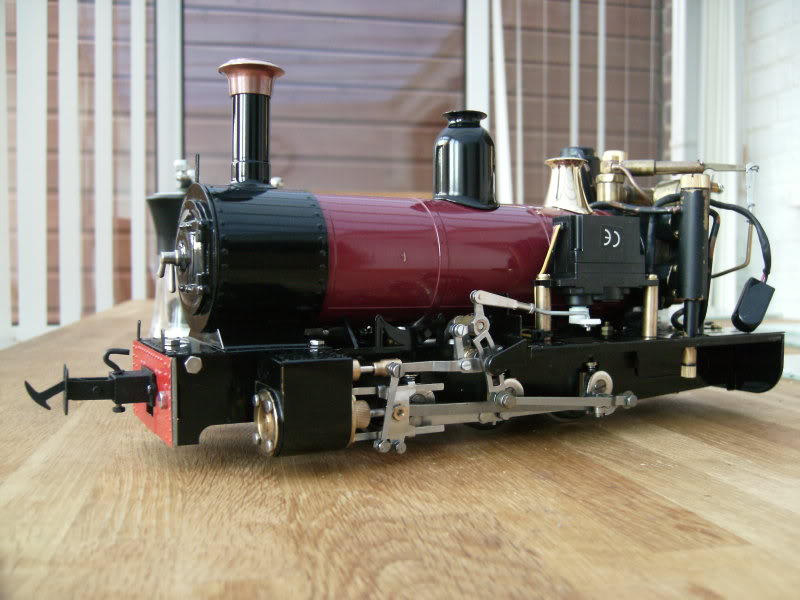
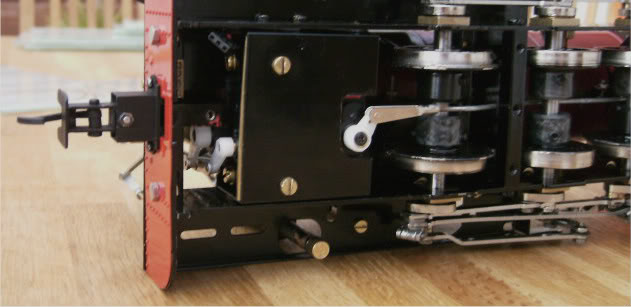
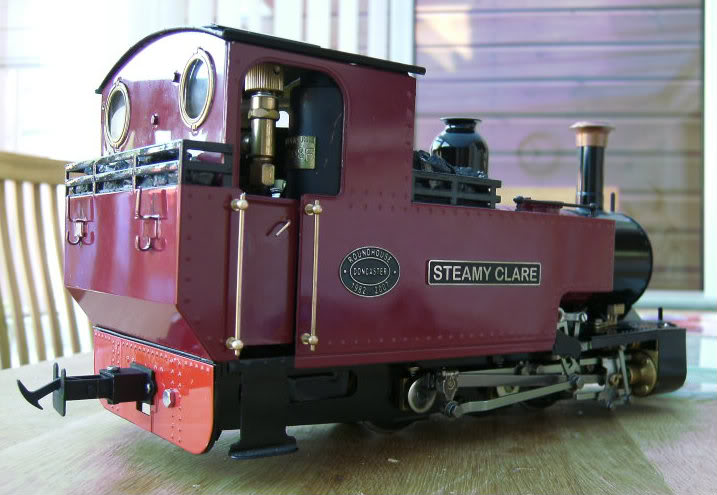
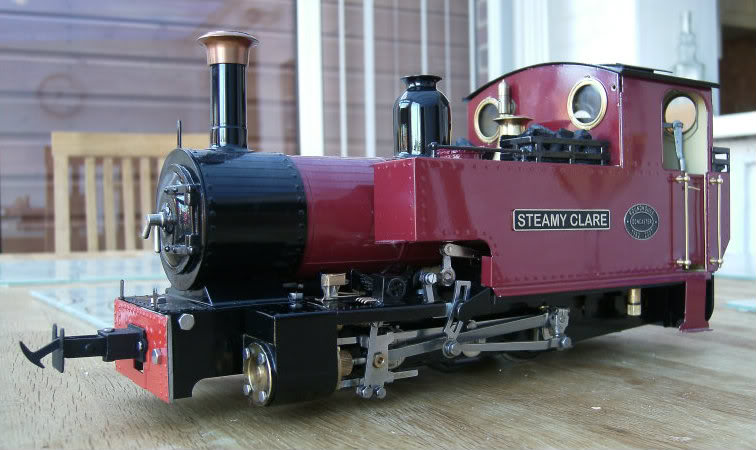
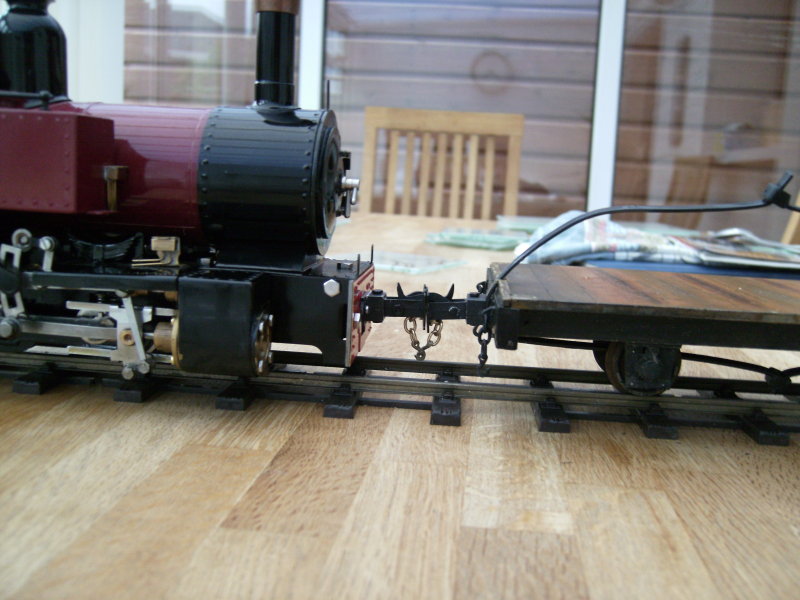
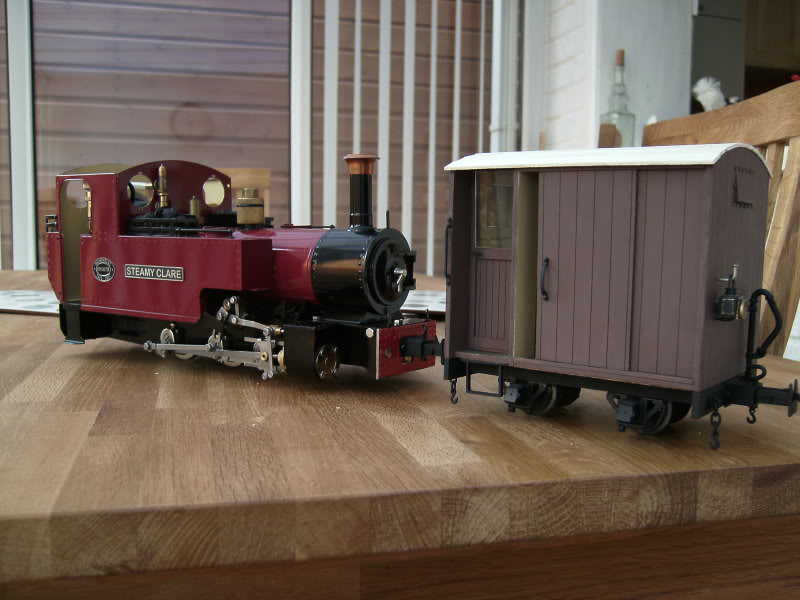
In a previous post I ask about blackening wheels and this process I have now done on my guards van which is in the same pic. It makes a big difference as the wheels are Accucraft 32mm and are very shiny out of the box. I will be blackening the wheels on the SL as well as the running gear.

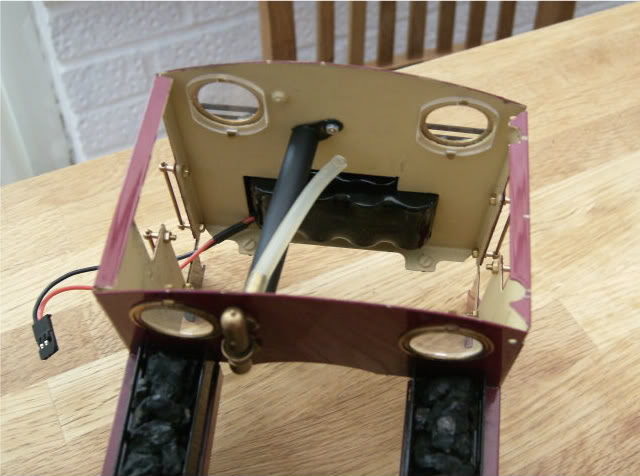
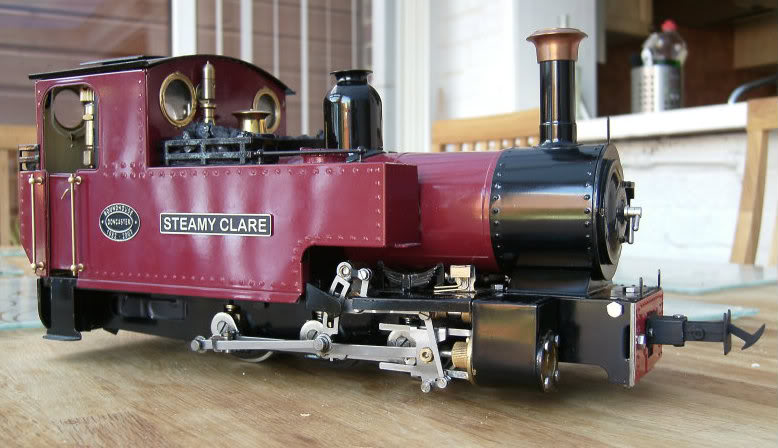
I am hoping ACME engineering will soon be able to source me a set of spectacle plates which should be a nice touch to this cosmetic change.

Cheers,

Tom

User avatar
tom_tom_go
Driver
Driver
Posts: 4824
Joined: Wed Feb 23, 2011 3:08 am
Location: Kent, UK
Contact:

Post by tom_tom_go » Mon Jul 18, 2011 5:06 pm

Finally painted the wheels last week which I think makes a big difference to all the shiny running gear stick out like a soar thumb:

Image
Image
Image

Once I get hold of some etch primer I will be spray painting the steam dome the same colour. Also need to decide whether I am going to have a go at fitting the Swift Sixteen cab windows or get them fitted professionally as it seems quite a job!

Now that we have had our English summer (we only get a few weeks of sun after all) I can get some more work done on this rather than building the railway outside!

Cheers,

Tom
RWLR

User avatar
tom_tom_go
Driver
Driver
Posts: 4824
Joined: Wed Feb 23, 2011 3:08 am
Location: Kent, UK
Contact:

Post by tom_tom_go » Wed Sep 21, 2011 5:59 pm

Matt of Berry Hill Works has kindly taken on the job of fitting the Swift Sixteen spectacle plates for me because I don't have the time (yes that's my excuse!)

Meanwhile, I had a go at spray painting the steam dome on the SL as I did not really like the brass look:

Image

I need to do something about the smokebox next!

Cheers,

Tom
RWLR

User avatar
tom_tom_go
Driver
Driver
Posts: 4824
Joined: Wed Feb 23, 2011 3:08 am
Location: Kent, UK
Contact:

Post by tom_tom_go » Tue Jan 03, 2012 12:38 pm

I have never been happy with the battery being located on the inside of the cab roof. Even when I managed to find a AAA battery pack it still could be seen and the fact that the cable hinders the opening/closing of the roof just annoyed me!

So here is what I have done:

Battery in the bunker secured with quality velcro pads cut to size:
Image

Futaba switch harness replaces the switch fitted by RH allowing on board charging (you can just see the charge lead in the second picture):
Image
Image

Fits nice and snug and allows sufficient movement for the whistle/regulator servo links:
Image

The roof no longer flips up/down. It can be completely removed from the loco when servicing is required which is what I wanted.

I have a pair of loco cab doors on order from Locoworks so this will hide the battery/wiring and complete the mod :)

Cheers,

Tom

User avatar
TonyW
Driver
Driver
Posts: 1357
Joined: Fri May 16, 2008 9:25 am
Location: North Wales
Contact:

Post by TonyW » Tue Jan 03, 2012 12:50 pm

tom_tom_go:64219 wrote:Image
Are those the Swift Sixteen spectacles?
Tony Willmore
Rhos Helyg Locomotive Works: http://www.rhoshelyg.me.uk
Facebook: https://www.facebook.com/RhosHelygLocoWorks

User avatar
tom_tom_go
Driver
Driver
Posts: 4824
Joined: Wed Feb 23, 2011 3:08 am
Location: Kent, UK
Contact:

Post by tom_tom_go » Tue Jan 03, 2012 12:57 pm

Hi Tony,

No they are the standard RH spectacles fitted to the SL.

Cheers,

Tom

User avatar
Mike PVLR
Trainee Fireman
Trainee Fireman
Posts: 168
Joined: Wed Sep 22, 2010 5:59 pm
Location: Upholland
Contact:

Post by Mike PVLR » Tue Jan 03, 2012 6:01 pm

looking at the foto from underneath i can see 2 servo's. Have you put one on your whistle ? If so was it difficult to do as I have one on order.

User avatar
tom_tom_go
Driver
Driver
Posts: 4824
Joined: Wed Feb 23, 2011 3:08 am
Location: Kent, UK
Contact:

Post by tom_tom_go » Wed Jan 04, 2012 3:10 pm

Hi Mike,

Yes that's right. It's a micro servo fitted to a brass plate.

This was fitted for me when I bought the loco from new, however, now that I have had her apart I think I could of done it myself as my confidence has grown in tinkering :)

If you need help or some pictures PM me and I will send you some.

Cheers,

Tom

User avatar
tom_tom_go
Driver
Driver
Posts: 4824
Joined: Wed Feb 23, 2011 3:08 am
Location: Kent, UK
Contact:

Post by tom_tom_go » Sat May 26, 2012 5:21 pm

The better weather has got me back into 16mm so I finally got round to seeing what some of my bits from Locoworks look like:

Image
Image
Image

The doors hide the battery I put in the bunker a treat!

Cheers,

Tom

User avatar
tom_tom_go
Driver
Driver
Posts: 4824
Joined: Wed Feb 23, 2011 3:08 am
Location: Kent, UK
Contact:

Post by tom_tom_go » Tue Jul 10, 2012 5:37 pm

Forgot this one of the additional oilers:

Image

Keep it up Locoworks :)

Cheers,

Tom

User avatar
tom_tom_go
Driver
Driver
Posts: 4824
Joined: Wed Feb 23, 2011 3:08 am
Location: Kent, UK
Contact:

Post by tom_tom_go » Mon Oct 08, 2012 5:00 pm

I like the Accucraft chopper couplings because they are cheap, however, they for me leave a too bigger gap between wagons so I had a go at making them smaller:

Image
Image
Image

The spacing now is 48mm whereas before it was over 60mm. I have tested this on 2ft 6" curves and I have had no issues.

The safety chain simply glues under the buffer. I might trim the buffer itself to bring it into proportion.

User avatar
GTB
Driver
Driver
Posts: 1559
Joined: Sat Mar 05, 2011 2:46 pm
Location: Australia

Post by GTB » Tue Oct 09, 2012 9:23 am

tom_tom_go:75643 wrote:I like the Accucraft chopper couplings because they are cheap, however, they for me leave a too bigger gap between wagons so I had a go at making them smaller:.
That looks good Tom......

For my wagons I just embedded them in the headstock, but your method looks much better for mounting on a loco.

What have you done to shorten them? It looks like you've drilled the pivot further back and then shortened the mounting box to match. Have you also modified the coupler shank?

Graeme

.

User avatar
tom_tom_go
Driver
Driver
Posts: 4824
Joined: Wed Feb 23, 2011 3:08 am
Location: Kent, UK
Contact:

Post by tom_tom_go » Tue Oct 09, 2012 3:25 pm

Glad you like them Graeme.

Yes, the coupler shank was cut back and filed so that the edges were rounded off to allow it to swing from left to right. The spring inside the mounting box was also removed (it has made no difference to the performance of the coupler).

Next time I do another one I will post some pics of the mods for you.

User avatar
GTB
Driver
Driver
Posts: 1559
Joined: Sat Mar 05, 2011 2:46 pm
Location: Australia

Post by GTB » Wed Oct 10, 2012 11:25 am

Thanks for the info Tom,

I'll have a go at your mod on the loco I'm currently working on. I like the choppers, but they currently stick out too far on my locos and it irritates me.

Graeme

User avatar
tom_tom_go
Driver
Driver
Posts: 4824
Joined: Wed Feb 23, 2011 3:08 am
Location: Kent, UK
Contact:

Post by tom_tom_go » Fri Oct 12, 2012 9:22 am

I had a go at hiding the lubricator drain plug with a toolbox. Would something like this of actually existed - does anyone have any pics?

Image
Image

The shelf is plastic so the set up is only temporary as it needs to go under a bit more.

Also, I wondered if this rag over the door looked alright to hid the gas tank?

Image

Would the crews of engines have the rug covering from the inside instead as I can't find a picture showing what they would of done?

Help please :)

User avatar
Annie
Fireman
Fireman
Posts: 471
Joined: Tue Aug 28, 2012 4:45 pm
Location: New Zealand

Post by Annie » Fri Oct 12, 2012 9:51 am

On New Zealand timber tramways loco crews would hang old sacks and even pieces of corrugated iron on the outside of a cab doorway to turn the prevailing wind and weather. I think hanging the canvas outside looks more logical and if it was raining it would prevent water dripping inside the cab.

As to toolboxes I think loco crews would fit them up wherever they could find a place to put them that they wouldn't fall over, but was still handy to get to.
What has Reality done for you lately?

spooner
Fireman
Fireman
Posts: 358
Joined: Sat May 01, 2010 12:21 pm
Location: Woodston,Peterborough

Post by spooner » Fri Oct 12, 2012 9:57 am

I would put rolled up blind (rag) on over side.
Keep up the good work.
Ian
WLR

User avatar
tom_tom_go
Driver
Driver
Posts: 4824
Joined: Wed Feb 23, 2011 3:08 am
Location: Kent, UK
Contact:

Post by tom_tom_go » Fri Oct 12, 2012 5:40 pm

Thanks for the comments guys. A rug tied up on the other side will look good. Still not sure about the toolbox, would it not get in the way of the fire grate? (on the real thing that is)

I dyed the piece of cloth some more with coffee and it looks more worn now:

Image

User avatar
laalratty
Retired Director
Retired Director
Posts: 3887
Joined: Wed Jan 16, 2008 5:35 pm
Location: Morecambe

Post by laalratty » Fri Oct 12, 2012 8:35 pm

I fear your toolbox would block access to the ashpan and therefore prevent it being ashed out easily. Also, muck from the footplate would probably run straight into it. Best way of hiding the drain screw is probably painting it with some black paint. Or maybe put something like a steam brake cylinder over it, they are sometimes found under the cab. The sheet over the cab side is quite prototypical though, I've seen pics of them on Isle of Man locos for a start
"What the hell is that?"
"It's a model icebreaker sir."
"It's a bit big isn't it?"
"It's a full scale model sir....."

User avatar
Annie
Fireman
Fireman
Posts: 471
Joined: Tue Aug 28, 2012 4:45 pm
Location: New Zealand

Post by Annie » Sat Oct 13, 2012 12:31 am

Oops, I forgot about access to the ashpan :oops: Yes a brake cylinder would make more sense to have in that position.
What has Reality done for you lately?

Post Reply

Who is online

Users browsing this forum: No registered users and 1 guest