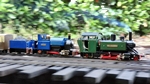
Absolutely !kandnwlr:102269 wrote:More pics of Minnie in steam please :D
The RHBR fleet
-
'Pierre Berry

- Cleaner

- Posts: 13
- Joined: Thu Jun 26, 2014 1:39 pm
- Location: Somewhere on Earth...
Thanks for the interest guys, photos of Minnie in steam eh? Pffffffffffffff,  There aren't many that haven't been uploaded before to be honest, the first photo comes from June last year! I don't tend to have my camera fired up when she is. I will try to amend that during her next outing on Saturday.


And only 1 suitable photo from this year, taken in March!

And only 1 suitable photo from this year, taken in March!
As promised here are more photos of Minnie in steam, not just brewing up/ cooling down.
Three panned shots, amazing what some practice can do!
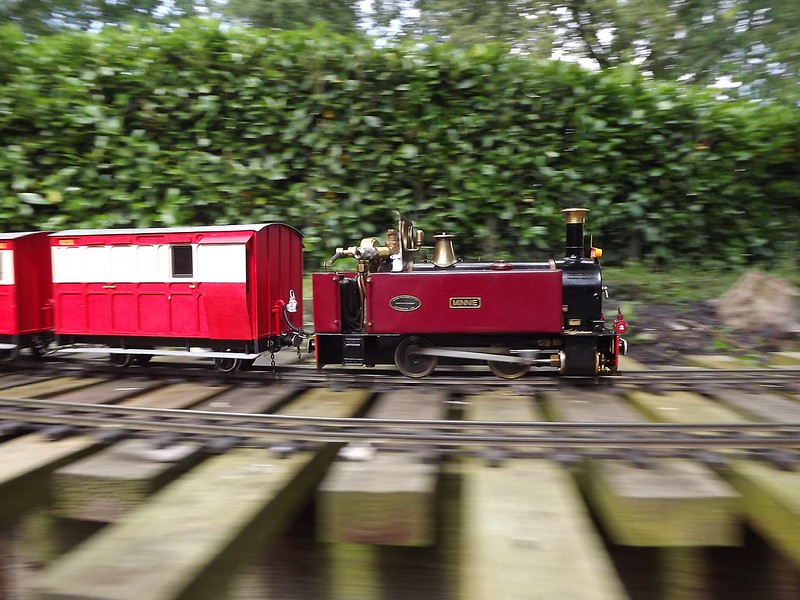
Panning No.1 by williamfj2, on Flickr
Panning No.2 by williamfj2, on Flickr
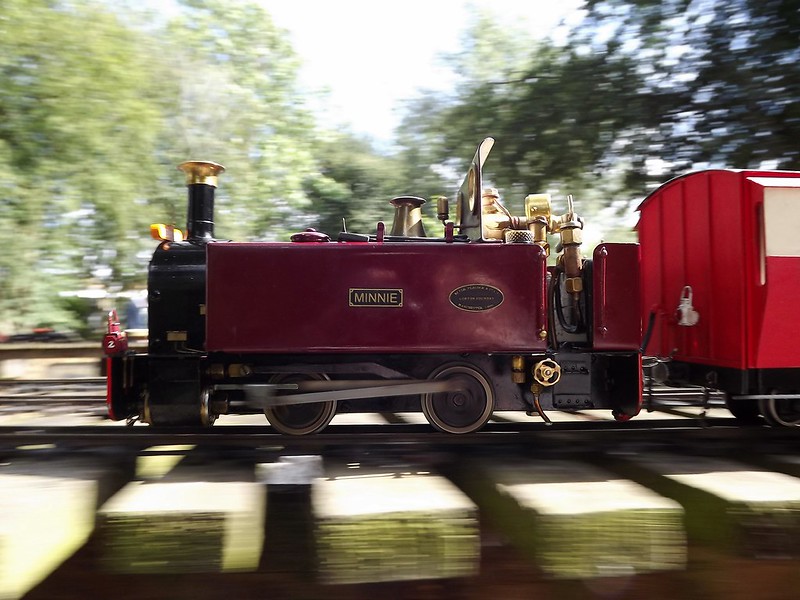
My favourite of the three pans, light, motion and steam! That said I'm not too happy with how the coaches look.
Panning No.3 by williamfj2, on Flickr
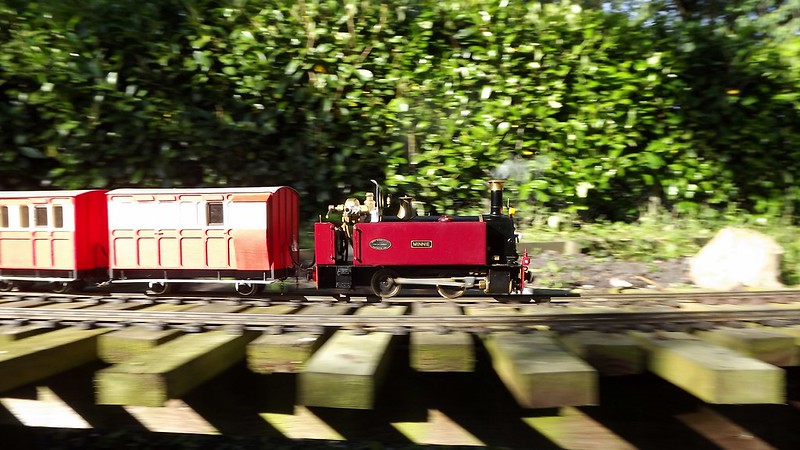
One that I've already shown, but I like it.
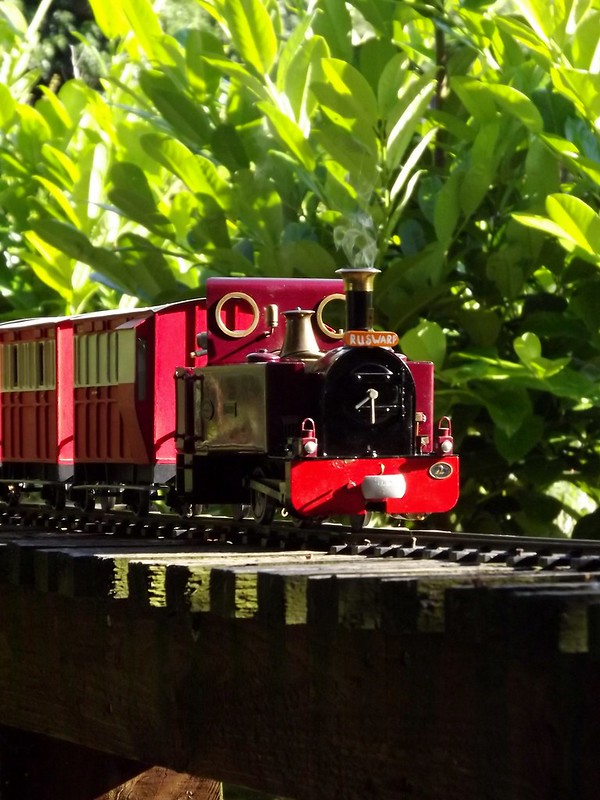
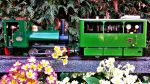
Minnie by williamfj2, on Flickr
At the end of a day where she didn't put a toe never mind a foot out of line. Must patch the paint on that numberplate though
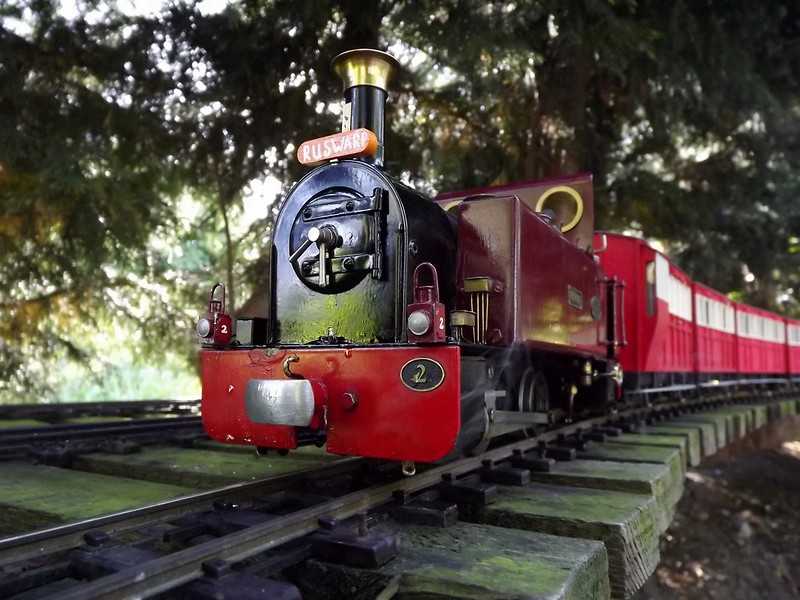
End of Another Good Day by williamfj2, on Flickr
Three panned shots, amazing what some practice can do!
Panning No.1 by williamfj2, on Flickr
Panning No.2 by williamfj2, on Flickr
My favourite of the three pans, light, motion and steam! That said I'm not too happy with how the coaches look.
Panning No.3 by williamfj2, on Flickr
One that I've already shown, but I like it.
Minnie by williamfj2, on Flickr
At the end of a day where she didn't put a toe never mind a foot out of line. Must patch the paint on that numberplate though
End of Another Good Day by williamfj2, on Flickr
I've just read this thread from start to finish. Your rolling stock and locos are splendid and your writing/ descriptions make me chuckle.
The second panning shot above and the last two shots are brilliant. The panning is an absolute cracker and the one with the sunlight on the leaves is beautiful. Well done fella.
Ben
The second panning shot above and the last two shots are brilliant. The panning is an absolute cracker and the one with the sunlight on the leaves is beautiful. Well done fella.
Ben
Wow, thanks Ben, must have been quite a slog reading my ramblings at times!
For the past couple of weeks things have been in a state of disarray for me & the fleet as I've moved to a different flat, but I'm getting a grasp of things now. Some stuff hasn't made the move though, the Brandbright coaches have been passed to a friend who might stand a better chance at completing them. I've found that once I let a project stall it's hard to get it restarted.
River Ankh earlier this month, despite being stored for about 18 months with little attention it only took a quick oil round to get her growling again.
-
Dannypenguin
- Trainee Driver

- Posts: 632
- Joined: Tue Feb 26, 2013 9:57 am
- Location: Forest of Dean, UK
- Contact:
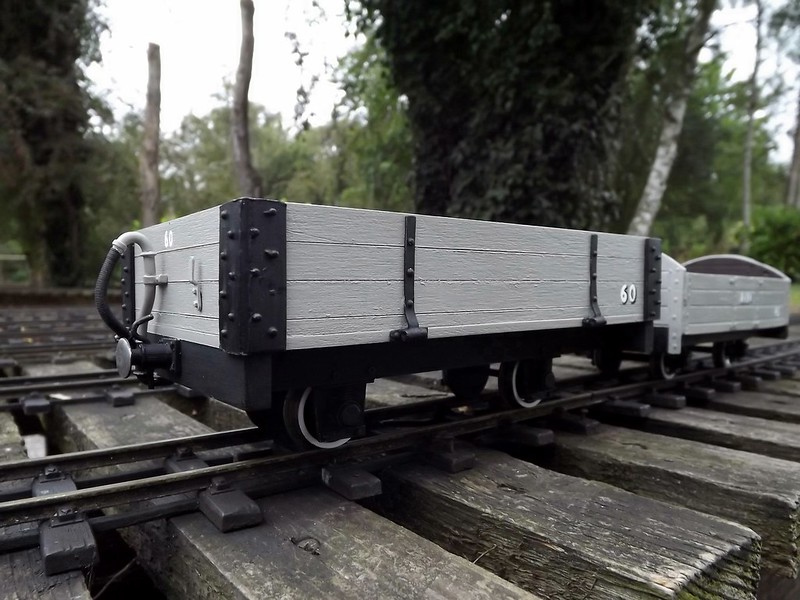
Neat little wagons you got yourself there 
Dan
Visit the PFLR website - http://poultonfarmlightrailway.webs.com/
Dean Forest Railway Society website - http://dfrsociety.org/
Visit the PFLR website - http://poultonfarmlightrailway.webs.com/
Dean Forest Railway Society website - http://dfrsociety.org/
-
Dr. Bond of the DVLR

- Retired Director

- Posts: 4485
- Joined: Tue Jun 09, 2009 9:43 pm
- Location: Suffolk
- Contact:

Minnie now sounds very different, she's been fitted with a whistle and is the first loco (as far as I know) to have her chuff pipe removed, and Dylan has been fitted with Swift Sixteen drawbar couplings as I found that the loco's hook was capable of working loose very quickly.
Despite not having a railway of my own, or even the possibility in the short term of building my own I've somehow come to the conclusion that I need a P Way train! So far I've got a 2 Swift Sixteen hoppers, and an IP Engineering crane either finished or well on the way. Once they're all finished then I should be starting on an IPE VoR bogie brake coach to act as the dedicated P Way coach.


Despite not having a railway of my own, or even the possibility in the short term of building my own I've somehow come to the conclusion that I need a P Way train! So far I've got a 2 Swift Sixteen hoppers, and an IP Engineering crane either finished or well on the way. Once they're all finished then I should be starting on an IPE VoR bogie brake coach to act as the dedicated P Way coach.
-
Soar Valley Light

- Driver

- Posts: 1451
- Joined: Sun Dec 08, 2013 5:18 pm
- Location: North West Leicestershire
I absolutely LOVE those hoppers. The huge log of an underframe might cast some doubt about the realistic possibility of prototype bottom discharge but I can overlook that, in every other respect they are beautifully proportioned.
How easy is it/would it be to fit chopper couplings to them?
How easy is it/would it be to fit chopper couplings to them?
"Smith! Why do you only come to work four days a week?
"'cause I can't manage on three gaffer!"
"'cause I can't manage on three gaffer!"

Thanks guys, hopefully Swift Sixteen's online instructions will show that it is modelled as a bottom discharge wagon. While I don't have any real experience with chopper couplings I don't think it would be too difficult to fit them but it would require modifying/replacing the supplied buffers.Soar Valley Light:105770 wrote:I absolutely LOVE those hoppers. The huge log of an underframe might cast some doubt about the realistic possibility of prototype bottom discharge but I can overlook that, in every other respect they are beautifully proportioned.
How easy is it/would it be to fit chopper couplings to them?
http://www.swiftsixteen.co.uk/Instructi ... ctionID=23[/url]
-
Soar Valley Light
- Driver
- Posts: 1451
- Joined: Sun Dec 08, 2013 5:18 pm
- Location: North West Leicestershire
The death of my laptop early last week (fecking windows 8!) gave me no excuses to do some modelling and I've made good progress on 4 projects, yet another IPE MOD open needs vacuum pipes painting the fitting and the numbering requires shading, the crane wagon I've been building is painted & the crane itself isn't too far off completion & the 2nd Swift Sixteen hopper wagon requires some detail picked out with black. The major project recently is the construction of an IPE VOR bogie brake whose body & bogies have been built & painted as my plan is to finish the body including fitting the glazing & roof before starting on the bottom end.
The last running day of the year is next Sunday and my aim is to have at least 3 of aforementioned vehicles running, a very realistic goal!
I've based the livery on the FR's No.1000 (formerly 100) which was used for a while as a p way coach, although I'm not entirely happy with the livery. Still needs a bit of tidying up but it's pretty much there.

The quality of the castings isn't great, they needed a lot of cleaning and in some cases bending to shape. I've made assembling it harder than necessary as I've avoided soldering however when viewed from a distance it'll be fine. If you've got some experience with white metal kits then it shouldn't present any major difficulties.
Three wagons outshopped in a day means I've no excuse to crack on with the VoR coach now.
Doesn't look pretty, but it'll do

I've made the crane work at the last minute just to make it even more fragile!

If I was redoing the kit I would solder it, I've had to repair the crane a few times as joints gave up. I've also done the rigging differently to how IPE specify in the instructions, drilling a hole in the hook so the string sits on the pulley properly and rather than use two pieces to hold the jib up I've used one tied & glued onto the jib then passed through the balance weight onto the other side of the jib.
Doesn't look pretty, but it'll do
I've made the crane work at the last minute just to make it even more fragile!
If I was redoing the kit I would solder it, I've had to repair the crane a few times as joints gave up. I've also done the rigging differently to how IPE specify in the instructions, drilling a hole in the hook so the string sits on the pulley properly and rather than use two pieces to hold the jib up I've used one tied & glued onto the jib then passed through the balance weight onto the other side of the jib.
Who is online
Users browsing this forum: No registered users and 9 guests