Re-animating this thread a bit. Loving the ideas so far. Here's a couple I've used to good effect.
Spherical-headed sewing pins make decent doorknobs.

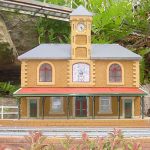
- IMG_5748.JPG (233.09 KiB) Viewed 3745 times
Bar stools can be made from googly-eyes for the cushions, with matchstick legs. The beer tap (manifold?) was made by making a 90 degree bend in a piece of coat-hanger wire, threading a scrap of 5mm square styrene over the wire, then bending the wire's straight end down. The handles and nozzles are the shafts of dressmaker's pins - kept after cutting their heads off for use as rivets. The bar was knocked up from foamboard and corflute offcuts. It's all quite rough, in fact this interior was an afterthought. But it'll work.

- IMG_7008.JPG (242.42 KiB) Viewed 3745 times
Interior staircases can be folded from thin cardboard - a frozen chicken box, in this case. The structure is again, corflute. Matchsticks and coffee stirrers for railings. Everything painted with old El-Cheapo craft acrylics.

- IMG_7016.JPG (221.98 KiB) Viewed 3745 times
Palm trees (potted or fullsize) can be made from feathers. I used
this method. The pot is a resin casting from a fish tank decoration. The lamp shades are very cheap, nasty plastic wheels removed from a secondhand wagon, drilled out and fitted with LEDs. Rainwater tank is a baked-bean tin.

- IMG_1385.JPG (265.9 KiB) Viewed 3745 times
HO or OO scale oil drums make pretty good gauges for instrument panels - saw them in half and get two for each drum, paint, then insert from behind the panel. For a black gauge face, paint the face white or silver first. Then black. After drying, careful scoring with a blade should scratch the top layer of black away, leaving faint lines of your base-colour behind, to represent gauge markings and needles. I wish I'd have done it with the white-faced gauges.

- IMG_2546.JPG (300.19 KiB) Viewed 3745 times